왜 생산성에 집착하는 개발자들은 모두 Vim 에 열광할까 ?
이 질문의 답은 내가 Vim을 적극적으로 사용하면서 알게되었다.
본인은 본래 Vim을 적당히 알고, 적당히 사용했다.
리눅스 서버에서 터미널 상 어떠한 값, 스크립트 등을 변경 또는 추가할때 주로 사용했는데, 이 작업에 있어 정말 최소한의 지식만을 찾아서 했다.
더 효율적인 방법을 찾아 배우려 하지 않았다.
이 작업이 본인의 일에 있어 차지하는 비중이 매우 낮았기 때문이라 핑계를 대고 싶다.
Vim 을 사용했다라고 말하기 창피할 정도의 지식을 가지고 했고, 당연히 Vim에 이점 따위 당연히 모르니 아무런 감흥도 없고 오히려 불편하기 짝이 없는 도구라고 단정 지어버렸다.
이와 같은 사고를 가지고 있던 본인이 Vim 을 적극적으로 사용하게된 계기는 새로 이직한 회사로 부터의 시작이었다.
영준님! 우리 개발팀은 Vim 환경을 적극적(강제적)으로 활용하고 있어요.
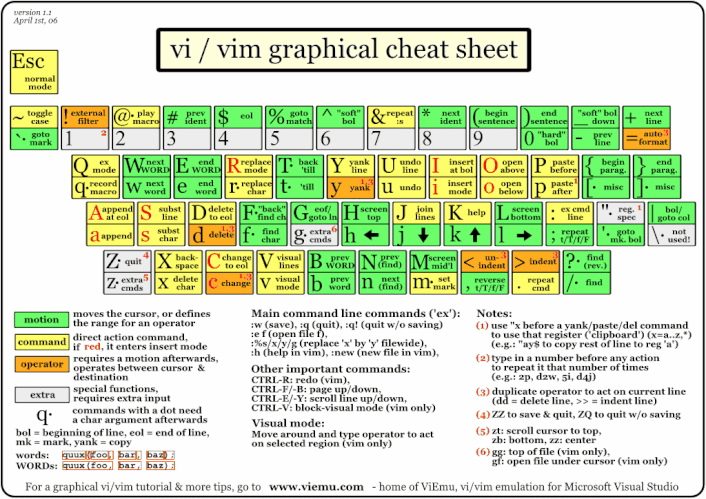
그 날로 IDE에 Vim 관련 플러그인을 설치하고, vim cheat sheet 을 프린트하여 앞에두고 강제적으로 Vim 을 사용했다. (IDE 의 경우, jetbrains 사 제품군을 기준으로 하고있지만 타 제품군의 IDE 도 Vim 관련 플러그인을 쉽게 찾을 수 있다.)
100% Vim 의 의지해야 되었기 때문에 처음에는 낯설고 불편했다.
오히려 기존 IDE Keymap 들의 따른 shortcut 들이 더 생산성을 높혀줄거라는 의구심도 생겼다.
그래도 계속 임했다.
역시 기존에 관습들을 버리기란 결코 쉽지 않았다.
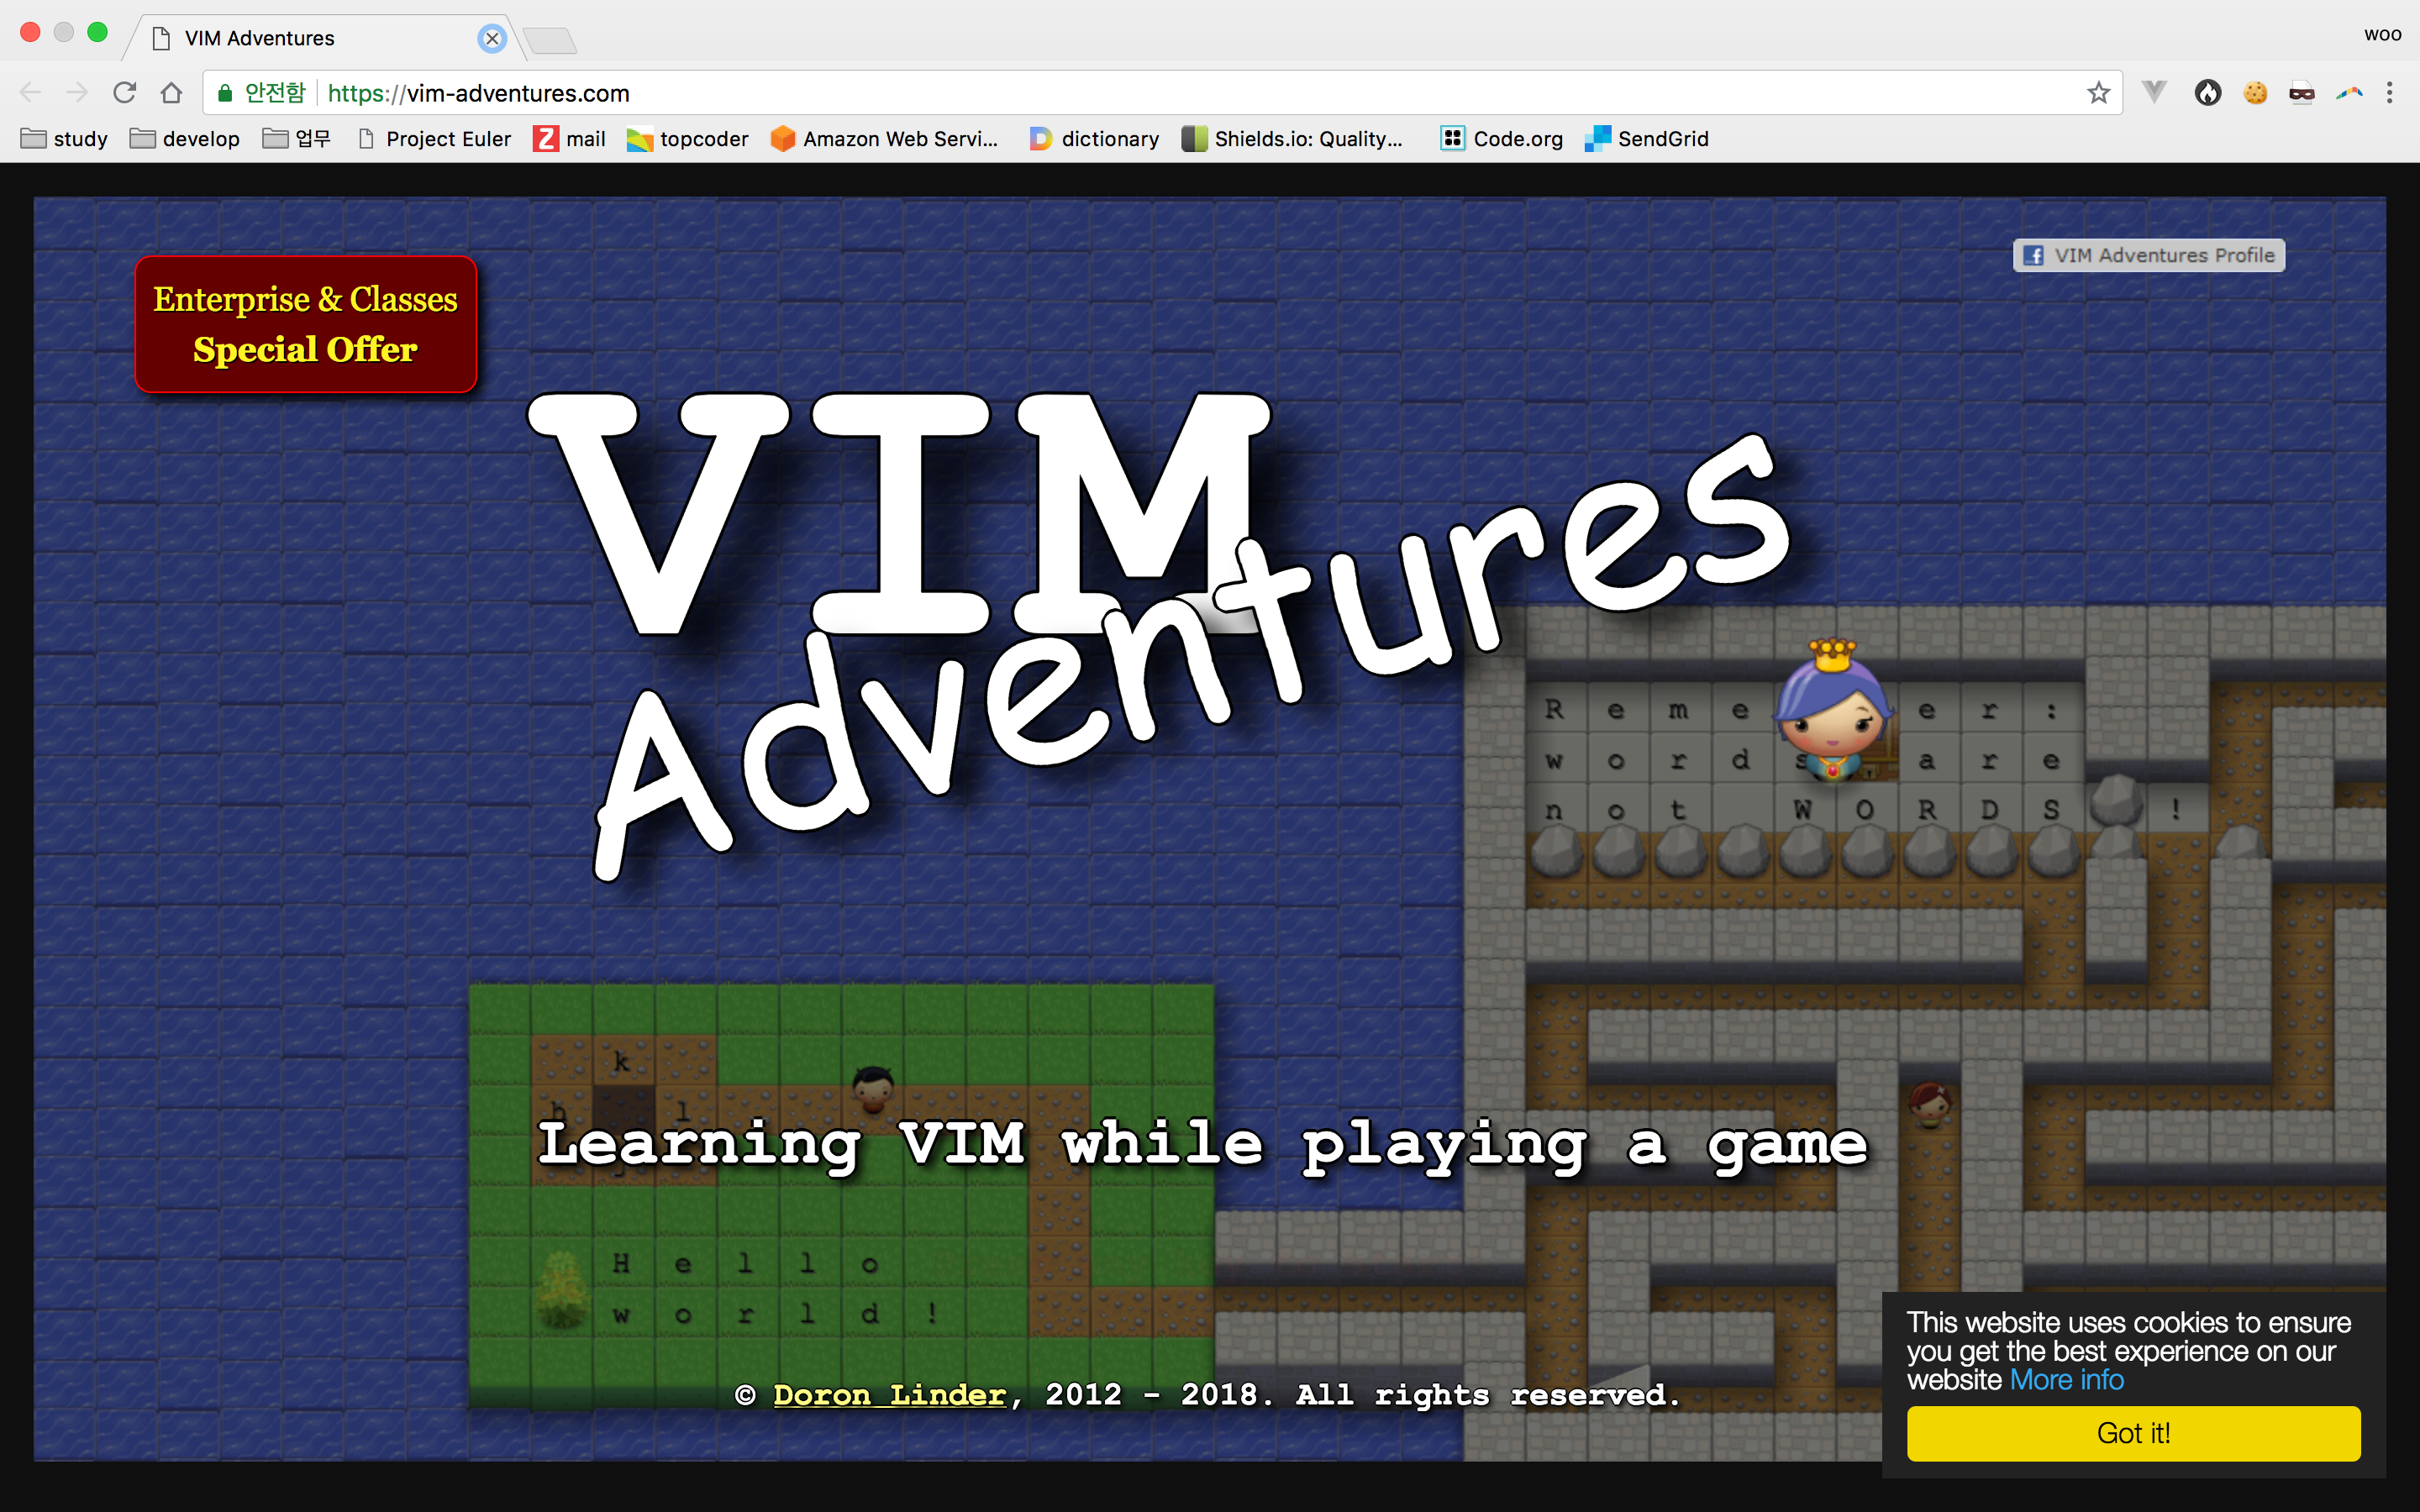
이 때, 회사에서 알려준 Vim Adventures 게임이 많은 도움이 되었다.
게임을 하면서 하나의 스테이지당 새로운 keypress를 알게되고 이를 인용해가면서 문제들을 해결해나가면서 좀 더 Vim 의 대해 빠르게 학습할 수 있었다.
유료 게임으로 알고있는데, 무료 환경에서도 어느정도 할 수 있는 것으로 알고있다.

이와 같은 상태로 일주일을 지났을 때 점차 Vim이 익숙해졌고, 한달이 지났을때는 오히려 Vim 환경이 아니면 불편해지는 경험을 했다.
그리고 터미널 상, 소스코드를 수정해야하는 작업이 있을때, 나는 비로소 Vim에 엄청난 이점을 알았다.
어떠한 환경에도 제한 받지 않고 작업을 할 수 있다는 것 이다.
왠만한 환경에서는 대부분 Vim 을 지원한다.
Vim 을 학습해야하는 이유는 우리가 "IDE 를 학습하는 이유"와 같다.
처음에 발생하는 learning curve 를 감수하면 생산선은 비약적으로 상승할 것 이라 자부한다.
타이핑, 마우스 조작을 줄이고, 간략한 스트로크가 당신의 생산성을 향상해 줄 것 이다.
이번 학습 계기를 통해 효율, 생산성 에 대한 중요성을 다시 한번 느끼게 된 계기라 이직한 회사에 고마움을 느낀다.
너무 Vim 의 대한 장점을 말 한 것 같아, 본인이 느낀 단점에 대해서도 말하겠다.
생각보다 스트로크를 줄이기가 어렵다.
이를테면 x 라는 결과를 취하기 위해 너무나 많은 방도가 있기에 매번 효율을 찾기란 힘들고 오히려 기존의 학습한 내용에 의존하여 스트로크가 더 느는 악순환을 초래할 수 있다.
이는 정말 간과해서는 안되는 중요한 부분중 하나다.
이 단점을 결국엔 학습이 부족하여 발생했다고 말하고 싶다.
Vim 을 사용하면서 내 오랜 버킷 리스트에만 담아두었던 Happy Hacking 키보드를 구매했다.
이전에는 계속 'magic keyboard' 만을 고집해서 사용했다.
트랙패드랑 조합도 좋았고, 다른 키보드에 대한 필요성 또한 느끼지 못했다.
그 이전에는 한성 적축 키보드를 사용했다. 가격대비 같은 가격대의 제품군 중에서는 좋았다.
키보드 때문인지 요즘 코딩하는 새로운 맛이 생겨 너무 즐겁다.
아래는 내 키보드다. (촬영하고 보니, 자리가 상당히 더럽다...)

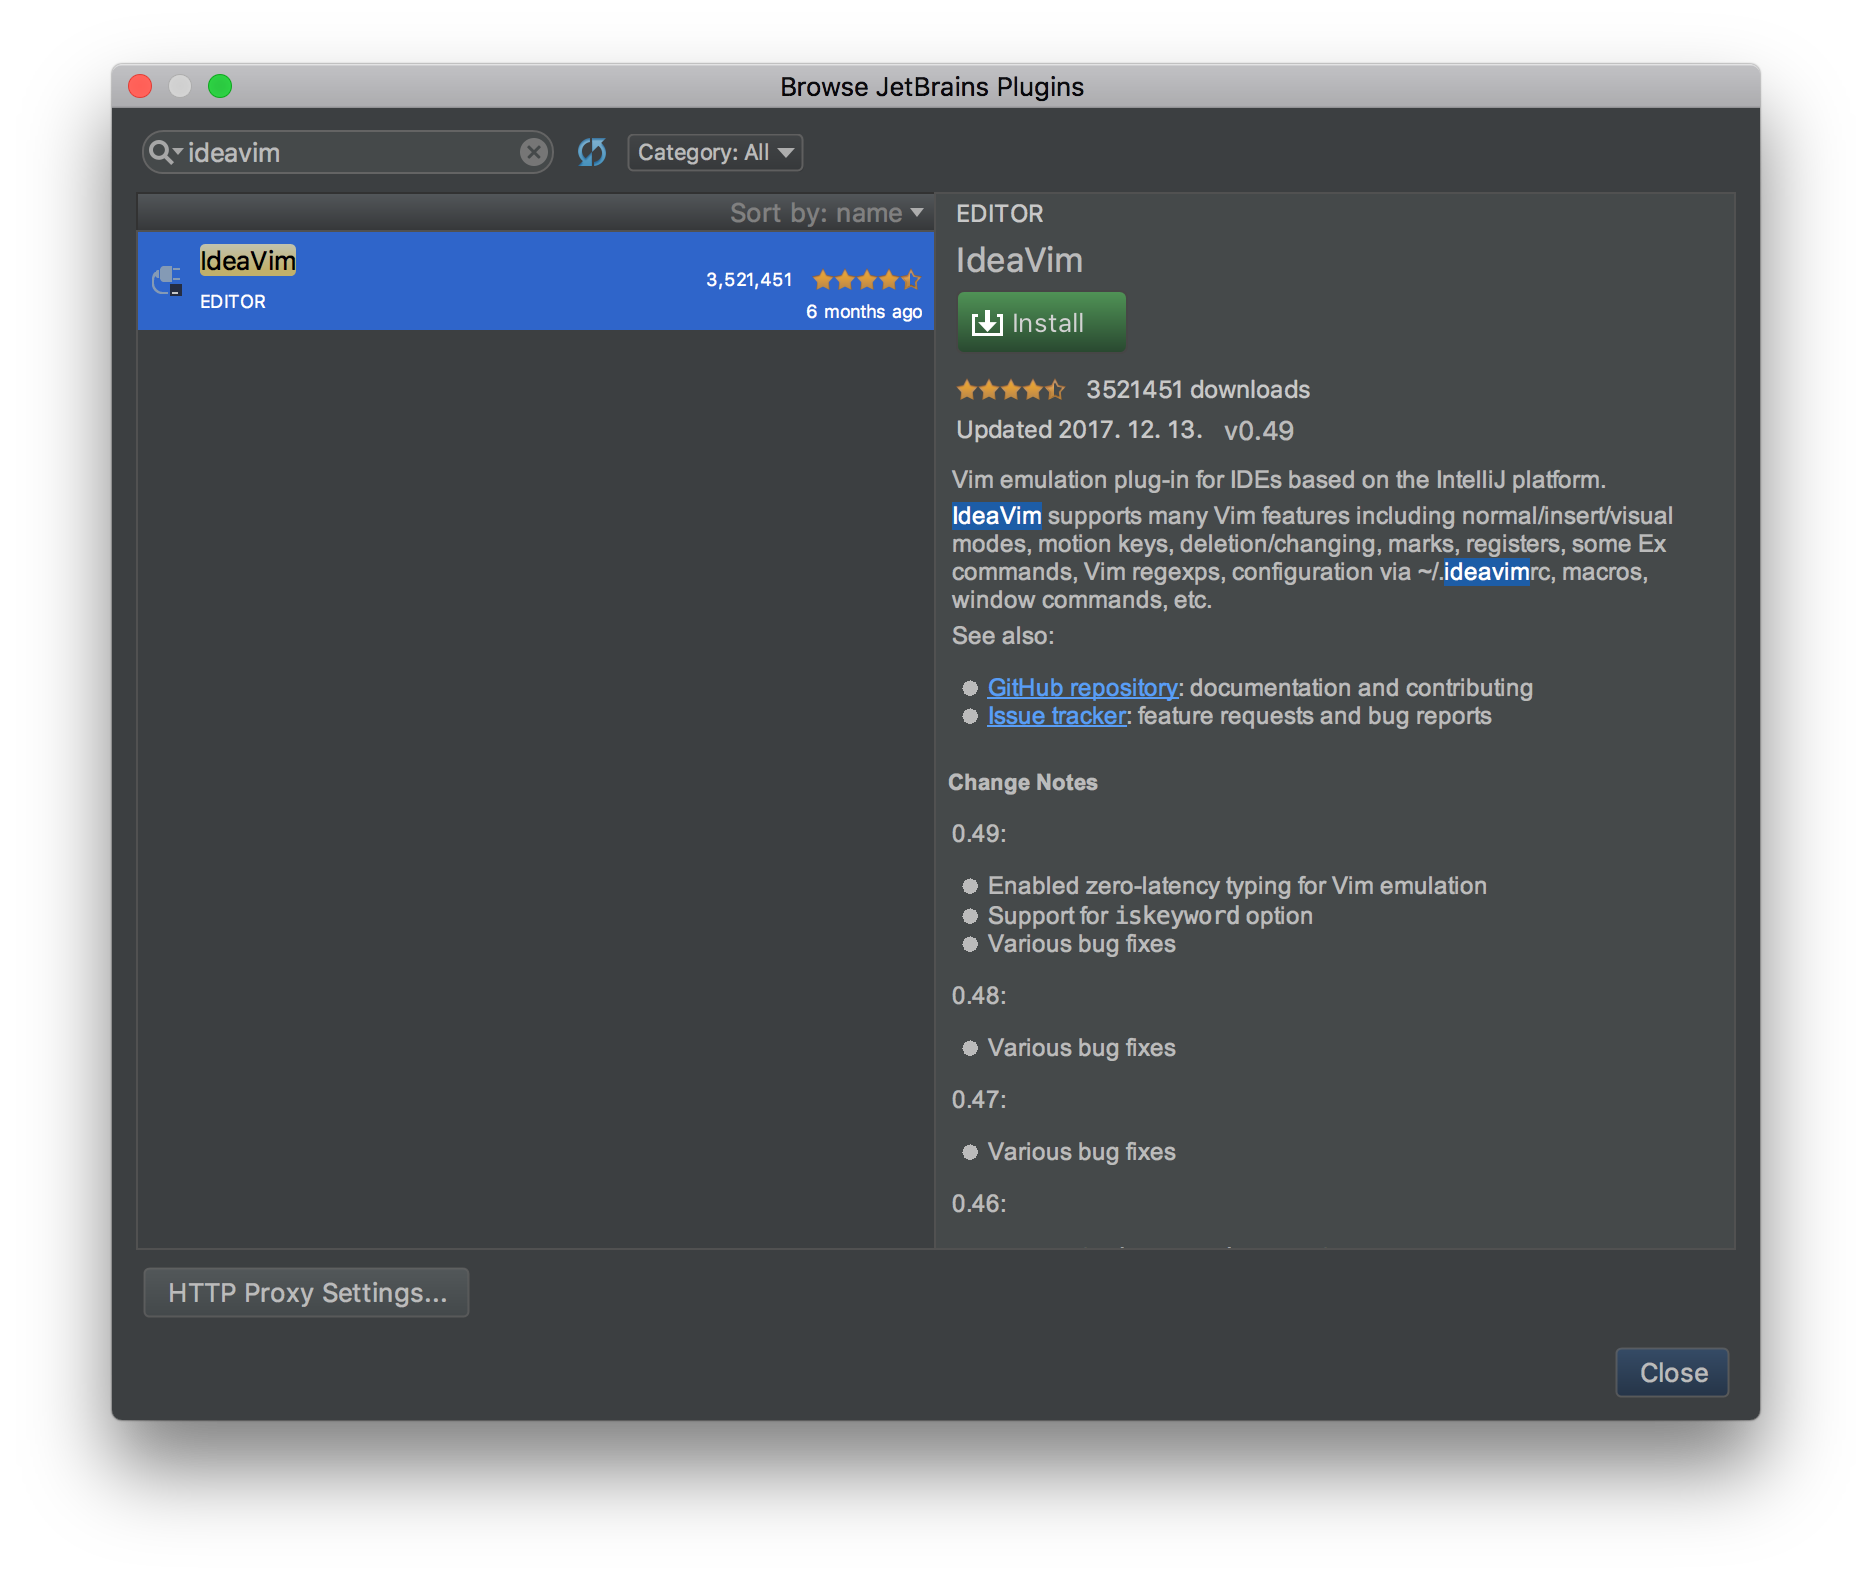
이 문서를 보시는 분들 중, 본인과 같은 환경을 지향하고 싶은 분이 있다면 IDE 에 ideaVim 플러그인을 설치하면된다.
본인은 주로 Jetbrains 사의 IDE 를 채택하여 사용하고있다.
다른 IDE 환경에서도 분명 다른 형태로 Vim 환경을 구성할 수 있는 요소들이 있을 것 이다.
그렇다면, 당신이 Jetbrains 사의 IDE 를 채택하고 있다는 가정하에 설명하겠다.
IDE 내 preferences 항목을 열어주시고, Plugins 항목을 선택한다.
이 후, 하단 Browes Repositories 버튼을 클릭 후, 모달 창 검색창에 ideaVim 을 설치한다.

이제 Vim 환경을 통해 코딩할 수 있다.
아래 Cheatsheet 은 본인이 Vim 환경을 적용하고, 스크린 앞에 두고 학습했던 것 이다.

처음에는 많이 낯설 것 이다.
누구나 새로운 도구에대한 사용은 항상 낯설고 어렵다.
그리고 그 어떤 도구 보다 Vim 은 절대적으로 친절하지 않습니다.
하지만 부디, Vim 을 학습하길 바란다.
비약적인 생산성 향상 이외에도 좋은 경험이자 자산이 될 것이다.
본인이 이 문서를 작성하면서 Vim 의 대한 장점만 부각하고 단점은 하나뿐이 얘기를 안해서 조금 아쉽기는 하나, 개인적으로 내가 느낀 단점은 저거 하나다.
아직 본인이 한달을 조금 넘게 사용하고 이 문서를 작성하는 입장이라 아직은 경험이 부족해서 그런 걸 수 도 있다.
앞으로도 본인은 계속 이 환경을 고집할 거 같다.
그러므로 추가적으로 단점이 생긴다면 이 문서를 보완할 예정이다.
Vim 은 친절하지 않다. 하지만 학습하려는자에게는 적절한 보상을 해주는 친구다.
자, 우리 모두 Vim 의 매료되어보자 !
Global
:help keyword # open help for keyword
:o file       # open file
:saveas file  # save file as
:close        # close current pane
Cursor movement
h        # move cursor left
j        # move cursor down
k        # move cursor up
l        # move cursor right
H        # move to top of screen
M        # move to middle of screen
L        # move to bottom of screen
w        # jump forwards to the start of a word
W        # jump forwards to the start of a word (words can contain punctuation)
e        # jump forwards to the end of a word
E        # jump forwards to the end of a word (words can contain punctuation)
b        # jump backwards to the start of a word
B        # jump backwards to the start of a word (words can contain punctuation)
0        # jump to the start of the line
^        # jump to the first non-blank character of the line
$        # jump to the end of the line
g_       # jump to the last non-blank character of the line
gg       # go to the first line of the document
G        # go to the last line of the document
5G       # go to line 5
fx       # jump to next occurrence of character x
tx       # jump to before next occurrence of character x
}        # jump to next paragraph (or function/block, when editing code)
{        # jump to previous paragraph (or function/block, when editing code)
zz       # center cursor on screen
Ctrl + b # move back one full screen
Ctrl + f # move forward one full screen
Ctrl + d # move forward 1/2 a screen
Ctrl + u # move back 1/2 a screen
Editing
i        # insert before the cursor
I        # insert at the beginning of the line
a        # insert (append) after the cursor
A        # insert (append) at the end of the line
o        # append (open) a new line below the current line
O        # append (open) a new line above the current line
ea       # insert (append) at the end of the word
Esc      # exit insert mode
Marking text (visual mode)
r        # replace a single character
J        # join line below to the current one
cc       # change (replace) entire line
cw       # change (replace) to the start of the next word
ce       # change (replace) to the end of the next word
cb       # change (replace) to the start of the previous word
c$       # change (replace) to the end of the line
s        # delete character and substitute text
S        # delete line and substitute text (same as cc)
xp       # transpose two letters (delete and paste)
.        # repeat last command
u        # undo
Ctrl + r # redo
Visual commands
v        # start visual mode, mark lines, then do a command (like y-yank)
V        # start linewise visual mode
o        # move to other end of marked area
O        # move to other corner of block
aw       # mark a word
ab       # a block with ()
aB       # a block with {}
ib       # inner block with ()
iB       # inner block with {}
Esc      # exit visual mode
Ctrl + v # start visual block mode
Cut and paste
yy       # yank (copy) a line
2yy      # yank (copy) 2 lines
yw       # yank (copy) the characters of the word from the cursor position to the start of the next word
y$       # yank (copy) to end of line
p        # put (paste) the clipboard after cursor
P        # put (paste) before cursor
dd       # delete (cut) a line
2dd      # delete (cut) 2 lines
dw       # delete (cut) the characters of the word from the cursor position to the start of the next word
D        # delete (cut) to the end of the line
d$       # delete (cut) to the end of the line
d^       # delete (cut) to the first non-blank character of the line
d0       # delete (cut) to the begining of the line
x        # delete (cut) character
Search and replace
/pattern       # search for pattern
?pattern       # search backward for pattern
\vpattern      # 'very magic' pattern: non-alphanumeric characters are interpreted as special regex symbols (no escaping needed)
n              # repeat search in same direction
N              # repeat search in opposite direction
:%s/old/new/g  # replace all old with new throughout file
:%s/old/new/gc # replace all old with new throughout file with confirmations
:noh           # remove highlighting of search matches
Search in multiple files
:vimgrep /pattern/ {file} # search for pattern in multiple files
:cn                       # jump to the next match
:cp                       # jump to the previous match
:copen                    # open a window containing the list of matches
Exiting
:w              # write (save) the file, but don't exit
:w !sudo tee %  # write out the current file using sudo
:wq or :x or ZZ # write (save) and quit
:q              # quit (fails if there are unsaved changes)
:q! or ZQ       # quit and throw away unsaved changes
Working with multiple files
:e file       # edit a file in a new buffer
:bnext or :bn # go to the next buffer
:bprev or :bp # go to the previous buffer
:bd           # delete a buffer (close a file)
:ls           # list all open buffers
:sp file      # open a file in a new buffer and split window
:vsp file     # open a file in a new buffer and vertically split window
Ctrl + ws     # split window
Ctrl + ww     # switch windows
Ctrl + wq     # quit a window
Ctrl + wv     # split window vertically
Ctrl + wh     # move cursor to the left window (vertical split)
Ctrl + wl     # move cursor to the right window (vertical split)
Ctrl + wj     # move cursor to the window below (horizontal split)
Ctrl + wk     # move cursor to the window above (horizontal split)
Tabs
:tabnew or :tabnew file # open a file in a new tab
Ctrl + wT # move the current split window into its own tab
gt or :tabnext or :tabn # move to the next tab
gT or :tabprev or :tabp # move to the previous tab
gt # move to tab
:tabmove # move current tab to the th position (indexed from 0)
:tabclose or :tabc # close the current tab and all its windows
:tabonly or :tabo # close all tabs except for the current one
:tabdo command # run the command on all tabs (e.g. :tabdo q - closes all opened tabs)


오..vim 을 저는 쓰는 기능만 쓰는데 ㅋㅋ
Cheatsheet 를 따로 프린트해서 쓸 생각까지는 못했네요
감사합니다~