네트워킹이 필요할 때
1. 넷플릭스
- 컨텐츠 리스트
- 사용자 정보
- 동영상 스트리밍
2. 애플 뮤직 앱
- 컨텐츠 리스트
- 사용자 정보
- 음악 스트리밍
3. 페이스북
- 뉴스피드 리스트
- 사용자 친구정보
- 새로운 노티 정보
Networking + iOS = URLSession
네트워킹는 slow
- 원인 : Concurrency ( 동시성 ) 동시에 여러개 수행
- "앱 + 동시성" => GCD & Operations
- 앞으로 배우게 될 목록
- Concurrency
- GCD
- HTTP
- URLSession
HTTP 개념
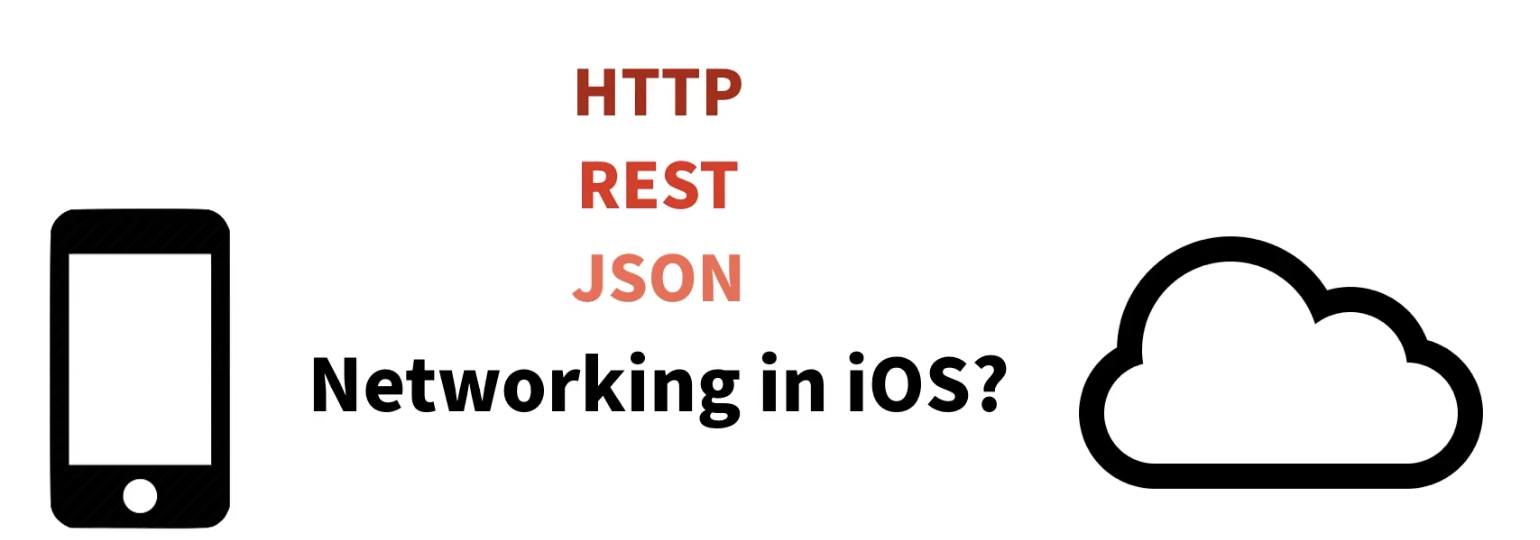
- 네트워킹 : 서버와 앱 간의 데이터 주고받기
- HTTP라는 방법으로 REST(서버)를 이용해서 JSON(타입)데이터를 주고받는다
HTTP 기초
: HyperText Transfer Protocol
: 서버와 클라이언트간의 다큐먼트를 목적으로 만들어진 통신규약
: 앱과 서버간의 데이터를 주고받을 때 사용하는 통신규약/규칙
클 <--- (메시지 ) ---> 서버
클 --- ( 요청 ) ---> 서버
클 <--- ( 반응 ) --- 서버
HTTP Request Method
- Post ( Create)
- Get ( Read )
- Update ( Update )
- Delete ( Delete )
- 기타 정보
URL - Uniform Resource Locator
Content-Type = 어떤 폼의 데이터가 전달될건지 표시
( ex : text/html , application/json , image/png, video/mpeg )
HLS - HTTP Live Streaming
Concurrency
- 앱이 하는 일
- 사용자 인터랙션 처리 ( 작업1 )
- 네트워킹 ( 작업2 )
- 백그라운드에서 파일 다운로드 ( 작업3 )
- 파일 저장하고 읽기 ( 작업4 )- 작업 = 스레드
- 이 스레드를 거의 동시에 빠르게 작업을 수행한다
GCD ( 스레드 위에 만들어진 녀석 )
: Grand Central Patch
-
어떤 해야할 일들을 만들어서 GCD에 넘기면 시스템에서 알아서 스레드 할당해서 안전하게 수행시켜준다는 의미
-
Queue : First In First Out
-
GCD + DispatchQueue
-
DispatchQueue 3가지 타입
1. Main Queue
- 메인 스레드에서 작동하는 큐
- UI update , 사용자 인터렉션 핸들러 같은 경우에 메인큐 사용

2. Global Queue
- 시스템에 의해 관리되는 ConcurrentQueue

- QoS : 글로벌 큐에서 수행해야할 녀석들의 우선순위를 표현할 녀석들이 있다
- Qos ( Quality of Service ) 5개 우선순위

3. Custom Queue
- 직접 큐를 생성하고 관리할 때

-
두 개의 Queue 같이 쓰기

-
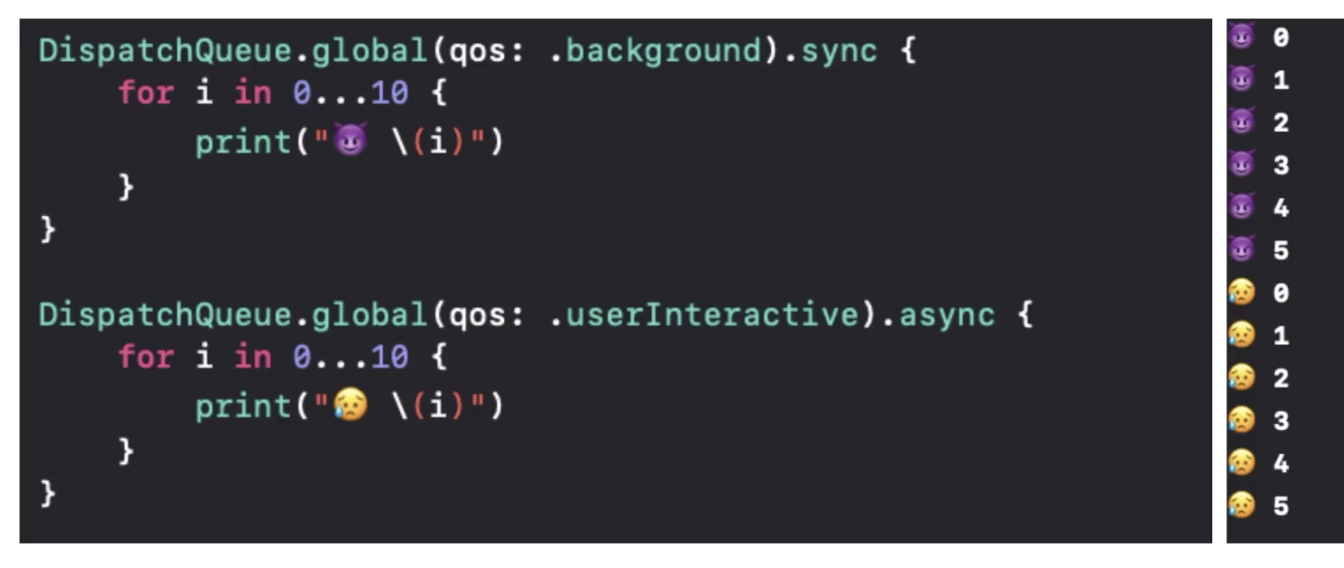
GCD에서는 Task를 "동기Sync VS 비동기Async"
( 동기 = 싱크, 앞에 작업이 끝나고 나서 다음 작업을 시작 )
( 비동기 = 앞에 작업이 끝나지 않고도 다음 작업을 시작 )
-
실습 코드
import UIKit


// Queue - main, global, custom

// - Main
DispatchQueue.main.async {
    // UI update
    let view = UIView()
    view.backgroundColor =  #colorLiteral(red: 1.0, green: 1.0, blue: 1.0, alpha: 1.0)

}

// - Global
DispatchQueue.global(qos: .userInteractive).async {
    // 진짜 핵중요하고 지금 당장 해야하는 것 userInteractive
}

DispatchQueue.global(qos: .userInitiated).async {
    // 거의 바로 해줘야 할 것 , 사용자가 결과를 기다릴때 UserInitiated
}

DispatchQueue.global(qos: .default).async {
    // 이건 굳이? default
    // DispatchQueue.global(){ } 와 같음
}

DispatchQueue.global(qos: .utility).async {
    // 시간이 좀 걸리는 일들, 사용자가 당장 기다리지 않는것, 네트워킹, 큰파일 불러올때?
}

DispatchQueue.global(qos: .background).async {
    // 사용자한테 당장 인식될 필요가 없는 것들, 뉴스데이터 미리 받기, 위치 업데이트, 영상 다운받는 일들
}

// - Custom Queue

let concurrntQueue = DispatchQueue(label: "concurrent", qos: .background, attributes: .concurrent)
let serialQueue = DispatchQueue(label:"serial",qos:.background)


// 큐에는 작업간의 의존이 존재 할 때도 있음 ( 복합적인 상황 )

func downloadImageFromServer() -> UIImage {
    // Heavy Task
    return UIImage()
}

func updateUI(image : UIImage){

}

DispatchQueue.global(qos: .background).async {
    // download
    let image = downloadImageFromServer()

    // UI 작업은 main 스레드에서 작업
    //  DispatchQueue.main을 이용해서 메인 스레드 사용 가능
    DispatchQueue.main.async {
        // update ui 는 메인 스레드에서 작업하는 습관 들여야함
        updateUI(image: image)
    }

}


// Sync, Async

// Async

//DispatchQueue.global(qos: .background).async {
//    for i in 0...5{
//        print("🤢 \(i)")
//    }
//}
//
//DispatchQueue.global(qos: .userInteractive).async {
//    for i in 0...5{
//        print("🥰 \(i)")
//    }
//}

// Sync

DispatchQueue.global(qos: .background).sync {
    for i in 0...5{
        print("🤢 \(i)")
    }
}

DispatchQueue.global(qos: .userInteractive).sync {
    for i in 0...5{
        print("🥰 \(i)")
    }
}
URLSession
- URLSession API
- iOS에서 네트워킹을 할 때 URLSession을 통해서 한다
- URLSession에 대한 전반적인 오버뷰
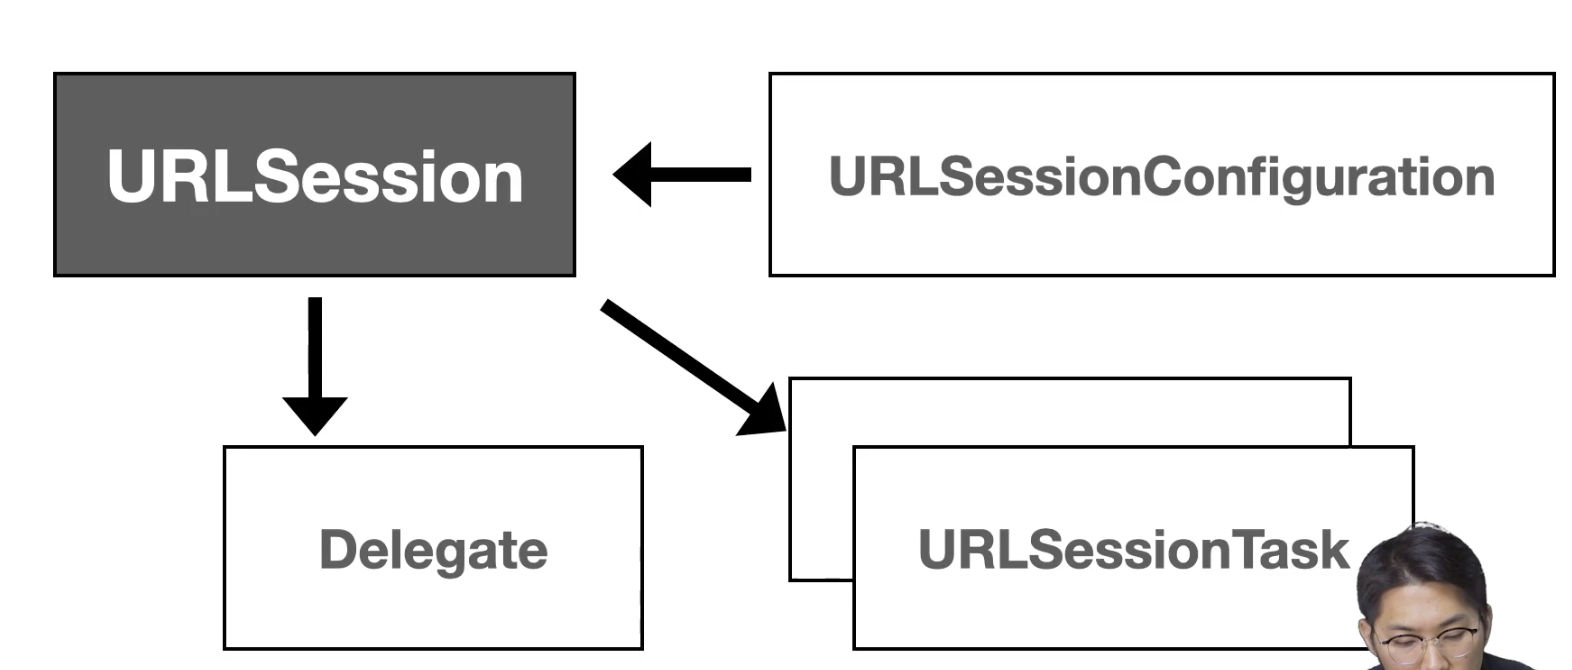
- URLSession은 URLSessionConfiguration을 이용해서 생성하게 됨
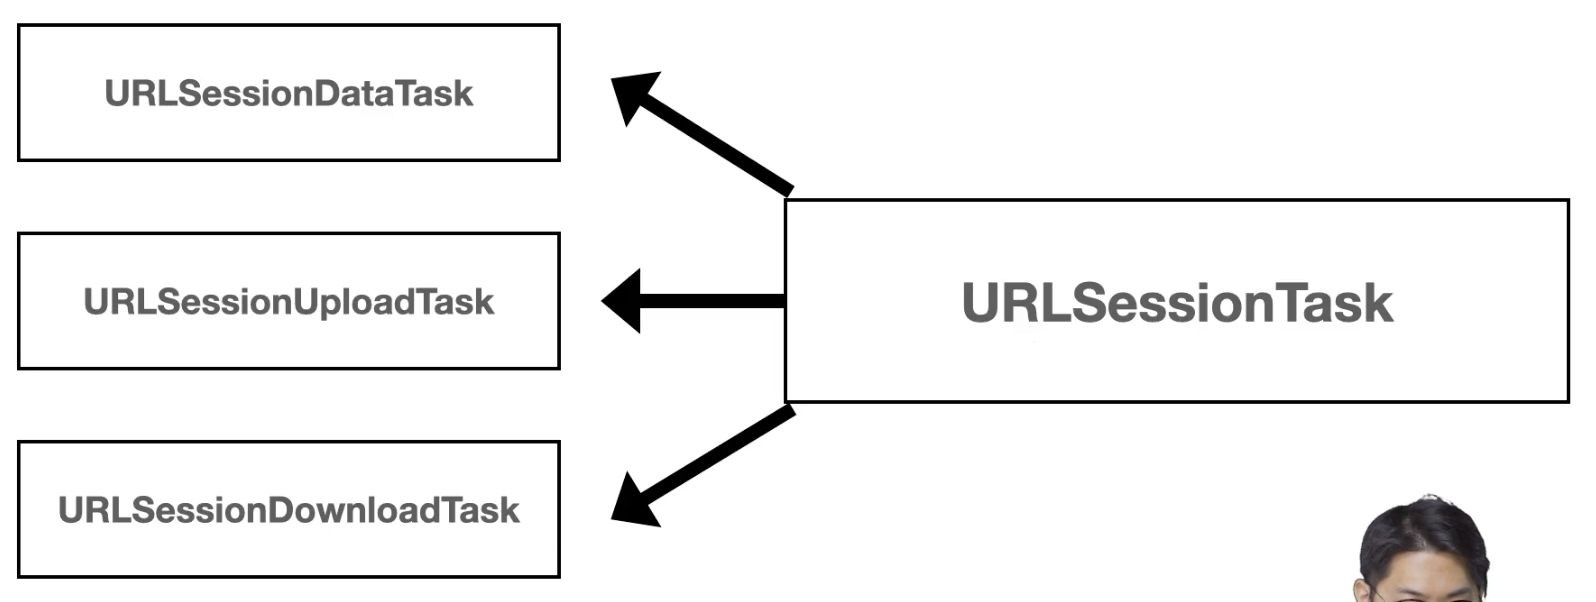
- URLSession은 여러개의 URLSessionTask를 만들 수 있음
- URLSessionTask를 통해서 실제로 서버와 통신을 하는 거임
- URLSession Delegate를 통해서 네트워킹 중간 과정을 확인해 볼 수 있음
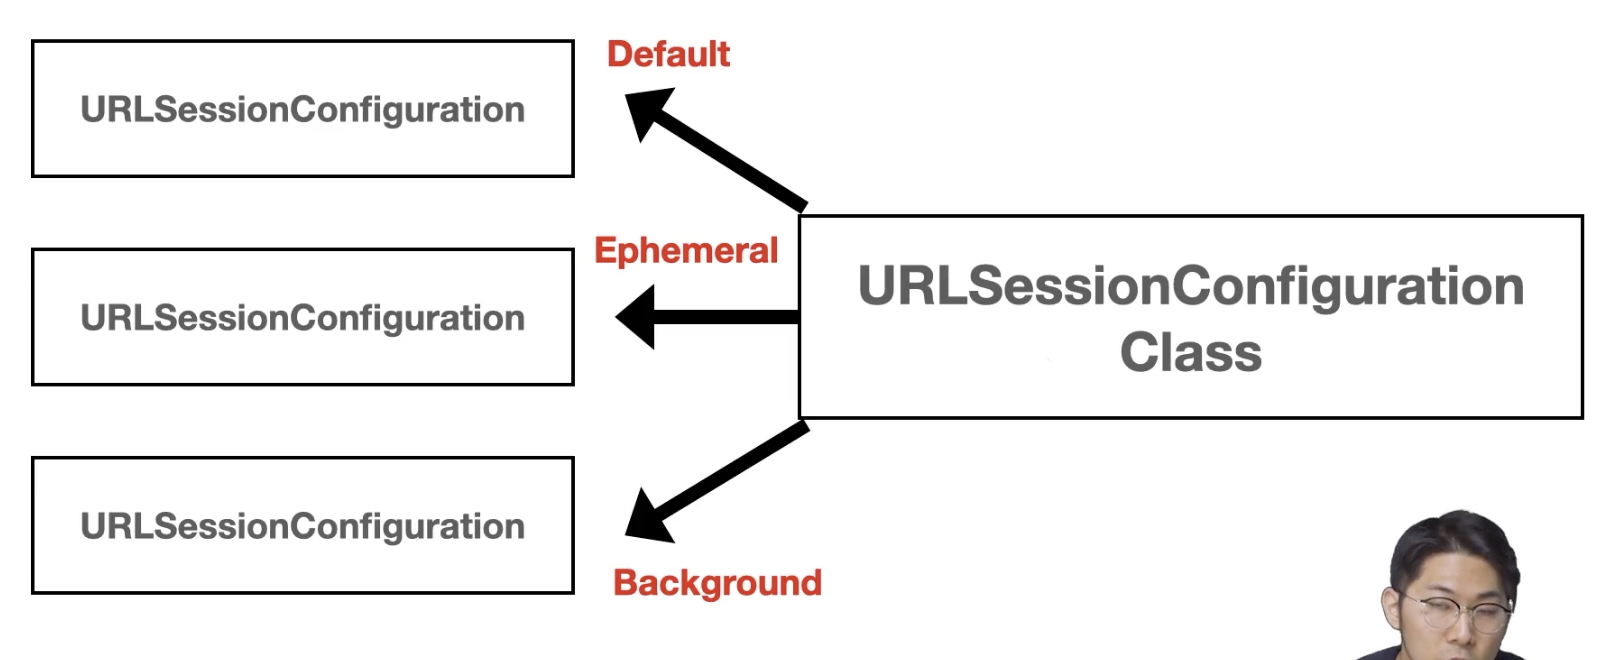
- URLSessionConfiguration
: URLSession의 정책에 따라서 default, ephemeral, background 3가지 타입으로 만들 수 있음- default : 기본 통신을 할 때 사용 가능
- ephemeral : 쿠키나 캐쉬같은 것을 저장하지 않게 정책을 가져갈 때
(크롬에서 private 모드라고 생각하면 됨) - background : 앱이 background에 있을 때 다운로드 , 업로드 할 때 사용
- URLSessionTask
: URLSessionTask의 경우에도 작업에 따라 3가지로 나누어짐- URLSessionDataTask : 기본적인 데이터를 받는 작업의 경우
(이 경우엔 response data를 메모리 상에서 처리하게 됨)
(background 세션 지원이 안됨) - URLSessionUploadTask : 파일을 업로드 할 경우
( 파일을 업로드할때 조금 더 편한 requester body를 제공 ) - URLSessionDownloadTask : 파일을 다운받아서 디스크에 쓸 경우
- URLSessionDataTask : 기본적인 데이터를 받는 작업의 경우
URLSession 실습 1
- background 켜서 함
import UIKit


// URL

let urlString = "https://itunes.apple.com/search?media=music&entity=song&term=Gdragon"
let url = URL(string: urlString)

// urlString 과 같음
// https://itunes.apple.com/search?media=music&entity=song&term=Gdragon
url?.absoluteString
// 어떤 방식으로 네트워킹을 하고 있냐
// https
url?.scheme
// itunes.apple.com
url?.host
// /search
url?.path
// media=music&entity=song&term=Gdragon
url?.query
// nil
url?.baseURL

let baseURL = URL(string: "https://itunes.apple.com")
let relativeURL = URL(string: "search?media=music&entity=song&term=Gdragon", relativeTo: baseURL)

// https://itunes.apple.com/search?media=music&entity=song&term=Gdragon
relativeURL?.absoluteString
// https
relativeURL?.scheme
// itunes.apple.com
relativeURL?.host
// /search
relativeURL?.path
// media=music&entity=song&term=Gdragon
relativeURL?.query
// https://itunes.apple.com
relativeURL?.baseURL


// query에 대한 아이템들을 각각의 item Object로 추가하거나 접근할 때
// URLComponents

var urlComponents = URLComponents(string:  "https://itunes.apple.com/search?")
let mediaQuery = URLQueryItem(name: "media", value: "music")
let entityQuery = URLQueryItem(name: "entity", value: "song")
let termQuery = URLQueryItem(name: "term", value: "Gdragon")

urlComponents?.queryItems?.append(mediaQuery)
urlComponents?.queryItems?.append(entityQuery)
urlComponents?.queryItems?.append(termQuery)


// https://itunes.apple.com/search?media=music&entity=song&term=Gdragon
urlComponents?.url
// https://itunes.apple.com/search?media=music&entity=song&term=Gdragon
urlComponents?.string
// [{name "media", value "music"}, {name "entity", value "song"}, {name "term", value "Gdragon"}]
urlComponents?.queryItems
// Gdragon
urlComponents?.queryItems?.last?.value
URLSession 실습 2
- 옵셔널을 강제로 없애는 방법 : 마지막에 ! 붙이기
- URLSession을 이용해서 실제로 request를 보냈고 그거에 대한 response 데이터를 받아봤고 그것을 우리가 볼 수 있는 String 형식을 표시하는 실습
import UIKit

// URLSession

// 1. URLSessionConfiguration
// 2. URLSession
// 3. URLSessionTask를 이용해서 서버와 네트워킹

// URLSessionTask

// - dataTask
// - uploadTask
// - downloadTask


let config = URLSessionConfiguration.default
let session = URLSession(configuration: config)

// URL
// URL Components
var urlComponents = URLComponents(string:  "https://itunes.apple.com/search?")!
let mediaQuery = URLQueryItem(name: "media", value: "music")
let entityQuery = URLQueryItem(name: "entity", value: "song")
let termQuery = URLQueryItem(name: "term", value: "Gdragon")
urlComponents.queryItems?.append(mediaQuery)
urlComponents.queryItems?.append(entityQuery)
urlComponents.queryItems?.append(termQuery)
let requestURL = urlComponents.url!

let dataTask = session.dataTask(with: requestURL) { (data, response, error) in
    guard error == nil  else { return }

    guard let statusCode = (response as? HTTPURLResponse)?.statusCode else { return }
    let successRange = 200..<300

    guard successRange.contains(statusCode) else {
        // handle response error
        return
    }

    guard let resultData = data else { return }

    //let resultString = String(data:resultData,encoding: .utf8)
    print("---> result : \(resultData)")

}

dataTask.resume()
URLSession 실습 3
import UIKit

// URLSession

// 1. URLSessionConfiguration
// 2. URLSession
// 3. URLSessionTask를 이용해서 서버와 네트워킹

// URLSessionTask

// - dataTask
// - uploadTask
// - downloadTask


let config = URLSessionConfiguration.default
let session = URLSession(configuration: config)

// URL
// URL Components
var urlComponents = URLComponents(string:  "https://itunes.apple.com/search?")!
let mediaQuery = URLQueryItem(name: "media", value: "music")
let entityQuery = URLQueryItem(name: "entity", value: "song")
let termQuery = URLQueryItem(name: "term", value: "Gdragon")
urlComponents.queryItems?.append(mediaQuery)
urlComponents.queryItems?.append(entityQuery)
urlComponents.queryItems?.append(termQuery)
let requestURL = urlComponents.url!


struct Response : Codable{
    let resultCount : Int
    let tracks: [Track]

    enum CodingKeys : String, CodingKey {
        case resultcount
        case tracks = "results"

    }

}

struct Track : Codable{
    let title : String
    let artistName : String
    let thumbnailPath : String

    enum CodingKeys : String, CodingKey {
        case title = "trackName"
        case artistName
        case thumbnailPath  = "artworkUrl30"

    }

    // trackName
    // artistName
    // artworkUrl30
}


let dataTask = session.dataTask(with: requestURL) { (data, response, error) in
    guard error == nil  else { return }

    guard let statusCode = (response as? HTTPURLResponse)?.statusCode else { return }
    let successRange = 200..<300

    guard successRange.contains(statusCode) else {
        // handle response error
        return
    }

    guard let resultData = data else { return }

    let resultString = String(data:resultData,encoding: .utf8)

    // 목표 : 트랙리스트 오브젝트로 가져오기

    // 하고 싶은 욕구 목록
    // - Data -> Track 목록으로 가져오고 싶다 [Track]
    // - Track 오브젝트를 만들어야겠다.
    // - Data에서 struct로 파싱하고 싶다 > Codable 이용해서 만들자
    //   - Json 파일, 데이터 > 오브젝트 ( Codable 이용하겠다 )
    //   - Response, Track 이렇게 두개의 struct를 만들어야겠다.

    // 해야할일
    // - Response, Track struct
    // - struct의 프로퍼티 이름과 실제 데이터의 키와 맞추기 ( Codable 디코딩하게 하기 위해서 )
    // - 파싱하기 ( Decoding )
    // - 트랙리스트 가져오기


    // 파싱 및 트랙 가져오기
    do {
        let decoder = JSONDecoder()
        let response = try decoder.decode(Response.self, from: resultData)
        let tracks = response.tracks

        print("---> tracks: \(tracks.count)  -\(tracks.last?.title),  \(tracks.last?.thumbnailPath)")
    } catch let error {
        print("---> error : \(error.localizedDescription)")
    }


    //print("---> result : \(resultString)")

}

dataTask.resume()