AI 움직임을 고도화 하기 위해서 EQS를 적용하려고 했음.
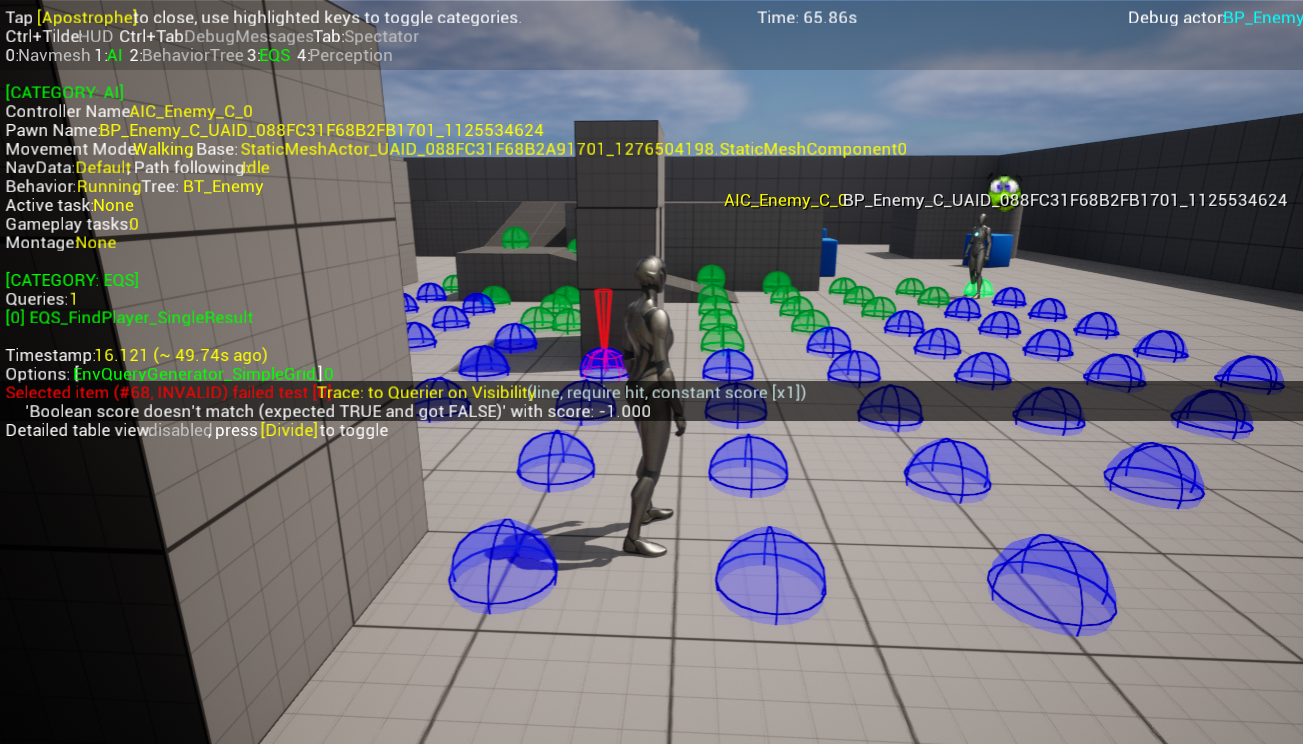
그러나 EQS Generator가 기본적으로 2D로 적용이 되고 있음. (XY 평면)
이유는 대부분의 게임이 지면 위에서 캐릭터가 움직이는 구조이기 때문에, 점수를 평가할 지점을 2D 평면 상에서 생성하고, NavMesh 유효성 검사로 통과 여부를 판단하기 때문.
👉 아래 사진과 같이 Z 축 으로 Item(Point)을 생성하지 않음.
현재 Navmesh가 Plugin을 사용해서 3D 기반으로 깔려있으므로
3D 기반 EQS Generator, 3D Grid Generated가 필요하다고 생각했음.
그렇기 때문에 Custom EQS Generated를 생성함
📌 EQG_XYZGrid.h
UCLASS(EditInlineNew, Category = "Generators", meta = (DisplayName = "XYZ 3D Grid"))
class ABYSSDIVERUNDERWORLD_API UEQG_XYZGrid : public UEnvQueryGenerator
{
	GENERATED_BODY()

public:
	UEQG_XYZGrid();


protected:
	virtual void GenerateItems(FEnvQueryInstance& QueryInstance) const override;

#pragma region Variable
	// Location creation criteria
	UPROPERTY(EditDefaultsOnly, Category = Generator)
	TSubclassOf<UEnvQueryContext> GenerateAround;

	// X/Y/Z Setting the scope
	UPROPERTY(EditDefaultsOnly, Category = Generator)
	FAIDataProviderFloatValue GridHalfSizeXY;

	UPROPERTY(EditDefaultsOnly, Category = Generator)
	FAIDataProviderFloatValue GridHalfHeightZ;

	// Point spacing
	UPROPERTY(EditDefaultsOnly, Category = Generator)
	FAIDataProviderFloatValue PointSpacing;
};
📌 EQG_XYZGrid.cpp
UEQG_XYZGrid::UEQG_XYZGrid()
{
   ItemType = UEnvQueryItemType_Point::StaticClass();
   GenerateAround = UEnvQueryContext_Querier::StaticClass();
   GridHalfSizeXY.DefaultValue = 500.f;
   GridHalfHeightZ.DefaultValue = 300.f;
   PointSpacing.DefaultValue = 200.f;
}

void UEQG_XYZGrid::GenerateItems(FEnvQueryInstance& QueryInstance) const
{
   TArray<FVector> ContextLocations;
   QueryInstance.PrepareContext(UEnvQueryContext_Querier::StaticClass(), ContextLocations);

   const float HalfXY = GridHalfSizeXY.GetValue();
   const float HalfZ = GridHalfHeightZ.GetValue();
   const float Spacing = PointSpacing.GetValue();

   for (const FVector& Origin : ContextLocations)
   {
       for (float X = -HalfXY; X <= HalfXY; X += Spacing)
       {
           for (float Y = -HalfXY; Y <= HalfXY; Y += Spacing)
           {
               for (float Z = -HalfZ; Z <= HalfZ; Z += Spacing)
               {
                   const FVector Point = Origin + FVector(X, Y, Z);
                   // Register only when on top of NavMesh
                   FNavLocation NavLoc;
                   if (UNavigationSystemV1::GetCurrent(QueryInstance.World)->ProjectPointToNavigation(Point, NavLoc, FVector(50, 50, 50)))
                   {
                       QueryInstance.AddItemData<UEnvQueryItemType_Point>(NavLoc.Location);
                   }
               }
           }
       }
   }
}
| 개념 | 의미 | 비고 |
|---|---|---|
ItemType = Point | 좌표 기반 결과 생성 | |
ProjectPointToNavigation | NavMesh 위인지 확인 | Navmesh 위로 투영해서 AI가 갈 수 있는 곳인지 확인 |
AddItemData | 탐색 후보로 등록 |
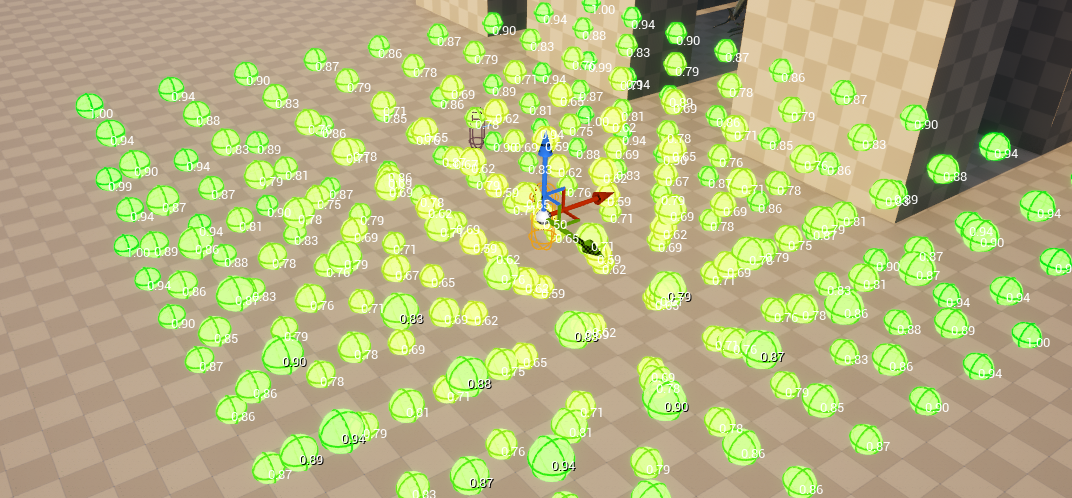
아래 사진과 같이 3D EQS가 잘 적용이 되는 모습
그러나 Patrol 이동에 있어서 너무 짧은 위치를 Winner Point로 찍게 되면 움직임이 부자연스러워 지고 뚝뚝 끊기는 느낌도 들게 됌.
그래서 최소 이동거리, 최대 이동거리를 Add Test :: Distance를 통해 설정
- Fillter & Score로 설정 : 거리가 먼곳일 수록 점수를 높게 부여하고 거리가 아닌 포인트는 탈락하도록 설정
- EnvQueryContext_Querier 설정을 통해 BT에서 해당 EQS가 실행될 때 AI 주변으로 Point를 설정하도록 함
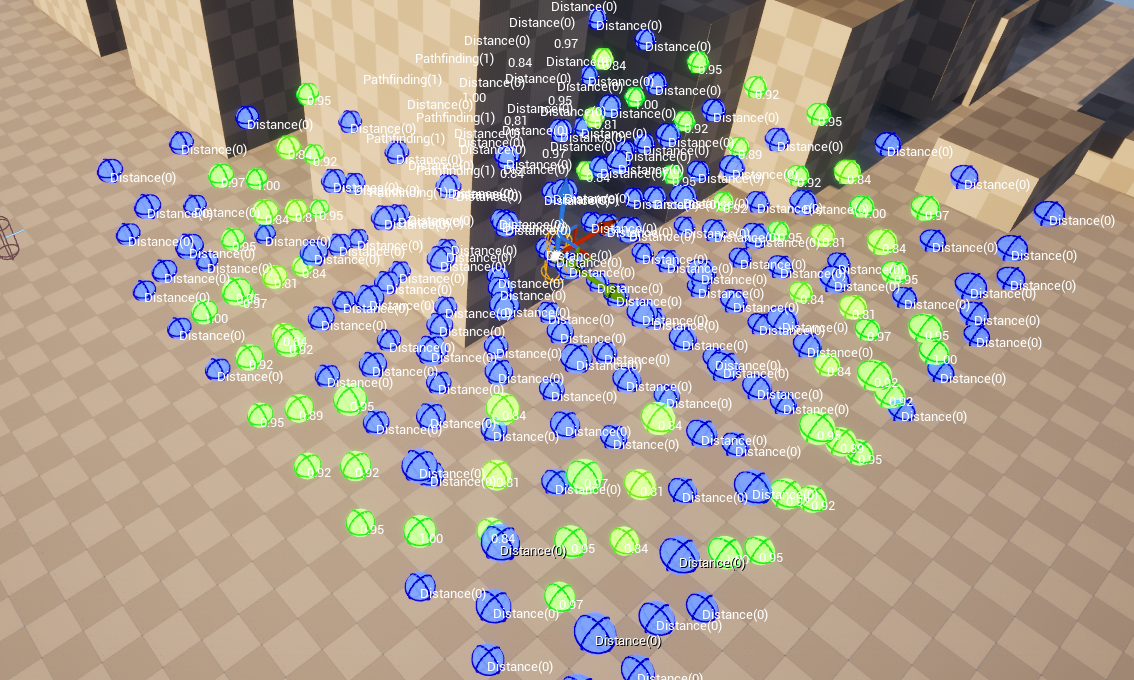
이동 방향에 있어서 Winner Point까지 경로에 있어서 실제로 이동할 수 있는지 확인하는 Test :: PathfInding 설정
경로가 없으면 (예: 벽 뒤, 장애물 안, 낭떠러지 위 등) → 그 점은 버려짐(discard)
- Fillter Only로 설정 : 갈 수 없는 곳은 탈락 시키도록 설정
아래 사진과 같이 갈 수 없거나 탈락시킨 Point는 파란색으로 표시가 되고 갈 수 있는 곳은 먼 곳 일수록 점수가 높아지는 것을 확인할 수 있음
그러나 이렇게 되면 항상 점수가 최대인 곳만 찾아서 이동하기 때문에 단조로울 수가 있음
그래서 BT 에서 해당 EQS를 실행할 때 상위 25% 의 점수를 랜덤으로 골라서 RunMode::Single Random Item from Best25% WinnerPoint로 잡을 수 있도록 설정
잘 작동하는 모습을 볼 수 있다.