
5주차 강의 복습 및 정리
1. 데이터 타입 확인
typeof을 원하는 것 앞에 작성 시 테이터를 확인할 수 있음. 단, object, null, array 모두 "object"로 출력함- 변수: let, const --> 데이터를 적을 때 전역인지 지역인지 확인인지 항상 확인!
2. 연산자
- 산술(더하기 빼기):
1 + 3 - 할당:
let a = 2 - 논리:
const a = 1 === 1/ and 연산자a && b/ or 연산자a || b/ not 연산자!a - 삼항
const a = 1 < 2

if (a) {
	console.log(true);
} else {
	console.log(false);
}

// 삼항 연산자(값이 참이면 앞 쪽이 아니면 뒷쪽 출력)
console.log(a ? true : false);
3. 조건문
3-1. if...else
if (a) {
	console.log(true);
} else if {
	console.log(false);
} else {
	console.log('what');
}
3-2. switch
switch (a) {
	case 0:
		console.log(0)
		break;
	case 2:
		console.log(0)
		break;
	case 4:
		console.log(0)
		break;
	default:
		console.log('what')
}
4. 반복문 for
const ulEl = document.querySelector('ul')

for (let i = 0; i < 10; i += 1) {
  const li = document.createElement('li')
  li.textContent = `list-${i + 1}`
  if ((i + 1 ) % 2 === 0) {
  li.addEventListener('click', function () {
    console.log(li.textContent);
  })}
  ulEl.appendChild(li)
}
5. 함수
//호이스팅(hoisting)이 가능함
//함수 선언 & 기명 함수
let x = 3;
ley y = 4;
function adding1() {
	console.log(x + y);
}
adding1(); // 7

//함수 표현
let adding2 = function (x, y) {
	console.log(x + y)
}
adding2(x, y) // 7
5-1. 호이스팅
//인터프리터가 파일을 해석 시 변수와 함수를 먼저 메모리에 할당하고 하나씩 처리하기에 일어나는 현상
//double()의 값이 제대로 출력이 됨
const a = 7;

double();

function double() {
  console.log(a * 2);
}
5-2.화살표 함수
const double = function (x, y) {
  return x * y;
}

// 아래로 변형, 반환이 하나밖에 없으면 굳이 {x * y}로 사용X
const doubelArrow = (x, y) => x * y;
5-3.IIFE, 즉시 실행함수 (Immediately-Inovoked Function Expression)
// 익명함수를 바로 실행
const a = 7;
function double() {
  console.log(a * 2);
}
double();

(function () {
  console.log(a * 2);
})();

((function () {
  console.log(a * 2);
}));
5-4. 타이머 함수
//setTimeout(함수, 시간): 일정 시간 후 함수 실행
const timer = setTimeout(() => {
  console.log('heropy');
}, 3000);

const h1El = document.querySelector('hi');
h1El.addEventListener('click', () => {
  clearTimeout(timer)
})

/* -------------------------------- */

//SetInterval(함수, 시간): 시간 간격마다 함수 실행
const timer2 = setInterval(() => {
  console.log('heropy');
}, 3000);

const h1El2 = document.querySelector('hi');
h1El.addEventListener('click', () => {
  clearInterval(timer)
})
5-5. 콜백 함수
//다른 함수의 인자로써 넘겨진 후 특정 이벤트에 의해 호출되는 함수
function timeout(cb) {
  setTimeout(() => {
    console.log('hi');
    cb();
  }, 3000);
}

timeout(() => {
  console.log('Done!');
});
6. 클래스: 객체를 생성하기 위한 템플릿(공장)
6-1. 생성자 함수(prototype)
// 생성자 함수는 pascal case
function User (first, last) {
  this.firstName = first;
  this.lastName = last;
}

User.prototype.getFullName = function () {
  return `${this.firstName} ${this.lastName}`
}

//User가 생성자 함수 -> 하나의 객체를 만듦 리터럴?
const heropy = new User('heropy', 'park');
const amy = new User('amy', 'park');
const neo = new User('neo', 'park');

console.log(heropy);
console.log(amy);
console.log(neo);- 객체를 생성하는 함수이며 다수의 객체를 만들 때 사용
- 인스턴스를 찍어내는 공장이라고 이해함 -> new로 인해서 계속 새로운 객체를 생산 가능
6-2. this
//호출 위치
//일반 함수는 호출 위치에 따라 this 정의
//화살표 함수는 자신이 선언된 함수 범위에서 this 정의 -> 함수가 만들어지는 영역
	//function으로 선언한 함수가 메소드로 호출되냐 함수 자체로 호출되냐에 따라 동적으로 this가 바인딩되는 반면, 화살표 함수는 선언될 시점에서의 상위 스코프가 this로 바인딩
	//메서드 안엔서 함수를 사용할 때는 **무조건** arrow function이라고 생각하는 것이 좋을 듯
	// 참고한 블로그: https://velog.io/@padoling/JavaScript-%ED%99%94%EC%82%B4%ED%91%9C-%ED%95%A8%EC%88%98%EC%99%80-this-%EB%B0%94%EC%9D%B8%EB%94%A9

const heropy = {
  name: 'hi',
  normal: function () {
    console.log(this.name);
  },
  arrow: () => {
    console.log(this.name);
  }
}
heropy.normal(); //여기서 출력이되고 앞에 딸려 있는 heropydp this를 실행
heropy.arrow(); //undeifend 현재 호출되는 위치에서 this가 안됨??

const amy = {
  name: 'amy',
  //함수를 그냥 할당
  normal: heropy.normal,
  arrow: heropy.arrow
}
amy.normal(); //연결되어 있는 객체는 amy이게에 this가 할당
amy.arrow(); //undefined

/*----------------------*/
const timer = {
  greet: 'hi',
  timeout: function () {
    setTimeout(() => {
      console.log(this.greet);
    }, 2000)
  }
}
timer.timeout() // 2초후 hi 출력
6-3. ES6 Classes 정의
// function User (first, last) {
//   this.firstName = first;
//   this.lastName = last;
// }

// User.prototype.getFullName = function () {
//   return `${this.firstName} ${this.lastName}`
// }

//위 작업을 아래와 같이 줄일 수 있음
/*----------------*/
class User {
  constructor(first, last) {
    this.firstName = first;
    this.lastName = last;
  }
  getFullName() {
    return `${this.firstName} ${this.lastName}`
  }
}
/*----------------*/

const heropy = new User('heropy', 'park');
const amy = new User('amy', 'park');
const neo = new User('neo', 'park');

console.log(heropy);
console.log(amy.getFullName());
console.log(neo.getFullName());
6-4. 상속(확장)
class Vehicle {
  constructor(name, wheel) {
    this.name = name;
    this.wheel = wheel;
  }
}

const myVehicle = new Vehicle('bent', '2');
console.log(myVehicle);

//상속
class Bicycle extends Vehicle {
  constructor(name , wheel) {
    super(name, wheel) // 부모함수를 참조하여 가져올 것
  }
}
const myBicycle = new Bicycle('ekek', 2);
const sonBicycle = new Bicycle('eqe', 2);
console.log(myBicycle);
console.log(sonBicycle);

//확장
class Car extends Vehicle {
  constructor(name, wheel, licenese) {
    super(name, wheel);
    this.licenese = licenese;
  }
}
const myCar = new Car('bentz', 4, true);
const sonCar = new Car('kia', 4, false);
console.log(myCar);
console.log(sonCar);
7. JS 데이터
7-1. 문자열(string)
- 문자 데이터 ("", '')
- MDN 참조하여 필요한 함수 탐색
- 쓰레기통 아이콘이면 더 이상 사용X
- 실험실 아이콘이면 시험 중
7-2. 숫자와 수학
- 숫자 데이터와
Math활용하여 연산 기능 구현 - MDN 참조하여 필요한 함수 탐색 가능
7-3. 배열(array)
const obj = [element1, element2, element3];- 배열의 원본을 수정시키는 것과 아닌 것이 있으니 이를 잘 구별하여 사용 필요
7-4. 객체(object)
- 생성 방식 두 가지
/* 객체 리터럴: 리터럴말대로 작성자가 괄호를 적고 직접 하나씩 입력하여 객체 생성 */
let hihi = {
	name: 'hi',
	age: 17
}

/* 생성자 함수를 통한 객체 */
const hihi = new Hi (first, last) {
  this.firstName = first;
  this.lastName = last;
}
7-4-1. prototye(유튜브-코딩애플 참조)
Array.prototype.함수 = function() {};
// 유전자를 만듦으로서 생성된 자식에서 해당 것을 사용할 수 있음
some.함수 // some이라는 배열에 우리가 저장해 놓은 '함수'라는 유전자를 불러와서 이에 해당하는 기느을 실행- 이런 prototype이 아닌 클래스에도 메서드를 만들 수 있으며 정적(static) 메서드라고 함
7-5. 구조 분해 할당 (destructing assignment)
const user = {
  name: "hi",
  age: 85,
  email: 'abc@gmail.com'
}
// 아래와 같이 객체를 이름으로(key값) 분해하여 사용할 수 있음, 또한 원객체에 값이 없는 것은 아래와 같이 address 부분에서 지정할 수 있음
// 또한, name으로 분해된 것의 이름을 naming으로 전환하고 싶을 때도 아래와 같이 사용
const { name: naming, age, email, address = 'Korea' } = user;

console.log(address); //Korea
console.log(naming); //hi

const fruits = ['Apple', 'Banana', 'Cherry'];
const [a, b, c, d] = fruits;
console.log(a, b, c, d); // Apple Banana Cherry undefined

const [, e] = fruits;
console.log(e); //banana
7-6. 전개 연산자(spread)
const fruits = ['Apple', 'Banana', 'Cherry', 'Orange'];
console.log(fruits); // 배열 출력 ['Apple', 'Banana', 'Cherry', 'Orange']
console.log(...fruits); // = console.log('Apple', 'Banana', 'Cherry', 'Orange')

function toObject(a, b, ...c) {
  return {
    a, //a: a,
    b, //b: b,
    c, //c: c
  }
}

console.log(toObject(...fruits));
// {a: 'Apple', b: 'Banana', c: Array(2)}
// a: "Apple"
// b: "Banana"
// c: (2) ['Cherry', 'Orange']
7-7. 불변성(immutability)
//원시 데이터: string, number, boolean, undefined, null
//참조형 데이터: object, array, function

// 원시데이터는 그냥 모양새 또는 타입이 같으면 true
let a = 1; //1번 메모리
let b = 2; //2번 메모리
console.log(a, b, a == b);//false
b = a; //2번 메모리에 1번 메모리 주소
console.log(a, b, a == b);//true
b = 7; //2번 메모리에 새로 할당
console.log(a, b, a == b);//false
let c = 1;//1번 메모리의 값을 c에 할당
console.log(b, c, b == c);//true

//참조형 데이터
let a = { k: 1 }; //1번 메모리
let b = { k: 1 }; //2번 메로리
console.log(a, b, a == b);//false
a.k = 7;
b = a; //2번 메모리에 1번 메모리 주소
console.log(a, b, a == b);//true
a.k = 2;
console.log(a, b, a == b);//true, 똑같이 2를 가지고 있는 같은 메모리 주소를 보고 있음
let c = b;//1번 메모리의 값을 c에 할당
console.log(a, b, c, a == c);//전부 2 그리고 true
a.k = 9;
console.log(a, b, c, a == c);//전부 9 그리고 true
7-8. 얕은 복사(shallow)와 깊은 복사(deep)
import _ from 'lodash'

const user = {
  name: 'hi',
  age: 85,
  emmails: ['abc@gmail.com']
}
/*
const copyUser = user;
console.log(copyUser === user); //같은 메모리를 보고 있음

user.age = 32; // copyUser와 user 모두 변환되며 서로 같은 메모리를 보고 있음
console.log('user', user);
console.log('copyUser', copyUser);
*/

/*
//얕은 복사
const copyUser = Object.assign({}, user); // 빈 객체에 새로 반환 또는 {...user}
console.log(copyUser === user); // 서로 다른 메모리를 보고 있기에 false

user.age = 32; // user의 값만 변경되고 copyUser는 변환X 따라서 서로 다른 메모리를 보고 있음
console.log('user', user);
console.log('copyUser', copyUser);

user.emmails.push('neo@gmail.com'); // 이 문장으로 인해 새로운 object
console.log(user.emmails === copyUser.emmails); // 참조형 데이터 안에 다른 참조형 데이터가 있기에 26번 line이 전부 적용이 됨
*/

//깊은 복사 -> 참조형 안에 참조형까지 전부 별개의 메모리로 분리시켜 영향을 받고 싶지 않을 때 사용
const copyUser = _.cloneDeep(user);
console.log(copyUser === user);

user.age = 32;
console.log('user', user);
console.log('copyUser', copyUser);

user.emmails.push('neo@gmail.com');
console.log(user.emmails === copyUser.emmails); //false
8. JS 데이터 실습
8-1. 가져오기 내보내기 (improt, export)
// node_modules에서 가지고 오는 것들은 아래와 같이 주소 부분 작성 가능
import _ from 'lodash';

/* 첫 번째 통로 - default 기본 통로 */
// 내보낼 때 이름(getType) 삭제해도 되고, 가져왔을 때 사용되는 이름도 바꿀 수 있음
// 한 파일(모듈, module)에 하나씩만 할당 가능
// import default getType from '파일주소'
export default function getType(data) { // default에서 function이름을 사용 안 해도 됨
  return Object.prototype.toString.call(data).slice(2, 8);
}

/* 두 번째 통로 */
// 이름을 객체로 지정해서 불러와야함, 다중 호출 가능
// import { random, user as cp } from '파일주소'  //"user as cp" 로 하여 이름을 바쑬 수 있음
// import * as R from './getRandom' //안에 있는 모든 것을 R로 지정해서 내보내는 것
export function random () {
  return Math.floor(Math.random() * 10);
}
export const user = {
  name: 'hi',
  age: 12
}
8-2. lodash
- 다운 받아서 활용할 수 있는 패키지 중 하나
/*uniq 값 반환*/
import _ from 'lodash';

const userA = [
  { userId: '1', name: 'A'},
  { userId: '2', name: 'B'}
]
const userB = [
  { userId: 1, name: 'A'},
  { userId: 3, name: 'C'},
]
const userC  = userA.concat(userB); // 위 4개가 다 합쳐짐
_.uniqBy(userC, userId); //유니크값 속성 추충
const userD = _.unionBy(userA, userB, 'userID'); //유니크값만 뽑아서 합침
import _ from 'lodash';
const users = [
{ userId: '1', name: 'A'},
{ userId: '2', name: 'B'},
{ userId: '3', name: 'C'},
{ userId: '4', name: 'D'},
{ userId: '5', name: 'E'},
]
const foundUser = _.find(users, {name: 'A'});
const foundIndex = _.findIndex(users, { name: 'C'}) // 출력 2
_.remove(users, { user: 'A' })
console.log(users)8-3. JSON(JavaScript Object Notation)
- 웹 어플리케이션에서 데이터를 전송할 때 일반적으로 사용
- 문자 데이터지만 import하였을 때 객체로 인식됨 → JSON.parse를 통해서 객체로 전환하여 사용
- 다시 JSON으로 사용하려면 JSON.strigfy
8-4. Storage
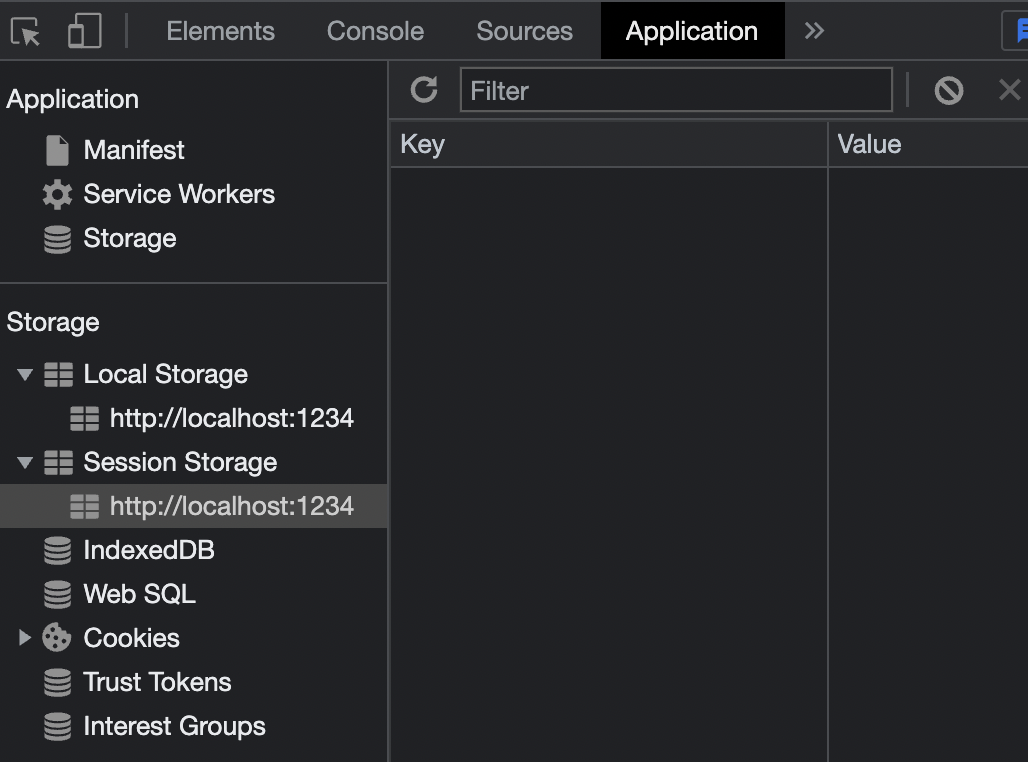
- 브라우저에 값을 저장
- local storage: domain 주소(사이트)에 종속, 데이터가 만료되지 않음, 반영구적으로 사용
- seesion storage: 페이지 세션이 끝날 때 사라짐
const user = {
name: 'hi',
age: 12,
emails: [
'this@gmail.com',
'that@gmail.com'
]
}
// 문자형태로 저장
// localStorage.setItem('user', JSON.stringify(user));
// // JS의 객체로 변경
// console.log(JSON.parse(localStorage.getItem('user')));
// 삭제
// localStorage.removeItem('user');
// 값 수정
const str = localStorage.getItem('user');
const obj = JSON.parse(str);
obj.age = 22;
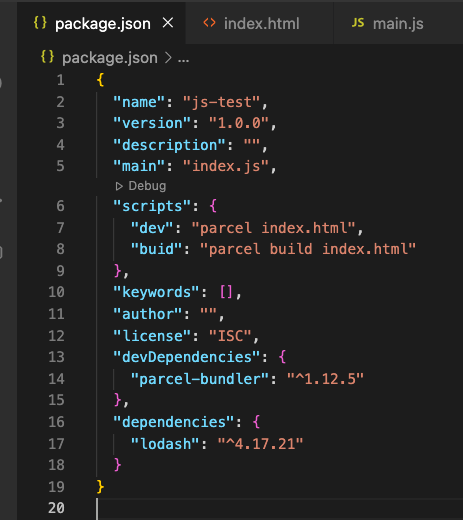
localStorage.setItem('user', JSON.stringify(obj));8-5. OMDb(Open Movie Database) API
- query string을 활용하여 요청함 ->
{주소}http://www.omdbapi.com/?속성=값&속성=값&속성=값 - 요청하여 받은 값은 json형태로 받음!
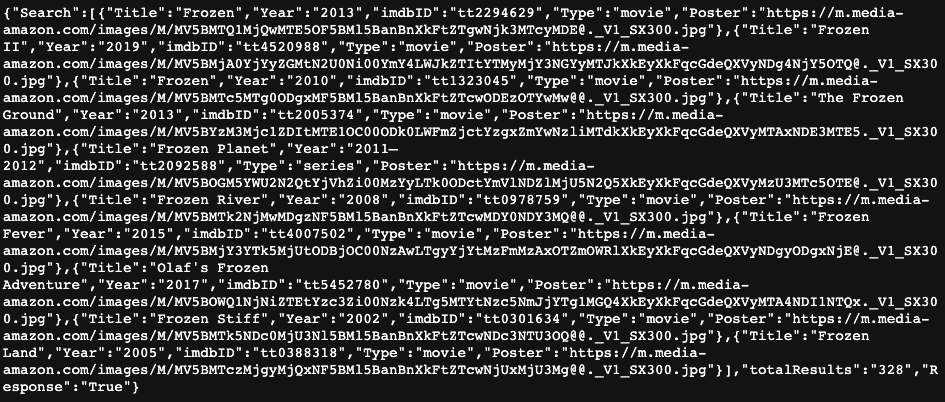
- axios 패키지를 이용하며 구조를 이해하고 다음 코드 선언 시 아래 사진과 같이 나옴
import axios from "axios";

function fetchMovies() {
  axios
    .get('https://www.omdbapi.com/?apikey=7035c60c&s=frozen') //qeury string 부분
    .then((res) => {
      console.log(res);
      const h1El = document.querySelector('h1');
      const imgEl = document.querySelector('img');
      h1El.textContent = res.data.Search[0].Title;
      imgEl.src = res.data.Search[0].Poster;
    });
}
fetchMovies();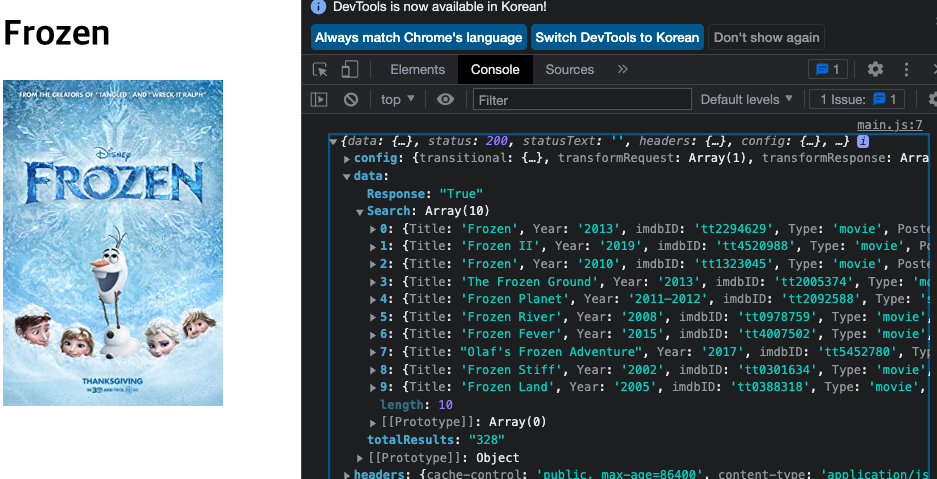
주간회고
- 이제 슬슬 강의만으로 이해하기 부족한 부분이 많다. 강의가 원론적인 의미로 이야기하는 부분이 많아서 이해하지 못하는 부분은 스스로 찾고 정리해아 함 -> 이 과정에서 개인적으로 느꼈을 때 "코딩애플"과 "생활코딩" 이 두분이 가장 이해하기 쉽게 설명해주는 듯
- 나중에 이런 것이 있었지...하면서 기억할 수 있게 자세하게 기억하기 보다는 전체적으로 느낌을 가지고 필요할 때 찾아볼 수 있는 기억력을 키울 수 있게 노력하자

꾸준히 공부하자