Layout in Flutter
https://docs.flutter.dev/development/ui/layout
flutter 레이아웃 매커니즘의 핵심은 Widget이다. Widget은 크게 두개로 분류 된다.
- layout widget
직접적으로 보이지 않는 widget이지만 보이는 영역의 widget 을 담아 배치나 사이즈 등을 조절 시키는 역할을한다.- visible widget
직접적으로 사용자에게 보이는 widget
1. Widget Layout
flutter 의 widget 을 배치하는데 아래와 같은 단계로 진행한다.
1. layout widget 선택
2. visible widget 선택
ex) Text, Image, Icon ....
Text('Hello World')

Image.asset(
  '파일경로/파일.jpg',
  fit: BoxFit.cover,
)

Icon(
  Icons.star,
  color: Colors.red[500],
)
3. 레이아웃 widget에 보이는 widget 배치
- Single-child layout widgets
child 위젯이 한개 일 경우
ex) Align, Center, Padding, Expanded ....- multi-child layout widgets
child 위젯이 한개 이상 일 경우
ex) Column, Row ....
const Center(
	child:Text('HELLO WORLD')
)
4. 페이지 레이아웃에 추가
Flutter 앱은 그 자체로 위젯이며 대부분 build 메서드가 있다. 앱의 build 메서드에서 위젯을 인스턴스화하고 반환하면 widget에 표시된다.
앱의 경우 기본 배너 배경색등 UI를 제공하는 Material widget을 사용할 수 있다. 인디급? 소규모 앱을 보면 생각보다 자주 보이던 디자인 🤔
import 'package:flutter/material.dart';
void main() {
runApp(const MyApp());
}
class MyApp extends StatelessWidget {
const MyApp({super.key});
Widget build(BuildContext context) {
return Container(
decoration: const BoxDecoration(color: Colors.white),
child: const Center(
child: Text(
'Hello World!',
textDirection: TextDirection.ltr,
style: TextStyle(
fontSize: 32,
color: Colors.black87,
),
),
),
);
}
}2. Lay out multiple widgets vertically and horizontally
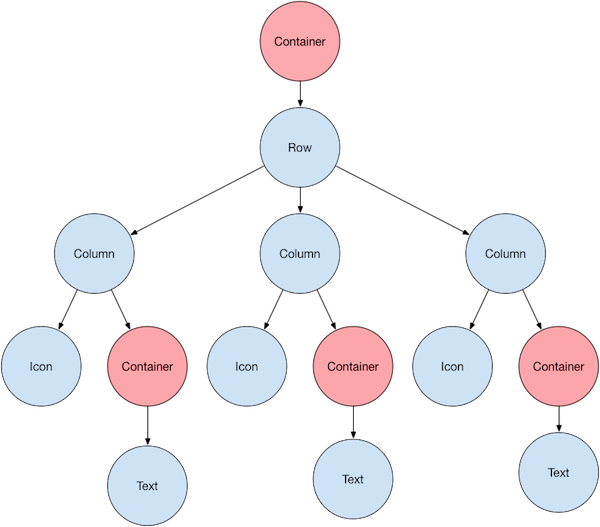
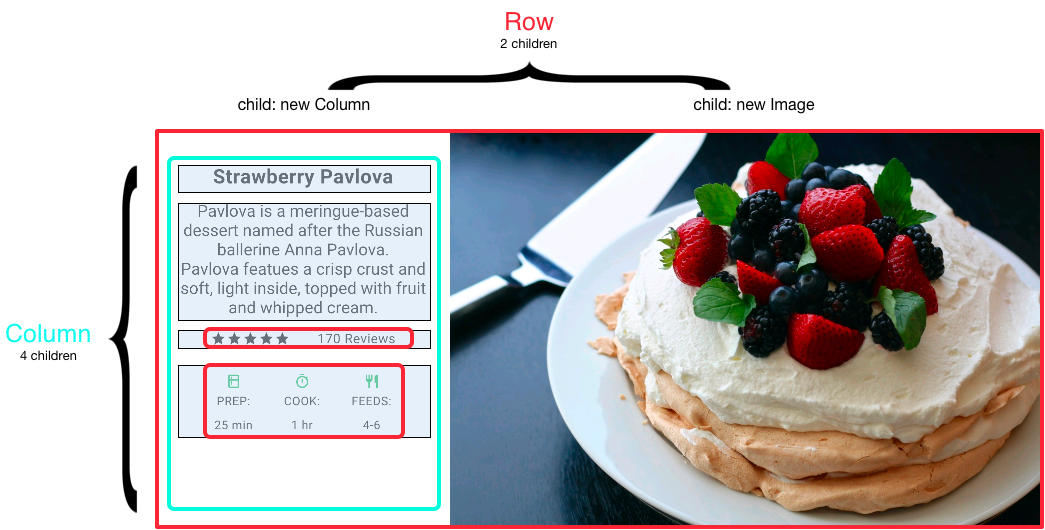
가장 일반적인 레이아웃 패턴은 위젯을 vertically and horizontally 으로 배열하는 것 이다.
flutter 에서 행이나 열을 생성하려면 Row 또는 Column 위젯에 자식 위젯 목록을 추가한다. 그리고 각 child 는 그 자체도 Row 또는 Column 으로 중첩 될 수 있다.
Aligning widgets
mainAxisAlignment및 crossAxisAlignment속성을 사용하여 child의 행이나 열을 정렬할 수 있다. 행의 경우 주 축은 수평으로 실행되고 교차 축은 수직으로 실행된다.
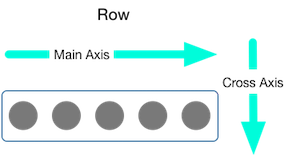
css flex 의 align-items, jusrify-content 와 개념이 같음 🤗
Row(
  mainAxisAlignment: MainAxisAlignment.spaceEvenly,
  children: [
    Image.asset('images/pic1.jpg'),
    Image.asset('images/pic2.jpg'),
    Image.asset('images/pic3.jpg'),
  ],
);

Column(
  mainAxisAlignment: MainAxisAlignment.spaceEvenly,
  children: [
    Image.asset('images/pic1.jpg'),
    Image.asset('images/pic2.jpg'),
    Image.asset('images/pic3.jpg'),
  ],
);
Sizing Widget
레이아웃이 너무 커서 device에 맞지 않으면 영향을 받는 가리에 노란색 패턴이 나타난다.

Expanded widget을 사용하여 행이나 열에 맞게 크기를 조정할 수 있다.
Row(
  crossAxisAlignment: CrossAxisAlignment.center,
  children: [
    Expanded(
      child: Image.asset('images/pic1.jpg'),
    ),
    Expanded(
    // 일부 사이즈 비율을 조정하기 flex 속성을 사용한다 기본값 : 1
    	flex:2,
      child: Image.asset('images/pic2.jpg'),
    ),
    Expanded(
      child: Image.asset('images/pic3.jpg'),
    ),
  ],
);
Packing Widget
기본적으로 행이나 열은 주축을 따라 가능한 많은 공간을 차지하지만 자식을 밀접하게 묶어야 한다면 mainAxisSize 를 사용 한다.
Row(
mainAxisSize: MainAxisSize.min,
children: [
Icon(Icons.star, color: Colors.green[500]),
Icon(Icons.star, color: Colors.green[500]),
Icon(Icons.star, color: Colors.green[500]),
const Icon(Icons.star, color: Colors.black),
const Icon(Icons.star, color: Colors.black),
],
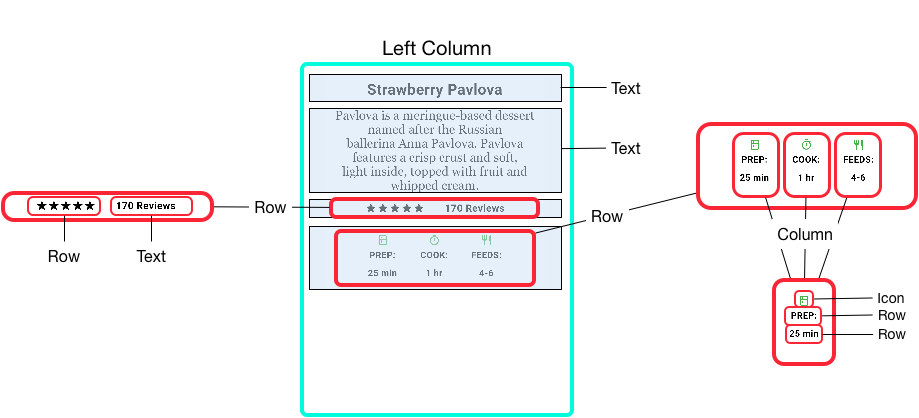
)Nesting rows and columns
필요한 만큼 행과 열 내부에 또 행과 열로 중첩 할 수 있다.

var stars = Row(
  mainAxisSize: MainAxisSize.min,
  children: [
    Icon(Icons.star, color: Colors.green[500]),
    Icon(Icons.star, color: Colors.green[500]),
    Icon(Icons.star, color: Colors.green[500]),
    const Icon(Icons.star, color: Colors.black),
    const Icon(Icons.star, color: Colors.black),
  ],
);

final ratings = Container(
  padding: const EdgeInsets.all(20),
  child: Row(
    mainAxisAlignment: MainAxisAlignment.spaceEvenly,
    children: [
      stars,
      const Text(
        '170 Reviews',
        style: TextStyle(
          color: Colors.black,
          fontWeight: FontWeight.w800,
          fontFamily: 'Roboto',
          letterSpacing: 0.5,
          fontSize: 20,
        ),
      ),
    ],
  ),
);
