GitHub Actions을 활용한 CI/CD 파이프라인 설정 및 Cloudtype 배포
cloudtype 을 사용해서 만든 앱을 인터넷에 배포해보자 !
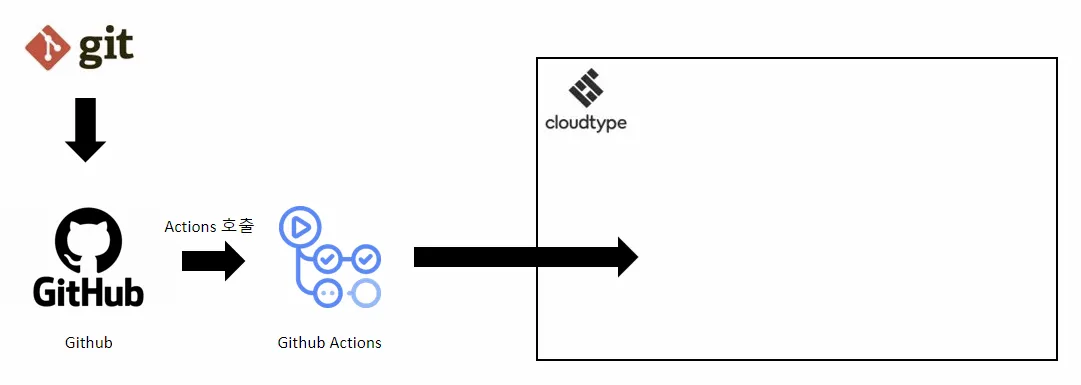
✅ 전체 흐름
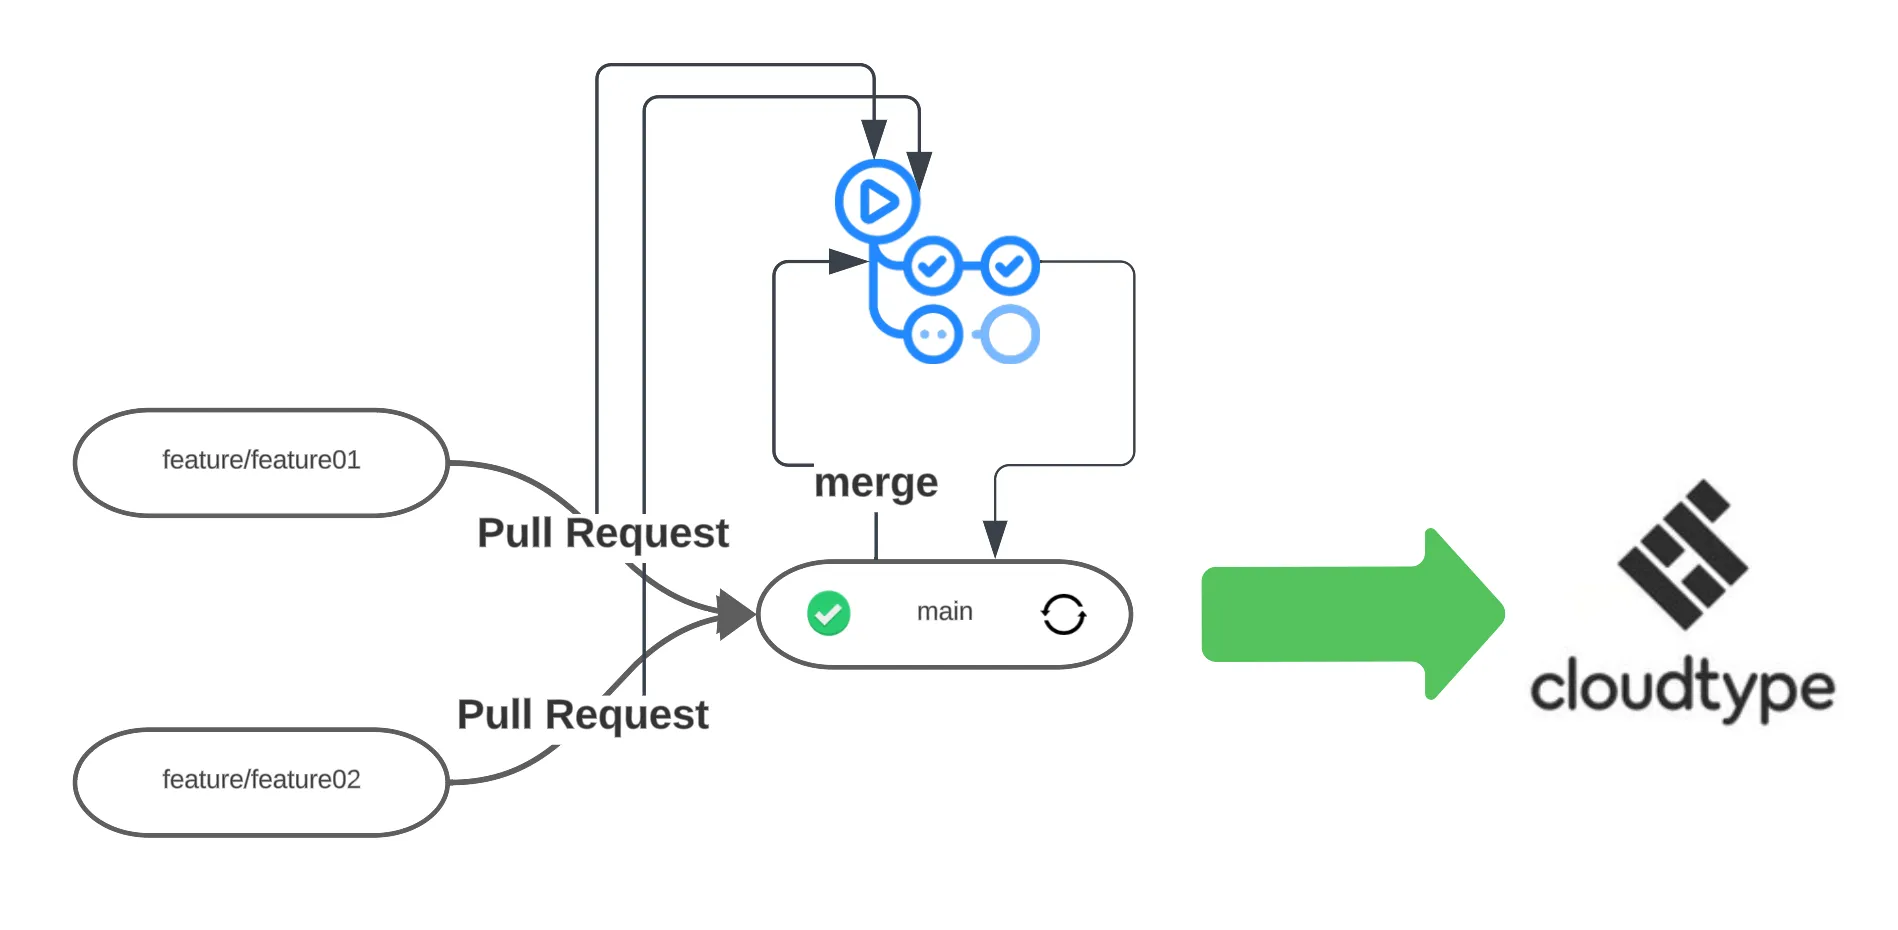
- 개발자는
feature/로 시작하는 브랜치를 만들어서 test코드를 포함한 수정 작업을 완료한 뒤 Pull Request 생성 - (자동화) Pull Request를 만들면 해당 브랜치에 대해
gradle test수행 - Pull Request 코드의 test가 실패한 경우, Pull Request를 생성한 개발자는 test 코드를 수정하여 Pull Request를 변경
- Pull Request 코드의 test가 성공한 경우, 다른 개발자들의 승인을 기다림
- 다른 개발자들은 Pull Request의 코드를 승인하거나 댓글로 소통
- (자동화) main 브랜치에 merge 되면 해당 브랜치를
cloudtype서버에 배포
🔄 cloudtype으로 CD 활용
저장소 생성 및 대상 코드 push
이전 게시글과 동일하게 CI를 먼저 구축해보자 !
☑️ github actions 설정
- test-pr.yml : Pull Request가 생성되면, ‘gradle test’ 를 진행해서 PR 의 테스트코드가 모두 성공인지 확인
#test-pr.yml

name: test every pr
on:
  workflow_dispatch:
  pull_request:
permissions:
  contents: read
  pull-requests: read
jobs:
  deploy:
    runs-on: ubuntu-latest
    steps:
      - name: Checkout
        uses: actions/checkout@v3
      - name: setup jdk
        uses: actions/setup-java@v3
        with:
          java-version: '17'
          distribution: 'temurin'
          cache: gradle
      - name: Grant execute permission for gradlew
        run: chmod +x ./gradlew
      - name: gradlew test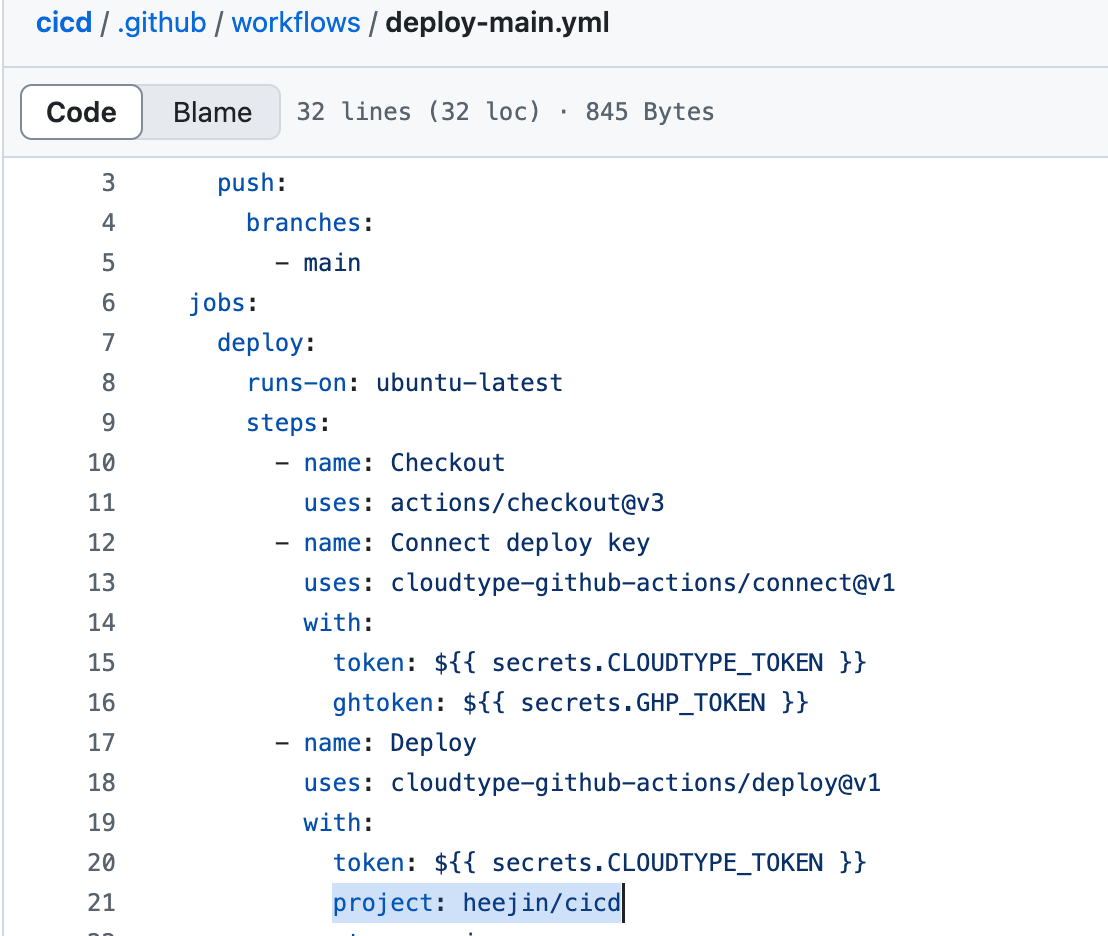
run: ./gradlew test- deploy-main.yml : cloudtype 서비스 배포에 필요한 key들을 가지고 바로 배포
#deploy-main.yml

name: Deploy to cloudtype
on:
  push:
    branches:
      - main
jobs:
  deploy:
    runs-on: ubuntu-latest
    steps:
      - name: Checkout
        uses: actions/checkout@v3
      - name: Connect deploy key
        uses: cloudtype-github-actions/connect@v1
        with:
          token: ${{ secrets.CLOUDTYPE_TOKEN }}
          ghtoken: ${{ secrets.GHP_TOKEN }}
      - name: Deploy
        uses: cloudtype-github-actions/deploy@v1
        with:
          token: ${{ secrets.CLOUDTYPE_TOKEN }}
          project: # 워크스페이스 이름/프로젝트 이름 ex) nbc.docker/cicd
          stage: main
          yaml: |
            name: # 프로젝트 이름 ex) `cicd`
            app: java@17
            options:
              ports: 8080
            context:
              git:
                url: git@github.com:${{ github.repository }}.git
                ref: ${{ github.ref }}
              preset: java-springboot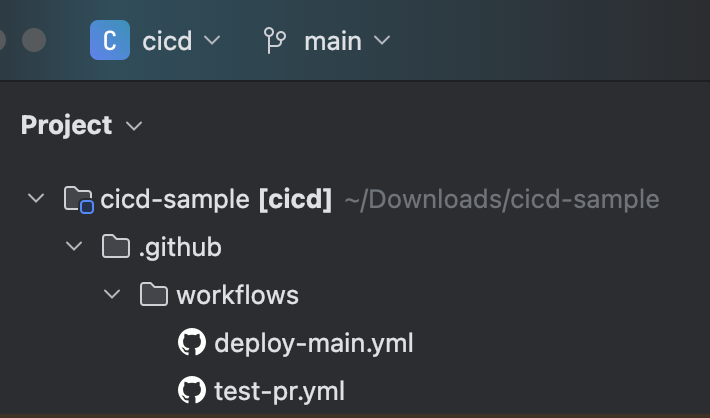
☑️ Github - Cloudtype 연동 설정
1️⃣ GitHub Personal Token 발급
- 이동
- Settings -> Developer Settings
- Tokens(classic)
- repo, admin:public_key 모든 권한 선택
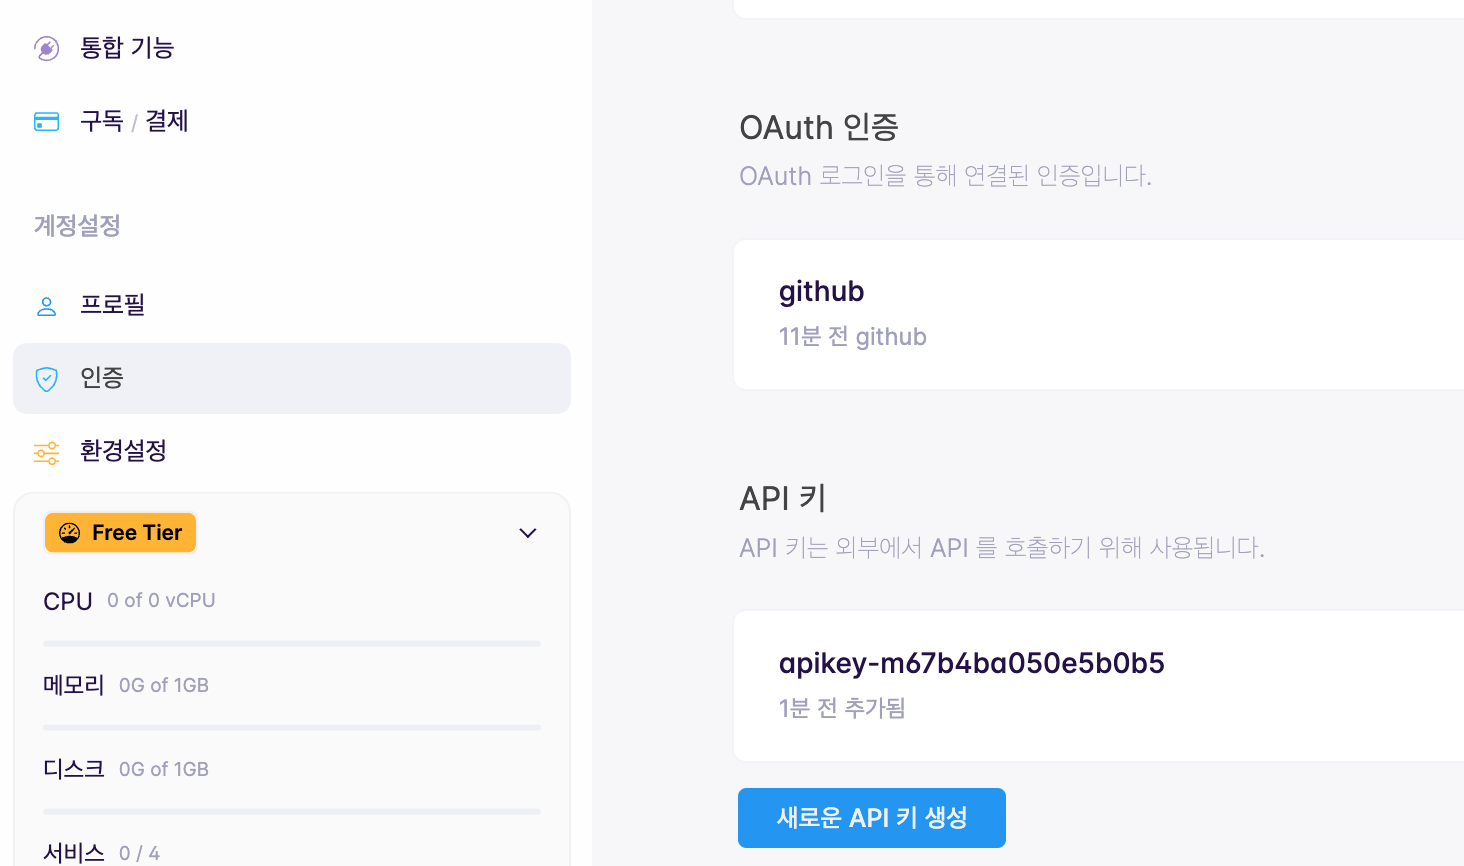
2️⃣ cloudtype 의 API Key 발급
- API Key: 외부에서 클라우드타입의 API를 활용하고자 할 때 사용되는 인증 정보
- Github Actions 등 외부의 CI/CD 도구를 활용하여 배포작업을 진행할 시 API Key의 발급이 필요 - cloudtype 접속 -> 환경설정 -> 인증 메뉴 -> API 키 생성
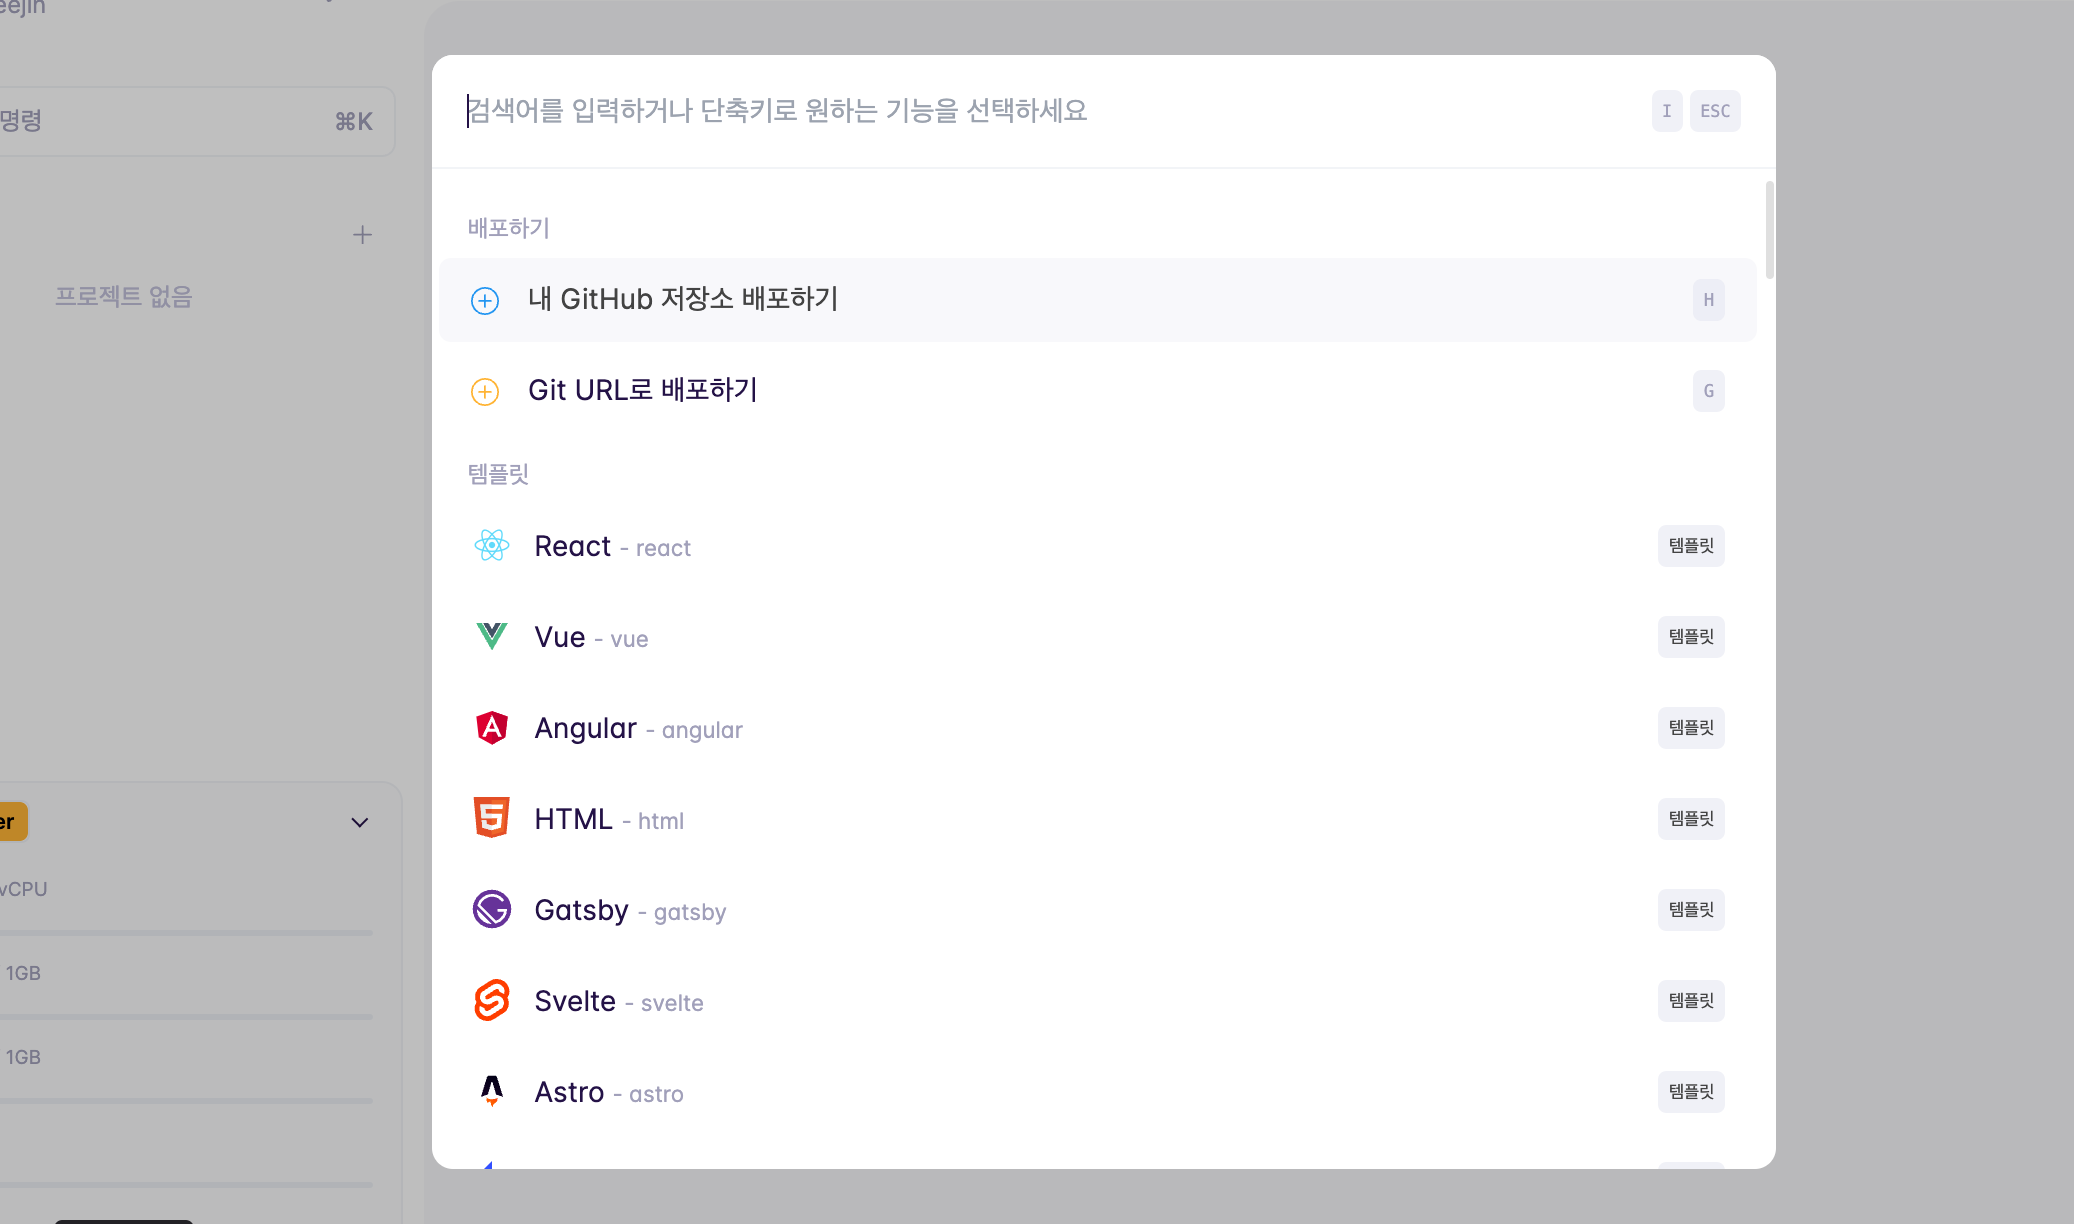
3️⃣ 배포 서비스 생성
4️⃣ github 설정
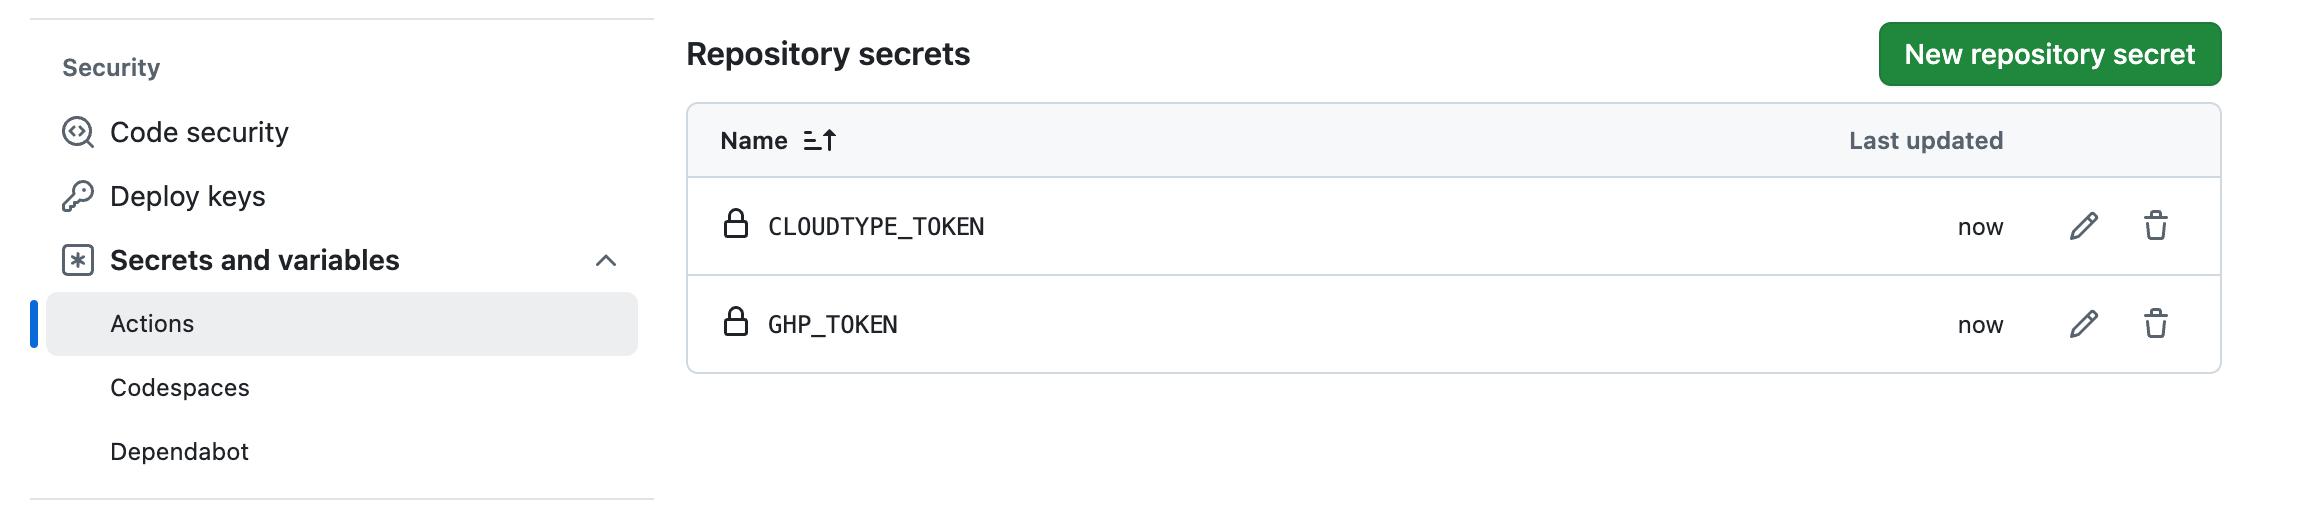
- 해당 repository Settings -> Security -> Secrets and variables -> Actions
- GitHub Personal token: GHP_TOKEN
- cloudtype API key: CLOUDTYPE_TOKEN
- Repository secrets에서 설정
5️⃣ Workspace와 프로젝트 이름 설정
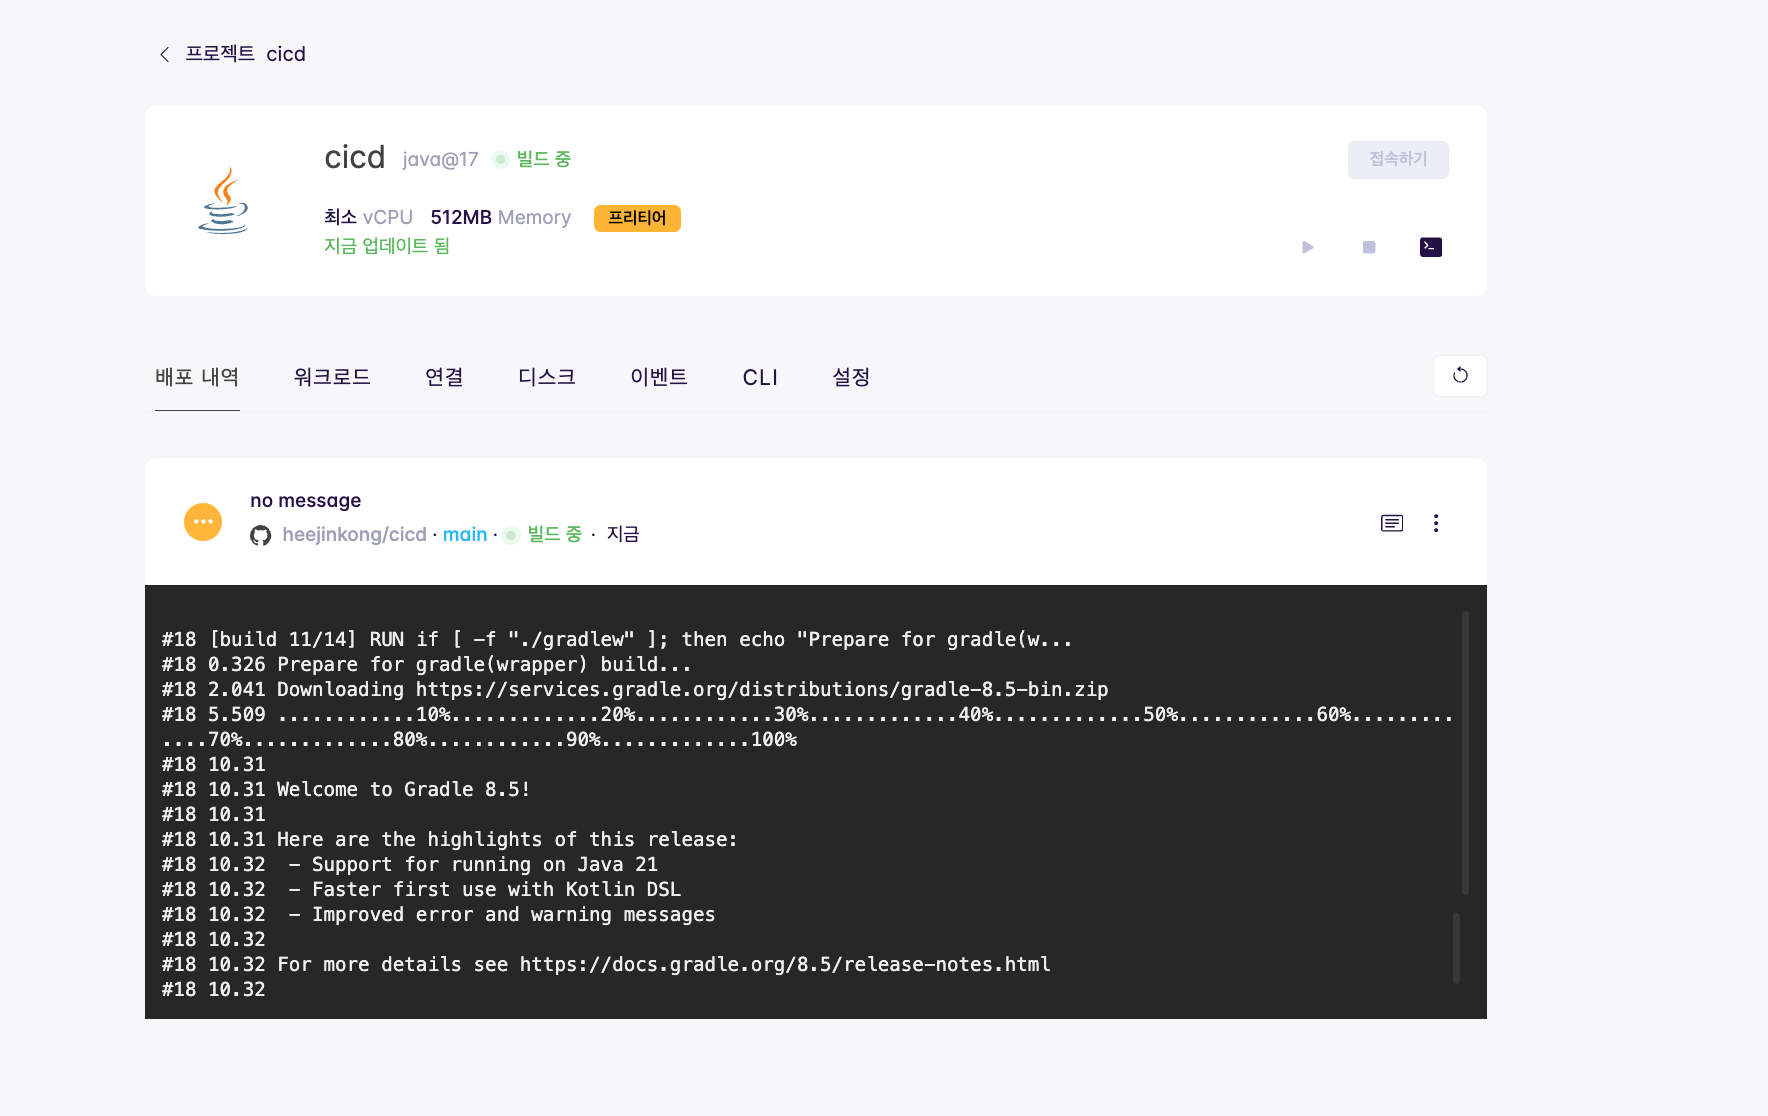
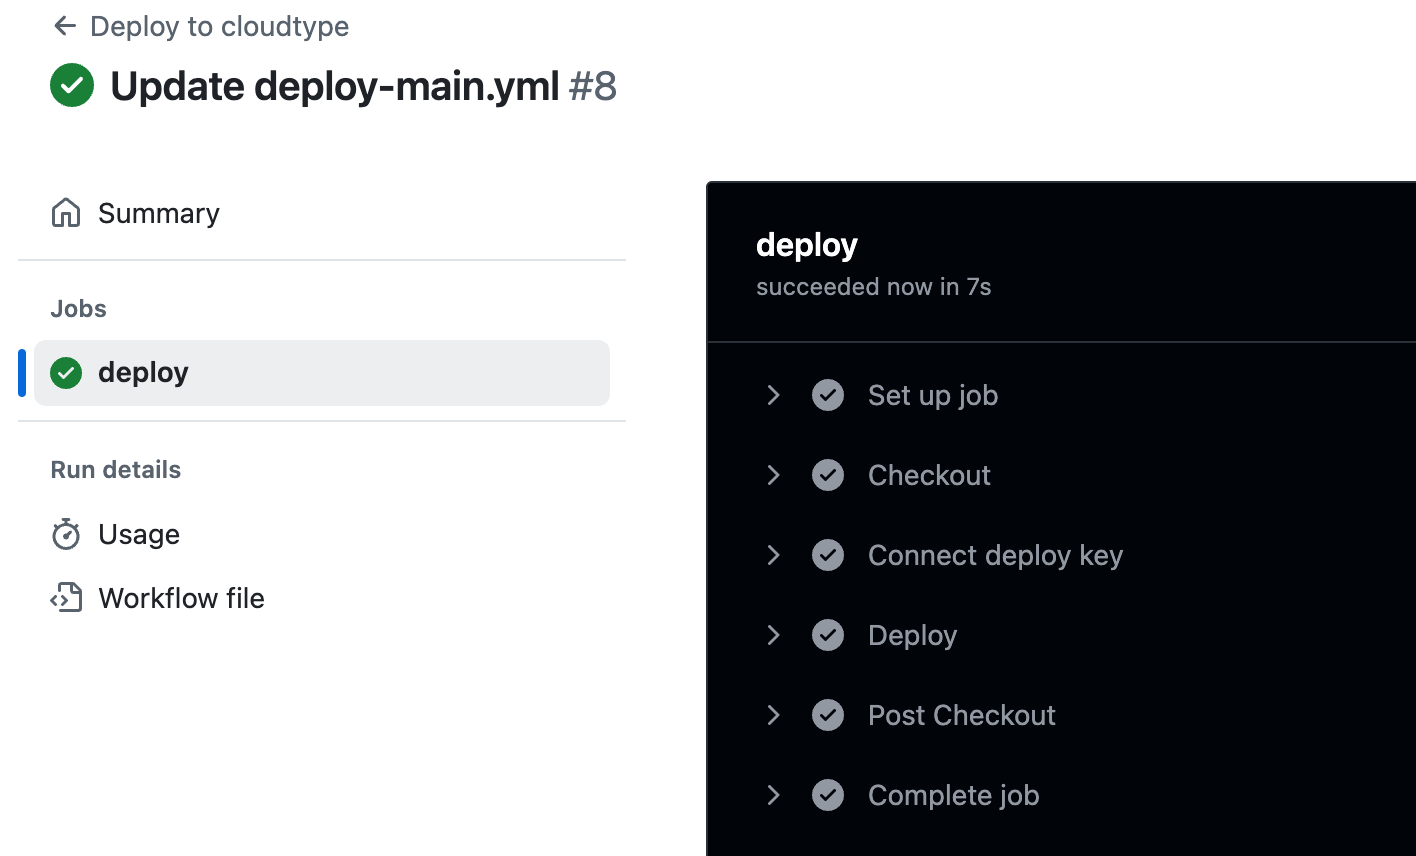
6️⃣ 설정 후 Actions에서 정상적으로 배포된 것을 확인
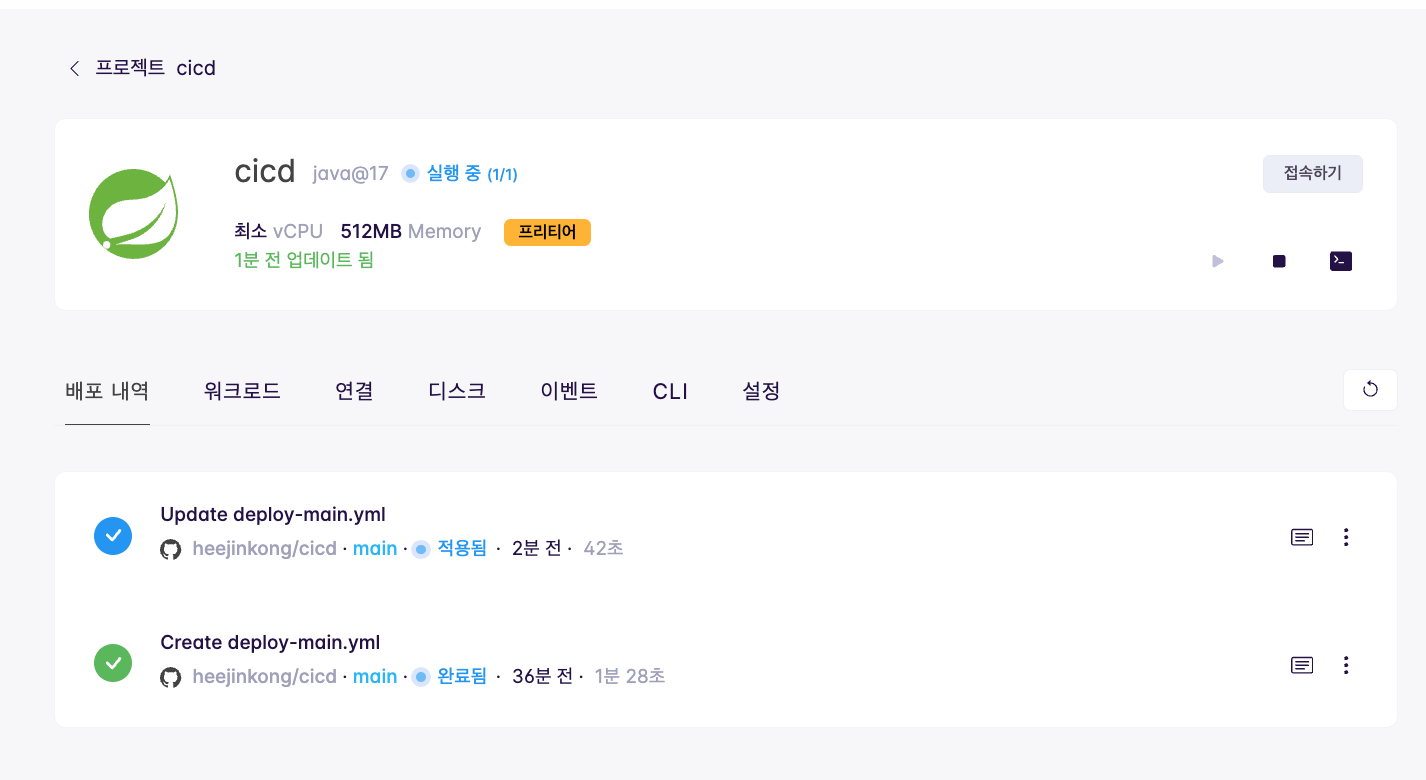
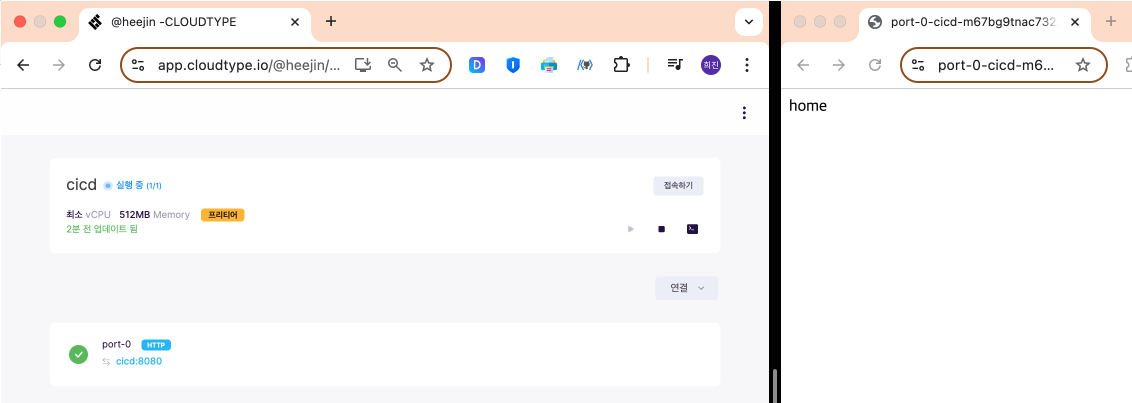
7️⃣ cloudtype에서 배포 완료 된 것을 확인
출처 : [TeamSparta]

🔥💻🔥