Anaconda의 유료화 이슈가 있어서
Miniforge3로 설치합니다!
< Miniforge3 설치 >
- Miniforge Github에서 원하는 버전 확인
https://github.com/conda-forge/miniforge
- 현재 Window 환경에서 설치하기에 https://github.com/conda-forge/miniforge/releases/tag/24.9.2-0 에서 Miniforge3-Windows-x86_64.exe 다운로드
- Miniforge3-Windows-x86_64.exe 실행
- 설치 과정에서 Add Miniforge to PATH 체크
- 나머지는 기본 설정으로 Next 누르면서 설치 완료
- 설치 확인
- cmd (명령 프롬프트) 창에서 conda version 확인
conda --version - conda-forge 확인
conda config --show channels - cmd 창처럼 Miniforge Prompt 창 실행 가능
< 가상환경 생성 >
-
현재 가상환경 확인
conda env list -
설치할 python version 확인
https://www.python.org/downloads/ -
새로운 가상환경 생성 (python version 명시)
conda create -n test python=3.12 -
가상환경 활성화
conda activate test (=source bin/activate test) -
가상환경에 jupyter notebook 설치
pip install jupyter notebook -
가상환경에 ipykernel 설치
pip install ipykernel -
가상환경 kernel 연결하기
python -m ipykernel install --user --name test --display-name "test" -
가상환경 종료
deactivate -
가상환경 삭제
conda env remove --n test
<Visual Studio Code 설치>
-
Windows 설치 파일 다운로드 https://code.visualstudio.com/download
세팅된 기본 옵션대로 그대로 설치 -
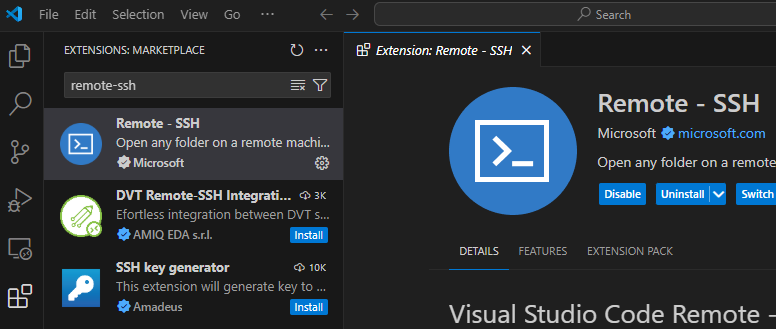
VS code 실행 후 Extentions를 클릭하여 Remote-SSH 검색하여 설치
-
F1 혹은 'CTRL+SHIFT+P' 를 눌러 아래의 Open SSH Configuration File 선택

-
config file에 원격 접속하려는 서버 정보 입력 후 저장
Host [별명]
	HostName [ip주소]
    User [계정명]
Port [포트번호]- 서버 정보 확인하기
- HostName 확인: terminal에 hostname 입력
- User 확인: terminal에 whoami 입력
- Port 확인: 따로 변경을 안 했다면 22 (변경했다면 etc/ssh/sshd_config 파일에서 port 번호 확인)
- 다시 F1 혹은 'CTRL+SHIFT+P' 눌러 아래의 Connect to Host 선택
- 연결 성공!