국제화의 정의는 국민국가간의 교류가 양적으로 증대되는 현상을 말한다.
스프링에서의 국제화란?
내가 작성한 코드를 나라별로 변환시켜 줄수있는 코드를 말한다.
국제화에 대해 설명하기전에 Spring에서 .properties가 어떻게 등록이 되는지 spring-servlet.xml부터 시작하여 설명하고자한다.
목차
1.XML로 Properties가 어떻게 등록이 되는가
2.Spring boot에서 Properties가 어떻게 등록이 되는가
3.Internationalization가 어떻게 이루어지는지?
1. XML로 어떻게 등록?
**Spring project를 처음 만들때 Spring Boot는 많은 사람들이 사용하던 설정 내용을 Pre-set으로 구성해서 제공되므로 https://start.spring.io/ 에서 원하는 의존성 기능들을 추가한 뒤 다운로드 받고 IDE에 Import하면 빠르게 설정내용을 프로젝트에 적용할 수 있다.
밑에 있는 코드는 우리가 이해해야할 코드이다.
message 관련 XML
<beans xmlns="http://www.springframework.org/schema/beans"
	xmlns:xsi="http://www.w3.org/2001/XMLSchema-instance"
	xsi:schemaLocation="http://www.springframework.org/schema/beans http://www.springframework.org/schema/beans/spring-beans.xsd">

	<bean id="messageSource" class="org.springframework.context.support.ReloadableResourceBundleMessageSource">
		<property name="basenames">
			<list>
			 	<value>/WEB-INF</value>
			</list>
	 	</property>
	 	<property name="" value="UTF-8" />
	 	<property name="" value="" />
	 </bean>
	<bean id="localeResolver" class="org.springframework.web.servlet.i18n.SessionLocaleResolver" />
</beans>
Spring boot로 인해 자동제공되는 Resourcebundlemessagesource가 있는데Resourcebundlemessagesource는 프로퍼티 뿐만 아니라 XML 파일로 되어있는 메시지 번들을 불러와서 메시지 소스를 구성할 수 있게 지원한다.
<bean ~ /bean> 안에 class를 보면 ReloadableResourceBundleMessageSource가 있는데 resourcebundlemessagesource를 상속한것이다. 왜 Resourcebundlemessagesource가 아닌 ReloadableResourceBundleMessageSource를 class정보로 넣은 이유는 Resourcebundlemessagesource는 resourcebundle을 통해 메세지를 읽어드리는데 classpath가 아닌 다른곳에서 메세지를 읽어드릴 수 없다. 따라서 ReloadableResourceBundleMessageSource를 쓴 이유다.(= 이게 무슨 말이냐면, 지정된경로에서만 값을 읽어드린다는거다. 그러면 다른 URL,URI에서는 값을 못읽어오니 문제가 생기겠지?) 결국 Messagesource가 Bean으로 등록이 되면서, <value ~ /value>로 해당파일의 경로를 읽고 <property ~ /property>에 각각 나라별로 해당되는 언어를 작성하면 밑에있는 localeResovler에 SessionLocaleResovler을 통해 자동변환되고 우리가 http웹상에 저장되어있는 우선순위에따라 보여지게된다.
이제는 이해가 갈것이다. Spring-servlet.xml은 spring boot로 자동제공되는 Resourcebundlemessagesource가 지원해서 나온 xml이라는걸 !!!!!
2.Properties가 어떻게 등록이 되는가
@Target(ElementType.TYPE)
@Retention(RetentionPolicy.RUNTIME)
@Documented
@Inherited
@SpringBootConfiguration
@EnableAutoConfiguration
@ComponentScan(excludeFilters = { @Filter(type = FilterType.CUSTOM, classes = TypeExcludeFilter.class),
		@Filter(type = FilterType.CUSTOM, classes = AutoConfigurationExcludeFilter.class) })
public @interface SpringBootApplication {
먼저 Spring Boot를 가장먼저 실행시키면 나타나는 SpringBootApplication이 실행된다. 6번째줄에 @EnableAutoConfiguration이 있기 때문에 우리가 xxx.properties로 파일을 만들고 저장하면 자동적으로 만들어지는 근거를 찾았다 이제 @EnableAutoConfiguration을 더 깊이있게 봐보자.
헷갈리면 안되는게 spring boot가 tomcat을 가지고있기때문에 springBootApplication을 로딩하면 WAS(tomcat)도 같이 로딩이 되는것이다.
우리가 Spring Boot Project를 처음만들때 tomcat라이브러리를 선택했기 때문이 근거가 될수있겠다
2-1)EnableAutoConfiguration
@Target(ElementType.TYPE)
@Retention(RetentionPolicy.RUNTIME)
@Documented
@Inherited
@AutoConfigurationPackage
@Import(AutoConfigurationImportSelector.class)
public @interface EnableAutoConfiguration {

	/**
	 * Environment property that can be used to override when auto-configuration is
	 * enabled.
	 */
	String ENABLED_OVERRIDE_PROPERTY = "spring.boot.enableautoconfiguration";
- 자동으로 어떻게 등록이 되냐봤더니 EnableAutoConfiguration 역시 Import를 하고있었고 AutoConfigurationImportSelector.class를 봐야 진정으로 어떻게 자동등록이되는걸 볼수있을것이다.
public class AutoConfigurationImportSelector implements DeferredImportSelector, BeanClassLoaderAware,
		ResourceLoaderAware, BeanFactoryAware, EnvironmentAware, Ordered {
        ..
        ...
        protected List<String> getCandidateConfigurations(AnnotationMetadata metadata, AnnotationAttributes attributes) {
		List<String> configurations = SpringFactoriesLoader.loadFactoryNames(getSpringFactoriesLoaderFactoryClass(),
				getBeanClassLoader());
		Assert.notEmpty(configurations, "No auto configuration classes found in META-INF/spring.factories. If you "
				+ "are using a custom packaging, make sure that file is correct.");
		return configurations;
}- 코드가 너무길이 조금만 발췌해왔고 구성정보를 찾기위해 configuration으로된 부분을 찾아봤더니 위에서 4번째줄인 List< String> configurations = SpringFactoriesLoader.... 이 눈에 띄었다. 결국 여기서 컴퓨터구성이 이뤄져 자동저장이 되는거같은데 다시한번 코드를 뜯어보자
public final class SpringFactoriesLoader {

	public static final String FACTORIES_RESOURCE_LOCATION = "META-INF/spring.factories";

	private static final Log logger = LogFactory.getLog(SpringFactoriesLoader.class);

	static final Map<ClassLoader, Map<String, List<String>>> cache = new ConcurrentReferenceHashMap<>();
맙소사! 결국 우리가 원하는것을 찾았다. 바로 "META-INF/spring.factories" 라이브러리에서 properties뿐만 아니라 spring에 대한걸 얻을수있을거같다. 하나만찾으려고했는데 여러정보까지 알수있을거같아 되게 흥미롭다.
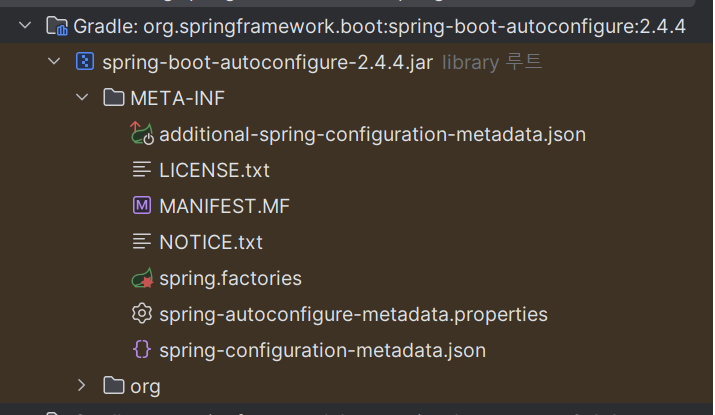
위에 근거는 바로 여기있고 이제 대망의 마지막으로 spring.factories를 까보자!
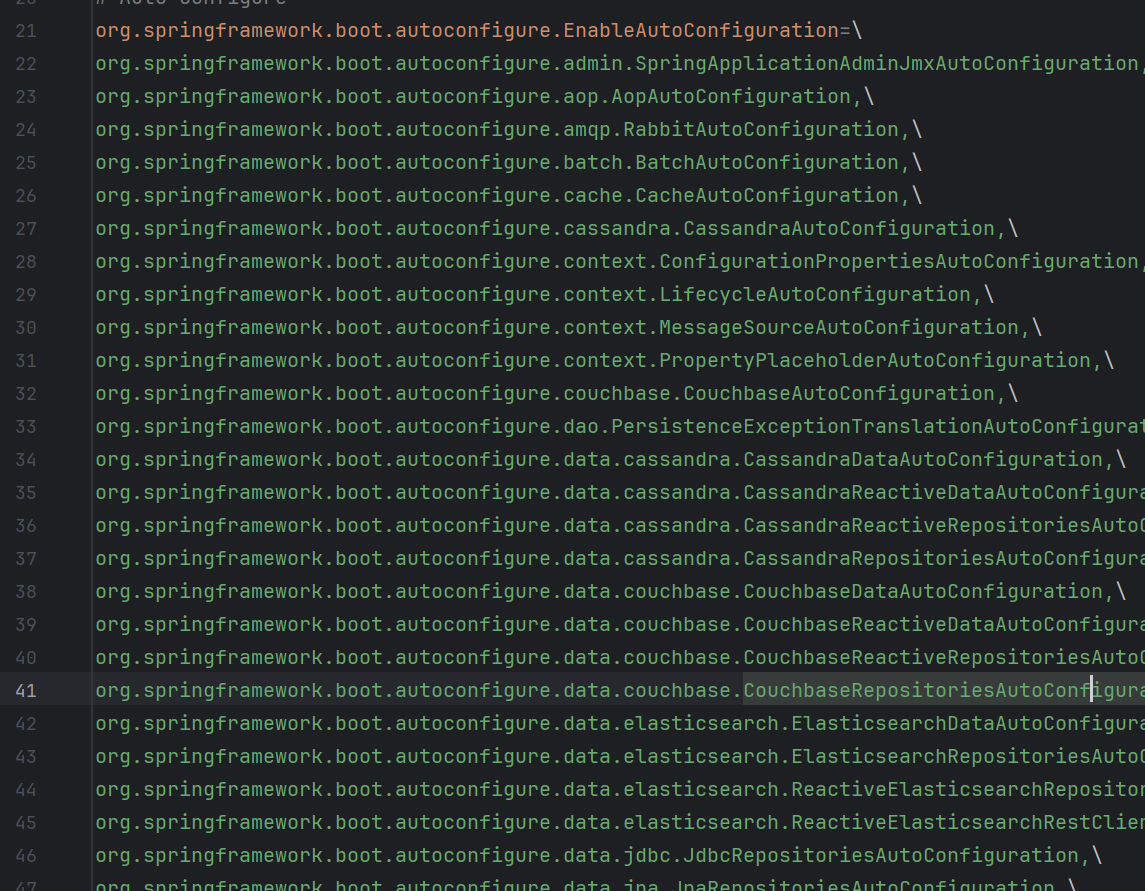
170줄가까이 되서 내가 원하는부분만 일단 일부찍어서 가져왔다. 여기서 우리가 논점적으로 봐야하는 줄은 30번째줄이다. properties라고 되어있어서 28번째줄과 31번째줄을 볼수있겠지만 이건 java코드상에서 properties를 설정해서 해줘야하는경우 발생하므로 이부분은 코드에서 잠깐봐보자
// properties
database.username = MangKyu
database.className=org.mariadb.jdbc.Driver

public class DatabaseConfig {

    // java code
    @Value("${database.username}")
    private String userName;

    @Value("${database.className}")
    private String className;

}
이처럼 thymeleaf가 아닌 java코드에서 properties를 사용해야하는경우 설정해줘야하는 문제이고 그중에서 이부분을 담당하는 코드는 28번째줄은 PropertySourcesPlaceholderConfigurer이다. 빈팩토리 후처리기라고도 하며 잠깐요약해서 설명하자면 @Value안에 선언된 ${}부분을 치환하는 역할을 담당하며 PropertySourcesPlaceholderConfigurer가 빈으로 먼저 등록이 되어있어야 @Configuration으로 등록된빈에 @Value의 라이프 사이클을 치환할수있으므로 근거가 될것이다.
이제 30번째줄을 이어서 설명하겠다
@Configuration(proxyBeanMethods = false)
@ConditionalOnMissingBean(name = AbstractApplicationContext.MESSAGE_SOURCE_BEAN_NAME, search = SearchStrategy.CURRENT)
@AutoConfigureOrder(Ordered.HIGHEST_PRECEDENCE)
@Conditional(ResourceBundleCondition.class)
@EnableConfigurationProperties
public class MessageSourceAutoConfiguration {
	private static final Resource[] NO_RESOURCES = {};
	@Bean
	@ConfigurationProperties(prefix = "spring.messages")
	public MessageSourceProperties messageSourceProperties() {
		return new MessageSourceProperties();
	}
- @ConfigurationProperties(prefix="spring.messages") 를통해서 먼저 등록이 되어야할 application.properties같은 기본 설정을 @Bean으로 등록한다.
@ConditionalOnMissingBean에 대한설명을 가져왔다 아래에서보자
"If a candidate bean may be created by another auto-configuration, make sure that the one using this condition runs after"
즉, 내가직접생성한 @Bean이라면 프로램이 설정한 @Bean("messages")은 후순위로 밀린다는것이다. 이러한조건때문에 사용자가 설정한 @Bean이 우선순위를 가지게된다
파라미터를 분석하자면
name = AbstractApplicationContext.MESSAGE_SOURCE_BEAN_NAME : 기본값인 @Bean name이다.
search = SearchStrategy.CURRENT : 현재런타임에서 찾는다는것이다
@Conditional(ResourceBundleCondition.class) 이 위에 선언되어있는데 Bean Definition을 설정하는 META정보 애노테이션이라고 같은 맥락에서 보면된다. @Conditional은 @Bean 등록여부에 조건을 달수있는 역할이며 조건을 만족해야 밑에코드인 @Bean으로 등록할수있게된다.
properties를 쓸때 어떻게 등록이되는지 한번봐보자
	protected static class ResourceBundleCondition extends SpringBootCondition {

		private static ConcurrentReferenceHashMap<String, ConditionOutcome> cache = new ConcurrentReferenceHashMap<>();

		@Override
		public ConditionOutcome getMatchOutcome(ConditionContext context, AnnotatedTypeMetadata metadata) {
			String basename = context.getEnvironment().getProperty("spring.messages.basename", "messages");
			ConditionOutcome outcome = cache.get(basename);
			if (outcome == null) {
				outcome = getMatchOutcomeForBasename(context, basename);
				cache.put(basename, outcome);
			}
			return outcome;
		}

		private ConditionOutcome getMatchOutcomeForBasename(ConditionContext context, String basename) {
			ConditionMessage.Builder message = ConditionMessage.forCondition("ResourceBundle");
			for (String name : StringUtils.commaDelimitedListToStringArray(StringUtils.trimAllWhitespace(basename))) {
				for (Resource resource : getResources(context.getClassLoader(), name)) {
					if (resource.exists()) {
						return ConditionOutcome.match(message.found("bundle").items(resource));
					}
				}
			}
			return ConditionOutcome.noMatch(message.didNotFind("bundle with basename " + basename).atAll());
		}

		private Resource[] getResources(ClassLoader classLoader, String name) {
			String target = name.replace('.', '/');
			try {
				return new PathMatchingResourcePatternResolver(classLoader)
						.getResources("classpath*:" + target + ".properties");
}- getMatchOutCome
		@Override
		public ConditionOutcome getMatchOutcome(ConditionContext context, AnnotatedTypeMetadata metadata) {
			String basename = context.getEnvironment().getProperty("spring.messages.basename", "messages");
			ConditionOutcome outcome = cache.get(basename);
			if (outcome == null) {
				outcome = getMatchOutcomeForBasename(context, basename);
				cache.put(basename, outcome);
			}
			return outcome;
		}
1.context.getEnvironment().getProperty("spring.messages.basename", "messages") 를 통해 property를 접근할수있는 환경을 만들고 "spring.messages.basename"를 "messages"에 할당한결과를 outcome에 저장한다
2.basename에 대한 cache를 얻는데 여기서 말하는 cache는 바로 밑에있는 그림이다
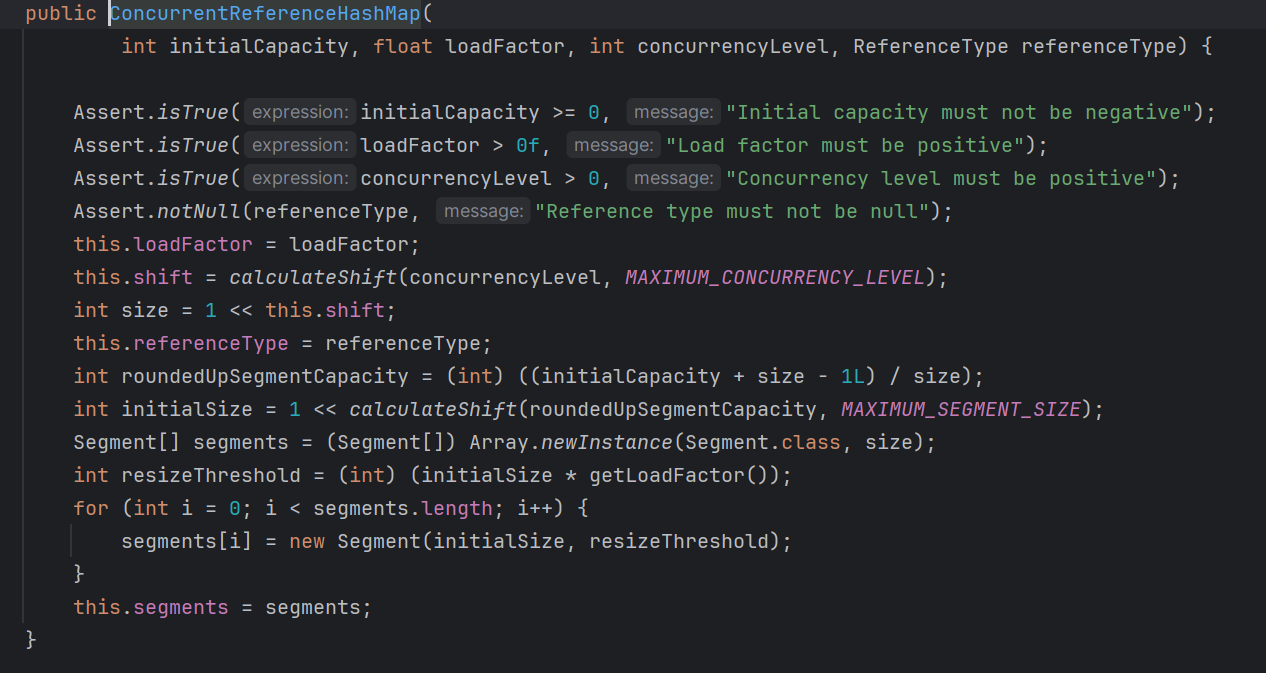
3.만약 cache를 저장한 outcome에 결과가 없다면 밑에있는 getMatchOutcomeForBasename을 호출하고 있다면 바로 반환한다. ( 아직까지 properties에 대한 환경설정만을 해줬기 때문에 outcome에 결과가 없는것은 지당하다)
- getMatchOutcomeForBasename
		private ConditionOutcome getMatchOutcomeForBasename(ConditionContext context, String basename) {
			ConditionMessage.Builder message = ConditionMessage.forCondition("ResourceBundle");
			for (String name : StringUtils.commaDelimitedListToStringArray(StringUtils.trimAllWhitespace(basename))) {
				for (Resource resource : getResources(context.getClassLoader(), name)) {
					if (resource.exists()) {
						return ConditionOutcome.match(message.found("bundle").items(resource));
					}
				}
			}
			return ConditionOutcome.noMatch(message.didNotFind("bundle with basename " + basename).atAll());
		}
1.ConditionMessage.Builder 통해 "ResourceBundle" 이라는 string타입으로 설정해 이름을 정해줘서 message에 넣는다.
2.trimAllWhitespace(basename))으로 공백을 지우고 list의 형태(commaDelimitedListToStringArray)로 담는다
3.context의 ClasssLoader와 name을 얻어 resource에 담는다.
4.만약 존재한다면 아까 설정한 1번에서 message에 결과를 담는것이다.
- 조금만 더 코드를 분석해보자면 아까 message에 forCondition이라는 메서드로 담았는데 이부분은 아래에 사진으로 가게된다

여기서 실제 역할을 담당하는 andCondition으로 들어가보니

로직을 수행하고나서 결국은 new Builder에 우리가 인자로 받아온 condition을 넣는다는것이다.
- 마지막으로 message.found("bundler")를 넣은부분만 확인하고 다음코드로 넘어가자
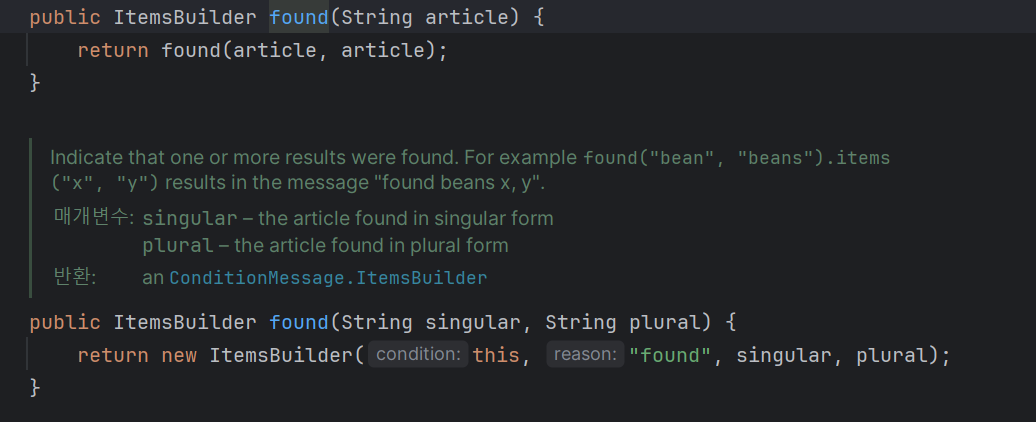
여기에서 결국 로직을 수행하고나면 new ItemsBuilder로 넘어간다는것인데 여기서 주의깊게봐야할점이 바로 저 this이다.
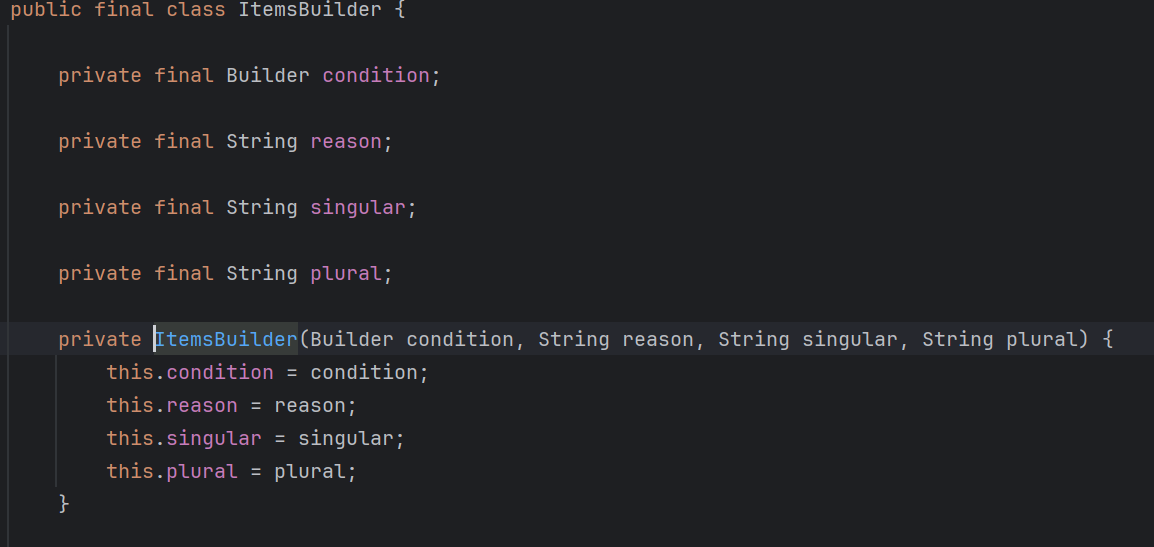
아까 우리가 "ResourceBundle"로 condition을 추가해줬는데 그 조건이 바로 this이다 왜냐면 Builder condition으로 불러왔기 때문이다!
결국 이 메서드를 불러왔던 getMatchOutcome에서 반환할때 이 값이기 때문에 우리가 많이들었던 "Resourcebundler로 조회한다는게 바로 이방식으로 조회해서 준다는것이다!!! 이제 이해가 됬을거라고 생각한다
마지막으로 아까getMatchOutcomeForBasename에서 getResources를 classLoader를 찾기위해 호출했는데 이부분을 봐보자
- getResources
		private Resource[] getResources(ClassLoader classLoader, String name) {
			String target = name.replace('.', '/');
			try {
				return new PathMatchingResourcePatternResolver(classLoader)
						.getResources("classpath*:" + target + ".properties");
			}
실질적으로 자바클래스가 JVM에 로딩되면 classLoader가 classpath를 통해 조회를 하게될텐데 바로바로 properties에 대한 조회를 하는부분이 여기라고보면된다.
중요한부분이 ClassLoader는 class file을 조회하기 때문에 String target = name.replace('.', '/'); 이렇게 바꿔준이유가 근거가 될것이다.
2-2) Bean이 실질적으로 등록하는 코드
	@Bean
	public MessageSource messageSource(MessageSourceProperties properties) {
		ResourceBundleMessageSource messageSource = new ResourceBundleMessageSource();
		if (StringUtils.hasText(properties.getBasename())) {
			messageSource.setBasenames(StringUtils
					.commaDelimitedListToStringArray(StringUtils.trimAllWhitespace(properties.getBasename())));
		}
		if (properties.getEncoding() != null) {
			messageSource.setDefaultEncoding(properties.getEncoding().name());
		}
		messageSource.setFallbackToSystemLocale(properties.isFallbackToSystemLocale());
		Duration cacheDuration = properties.getCacheDuration();
		if (cacheDuration != null) {
			messageSource.setCacheMillis(cacheDuration.toMillis());
		}
		messageSource.setAlwaysUseMessageFormat(properties.isAlwaysUseMessageFormat());
		messageSource.setUseCodeAsDefaultMessage(properties.isUseCodeAsDefaultMessage());
		return messageSource;
	}
이제 @Bean으로 Messagesource를 등록하는데 우리가 주의깊게 봐야할내용은
1. if (StringUtils.hasText(properties.getBasename()))
-> ResourceBundle을 통해 읽기때문에 MessageSourceProperties에 저장된 basename을 가져와서 저장한다.

2. if (properties.getEncoding() != null)
	messageSource.setDefaultEncoding(properties.getEncoding().name());

3. messageSource.setFallbackToSystemLocale(properties.isFallbackToSystemLocale());

4 .Duration cacheDuration = properties.getCacheDuration();

		5. if (cacheDuration != null) {
			messageSource.setCacheMillis(cacheDuration.toMillis());
		}
- 이정도이며, 1번에서는 이름찾아서 2번에서는 Encoding하고 3번과 4번, 5번에서는 Locale정보와 Cache를 얻는다는 것이다. 앞서 설명한 코드에서는 properties에 대한 관련설정을 한 로직이라면, 지금은 Bean Definition와 같은 META DATA를 설정하는 코드라고 보면 이해가 될것이다.
이렇게 properties가 어떻게 자동생성이되는지 알아봤다. 정리하자면, message의 이름이 붙은 properties는 Default값으로 언어별로 message_en.properties, message_kr.properties 와 같은 message의 이름을 인식하는 properties가 있다면 spring boot에서는 인식할것이며 반대로 error.properties와 같은 message default가 아닌 사용자의 properties를 설정한경우 우선순위가 될것이다.
3.Internationalization가 어떻게 이루어지는지?
우리는 servlet요청이오면 init()-service()-destory()가 이루어지는걸 다들 알고있을것으며 DispatcherServlet로 serlvet에 대한 요청이 온다는것도 알고있을것이다.
그러면 국제화가 언제 이루어지는지 한번 알아보고자한다.
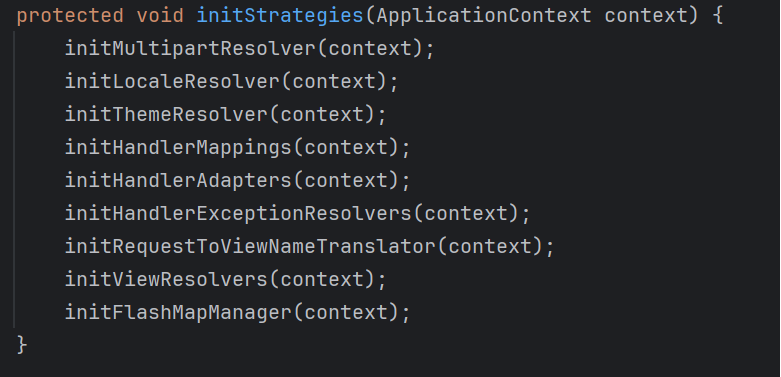
실제 DispatcherServlet의 코드를 일부 발췌해온내용으로 initStrategies메서드안에 initLocalResolver(); 메서드가 구현이 되어있다.
이제 initLocalResolver(); 메서드를 봐보자
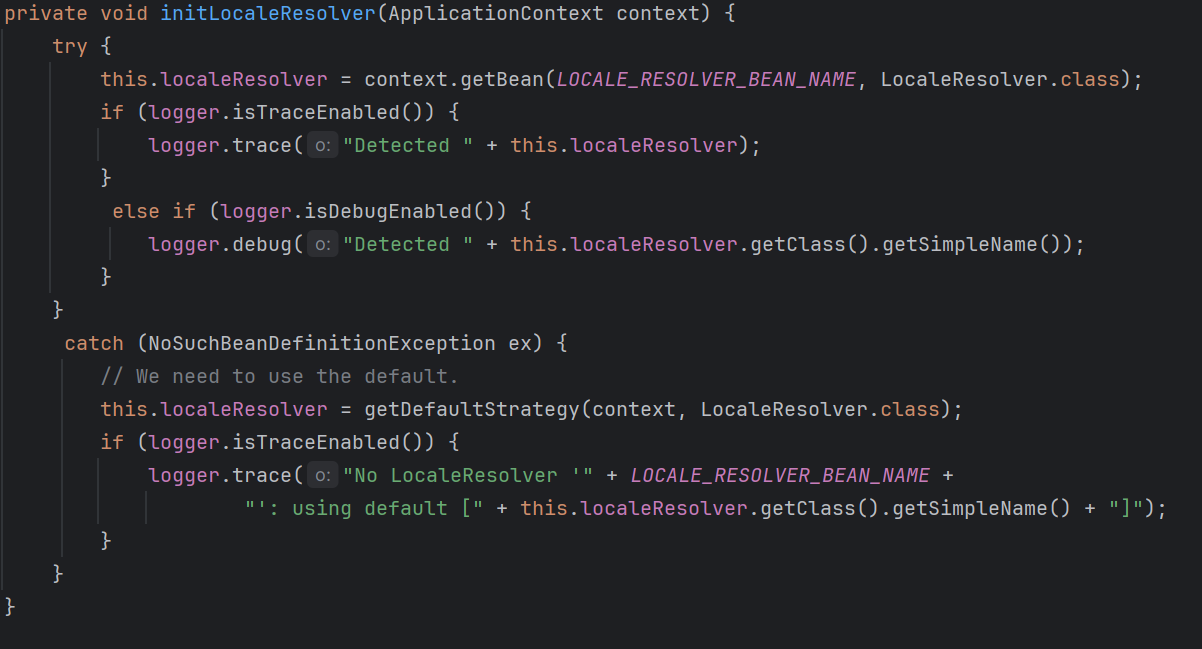
DispatcherServlet은 LocalResolver을 지원하고있다. 따라서 우리가 Chrome의 언어를 한국어에서 영어로 바꾸게 되면 Http 요청 헤더에 Accept-Language가 english가 우선순위가 될것이다.
이렇게해서 properties가 어떻게 생성이되는지와 국제화가 어떻게 이루어졌는지 확인해보았다. 그렇다면 properties가 국제화와 어떻게 연관이 있는지 묻는다면 properties는 bean으로 생성이 되었기 때문에 공통으로 바꿀수있는 구간에 즉, view로 보여지는 구간에 properties를 적용시킨다면 클라이언트가 언어를 한국어에서 영어로 바뀌게될때 properties가 적용이된 구간전체가 영어로 바뀌게 될것이다.
여기서 또 호기심이 있는사람은 DispatcherServlet에서 initStrategies가 어떻게 호출이되었는지 관심이있을것이다. 이부분은 링크로 남긴다.
initStrategies : 링크텍스트
참고