저번 게시글까지 5-4 Docker(compose) 설치를 완료했다.
이번 게시물부터 nginx 설치와 설정을 진행해보자
- 도메인 발급 (구매) (HTTPS) [1년]
- main 브랜치로 Merge
- EC2 생성
- AWS S3, CodeDeploy 생성
- EC2 내부 작업
- CodeDeploy 설치
- Timezone 설정
- Redis-Server 설치
- Docker(compose) 설치
- ▶ nginx 설치와 설정
- 깃액션 CI/CD 구축
- 시크릿 환경변수값 추가
- deploy.yml 코드 작성
- Deploy 작동 테스트
5-5) nginx 설치와 설정
이번 단계에서는 Nginx를 설치 후, SSL 인증을 통해 HTTPS 까지 적용해본다.
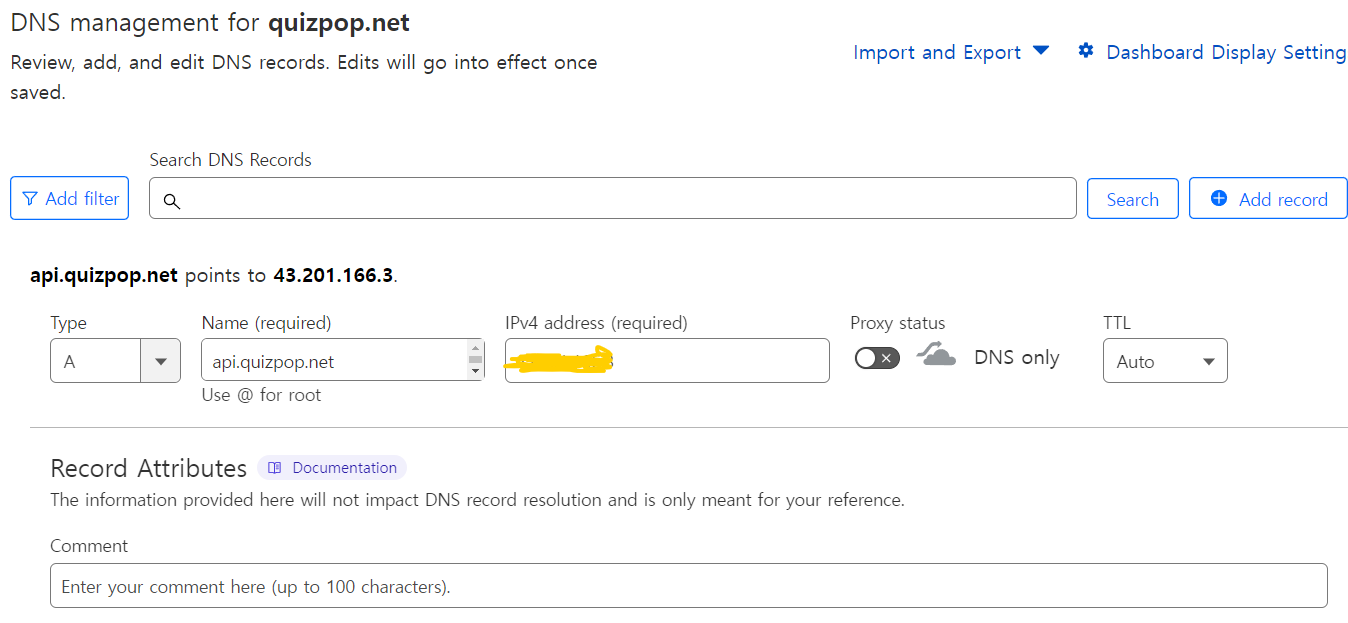
우선, 클라우드플레어에 A레코드를 추가하여 ubuntuIP를 등록한다.
$ sudo apt update
$ sudo apt-get install letsencrypt -y
$ sudo apt update && sudo apt upgrade -y
$ sudo apt install certbot python3-certbot-nginx
$ sudo service nginx start
nginx가 정상적으로 설치되었는지 확인하기 위해
이제 인터넷 브라우저에 EC2의 IP주소를 입력해보자.
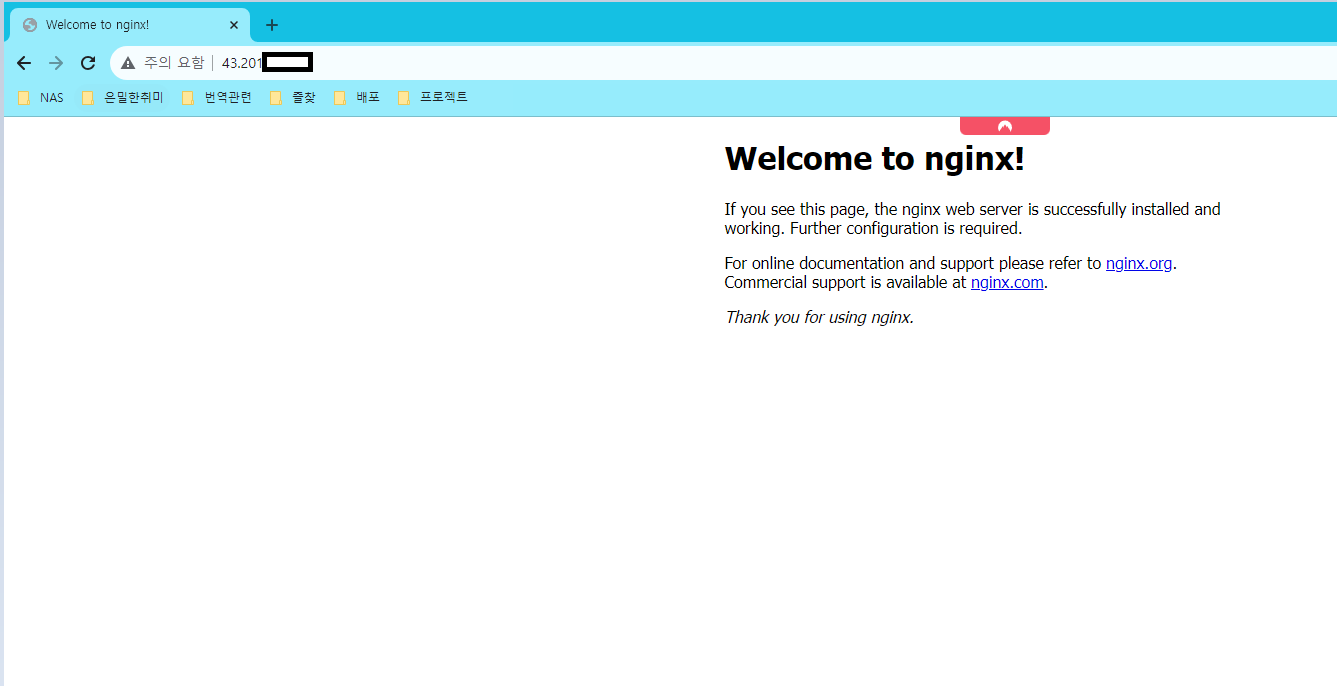
잘 접속되는 것을 확인할 수 있다.
이제, nginx로 /api로 요청이 온 것들을 https로 처리해주기 위해
설정을 진행한다.
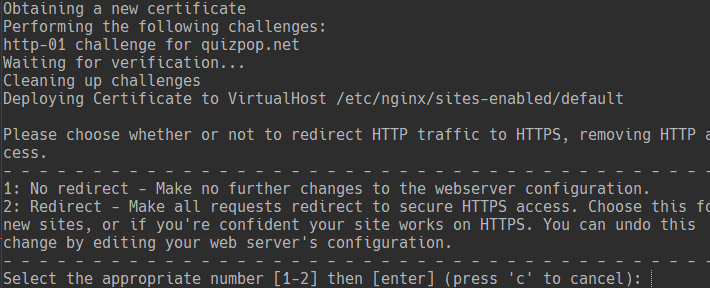
$ sudo certbot --nginx -d <domain>
ex) $ sudo certbot --nginx -d api.quizpop.net
Enter email address를 입력하라고 나온다.
email주소를 입력한다.

약관에 동의하라는 내용이다.
이건 선택사항이 없다.. A를 입력한다.

Electronic Frontier에 이메일 주소를 공유할 것이냐고 묻는다.
이건 비동의 해도 상관 없다.
이메일 등록을 프로젝트 이메일로 등록했기 때문에, N을 입력해주었다.

두가지 선택 사항이 나온다.
1 : HTTP 연결을 HTTPS로 리다이렉트 하지 않음
2 : HTTP연결을 HTTPS로 리다이렉트함
2번을 입력한다.
이제 90일마다 만료되는인증서를 자동갱신해준다.
$ sudo certbot renew --dry-run이제 인터넷브라우저에 인증했던 도메인을 입력해본다.
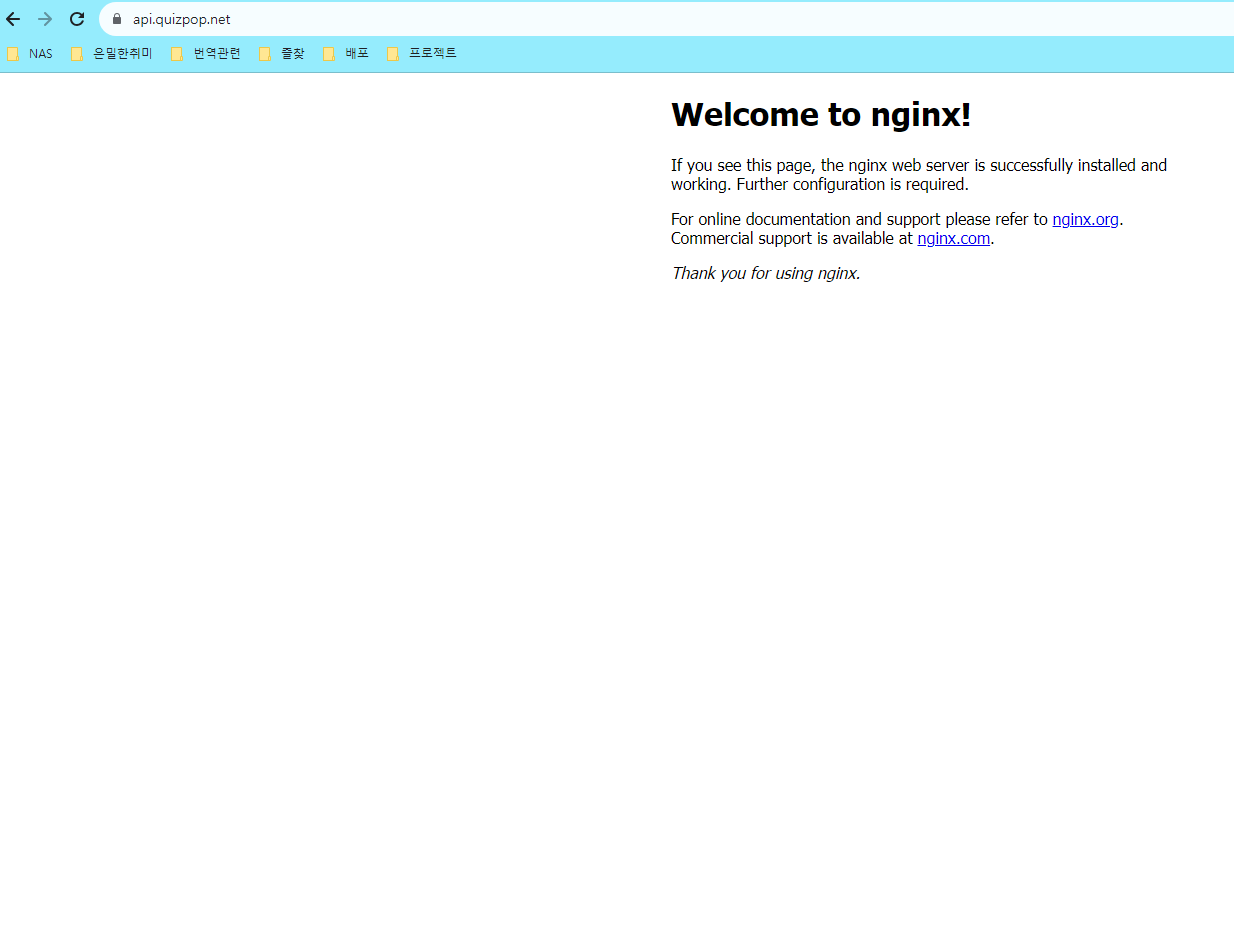
https(리버스프록시) 처리가 성공적으로 진행되었다.
이제 무중단배포를 위해 로드밸런싱 설정을 해야 한다.
nginx를 설정하러 가보자.
// 위치이동
cd /etc/nginx

// 권한 부여
sudo chmod 777 ./sites-available
sudo chmod 777 ./sites-enabled
upstream 설정을 추가하기 위해 파일을 연다.
sudo vim /etc/nginx/nginx.conf
http 블록안에 upstream server를 추가한다.
# upstream server
upstream spring-server{
	server localhost:8081;
	server localhost:8082;
}
이에 맞추어 default 파일도 수정한다.
sudo vim /etc/nginx/sites-available/defaultserver {
root /var/www/html;
# Add index.php to the list if you are using PHP
index index.html index.htm index.nginx-debian.html;
server_name {도메인주소}; # managed by Certbot
location / {
proxy_pass http://spring-server;
proxy_set_header X-Real-IP $remote_addr;
proxy_set_header HOST $http_host;
proxy_set_header X-Nginx-Proxy true;
proxy_set_header X-Forwarded-For $proxy_add_x_forwarded_for;
proxy_redirect off;
}
listen [::]:443 ssl ipv6only=on; # managed by Certbot
listen 443 ssl; # managed by Certbot
ssl_certificate /etc/letsencrypt/live/{도메인주소}/fullchain.pem; # managed by Certbot
ssl_certificate_key /etc/letsencrypt/live/{도메인주소}/privkey.pem; # managed by Certbot
include /etc/letsencrypt/options-ssl-nginx.conf; # managed by Certbot
ssl_dhparam /etc/letsencrypt/ssl-dhparams.pem; # managed by Certbot
}
server {
if ($host = {도메인주소}) {
return 301 https://$host$request_uri;
} # managed by Certbot
listen 80;
listen [::]:80;
server_name {도메인주소};
return 404; # managed by Certbot
}변경 후 설정을 적용하기 위해 재시작해준다.
$ sudo service nginx restart6. 깃액션 CI/CD 구축
이제 깃액션 CI/CD를 구축하러 가보자.
프로젝트 루트에 appspec.yml을 만든다.
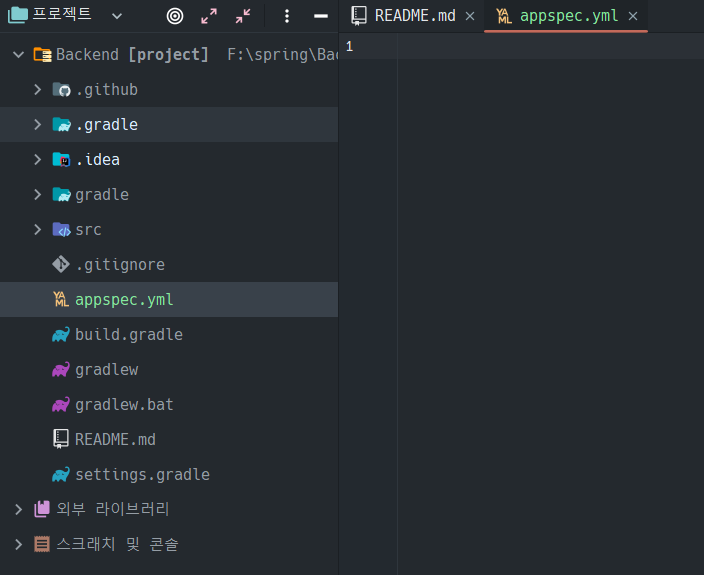
파일을 만든 뒤, 해당 내용을 적어 넣는다.
version: 0.0
os: linux

files:
  - source:  /
    destination: /home/ubuntu/app
    overwrite: yes

permissions:
  - object: /
    pattern: "**"
    owner: ubuntu
    group: ubuntu

hooks:
  ApplicationStart:
    - location: deploy.sh
      timeout: 60
      runas: ubuntu
그리고 프로젝트 루트에 docker 폴더를만들고
docker-compose-blue.yml, docker-compose-green.yml, Dockerfile을 만든다.
# docker-compose.blue.yml
version: '3'
services:
  backend:
    build: .
    ports:
      - "8081:8080"
    container_name: spring-blue
# docker-compose.green.yml
version: '3'
services:
backend:
build: .
ports:
- "8082:8080"
container_name: spring-green# Dockerfile
### base image
FROM openjdk:17-jdk-slim
### jar file 위치
ARG JAR_FILE=*.jar
### 파일 복사
COPY ${JAR_FILE} app.jar
### 실행할 명령 지정한다.
ENTRYPOINT ["java","-jar","/app.jar"]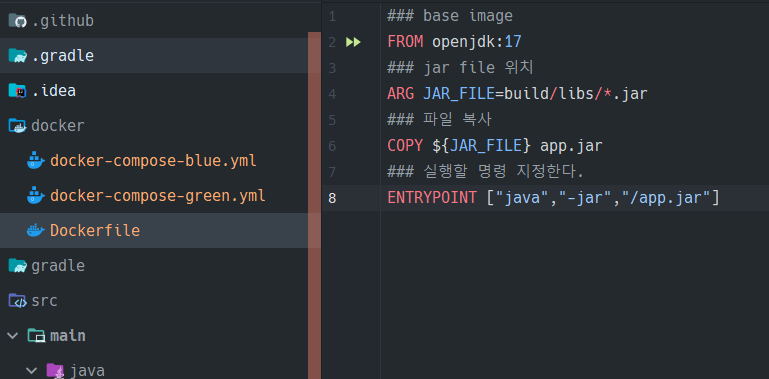
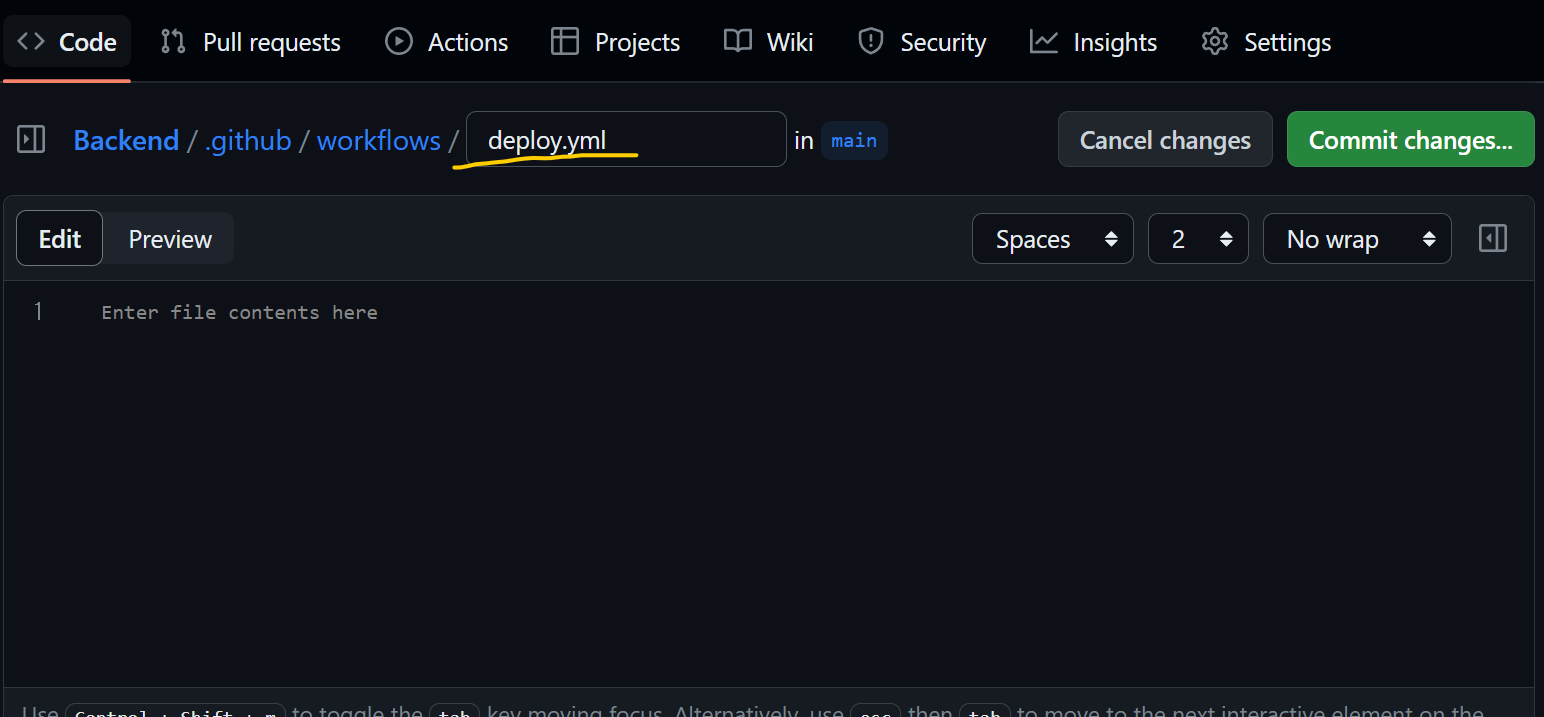
Github Repository에 들어가서 Actions 탭으로 들어가 깃액션 deploy.yml을 만든다.
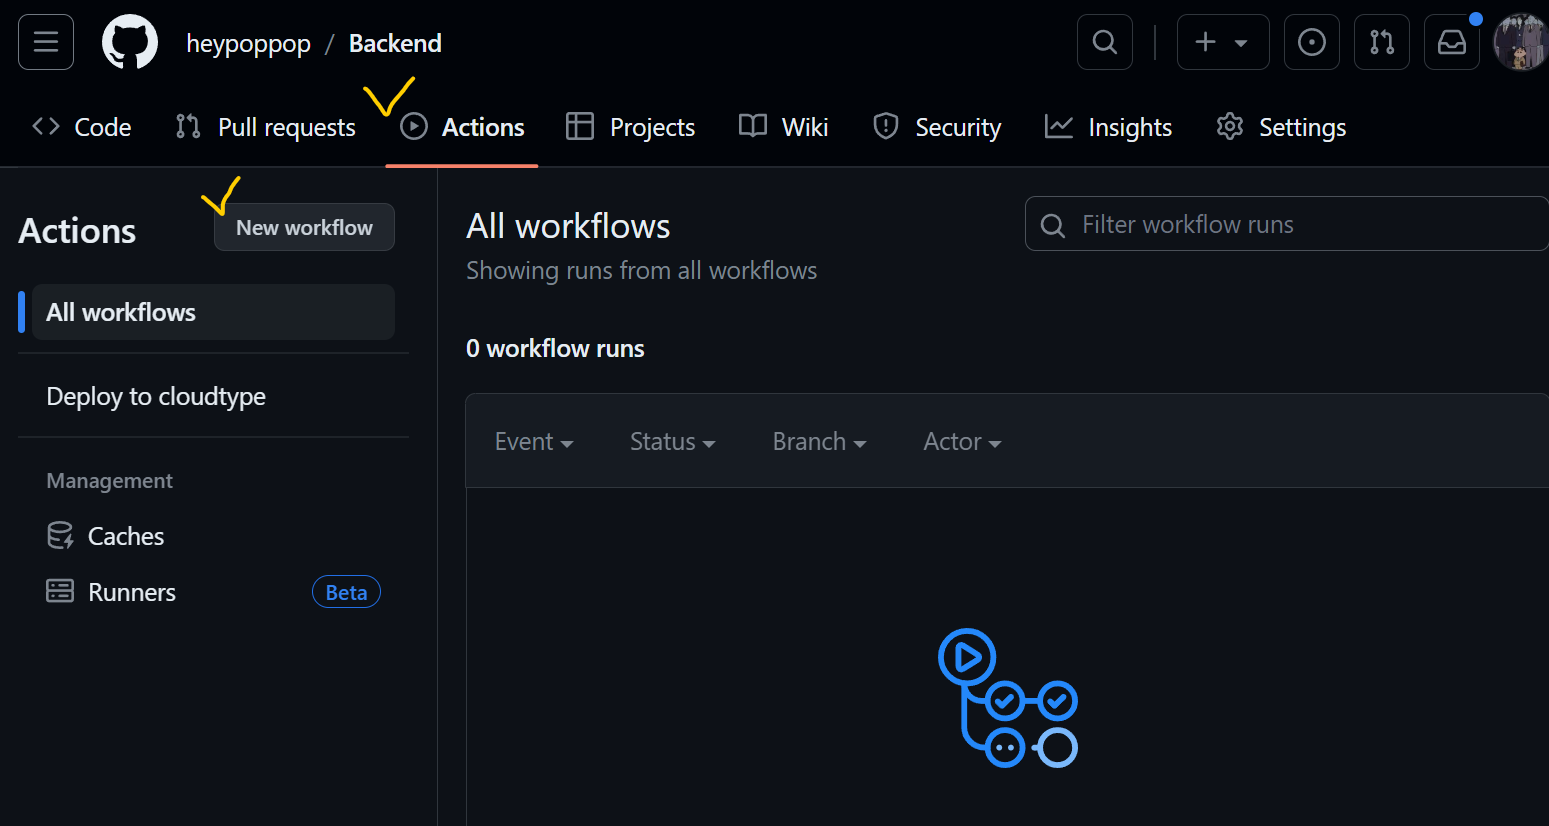
set up a workflow yourself를 누른다.
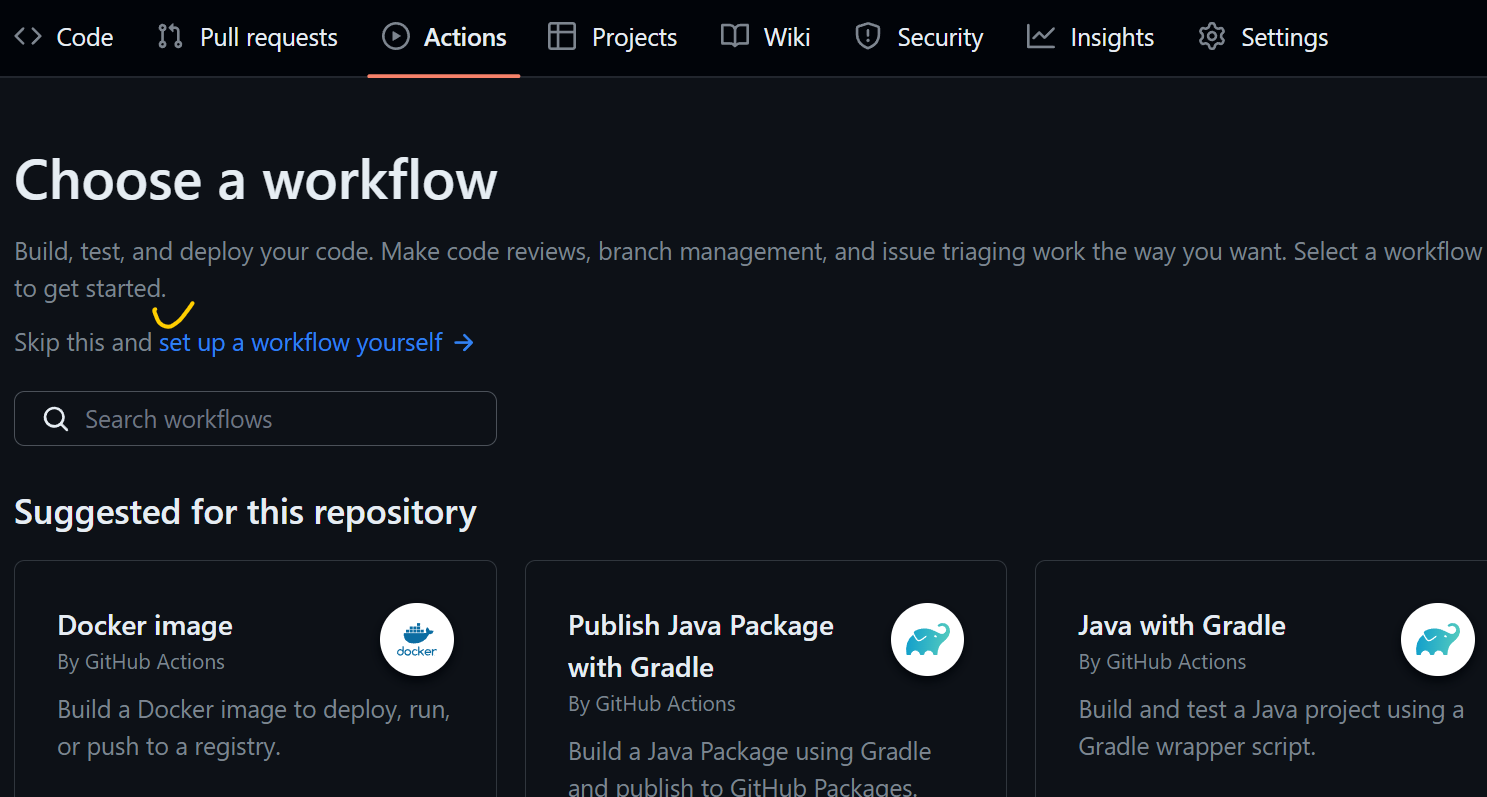
파일명을 수정한 뒤, delopy.yml 파일을 작성한다.
작성시 주의할 점은 이 놈도 파이썬처럼 들여쓰기 등에 굉장히 예민한 친구다.
들여쓰기에 유의하며 작성하도록 하자.
name: BE - CI/CD

on:
  push:
    branches: ["main"]

env:
  RESOURCE_PATH: ./src/main/resources/application.yml


permissions:
  contents: read

jobs:
  build:
    runs-on: ubuntu-latest

    steps:
      - uses: actions/checkout@v3

      - name: Set up JDK 17
        uses: actions/setup-java@v3
        with:
          java-version: '17'
          distribution: 'temurin'

      - name: Gradle 캐싱
        uses: actions/cache@v3
        with:
          path: |
            ~/.gradle/caches
            ~/.gradle/wrapper
          key: ${{ runner.os }}-gradle-${{ hashFiles('**/*.gradle*', '**/gradle-wrapper.properties') }}
          restore-keys: |
            ${{ runner.os }}-gradle-

      - name: Set yml file
        uses: microsoft/variable-substitution@v1
        with:
          files: ${{ env.RESOURCE_PATH }}
        env:
          cloud.aws.s3.bucket: ${{ secrets.S3_Name }}
          cloud.aws.credentials.access-key: ${{ secrets.AWS_ACCESS_KEY_ID }}
          cloud.aws.credentials.secret-key: ${{ secrets.AWS_SECRET_ACCESS_KEY }}
          spring.datasource.url: ${{ secrets.DB_URL }}
          spring.datasource.password: ${{ secrets.DB_PASSWORD }}
          spring.data.redis.port: ${{ secrets.REDIS_PORT }}
          spring.data.redis.host: ${{ secrets.REDIS_URL }}
          spring.data.redis.password: ${{ secrets.REIDS_PASSWORD }}
          jwt.secret.key: ${{ secrets.JWT_KEY }}

      - name: Gradle 권한 부여
        run: chmod +x gradlew

      - name: Gradle로 빌드 실행
        run: ./gradlew bootjar

      - name: zip file 생성
        run: |
          mkdir deploy
          cp ./docker/docker-compose.blue.yml ./deploy/
          cp ./docker/docker-compose.green.yml ./deploy/
          cp ./appspec.yml ./deploy/
          cp ./docker/Dockerfile ./deploy/
          cp ./scripts/*.sh ./deploy/
          cp ./build/libs/*.jar ./deploy/
          zip -r -qq -j ./spring-build.zip ./deploy

      - name: AWS 연결
        uses: aws-actions/configure-aws-credentials@v1
        with:
          aws-access-key-id: ${{ secrets.AWS_CI_ACCESS_KEY_ID }}
          aws-secret-access-key: ${{ secrets.AWS_CI_SECRET_ACCESS_KEY }}
          aws-region: ap-northeast-2

      - name: S3에 프로젝트 업로드
        run: |
          aws s3 cp \
          --region ap-northeast-2 \
          ./spring-build.zip s3://quizpop-server-bucket

      - name: Code Deploy 배포 요청
        run: aws deploy create-deployment --application-name quizpop
          --deployment-config-name CodeDeployDefault.OneAtATime
          --deployment-group-name quizpop
          --s3-location bucket=quizpop-server-bucket,bundleType=zip,key=spring-build.zip
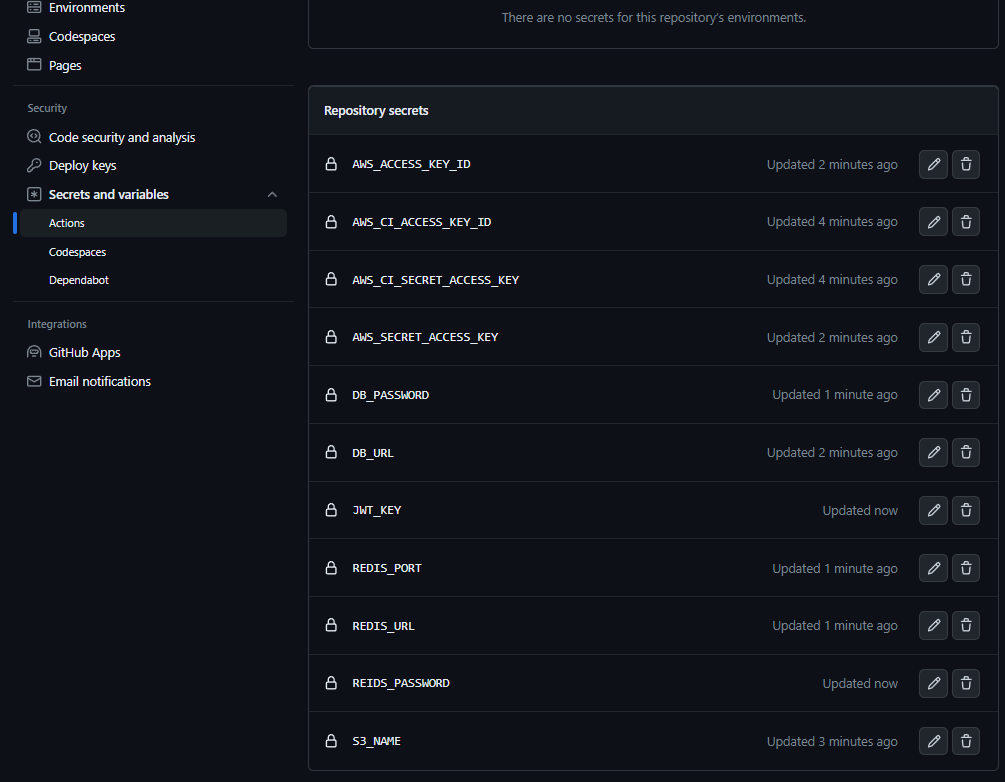
작성이 끝났다면 이제 github > Settings > Secrets and variables > Actions
에 들어가서 환경변수 값들을 입력해주자.

프로젝트 루트에서 scripts 폴더를 만든 후
deploy.sh 파일을 작성한다.
#!/bin/bash

cd /home/ubuntu/app

DOCKER_APP_NAME=spring

# blue 실행중 확인
EXIST_BLUE=$(docker-compose -p ${DOCKER_APP_NAME}-blue -f docker-compose.blue.yml ps | grep running)

# green 실행중 > blue up
if [ -z "$EXIST_BLUE" ]; then
	docker-compose -p ${DOCKER_APP_NAME}-blue -f docker-compose.blue.yml up -d --build

	sleep 30

	docker-compose -p ${DOCKER_APP_NAME}-green -f docker-compose.green.yml down
	docker image prune -af # 사용하지 않는 이미지 삭제

# blue 실행중 > green up
else
	docker-compose -p ${DOCKER_APP_NAME}-green -f docker-compose.green.yml up -d --build

	sleep 30

	docker-compose -p ${DOCKER_APP_NAME}-blue -f docker-compose.blue.yml down
	docker image prune -af
fi
깃액션에서 작업이 완료되었다.
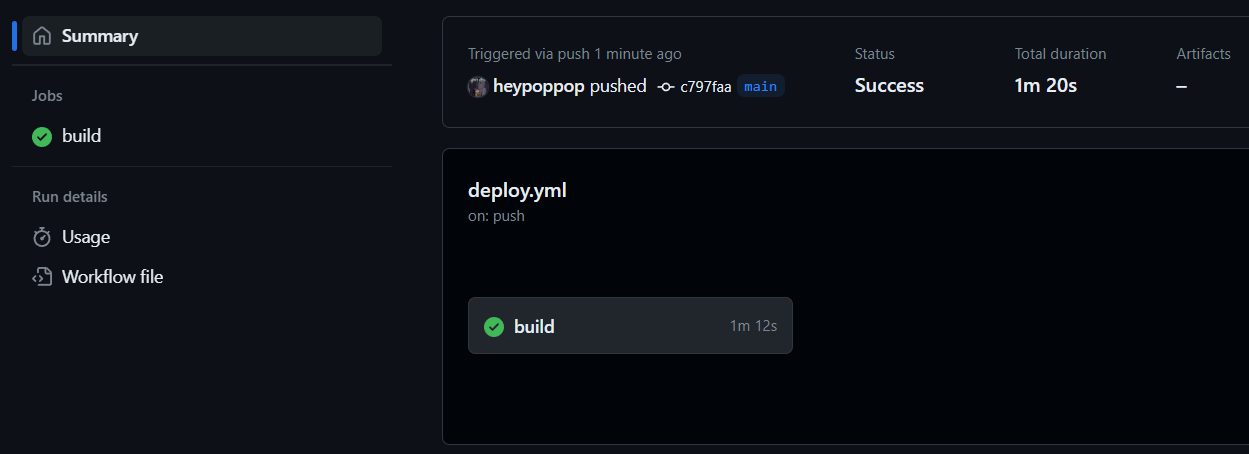
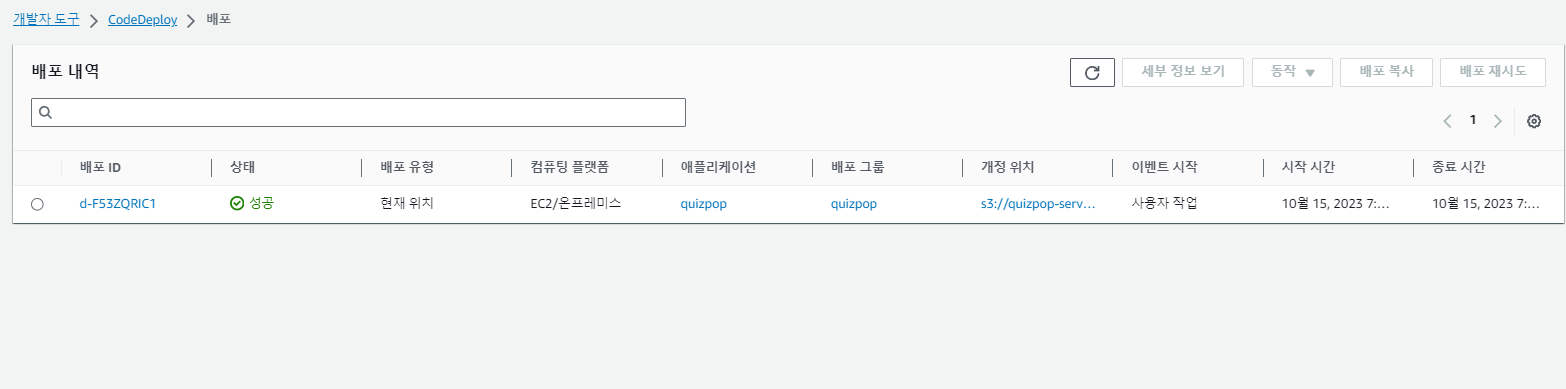
코드 디플로이 또한 배포가 성공된 것을 볼 수 있다.
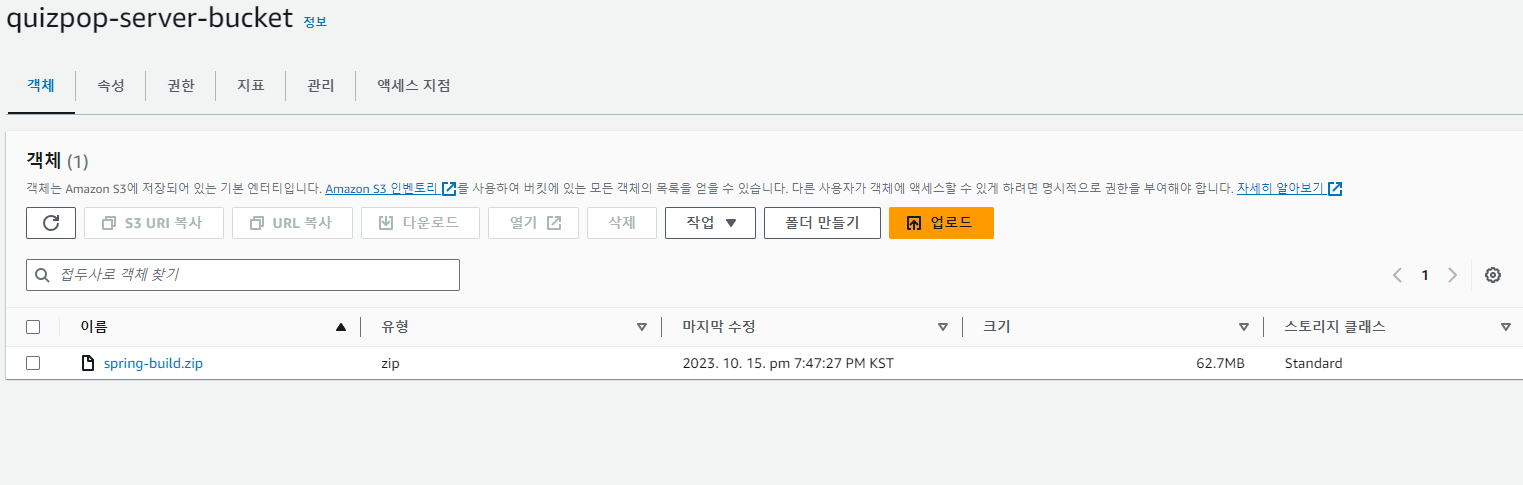
S3에도 성공적으로 파일이 들어와있다.
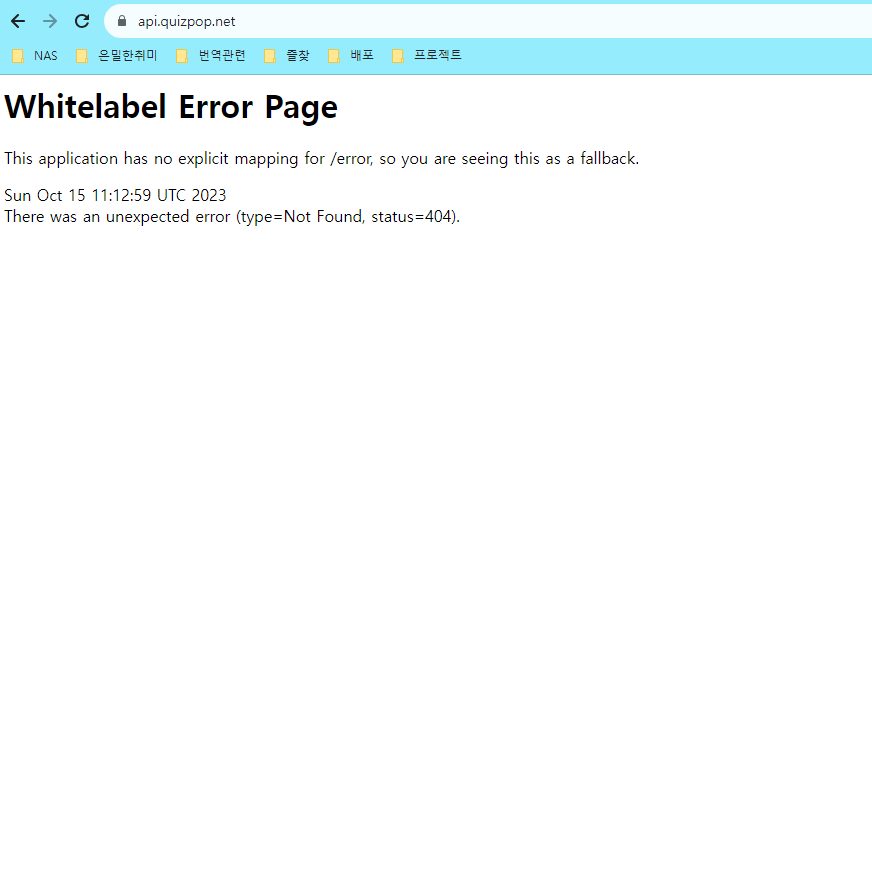
api.quizpop.net에 접속해보면 스프링부트를 볼 수 있다.
마찬가지로 EC2 내부에서
docker ps를 쳐보면

blue가 실행중임을 알 수 있다.
이제 github에서 변경사항이 push 되면 spring-green과 spring-blue가 번갈아 가며 실행되는 것을 볼 수 있다.

트러블슈팅
무중단 배포 중 EC2가 뻗는 현상이 발생했다.
EC2가 왜 자꾸 뻗는지를 알아보기 위해 메모리 사용량을 확인해보았다.
명령어는 free -h이다
-
실행 되고 있는 docker가 없을 때

-
docker가 뜨고있을 때

메모리가 절망적임을 알 수 있었다.
메모리를 스왑하여 메모리 공간을 늘리는 작업을 진행했다.
메모리 스왑: Swap은 디스크 영역으로, RAM이 부족할 때 사용되며, 과도한 사용은 시스템 성능 저하를 초래한다.
$ sudo apt update
// 스왑 메모리 설정 (EC2 메모리는 1GB로 *2를 해주었다.)
$ sudo fallocate -l 2G /swapfile
$ sudo chmod 600 /swapfile
$ sudo mkswap /swapfile
// 스왑 시작
$ sudo swapon /swapfile
이제 다시 free -h를 해보면 Mem:밑에 Swap:이 생긴 것을 볼 수 있다.
제대로 동작하는지 확인 후, EC2가 재부팅되도 초기화 되지 않도록
자동으로 Swap이 활성화 될 수 있도록 한다.
$ sudo vim /etc/fstabLABEL=cloudimg-rootfs / ext4 discard,errors=remount-ro 0 1
LABEL=UEFI /boot/efi vfat umask=0077 0 1
/swapfile swap swap defaults 0 0이것으로 swap 메모리 설정이 끝났다.
Swap 메모리 설정 후 EC2가 건강하게 무사히 무중단배포가 이뤄짐을 확인 할 수 있었다.