📖 실습환경
🌟 Jupyter Notebook 실행
- VSCode 혹은 Web Browser 를 통해 실행하고, da_study 환경에서 작업합니다.
- Jupyter notebook 과 mysql 은 모두 sql_ws 폴더에서 시작합니다.
- AWS RDS 로 생성한 database-1 을 모두 사용합니다.
database-1의 police_station테이블의 데이터를 백업 후 모두 삭제
mysqldump --set-gtid-purged=OFF -h "엔드포인트" -P 3306 -u admin -p zerobase police_station > backup_police.sql
# set-gtid-purged=OFF 외부에서 AWS RDS에서 백업할 때 꼭 써야하는 옵션(접속 전)
Delete from police_station;
🌟 Python.ipynb 파일 생성
- VSCode 의 경우 새파일을 열고 해당 파일명을 입력
- 오른쪽 상단에서 da_study 를 선택한 뒤 실습
📖 Python with MySQL
🌟 Install MySQL Driver
- Python 에서 MySQL 을 사용하기 위해서는 먼저 MySQL Driver 를 설치
(da_study) C:\sql_ws>pip install mysql-connector-python- 확인
import mysql.connector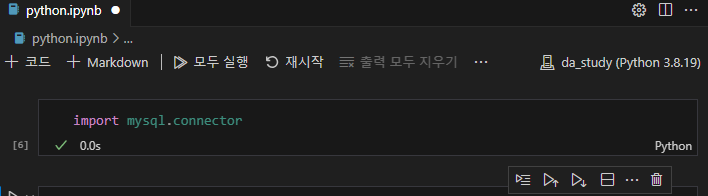
🌟 Create Connection
- MySQL에 접속하기 위한 코드
# Local Database 연결
local = mysql.connector.connect(
host = "localhost", #hostname
user = "root", #username
password = "*********"
)
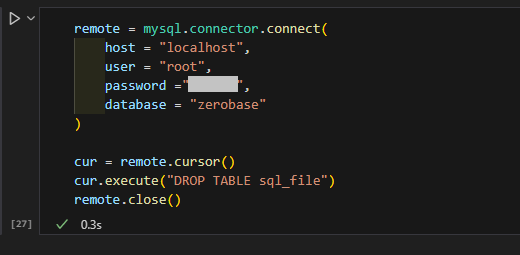
# AWS RDS 연결
remote = mysql.connector.connect(
host = "엔드포인트",
port = 3306,
user = "username",
password = "*********",
database = "dbname" # <- 특정 데이터베이스 지정
)🌟 Close Database
import mysql.connector

	# 연결 후
mydb = mysql.connector.connect(
	host = "<hostname>",
	user = "<username>",
	password = "<password>",
	database = "<dbname>"
)

# Close
mydb.close()
📖 Execute SQL
🌟 Query를 실행
import mysql.connector
mydb = mysql.connector.connect(
host = "<hostname>",
user = "<username>",
password = "<password>",
database = "<dbname>"
)
mycursor = mydb.cursor()
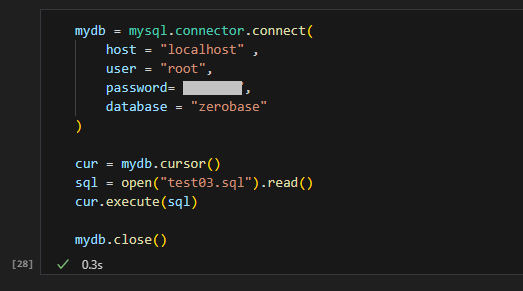
mycursor.execute(<\query);🌟 SQL File을 실행
mydb = mysql.connector.connect(
	host = "hostname",
	user = "username",
	password = "password",
	database = "dbname"

mycursor = mydb.cursor()

sql = open("filename.sql").read()
mycursor.execute(sql);
🌟 SQL File 내에 Query가 여러개 존재
mydb = mysql.connector.connect(
	host = "hostname",
	user = "username",
	password = "password",
	database = "dbname"

mycursor = mydb.cursor()

sql = open("filename.sql").read()
result = mycursor.execute(sql,muti=True)
실습
💭 Execute SQL
- 테이블 생성

- 결과
mysql> desc sql_file;
+----------+-------------+------+-----+---------+-------+
| Field    | Type        | Null | Key | Default | Extra |
+----------+-------------+------+-----+---------+-------+
| id       | int         | YES  |     | NULL    |       |
| filename | varchar(16) | YES  |     | NULL    |       |
+----------+-------------+------+-----+---------+-------+- 테이블 삭제
- 결과
mysql> desc sql_file;
ERROR 1146 (42S02): Table 'zerobase.sql_file' doesn't exist
💭 Execute SQL File
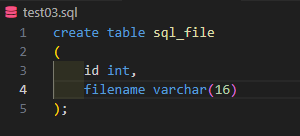
- test03.sql 생성
- test03.sql 실행
- 결과
mysql> desc sql_file;
+----------+-------------+------+-----+---------+-------+
| Field    | Type        | Null | Key | Default | Extra |
+----------+-------------+------+-----+---------+-------+
| id       | int         | YES  |     | NULL    |       |
| filename | varchar(16) | YES  |     | NULL    |       |
+----------+-------------+------+-----+---------+-------+
💭 Query가 여러개 존재할 경우
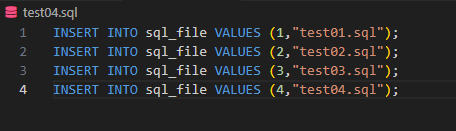
- test04.sql 생성
- Multi = True
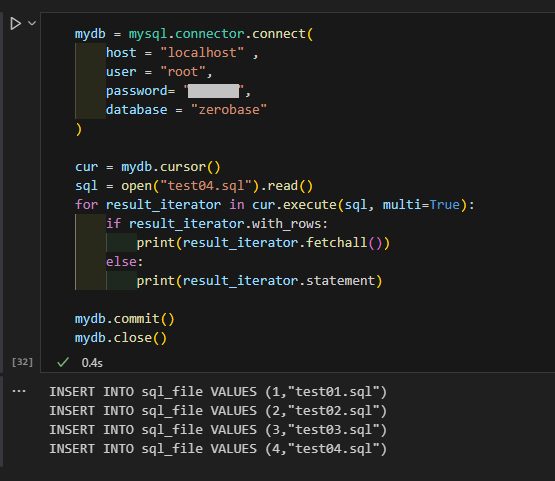
- 결과
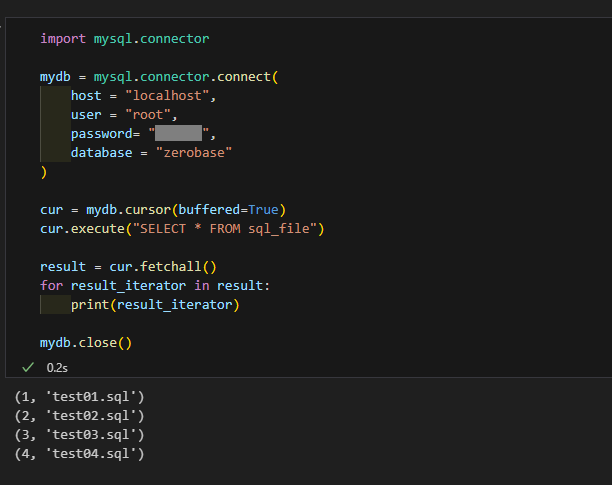
mysql> select * from sql_file;
+------+------------+
| id   | filename   |
+------+------------+
|    1 | test01.sql |
|    2 | test02.sql |
|    3 | test03.sql |
|    4 | test04.sql |
+------+------------+
📖 Fetch ALL
🌟 Fetch ALL
- 쿼리를 실행한 다음에 결과 값이 row를 포함하고 있으면 Fetch all해서 프린트
- 데이터를 Fetch all을 써서 변수에 담을 수 있다.
mycursor.execute(query)

result = mycursor.fetchall()
for data in result:		#for문을 이용하면 row마다
	print(data)
💭 Fetch ALL 실습
- sql_file 테이블 조회 (읽어올 데이터 양이 많은 경우 buffered=True)
💭 [참고] 검색결과를 Pandas 로 읽기
import pandas as pd
df =pd.DataFrame(result)
df.head()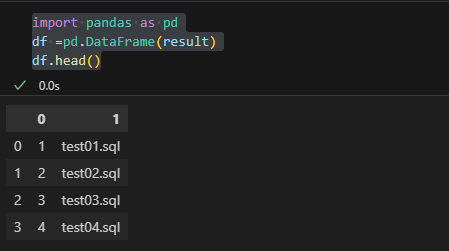
📖 CSV
🌟 Python with CSV
• CSV 에 있는 데이터를 Python 으로 INSERT
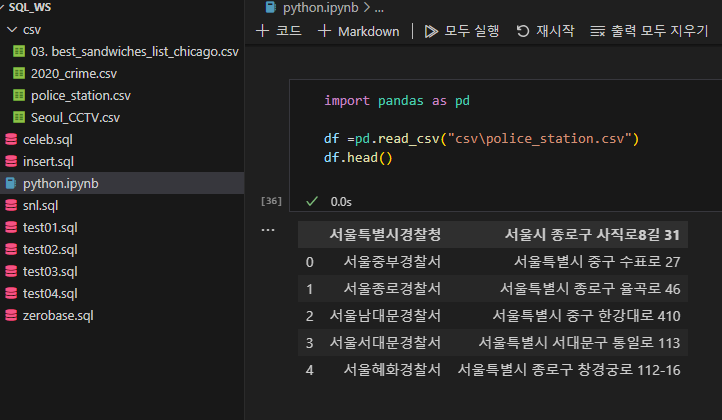
🌟 Read CSV
- 제공받은 police_station.csv 를 Pandas 로 읽어와서 데이터를 확인
🌟 Zerobase에 연결
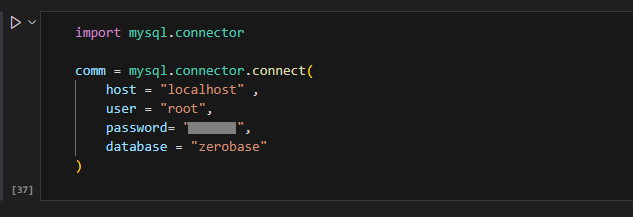
🌟 Cursor 만들기
- 읽어올 양이 많은 경우 cursor 생성 시 buffer 설정을 해준다
cursor = comm.cursor(buffered=True)
🌟 INSERT문 만들기
sql = "insert into police_station values (%s, %s)"
🌟 data 입력
- commit() 은 database 에 적용하기 위한 명령
for i,row in df.iterrows():
    cursor.execute(sql,tuple(row))
    print(tuple(row))
    comm.commit()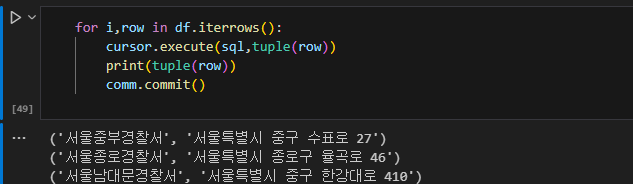
- 결과
cursor.execute("SELECT * FROM police_station")

result =  cursor.fetchall()
for row in result:
    print(row)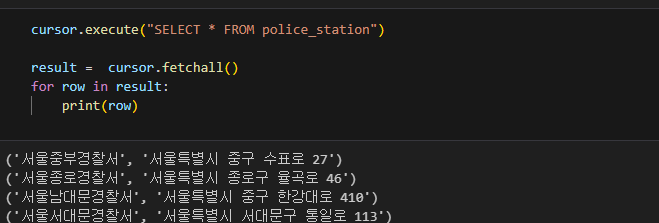
- 검색 결과를 Pandas로 읽기
df = pd.DataFrame(result)
df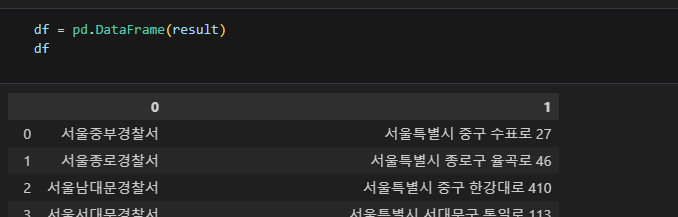
🍀 Tip
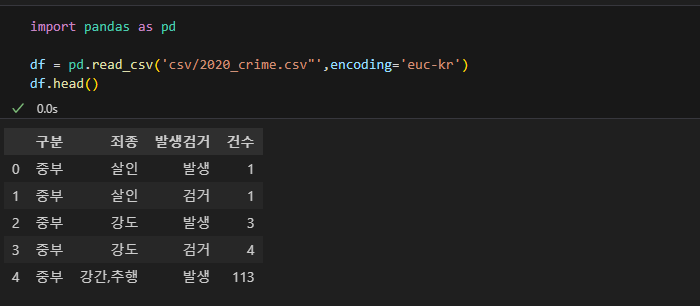
- csv 한글이 깨지는 경우, encoding 값을 'euc-kr' 로 설정 (특히 우리나라 사이트에서 제공받은 csv 파일들.)
import pandas as pd

df = pd.read_csv('csv/2020_crime.csv"',encoding='euc-kr')
df.head()