PROVIDER → RIVERPOD
글자 위치만 바꾸면 Riverpod이 된다.

Riverpod이 2.4로 업데이트 될 때 Code Generation을 통한 Provider 생성을 기본으로 하는 것으로 Document가 최신화됐다.
이에 더하여 앞으로의 버젼에서는 Code Generation을 통해서만 지원하는 기능이 생길 수 있다고 한다.
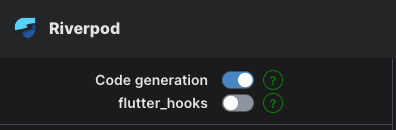
Riverpod 공식 문서 좌측 상단에 보면 Code generation을 사용한 코드예시와 설명을 볼 것인지 toggle할 수 있는데, Code generation이 on 되어있는 것이 Default다.
.
또한 Local State를 관리하는 것은 riverpod이 아닌 Flutter_hooks를 통해서 하도록 권장하고 있다.
이 글에서는 riverpod_hooks와 flutter_hooks의 설치부터 기초적인 사용까지 기록해두려 한다.
설치
- 라이브러리 추가
// Hooks를 사용하기 위해 hooks_riverpod 패키지를 사용
flutter pub add hooks_riverpod
flutter pub add flutter_hooks

// code generation을 위해 annotation, generator 라이브러리 설치
flutter pub add riverpod_annotation
flutter pub add dev:riverpod_generator
flutter pub add dev:build_runner

// riverpod lint 라이브러리 설치
flutter pub add dev:custom_lint
flutter pub add dev:riverpod_lint- analysis_options.yaml 파일에
riverpodLint 추가
...
analyzer:
  plugins:
    - custom_lint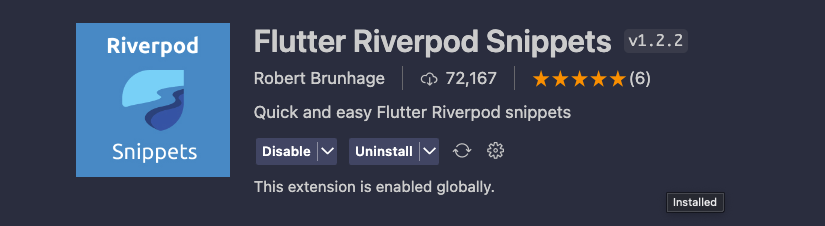
...- VSC Riverpod Extention 추가
Initialize Riverpod
- 전역변수로 Provider의 Ref를 사용하기 위해 Root 위젯을
ProviderScope로 감싸준다
void main() {
  runApp(
    ProviderScope(
      child: MyApp(),
    ),
  );
}
Provider 선언 및 사용
Provider 선언
provider를 선언할 때 Function형과 Class형을 나눠서 선언할 수 있다.
State를 변경하고 관리하는 로직을 추가할 필요가 있다면 Class형으로 선언하도록 한다.
** 기존 StateProvider를 통해서 State update를 진행했었던 코드는 모두 Class형으로 변경하여 mutate가능
- code generation을 사용할 때는 import 부분에
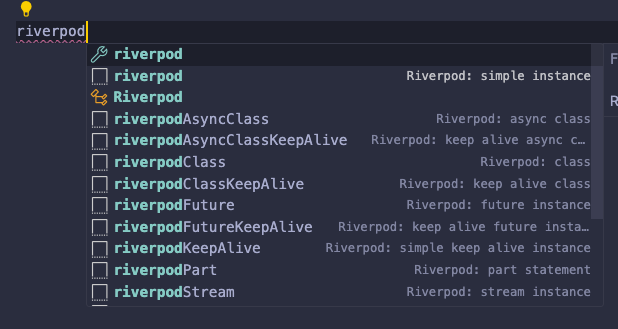
part ‘filename.g.dart’;추가해야함 - 위에서 설치한 VSC extention 덕에
riverpod이라고 입력하면 생성할 수 있는provider케이스를 추천해준다.
Class형 선언 예시
import 'package:riverpod_annotation/riverpod_annotation.dart';
part 'user_name_provider.g.dart';
class UserName extends _$UserName {
// 해당 override함수를 통해 state 초기화
String build() {
return 'minwoo';
}
// mutation 함수를 통해 state를 변환해준다.
void setUserName({required String newUserName}) {
state = newUserName;
}
}build함수를 override해주는 것을 통해 provider를 초기화할 수 있다.
Function형 선언 예시
import 'package:riverpod_annotation/riverpod_annotation.dart';
part 'user_name_provider.g.dart';
String userName(UserNameRef ref) {
return 'minwoo';
}Future / KeepAlive Provider
import 'package:riverpod_annotation/riverpod_annotation.dart';
part 'future_keep_alive_provider.g.dart';
(keepAlive: true)
class GetTeamName extends _$GetTeamName {
Future<String> build() async {
state = const AsyncValue.loading();
await Future.delayed(const Duration(seconds: 2));
return Future.value('Client');
}
}- KeepAlive
- Provider는
watch를 하고 있는ref가 존재하지 않으면 자동으로 메모리 캐시에서 소거된다. Annotation에keepAlive : true를 추가해줌으로서 autoDispose를 해제하고,watch하는ref가 없어도 캐시를 유지할 수 있도록 할 수 있다.
- Provider는
- Future(Async)
- riverpod은 비동기식 state를 관리하기 위해 Async타입 State를 지원한다.
- build 함수를 override 할 때는 Future<>로 선언한다.
Code generation
- Provider들을 생성해줄 때
build_runner를 실행하여 code generation이 정상적으로 되는지를 확인해준다. build_runner실행$ flutter pub run build_runner watch
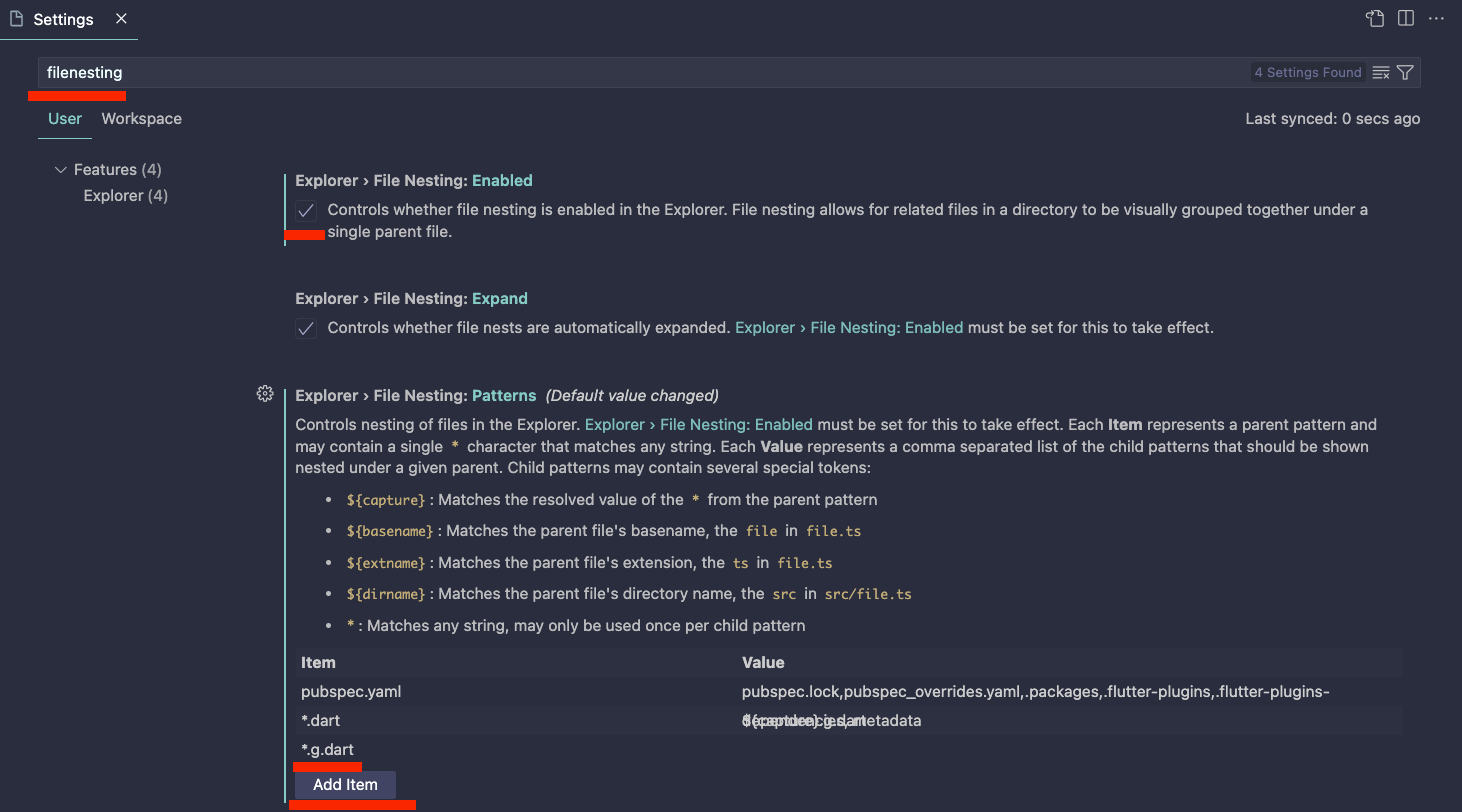
- VSC에서 generate된 파일들 nesting 시키는 법 VSC Setting에 들어가서
- filenesting 검색
- Explorer File nesting Enabled 처리
- Add Item에서
*.g.dart
Provider 사용
기본 사용
- Provider 의 변수명은 선언한 클래스/함수 명 뒤에 Provider 를 붙이면 된다.
- ex)
- @riverpod
String userName(UserNameRef ref) - ref.watch(userNameProvider)
- @riverpod
import 'package:flutter/material.dart';
import 'package:hooks_riverpod/hooks_riverpod.dart';
import 'package:riverpod_code_hooks/provider/user_name_provider.dart';
class StateScreen extends HookConsumerWidget {
const StateScreen({super.key});
Widget build(BuildContext context, WidgetRef ref) {
final userName = ref.watch(userNameProvider);
...
return Scaffold(
...
Text('User Name: $userName'),
...
- Flutter의 기존
StatelessWidget,StatefulWidget을 사용하는 대신Riverpod과Hooks를 사용하기 위해HookConsumerWidget을 상속하여 사용한다. - 만약
Hooks를 사용하지 않는다면ConsumerWidget,ConsumerStatefulWidget을 상속받으면 된다. - 빌드단 안에서
ref.watch(userNameProvider)와 같은 형식으로 Provider에서 선언한 state타입을 리턴받을 수 있다. read,watch두 가지 메소드를 통해 state를 받을 수 있으나, 상태변화를Listen하기 위해서는watch로 불러와야 한다.- 하지만 callBack함수 안에서는
read만을 사용해야 한다.
Callback 함수 & State mutation
TextButton(
	onPressed: () {
	ref.read(userNameProvider.notifier).setUserName(newUserName: 'New Name');
	},
	child: const Text('set new User Name'),
),- Class형으로 선언한 Provider의 state mutate 함수를 사용하기 위해서는
ref.read(provider.notifier).function()와 같이 진행하면 된다. - 위에서 언급한 것처럼 onPressed()와 같은 callback함수 안에서는
[ref.read](http://ref.read)메소드를 사용한다.
AsyncProvider
...
final AsyncValue teamName = ref.watch(getTeamNameProvider);
...- 비동기식 return타입을 사용할 때에는, AsyncValue타입으로 타입을 선언해준다.
- AsyncValue 를 상속받는 status에는 3가지 타입 존재.
- AsyncLoading
- AsyncData
- AsyncError
- 비동기식 state는 최초에 init될 때,
AsyncLoading값을 갖고 시작하며, 정상적으로 데이터를 얻게 되면AsyncData, error발생하면AsyncError로 변경된다.
Widget build(BuildContext context, WidgetRef ref) {
final AsyncValue teamName = ref.watch(getTeamNameProvider);
return Scaffold(
...

Column(
	children: [
		teamName.when(
			data: (data) {
				return Text('Team Name: $data');
			},
			error: (err, trace) {
				return Text('Error: $err');
			},
			loading: () {
				return const CircularProgressIndicator();
	},
),- 비동기식 state를 가진 Provider에서는 위와 같이
when메소드를 사용하여,data,error,loading상태일 때의 return값을 정해주어, 유연하게 UI로 관리 가능하다.
Provider Cache Clear
- Callback 함수 안에서
로 provider의 캐시를 제거할 수 있다.ref.invalidate(someProvider);
혹은 provider안에서 선언된 함수에서
ref.invalidateSelf()로 초기화해줄 수 있으나, 바로 이어서 read되는 상태가 된다.
- provider는 watch하고 있는 context가 없으면 자동으로 dispose된다.
Warning with Provider
- Local State에서만 사용되는 값들에는 Provider를 사용하지 않는다.
💡 storing form state

- currently selected item
- animations
- generally everything that Flutter deals with a "controller" (e.g. `TextEditingController`)

If you are looking for a way to handle local widget state, consider using [flutter_hooks](https://pub.dev/packages/flutter_hooks) instead.

One reason why this is discouraged is that such state is often scoped to a route.

Failing to do so could break your app's back button, due to a new page overriding the state of a previous page.- Callback 함수 안에서
watch메소드 사용 X
Hooks
- Hooks는 Local State를 관리할 때 사용합니다.
- useState()를 통해서 관리할 최초 값을 초기화시키고
final counter = useState(0); - useEffect()통해서 관리하는 값이 변경될 때마다, 실행시킬 sideEffect를 정의합니다.
<useEffect(() { // 여기에는 count.value가 변경될 때마다 실행할 코드를 작성합니다. logger.i('Count has changed to: ${counter.value}'); // context dispose 될 때, 함께 dispose될 항목 return return null; // count.value가 바뀔 때마다 이 효과를 재실행합니다. }, [counter.value] ); - 전체코드
import 'package:flutter/material.dart'; import 'package:flutter_hooks/flutter_hooks.dart'; import 'package:hooks_riverpod/hooks_riverpod.dart'; import 'package:riverpod_code_hooks/config/logger.dart'; class HooksUseStateScreen extends HookConsumerWidget { static const route = 'hooks_use_state'; const HooksUseStateScreen({super.key}); Widget build(BuildContext context, WidgetRef ref) { final counter = useState(0); // useEffect를 사용하여 특정 상태 값이 변경될 때마다 부수 효과를 실행합니다. useEffect(() { // 여기에는 count.value가 변경될 때마다 실행할 코드를 작성합니다. logger.i('Count has changed to: ${counter.value}'); return null;// context dispose 될 때, 함께 dispose될 항목 return }, [counter.value]); // count.value가 바뀔 때마다 이 효과를 재실행합니다. return Scaffold( appBar: AppBar( title: const Text('Hooks use State Screen'), ), body: SizedBox( width: double.infinity, child: Column( crossAxisAlignment: CrossAxisAlignment.center, mainAxisAlignment: MainAxisAlignment.center, children: [ Text('Counter: ${counter.value}'), const SizedBox(height: 12), Row( mainAxisAlignment: MainAxisAlignment.center, children: [ ElevatedButton( onPressed: () { counter.value++; }, child: const Text('Increment'), ), ElevatedButton( onPressed: () { counter.value--; }, child: const Text('Decrement'), ), ], ), ], ), ), ); } }
- Hooks는
AnimationController와 같이dispose,update,initstate와 같이 반복적으로 정의해줘야 하는 코드들을 사용하지 않을 수 있도록 별도로 정의된 변수들을 사용할 수 있도록 해줍니다.
import 'package:flutter/material.dart';
import 'package:flutter_hooks/flutter_hooks.dart';
import 'package:hooks_riverpod/hooks_riverpod.dart';
class HooksUseAnimationControllerScreen extends HookConsumerWidget {
static const route = 'hooks_use_animation_controller';
const HooksUseAnimationControllerScreen({super.key});
Widget build(BuildContext context, WidgetRef ref) {
final animationController =
useAnimationController(duration: const Duration(seconds: 1));
return Scaffold(
appBar: AppBar(
title: const Text('Hooks use AnimationController Screen'),
),
body: SizedBox(
width: double.infinity,
child: Column(
crossAxisAlignment: CrossAxisAlignment.center,
mainAxisAlignment: MainAxisAlignment.center,
children: [
ScaleTransition(
scale: animationController,
child: const FlutterLogo(size: 100),
),
],
),
),
floatingActionButton: FloatingActionButton(
onPressed: () {
if (animationController.isCompleted) {
animationController.reverse();
} else {
animationController.forward();
}
},
child: const Icon(Icons.play_arrow),
),
);
}
}참고 : https://riverpod.dev/ko/docs/introduction/getting_started

소프트웨어 엔지니어 / Flutter 개발자