
감정저장소의 개발과 디자인을 둘 다 진행하면서 느꼈던 회고를 작성합니다.
#Flame이 뭐야?
Flutter가 3.10버젼을 릴리즈하면서 SKIA엔진을 Impeller엔진으로 대체했고, 덕분에 UI상의 버벅거리는 현상인 Jank가 많이 줄어들게 됐습니다. Flutter를 1.0 버젼에서부터 사용했던 사람으로서 체감을 많이 할 수 있었고 Flutter가 성능개선을 계속해서 지원해주는 것에 항상 감사를 느끼고 있습니다 😊
Flutter팀은 엔진교체를 예고함과 동시에 3.0 버젼을 릴리즈하면서 Flutter Casual Game ToolKit 을 소개했습니다. Flutter Casual Game ToolkKit은 규모가 작은 게임을 Flutter로도 개발할 수 있다는 것을 확인시켜줬습니다. 이 ToolKit에 사용된 핵심 라이브러리 바로 Flame 입니다! 😃
Flutter Casual Games Toolkit
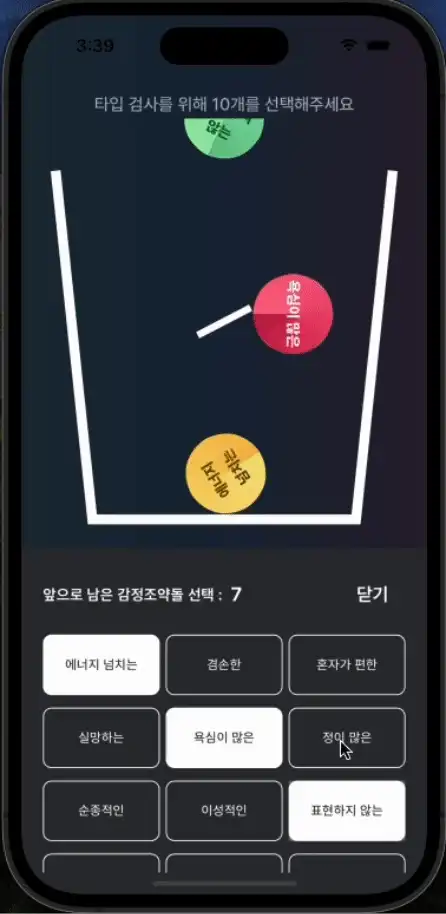
#감정저장소에는 어떻게?
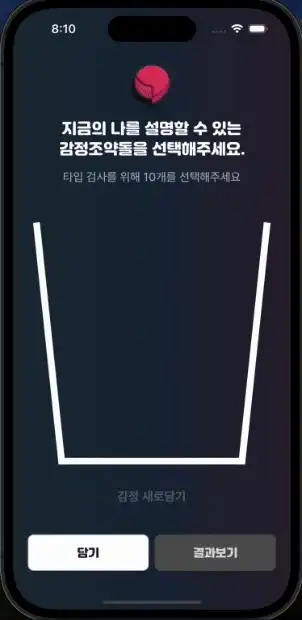 !
!
위 GIF를 보면 감정조약돌들이 위에서 아래로 떨어지고, 서로 부딪치는 것을 확인할 수 있습니다. 우리가 흔히 말하는 물리엔진이 오브젝트들에 적용되어 있기 때문이에요!
Flame 라이브러리에는 다양한 기능을 제공하는 서드파티 라이브러리들이 포함되어있는데, 그 중에서도 물리엔진 기능을 제공하는 Forge2DGame라이브러리가 사용되고 있습니다.
아래 코드를 보면서 자세히 설명해보겠습니다 🙂
final screenSize = Vector2(1500, 1700); // 해상도

class PhysicScreen extends Forge2DGame {
  PhysicScreen()
      : super(
          zoom: 100,
          gravity: Vector2(0, 30),
          cameraComponent: CameraComponent.withFixedResolution(
            width: screenSize.x,
            height: screenSize.y,
          ),
        );
Forge2DGame 인터페이스를 상속받아 중력값인 gavity를 Vector2() 값으로 넣어주고, Flame게임의 스크린 크기를 결정하기 위해 CameraComponent 오브젝트에 선언되어있는 withFixedResolution Constructor를 사용해 해상도 값을 넣어줍니다.
Future<void> onLoad() async {
camera.backdrop.add(_Background(size: screenSize));
}
}|
class _Background extends PositionComponent {
_Background({super.size});
void render(Canvas canvas) {
canvas.drawRect(Rect.fromLTWH(0, 0, size.x, size.y),
Paint()..color = Colors.transparent);
}
}
그리고 Forge2DGame 인터페이스는 onLoad, onAttach, onMount, onDispose 등의 기능을 제공해줍니다. 이 중에서 onLoad() 함수는 최초에 컴파일단계에서 게임속 세상의 오브젝트를 불러올 때, 실행되고 여기서 배경색상을 지정해줄 수 있습니다.
실제 떨어지는 공이 만들어지는 코드는 다음과 같아요.
class EmotionBall extends BodyComponent {
final String assetURL;
EmotionBall({required this.assetURL});
double size = 1.6.w;
Future<void> onLoad() async {
await super.onLoad();
final sprite = Sprite(game.images.fromCache(assetURL));
add(
SpriteComponent(
sprite: sprite,
size: Vector2(3.2.w, 3.2.w),
anchor: Anchor.center,
),
);
}
오브젝트에 직접 색상을 입힐 수도 있고, 유니티를 사용해보신 분들이라면 잘 아실 Sprite를 오브젝트에 입혀줄 수 있습니다.
Body createBody() {
final bodyDef = BodyDef(
position: Vector2(worldSize.x / 2, -1),
type: BodyType.dynamic,
);
final shape = CircleShape()..radius = size;
final fixtureDef = FixtureDef(shape)
..density = 3
..friction = 1
..restitution = 0.4;
return world.createBody(bodyDef)
..createFixture(fixtureDef)
..angularVelocity = radians(100);
}
}가장 핵심적인 기능은 위의 코드라고 할 수 있는데요. Forge2D라이브러리의 BodyComponent클래스에서 지원하는 createBody() 함수를 통해 최초 생성되는 위치인 position, 그리고 BodyType을 결정해줄 수 있습니다.
BodyType은
고정되어서 말그대로 고정적인 위치값을 갖게되는 static
zero velocity, zero mass, manually moved
static과 동일하지만, 게임 로직을 통해 움직임을 줄 수 있는 kinetic
zero velocity, zero mass, moved by solver
그리고 자유로운 물리효과를 받는 dynamic
with positive mass, non-zero velocity, determined by forces, moved by solver
을 지원합니다.
BodyType을 결정해주는 코드 아래에서는 mass의 속성들을 결정해줄 수 있습니다. 🙂
가운데에 돌아가는 Box는 Kinetic 타입, 떨어지는 공들은 중력의 영향을 받는 Dynamic 타입의 오브젝트입니다
추가적으로 Forge2DGame 인터페이스는 microseconds 프레임을 지원하는 update 메소드를 제공하는데요.
기기사양에 따라서 지원되는 프레임수는 유동적이라고 하네요 😃
void update(double dt) async {
...
}