회원 가입 시 기재한 E-mail에 인증메일을 발송해서, 인증이 완료된 회원만 로그인이 가능하도록 구현
1. pom.xml
- Java Mail 라이브러리 추가
<!-- https://mvnrepository.com/artifact/com.sun.mail/javax.mail -->
<dependency>
	<groupId>com.sun.mail</groupId>
	<artifactId>javax.mail</artifactId>
	<version>1.6.2</version>
</dependency>
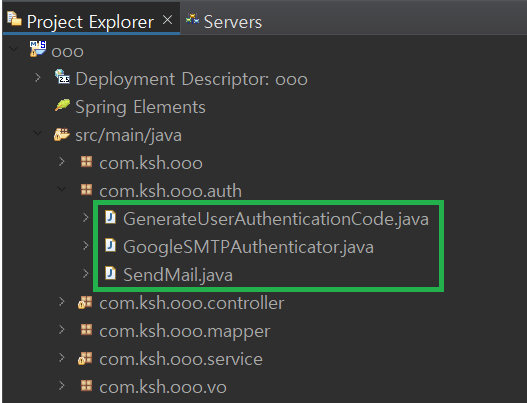
인증을 뜻하는 auth 패키지를 만든 후 3개의 클래스 정의
2. GenerateUserAuthenticationCode.java
- 인증 메일을 통해 발송할 인증 코드 생성을 위한 클래스 정의
2-1. 변수 선언
public class GenerateUserAuthenticationCode {

	private String authCode; // 인증 코드값을 저장할 변수

	// 인증 코드 생성에 사용될 코드 문자 집합을 배열로 생성
	// => 영문 대문자, 소문자, 숫자, 특수문자(!@$) 사용
	char[] codeTable = {
		'A', 'B', 'C', 'D', 'E', 'F', 'G', 'H', 'I', 'J',
		'K', 'L', 'M', 'N', 'O', 'P', 'Q', 'R', 'S', 'T',
		'U', 'V', 'W', 'X', 'Y', 'Z', 'a', 'b', 'c', 'd',
		'e', 'f', 'g', 'h', 'i', 'j', 'k', 'l', 'm', 'n',
		'o', 'p', 'q', 'r', 's', 't', 'u', 'v', 'w', 'x',
		'y', 'z', '0', '1', '2', '3', '4', '5', '6', '7',
		'8', '9', '!', '@', '$'
	};
}
2-2. 생성자 정의
- 인증 코드의 길이(자릿수) 파라미터 선언
public class GenerateUserAuthenticationCode {

    public GenerateUserAuthenticationCode(int codeLength) {
        // Random 객체를 활용하여 배열 길이 범위 내의 값을 난수로 생성 후
        // 난수에 해당하는 배열 인덱스에 위치한 문자를 문자열 결합을 통해 인증 코드 생성
        // => 이 때, 난수로 생성한 문자열(인증코드)의 길이는 전달받은 파라미터 크기만큼 반복
        Random r = new Random();

        // 난수를 활용하여 가져온 코드 문자를 결합하여 저장할 객체 생성
        // => StringBuffer(또는 StringBuilder) 클래스는 버퍼를 활용하여 문자열을 직접 수정하므로
        //    String 클래스에 비해 문자열 수정에 유리함(메모리 낭비가 적고, 수정 속도가 빠름)
        StringBuffer buffer = new StringBuffer();

        // for 문을 사용하여 전달받은 코드 길이 만큼 반복
        for(int i = 1; i <= codeLength; i++) {
            // Random 객체의 nextInt(int bound) 메서드를 호출하여 난수 생성
            // 이 때, 난수의 범위를 테이블 크기로 한정하여 생성
            int rNum = r.nextInt(codeTable.length); // 0 ~ 테이블크기-1 까지 범위 정수형 난수 생성

            // 생성된 난수를 배열 인덱스로 활용하여 해당 인덱스의 문자를 StringBuffer 객체에 추가
            buffer.append(codeTable[rNum]);
        }

        // 생성된(결합된) 버퍼 내의 인증코드를 문자열로 변환하여 변수 authCode 에 저장
        authCode = buffer.toString();
    }
}
2-3. 메서드 정의
- 생성된 인증코드를 리턴하는 Getter 메서드 정의
public class GenerateUserAuthenticationCode {

    public String getAuthCode() {
            return authCode;
        }
}
3. GoogleSMTPAuthenticator.java
자바 메일 기능 사용 시 메일 서버(ex. Gmail 등) 인증을 위한 인증 정보를 관리하는 javax.mail.Authenticator 클래스를 상속받는 서브클래스 정의
public class GoogleSMTPAuthenticator extends Authenticator {

}
3-1. 변수 선언
인증 정보(아이디, 패스워드)를 관리할 javax.mail.PasswordAuthentication 클래스 타입 변수 선언
public class GoogleSMTPAuthenticator extends Authenticator {

	PasswordAuthentication passwordAuthentication;

}
3-2. 기본 생성자 정의
인증에 사용할 아이디와 패스워드 정보를 갖는 PasswordAuthentication
→ 파라미터로 계정명과 패스워드 전달
public class GoogleSMTPAuthenticator extends Authenticator {

    // => Gmail 기준 2단계 인증 미사용 시 Gmail 계정명, 패스워드 전달
	// => Gmail 기준 2단계 인증 사용 시 Gmail 계정명과 함께 패스워드 대신 2단계 인증을 우회하는 앱비밀번호 전달
	//    (구글 계정 설정 - 보안 - Google 에 로그인 항목의 앱 비밀번호 설정 필요)
	//    (생성 항목 : 앱선택 = 메일, 기기 선택 = Windows 컴퓨터)
	//    => 생성 완료 시 나타나는 앱 비밀번호를 사용해야함
	passwordAuthentication = new PasswordAuthentication("hiyayeah502", "내비번보호ㅎㅎ");

}
3-3. 메서드 오버라이딩
인증 정보를 관리하는 PasswordAuthentication 객체를 외부로 리턴하는 getPasswordAuthentication() 메서드 오버라이딩
public class GoogleSMTPAuthenticator extends Authenticator {

	@Override
	protected PasswordAuthentication getPasswordAuthentication() {
		return passwordAuthentication;
	}

}
4. SendMail.java
4-1. 메서드 정의
메일 발송 작업을 수행하는 sendMail() 메서드 정의
→ 파라미터 : 수신자 주소, 메일 제목, 메일 본문
→ 리턴타입 : 메일 발송 성공 여부 - boolean 타입(isSendSuccess)
public class SendMail {

	public boolean sendMail(String receiver, String title, String content) {

		boolean isSendSuccess = false; // 메일 발송 성공 여부 저장 변수(true : 성공, false : 실패)

		String sender = "admin@ooo.com"; // 발신자 주소(상용 메일 사이트에는 변경 불가능)

		try {
			// -------- 메일 전송에 필요한 설정 작업 ---------
			Properties properties = System.getProperties();
			properties.put("mail.smtp.starttls.enable", "true");
			properties.put("mail.smtp.ssl.protocols", "TLSv1.2");
			properties.put("mail.smtp.host", "smtp.gmail.com"); // 구글(Gmail) 메일 발송 서버 주소 지정
			properties.put("mail.smtp.auth", "true"); // 인증 여부 설정(로그인 필요 시)
			properties.put("mail.smtp.port", "587"); // 메일 전송에 사용될 서비스 포트 설정(SMTP 포트) => 기본 25번. 각 서버별로 달라질 수 있음
			// --------------------------------------------
			// 메일 서버에 대한 인증 정보를 관리하는 사용자 정의 클래스(GoogleSMTPAuthenticator)의 인스턴스 생성
			Authenticator authenticator = new GoogleSMTPAuthenticator(); // 슈퍼클래스(Authenticator) 타입으로 업캐스팅
			Session mailSession = Session.getDefaultInstance(properties, authenticator);
			Message mailMessage = new MimeMessage(mailSession);
			// ---------------------------------------------------------------------
			// 전송할 메일에 대한 발송 정보 설정
			Address sender_address = new InternetAddress(sender, "오운완"); // 두번째 파라미터(발신자 이름)는 변경 가능
			Address receiver_address = new InternetAddress(receiver);
			mailMessage.setHeader("content-type", "text/html; charset=UTF-8");
			mailMessage.setFrom(sender_address);
			mailMessage.addRecipient(RecipientType.TO, receiver_address);
			mailMessage.setSubject(title);
			mailMessage.setContent(content, "text/html; charset=UTF-8");
			mailMessage.setSentDate(new Date());

			// 메일 전송
			Transport.send(mailMessage);
			System.out.println("메일이 정상적으로 전송되었습니다!");

			isSendSuccess = true;
		} catch(Exception e) {
			e.printStackTrace();
			System.out.println("SMTP 서버 설정 또는 서비스 문제 발생!");
		}

		return isSendSuccess;
	}

}
5. AuthInfoVO.java
인증 관련 정보를 담을 클래스 정의 (com.ksh.ooo.vo 패키지)
package com.ksh.ooo.vo;

public class AuthInfoVO {

	private int member_idx;
	private String auth_code;

	public AuthInfoVO() {}

	public AuthInfoVO(int member_idx, String auth_code) {
		this.member_idx = member_idx;
		this.auth_code = auth_code;
	}

	public int getMember_idx() {
		return member_idx;
	}

	public void setMember_idx(int member_idx) {
		this.member_idx = member_idx;
	}

	public String getAuth_code() {
		return auth_code;
	}

	public void setAuth_code(String auth_code) {
		this.auth_code = auth_code;
	}

}
일단 필요한 class들 세팅은 이정도로 완료했다. 인증 메일 발송의 경우 MVC Model2 방식으로만 구현해보아서, Spring에서 어떤 로직으로 구현할지 고민을 해보아야 할 것 같다..
