[출처] https://pc-solucion.es/terminos/jdbc
JDBC
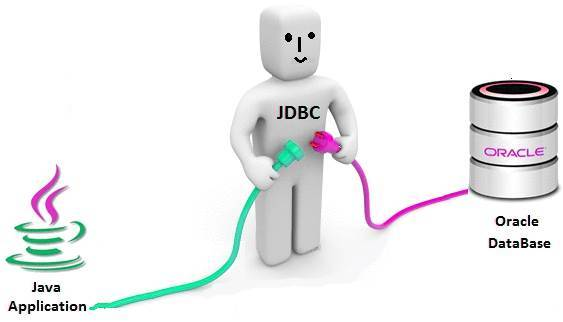
JDBC(Java Database Connectivity)는 자바에서 데이터베이스에 접속할 수 있도록 하는 자바 API이다. JDBC는 데이터베이스에서 자료를 쿼리하거나 업데이트하는 방법을 제공한다.
[출처] 위키백과, https://ko.wikipedia.org/wiki/JDBC
JDBC는 특정 데이터베이스에 종속되지 않는 데이터베이스 연동을 지원하는데, 이는 JDBC API가 인터페이스 기반으로 다형성을 이용하기 때문이다.
JDBC API가 제공하는 인터페이스를 구현한 클래스를 JDBC 드라이버라고 하는데 jar형태의 압축 파일로 제공되며, DBMS를 제공하는 회사의 홈페이지에서 다운받을 수 있다. 따라서 JDBC 드라이버부터 데이터베이스까지는 DBMS에 종속적인 영역이다.
즉, JDBC API를 이용하여 데이터베이스 연동을 처리하면 우리가 oracle을 사용하던지 mySQL을 사용하던지 해당 JDBC 드라이버를 사용하면 자바프로그램과 데이터베이스를 연동할 수 있다. 데이터베이스가 변경되더라도 해당 JDBC 드라이버만 변경하면 된다.
JDBC 프로그램 절차
[1단계] 드라이버 등록
- 해당 database 벤더 사가 제공하는 클래스 등록한다.
// oracle
  Class.forName("oracle.jdbc.driver.OracleDriver");

// mysql
  Class.forName("com.mysql.cj.jdbc.Driver");
[2단계] 커넥션(Connection) 연결
- DriverManager 클래스가 제공하는 static 메소드인 getConnection()을 사용한다.
- 커넥션은 application과 db를 연결하는 고속도로라고 생각하면 된다.
// 드라이버타입@ip주소:포트번호:db이름(SID)
// orcl:사용자정의설치 , thin : 자동으로 설치 //ip주소 -> localhost 로 변경해도됨

// oracle
String url_oracle = "jdbc:oracle:thin:@localhost:1521:xe";
// mysql
String url_mysql = "jdbc:mysql://localhost:3306/scott?";

String user = "scott";
String password = "tiger";
con = DriverManager.getConnection(url, user, password);
[3단계] PreparedStatement 생성
- PreparedStatement는 sql을 태워 db로 보내준다.
- 커넥션이 고속도로라면 PreparedStatement은 자동차이다.
- sql은 이 자동차에 탑승한다.
String sql = "insert into MEMBER values (?, ?, ?, ?)";
ps = con.prepareStatement(sql);
[4단계] SQL 전송
- PreparedStatement의 excuteUpdate() 메소드를 사용한다.
- 파라미터(?)에 사용자가 입력한 값들을 채운다.
(※ excuteUpdate() 메소드 - INSERT, IUPDATE, DELETE 실행 시 사용) - excuteUpdate()는 실행된 sql에 의해 실제 데이터베이스에 반영된 데이터의 수를 리턴한다.
ps.setString(1, "첫번째"); // 숫자타입이면 setInt
ps.setString(2, "두번째"); // 날짜타입이면 setDate
ps.setString(3, "세번째");
ps.setString(4, "네번째");

int result = ps.executeUpdate(); // 전송된 데이터 수
[5단계] 연결 해제
- JDBC 프로그램이 종료되면 데이터베이스 연동에 사용했던 모든 객체들의 연결을 종료(close)한다.
- 특히 Connection의 경우는 데이터베이스로부터 생성할 수 있는 Connection의 수가 제한되어 있어서 프로그램이 종료되기 직전에 반드시 데이터베이스와의 연결을 종료해야 한다.
ps.close(); // PreparedStatement 먼저 닫기!
con.close();
[oracle 연결 예시]
import java.sql.Connection;
import java.sql.DriverManager;
import java.sql.PreparedStatement;
import java.sql.SQLException;

public class DBConnectOracle {
    public static void main(String[] args) {
        Connection con = null;
        PreparedStatement ps = null;

        try {
            // 1.Jdbc driver 등록 처리 : 해당 database 벤더 사가 제공하는 클래스 등록
            Class.forName("oracle.jdbc.driver.OracleDriver");
            System.out.println("1. 드라이버 설정 성공..");
            // 2.등록된 클래스를 이용해서 db연결
            // 드라이버타입@ip주소:포트번호:db이름(SID)
            // orcl:사용자정의설치 , thin : 자동으로 설치 //ip주소 -> localhost 로 변경해도됨
            String url = "jdbc:oracle:thin:@localhost:1521:xe";
            String user = "scott";
            String password = "tiger";
            con = DriverManager.getConnection(url, user, password);
            System.out.println("2. db연결 성공.");

            // 오토커밋을 false로 설정
            con.setAutoCommit(false);
            System.out.println("3. 오토커밋 설정 비활성화.");
            String sql = "insert into MEMBER values (1, '안녕', 'win', 'win', sysdate)";
            ps = con.prepareStatement(sql);
            System.out.println("4. sql문 객체 생성 성공");
            int result = ps.executeUpdate();

            String sql2 = "insert into MEMBER values (2, '안녕', 'win', 'win', sysdate)";
            ps = con.prepareStatement(sql2);
            System.out.println("4. sql문 객체 생성 성공");
            int result2 = ps.executeUpdate();

            System.out.println("5. sql문 전송 성공, 결과1>> " + result);
            System.out.println("5. sql문 전송 성공, 결과2>> " + result2);

            // 트랜잭션 커밋
            if (result >= 1 && result2 >= 1) {
                System.out.println("데이터 입력 완료");
                con.commit();
                System.out.println("6. 트랜잭션 커밋 완료.");

            }
            // Query가 제대로 실행되지 않은 경우
            else {
                System.out.println("데이터 입력 실패");
                con.rollback();
            }
        } catch (ClassNotFoundException | SQLException e) {
            e.printStackTrace();
            if (con != null) {
                try {
                    con.rollback(); // 예외 발생 시 롤백
                } catch (SQLException ex) {
                    ex.printStackTrace();

                }
                System.out.println("트랜잭션 롤백.");
            }
        } finally {
            try {
                ps.close(); // 먼저닫기
                con.close();
            } catch (SQLException e) {
                e.printStackTrace();
            }
        }


    }

}
[mySQL 연결 예시]
import java.sql.Connection;
import java.sql.DriverManager;
import java.sql.PreparedStatement;
import java.sql.SQLException;

public class DBConnectMysql {
    public static void main(String[] args) {
        Connection con = null;
        PreparedStatement ps = null;
        try {
            Class.forName("com.mysql.cj.jdbc.Driver");
            System.out.println("1. 드라이버 설정 성공..");

            String url = "jdbc:mysql://localhost:3306/scott?";
            String user = "scott";
            String password = "tiger";
            con = DriverManager.getConnection(url, user, password);
            System.out.println("2. db연결 성공.");

            // 오토커밋을 false로 설정
            con.setAutoCommit(false);
            System.out.println("3. 오토커밋 설정 비활성화.");
            String sql = "insert into MEMBER values (3, '안녕', 'win', 'win', NOW())";
            ps = con.prepareStatement(sql);
            System.out.println("4. sql문 객체 생성 성공");
            int result = ps.executeUpdate();

            String sql2 = "insert into MEMBER values (4, '안녕', 'win', 'win', NOW())";
            ps = con.prepareStatement(sql2);
            System.out.println("4. sql문 객체 생성 성공");
            int result2 = ps.executeUpdate();

            System.out.println("5. sql문 전송 성공, 결과1>> " + result);
            System.out.println("5. sql문 전송 성공, 결과2>> " + result2);

            // 트랜잭션 커밋
            if (result >= 1 && result2 >= 1) {
                System.out.println("데이터 입력 완료");
                con.commit();
                System.out.println("6. 트랜잭션 커밋 완료.");

            }
            // Query가 제대로 실행되지 않은 경우
            else {
                System.out.println("데이터 입력 실패");
                con.rollback();
            }
        } catch (ClassNotFoundException | SQLException e) {
            e.printStackTrace();
            if (con != null) {
                try {
                    con.rollback(); // 예외 발생 시 롤백
                } catch (SQLException ex) {
                    ex.printStackTrace();

                }
                System.out.println("트랜잭션 롤백.");
            }
        } finally {
            try {
                ps.close(); // 먼저닫기
                con.close();
            } catch (SQLException e) {
                e.printStackTrace();
            }
        }
    }
}
[출처] 채쌤의 servelet&jsp프로그래밍 핵심, 채규태
본 포스팅은 멀티캠퍼스의 멀티잇 백엔드 개발(Java)의 교육을 수강하고 작성되었습니다.

성장하는 개발자, 하지은입니다.