이번 항해99 5주차는 좀더 심화된 리액트 개념으로 개인 미니로젝트를 만들어보는것이었다.
프로젝트 설명
프로젝트 기간 : 2021-07-05 ~ 2012-07-08
프로젝트명 : 이미지커뮤니티 ( 가짜스타그램 )
사용 기술 : 리액트, 파이어베이스
사용 IDE : VS Code
프로젝트 설명 : 유저들이 이미지와 설명글을 업로드하여 다른 유저들에게 공유
기능 : 회원가입 및 로그인, 이미지를 포함한 게시글 업로드 및 수정, 게시글 업로드시 세가지 종류의 노출 레이아웃 설정
프로젝트 결과물
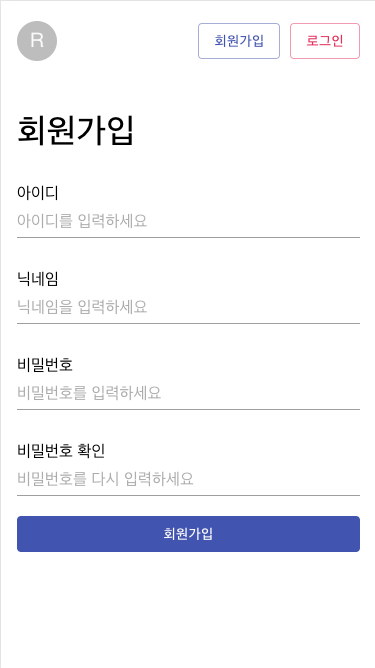
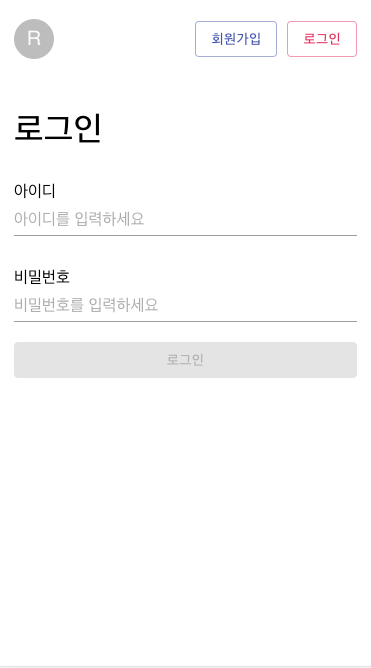
회원가입 및 로그인
const signupFB = (id, pwd, userName) => {
  return function (dispatch, getState, { history }) {
    auth
      .createUserWithEmailAndPassword(id, pwd)
      .then((user) => {
        auth.currentUser
          .updateProfile({
            displayName: userName,
          })
          .then(() => {
            dispatch(
              setUser({ user_name: userName, id: id, user_profile: "" })
            );
            history.push("/");
          })
          .catch((error) => {
            console.log(error);
          });
      })
      .catch((error) => {
        var errorCode = error.code;
        var errorMessage = error.message;
        console.log(errorCode, errorMessage);
      });
  };
};
- 회원가입시 아이디, 패스워드 그리고 닉네임을 입력할때 userInfo라는 state 값이 넣은 후 회원가입 버튼 클릭시 firebase에 이메일 형식으로 저장하는 회원저장소에 추가
const loginFB = (id, pwd) => {
  return function (dispatch, getState, { history }) {
    auth.setPersistence(firebase.auth.Auth.Persistence.SESSION).then((res) => {
      auth
        .signInWithEmailAndPassword(id, pwd)
        .then((user) => {
          console.log(user);

          dispatch(
            setUser({
              user_name: user.user.displayName,
              id: id,
              user_profile: "",
              uid: user.user.uid,
            })
          );

          history.push("/");
        })
        .catch((error) => {
          var errorCode = error.code;
          var errorMessage = error.message;
          console.log("error : ", error);
          if (error.code === "auth/invalid-email") {
            alert("아이디를 이메일 형식으로 입력해주세요");
          } else if (error.code === "auth/user-not-found") {
            alert("존재하는 아이디가 없습니다.");
          } else if (error.code === "auth/wrong-password") {
            alert("비밀번호가 일치하지 않습니다.");
          }
          console.log(errorCode, errorMessage);
        });
    });
  };
};-
로그인 시 아이디와 패스워드 파라미터를 firebase 로그인 저장소에 넘겨서 만약 일치한다면 리덕스 저장소에 해당 유저 정보 저장한 후 메인페이지로 이동
-
일치하는 정보가 없다면 에러코드별로 alert 출력
게시글 작성, 수정 및 출력
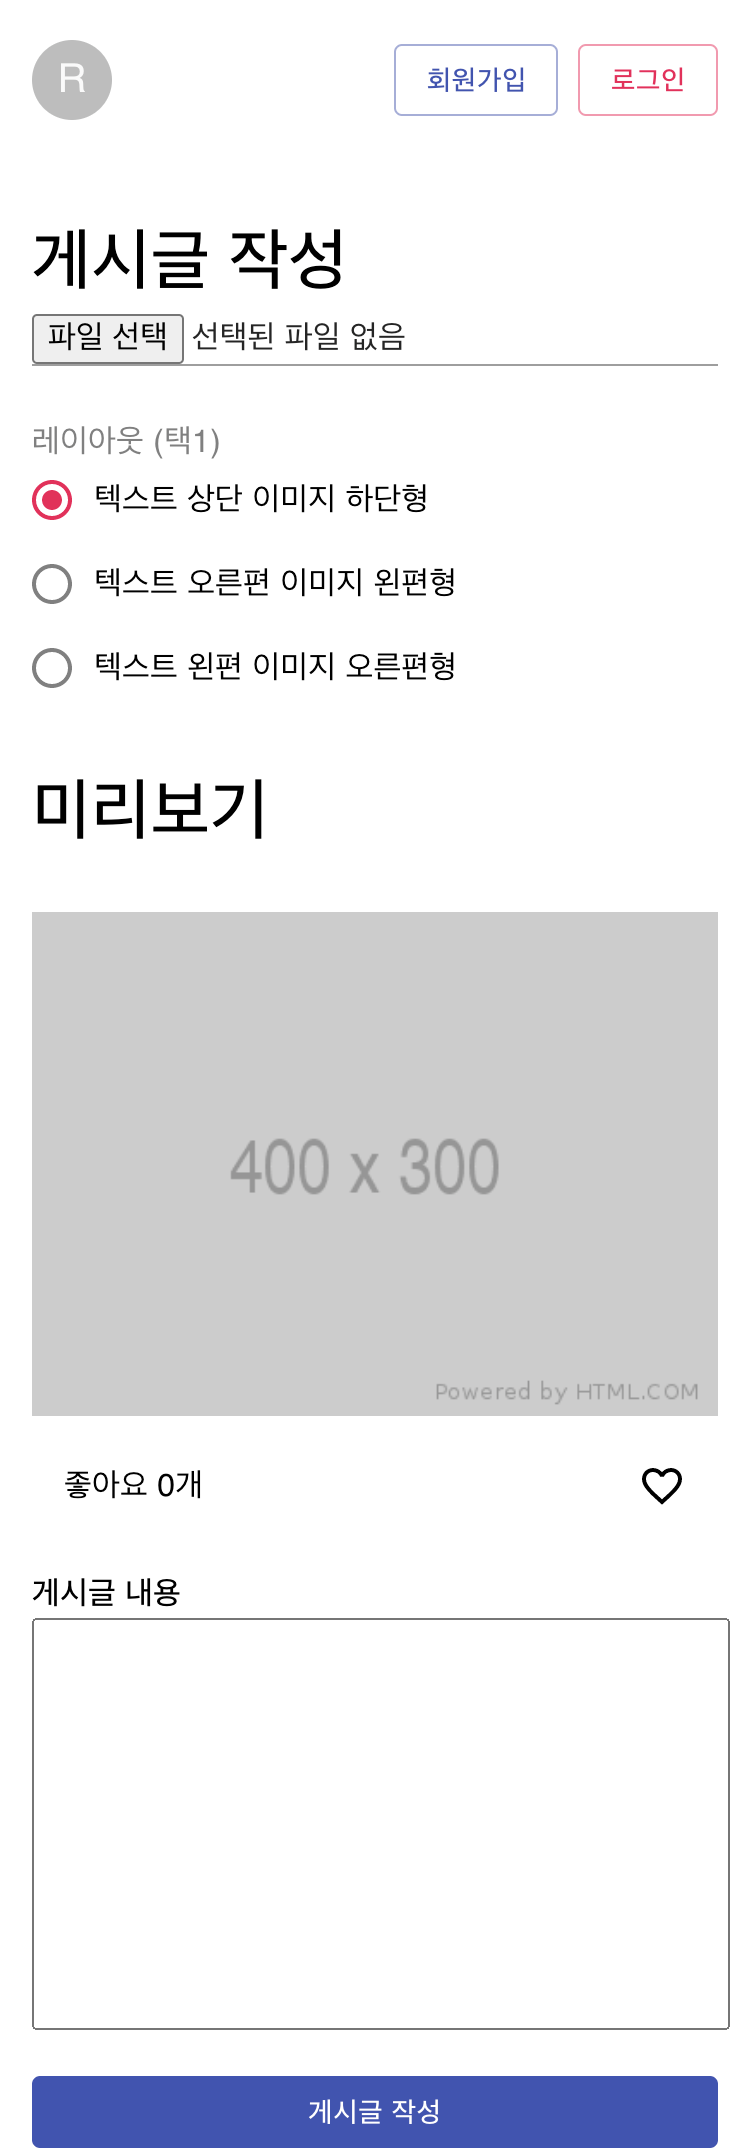
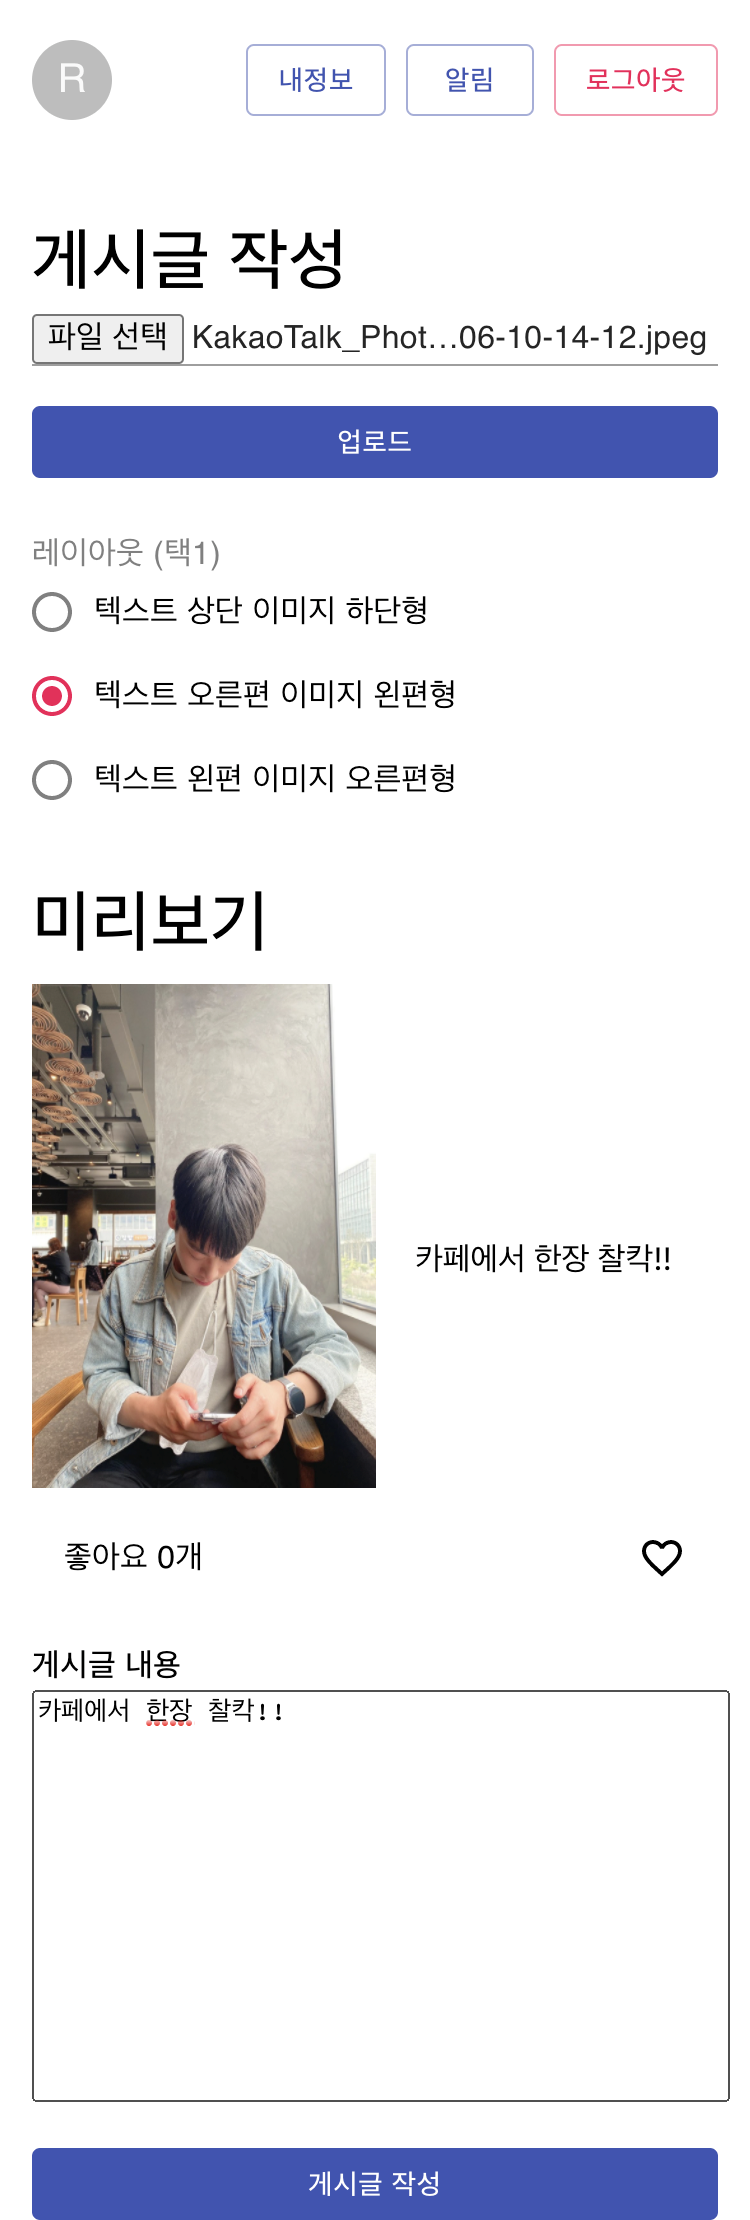
게시글 작성 뷰
게시글 내용 작성 전
게시글 내용 작성 후
 const selectFile = (e) => {
    const reader = new FileReader();
    const file = e.target.files[0];

    reader.readAsDataURL(file);
    setUploadFile(true);

    reader.onloadend = () => {
      dispatch(imageActions.setPreview(reader.result));
      setUploadedFile(file);
    };
    setHideUploadBtn(true);
};- 파일 이미지 업로드 시 preview라는 상태값에 읽은 파일 결과값을 저장 후 미리보기로 노출
		<FormControl component="fieldset" style={{ marginTop: "30px" }}>
          <FormLabel component="legend">레이아웃 (택1)</FormLabel>
          <RadioGroup
            aria-label="layout"
            name="layout"
            value={radioValue}
            onChange={handleChange}
          >
            <FormControlLabel
              value="post1"
              control={<Radio selected />}
              label="텍스트 상단 이미지 하단형"
            />
            <FormControlLabel
              value="post2"
              control={<Radio />}
              label="텍스트 오른편 이미지 왼편형"
            />
            <FormControlLabel
              value="post3"
              control={<Radio />}
              label="텍스트 왼편 이미지 오른편형"
            />
          </RadioGroup>
        </FormControl>
function uploadImageFB(image) {
  return function (dispatch, getState, { history }) {
    dispatch(uploading(true));

    console.log(`images/${new Date().getTime()}_${image.name}`);
    const _upload = storage.ref(`images/${image.name}`).put(image);

    //   업로드!
    _upload
      .then((snapshot) => {
        console.log(snapshot);

        snapshot.ref.getDownloadURL().then((url) => {
          console.log(url);
          dispatch(uploadImage(url));
        });
      })
      .catch((err) => {
        dispatch(uploading(false));
      });
  };
}
2.이미지 업로드 시 firebase 내 이미지 저장소에 저장 후 이미지 url 추출
<Grid style={{ margin: "30px 0" }}>
          <Typography variant="h4" style={{ fontWeight: 500 }}>
            미리보기
          </Typography>
          {(function () {
            if (radioValue === "post1") {
              return (
                <Post1Box
                  contents={textContent}
                  image_url={
                    preview ? preview : "http://via.placeholder.com/400x300"
                  }
                ></Post1Box>
              );
            } else if (radioValue === "post2") {
              return (
                <Post2Box
                  contents={textContent}
                  image_url={
                    preview ? preview : "http://via.placeholder.com/400x300"
                  }
                ></Post2Box>
              );
            } else if (radioValue === "post3") {
              return (
                <Post3Box
                  contents={textContent}
                  image_url={
                    preview ? preview : "http://via.placeholder.com/400x300"
                  }
                ></Post3Box>
              );
            }
          })()}
</Grid>- 라이도 버튼에 노출 시킬 3가지 종류의 레이아웃 value값을 지정 후 클릭시 조건에 부합되는 레이아웃 형태로 미리보기 노출
const addPostFB = (contents = "", type = "post1") => {
  return function (dispatch, getState, { history }) {
    const postDB = firestore.collection("post");
    const _user = getState().user.user;
    const _image = getState().image.preview;

    const user_info = {
      user_name: _user.user_name,
      user_id: _user.uid,
      user_profile: _user.user_profile,
    };

    const _upload = storage
      .ref(`images/${user_info.user_id}_${new Date().getTime()}`)
      .putString(_image, "data_url");

    const _post = {
      ...initialPost,
      contents: contents,
      type: type,
      insert_dt: moment().format("YYYY-MM-DD hh:mm:ss"),
    };

    _upload
      .then((snapshot) => {
        snapshot.ref
          .getDownloadURL()
          .then((url) => {
            console.log(url);
            dispatch(imageActions.uploadImage(url));
            return url;
          })
          .then((url) => {
            console.log(url);
            postDB
              .add({ ...user_info, ..._post, image_url: url })
              .then((doc) => {
                let post = {
                  user_info,
                  ..._post,
                  id: doc.id,
                  image_url: url,
                };
                dispatch(addPost(post));
                dispatch(imageActions.deletePreview());
                history.replace("/");
              })
              .catch((err) => {
                window.alert("앗! 포스트 작성에 문제가 있어요!");
                console.log("post 작성 실패!", err);
              });
          });
      })
      .catch((err) => {
        window.alert("앗! 이미지 업로드에 문제가 있어요!");
        console.log(err);
      });
  };
};
- 게시글 작성 버튼 클릭시 firebase 에 등록한 post 컬렉션에 이미지 url를 포함한 필요 정보 데이터 삽입
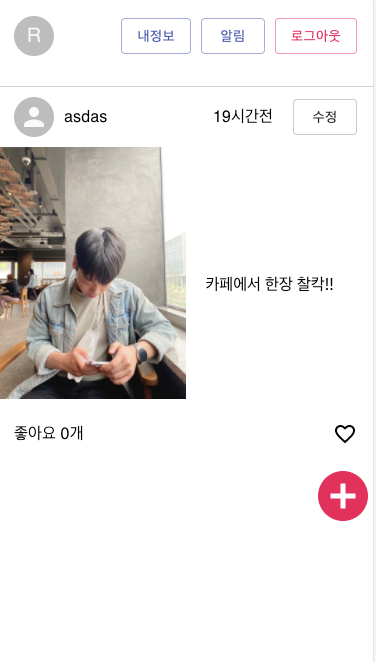
const getPostFB = (start = null, size = 3) => {
  return function (dispatch, getState, { history }) {
    let _paging = getState().post.paging;

    if (_paging.start && !_paging.next) {
      return;
    }
    const postDB = firestore.collection("post");

    let query = postDB.orderBy("insert_dt", "desc");
    if (start) {
      query = query.startAt(start);
    }

    query
      .limit(size + 1)
      .get()
      .then((docs) => {
        console.log("docs : ", docs.docs);
        let post_list = [];

        docs.forEach((doc) => {
          let _post = doc.data();

          let post = Object.keys(_post).reduce(
            (acc, cur) => {
              if (cur.indexOf("user_") !== -1) {
                return {
                  ...acc,
                  user_info: { ...acc.user_info, [cur]: _post[cur] },
                };
              }
              return { ...acc, [cur]: _post[cur] };
            },
            { id: doc.id, user_info: {} }
          );

          post_list.push(post);
        });

        // 마지막 하나는 빼줍니다.
        // 그래야 size대로 리스트가 추가되니까요!
        // 마지막 데이터는 다음 페이지의 유무를 알려주기 위한 친구일 뿐! 리스트에 들어가지 않아요!
        post_list.pop();

        dispatch(setPost(post_list));
      });
  };
};- 게시글 작성후 firebase 컬렉션 내 문서의 정보들을 가져오고 메인페이지에 뿌려주기
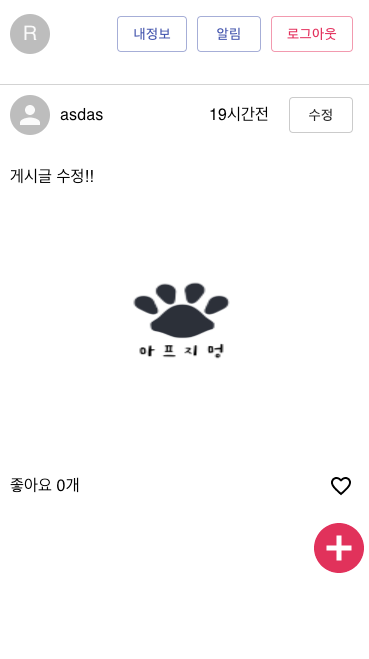
const editPostFB = (post_id = null, post = {}) => {
  return function (dispatch, getState, { history }) {
    if (!post_id) {
      console.log("게시물 정보가 없어요!");
      return;
    }
    const _image = getState().image.preview;
    const _post_idx = getState().post.list.findIndex((p) => p.id === post_id);
    const _post = getState().post.list[_post_idx];

    const postDB = firestore.collection("post");

    if (_image === _post.image_url) {
      postDB
        .doc(post_id)
        .update(post)
        .then((doc) => {
          dispatch(editPost(post_id, { ...post }));
          history.replace("/");
        });

      return;
    } else {
      const user_id = getState().user.user.uid;
      const _upload = storage
        .ref(`images/${user_id}_${new Date().getTime()}`)
        .putString(_image, "data_url");

      _upload.then((snapshot) => {
        snapshot.ref
          .getDownloadURL()
          .then((url) => {
            console.log(url);

            return url;
          })
          .then((url) => {
            postDB
              .doc(post_id)
              .update({ ...post, image_url: url })
              .then((doc) => {
                dispatch(editPost(post_id, { ...post, image_url: url }));
                dispatch(imageActions.deletePreview());

                history.replace("/");
              });
          })
          .catch((err) => {
            window.alert("앗! 이미지 업로드에 문제가 있어요!");
            console.log("앗! 이미지 업로드에 문제가 있어요!", err);
          });
      });
    }
  };
};- 게시글 수정 버튼 클릭시 게시글 수정 페이지로 이동하고, 사진, 레이아웃 타입, 내용등 필요 정보를 수정하고 수정 버튼을 클릭시 변경 사항을 변수로 받아 해당 문서 id 값을 가진 필드값을 수정
느낀점
저번주에 배웠던 리액트 기본 개념에서 더 나아가 좀 더 깊은 리덕스 개념들을 사용하면서 로그인 및 회원가입, 게시글 등록 및 수정등 여러 기능들을 사용하면서 프로젝트를 진행해보았다.
아직 손에 많이 익질 않았지만, 매우 재미있게 개발을 했던것 같다. 개발이라는것은 처음에는 참 이해가 안가고 어렵지만 프로젝트를 진행하면서 많은 고민을 하면서 적용을 하다보면 갑작스럽게 이해가 가고 손에 익는 계기가 오게되는것 같다. 이러한 과정이 참 뿌듯하고 재미있는 것 같다.
항해99를 하면서 여러 프로젝트를 만들어 실무적인 감각을 키울 수 있다는 것에 다시 한번 감사하고
이 기회를 최대한 활용하여 나의 리액트 주특기 감각을 최대치로 끌어올려 봐야겠다고 생각한다.
github url
- https://github.com/zlzlzlmo/image_community
