NewsAPI를 활용하여 본격적으로 프로젝트를 진행하기 전에 필요한 모델과 구조를 그려보았다.
먼저 가져올 데이터의 형식은
https://newsapi.org/v2/everything?**q=apple**&**from=2023-05-14**&**to=2023-05-14**&**sortBy=popularity**&apiKey=<key값>
위의 API Key를 활용하여 apple에 대해 가져오고 형식은 아래와 같다.
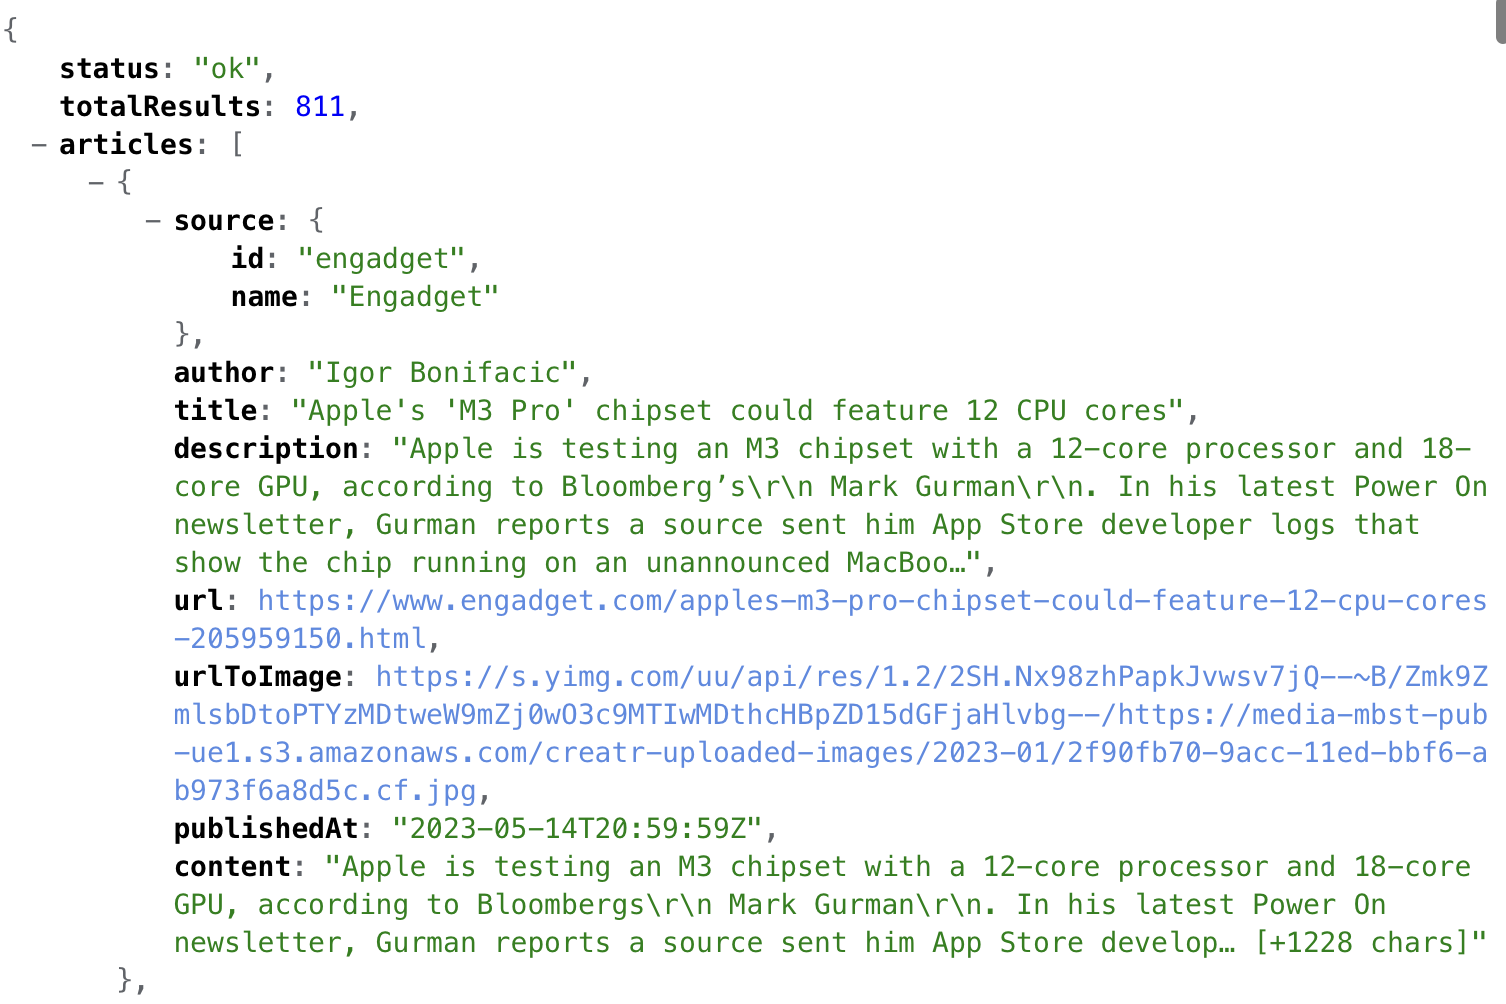
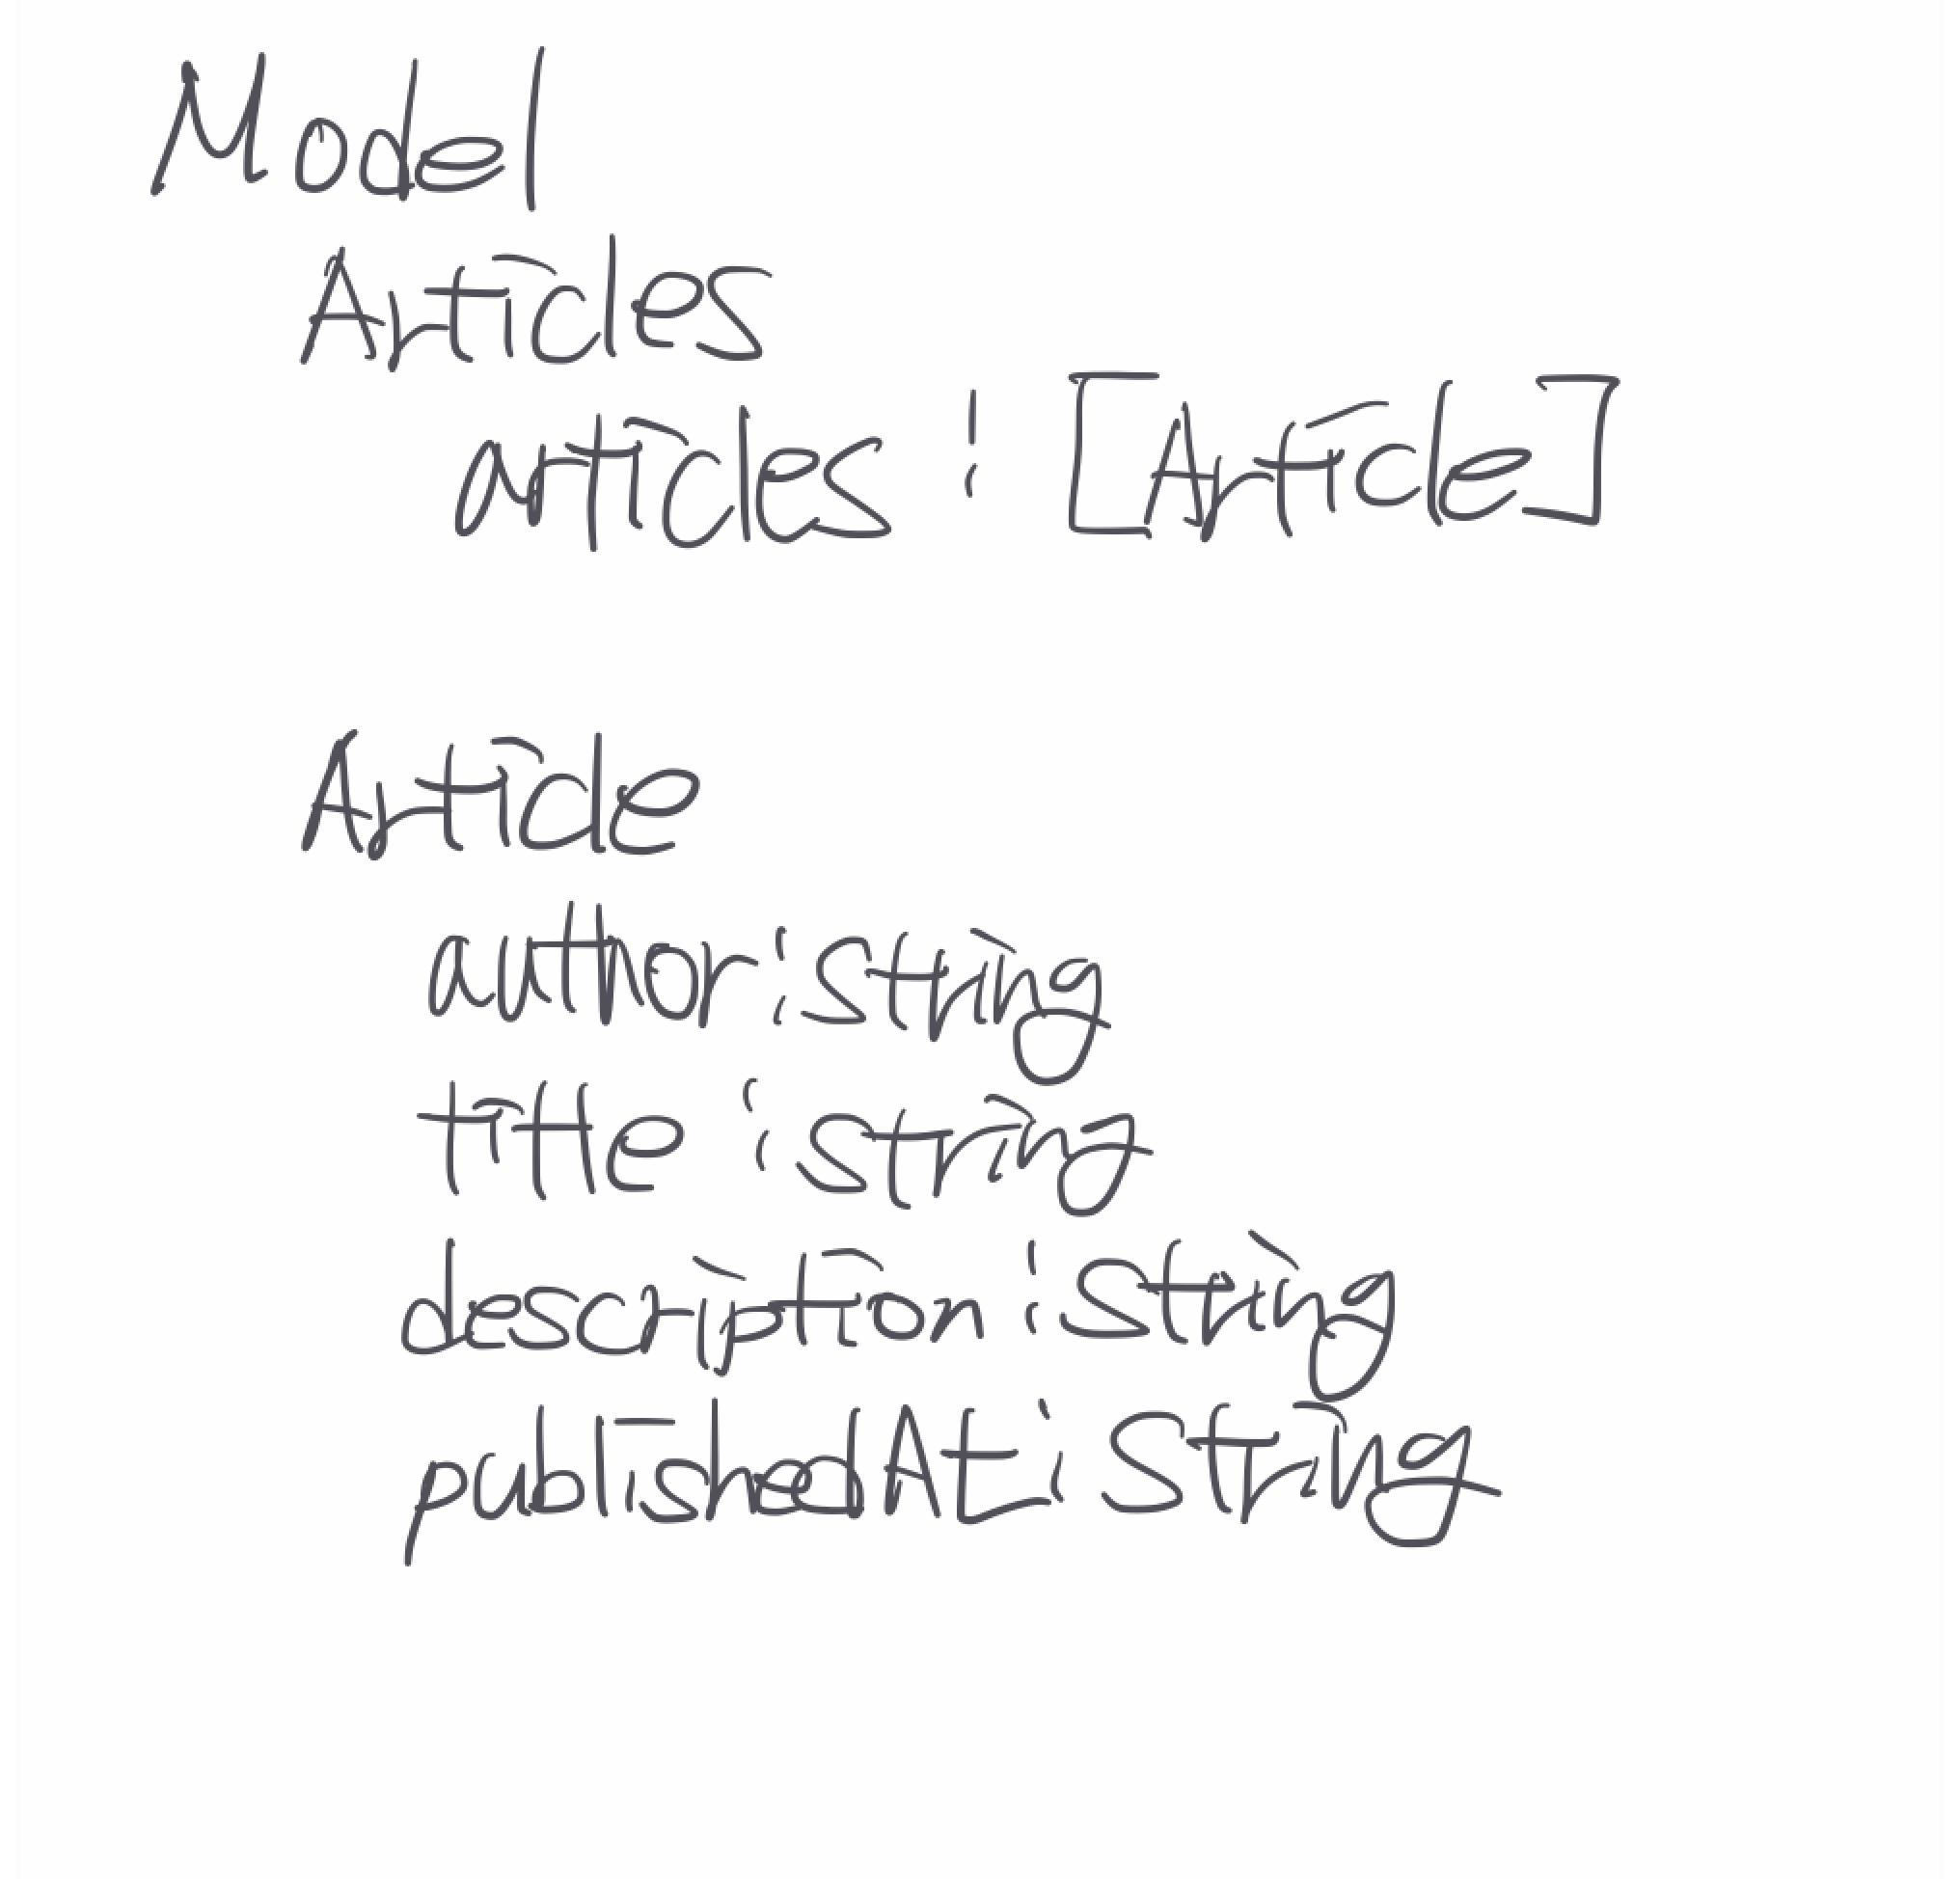
나는 여기서 author, title, description, publishedAt을 사용하고 publishedAt에서 시간을 정제하여 나타낼 것이다.
따라서 이에 맞춘 모델을 구상했다.
다음으로 네트워크 통신과 통신 후에 데이터를 어떻게 바인딩할지에 대해 구상했다.
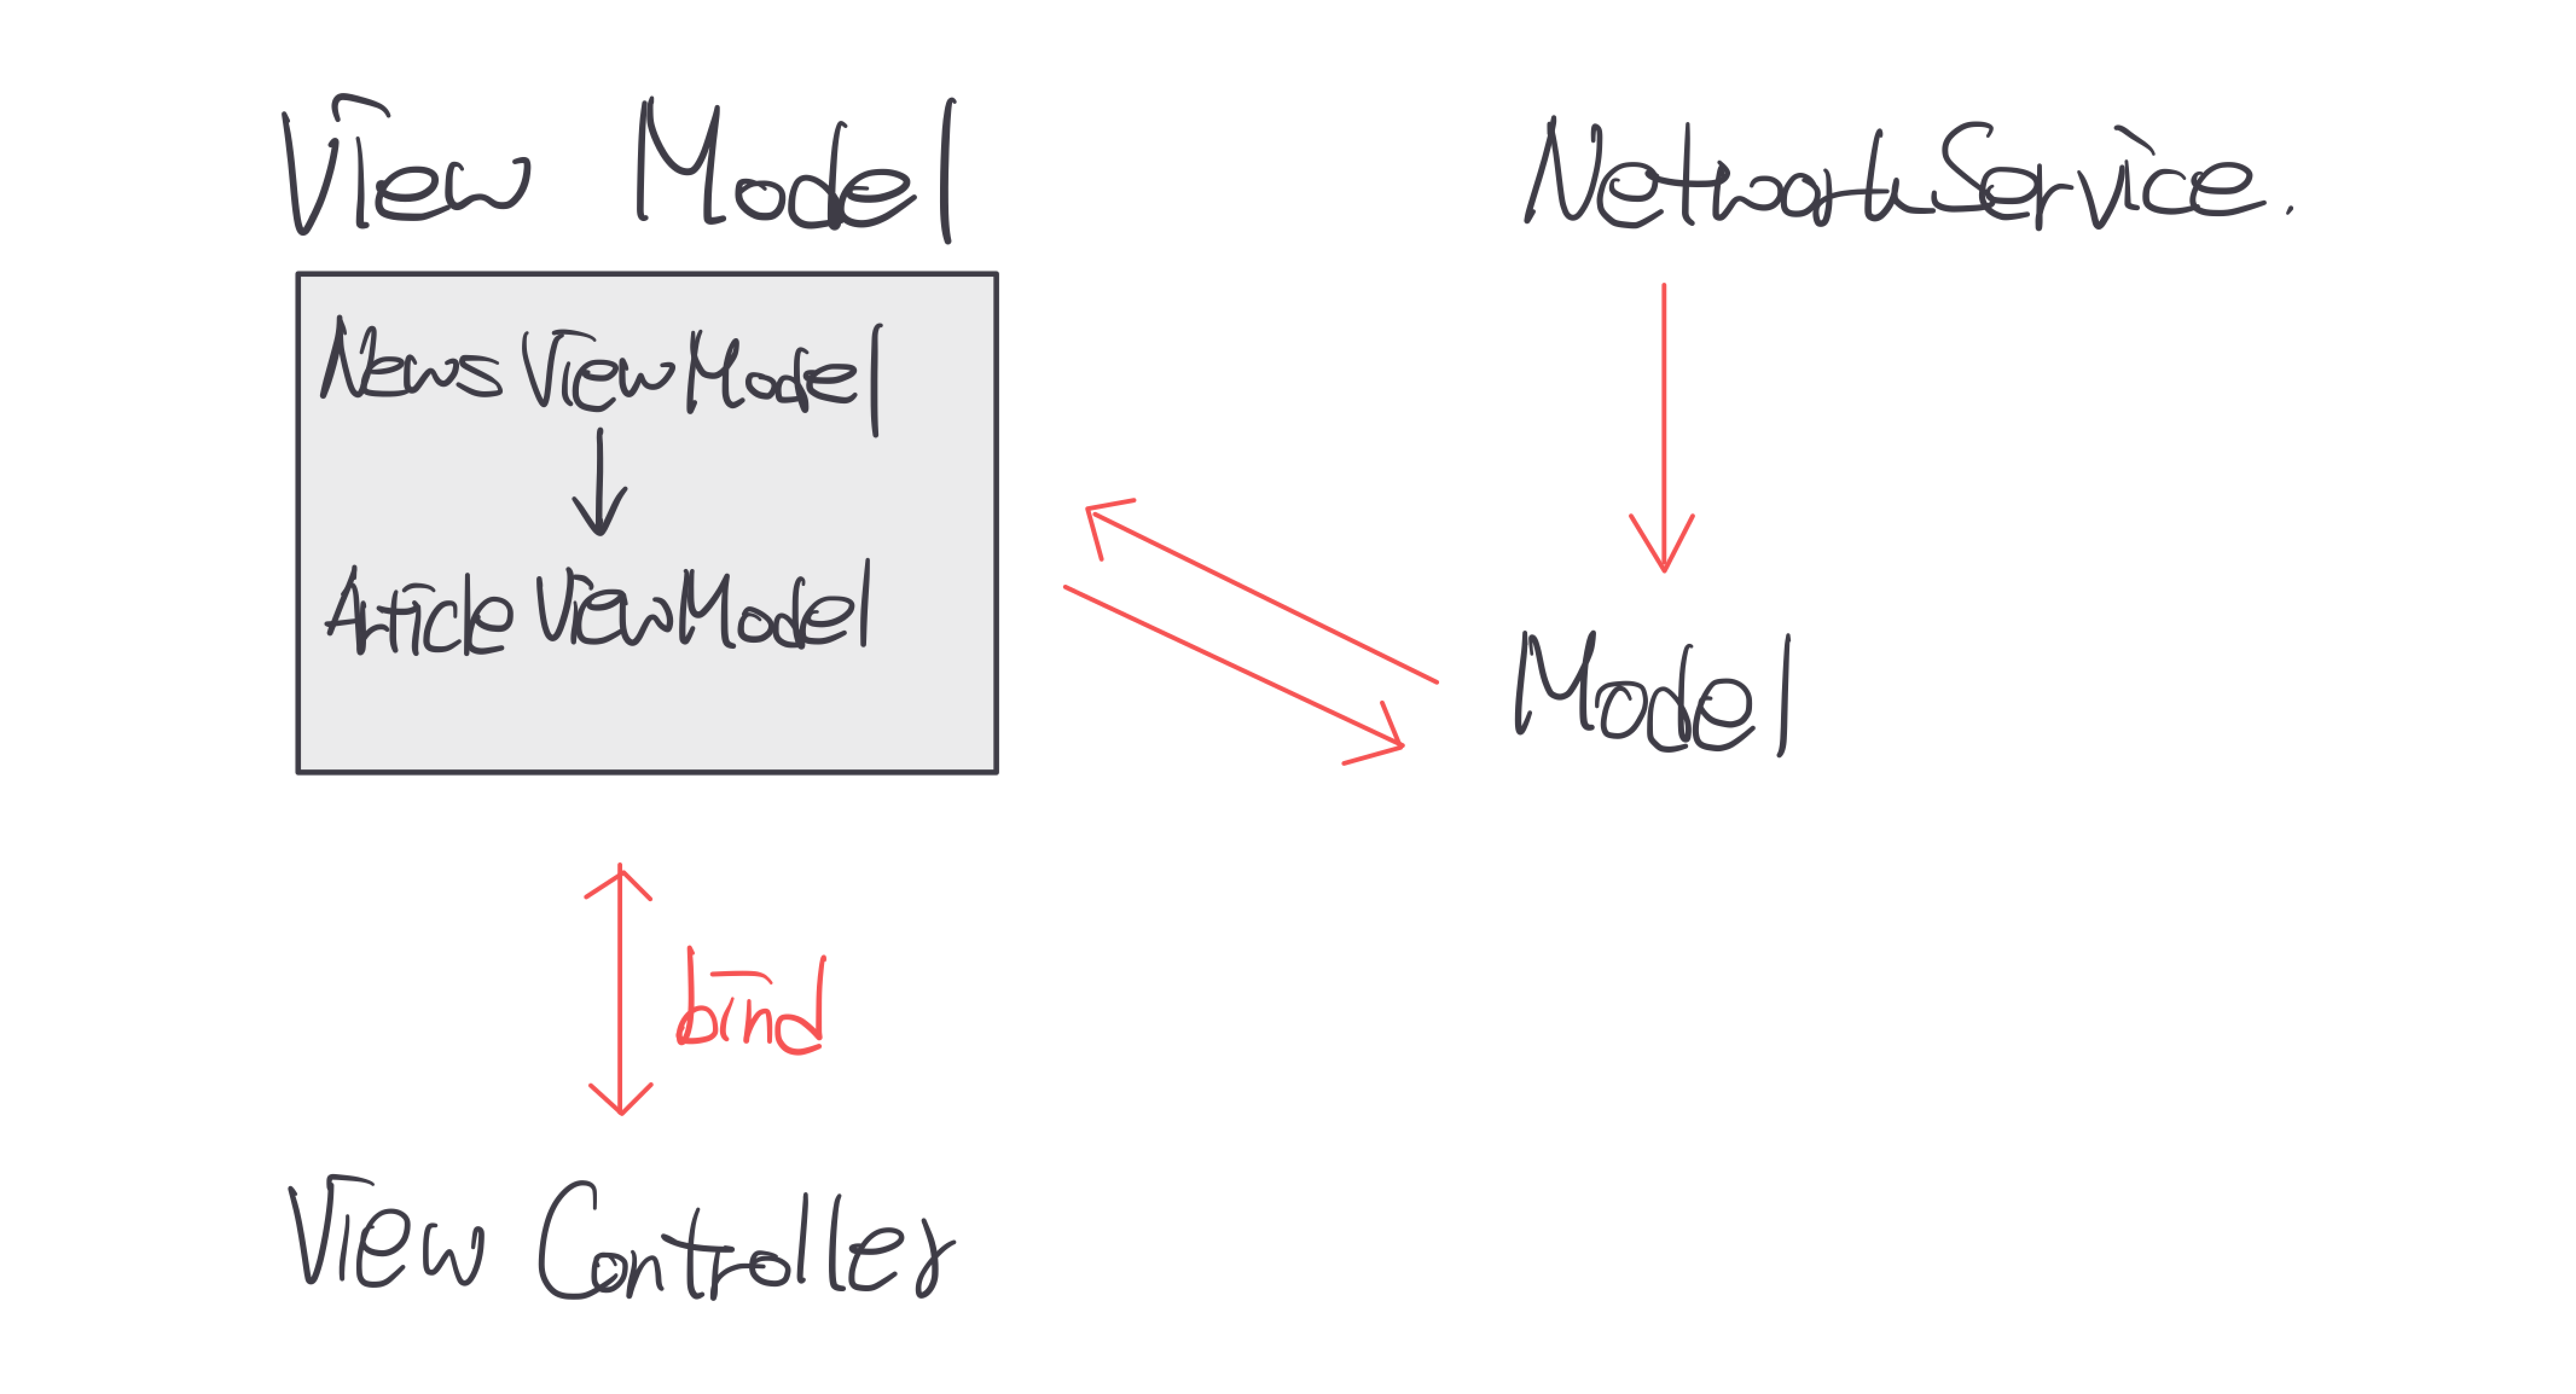
NetworkService가 URLSession을 활용하여 NewsAPI에서 데이터를 불러오고 이를 모델에 맞춰서 전달한다.
이때
NetworkService를 따로 분리한 이유는 네트워크 통신의 테스트를 위함이다.
각각의 테스트가 목적 중의 하나인 만큼 따로 테스트 코드를 통해 네트워크 통신을 테스트할 수 있도록 했다.
ViewModel 에서는 전달받은 데이터를 View를 구성하도록 전달하고 필요하다면 정제하여 전달하도록 하는 메소드를 구현한다.
ViewController에서는 ViewModel의 데이터 전달 메소드를 사용하여 화면에 나타낼 수 있도록 했다.
구현
위의 구상대로 구현해보았다.

먼저 NetworkService 클래스를 구현하고 Articles 모델에 맞춰서 전달하도록 했다.
만약 에러가 발생한다면 nil을 반환하도록 구현했다.
class NetworkService {
    func getArticles(completion: @escaping ([Article]?) -> Void ){
        guard let url = URL(string: "https://newsapi.org/v2/everything?q=apple&from=2023-05-14&to=2023-05-14&sortBy=popularity&apiKey=1d54e43914a942ccb07949ebf0d00e3d") else { return }

        URLSession.shared.dataTask(with: url){ data , response, error in
            if let error = error {
                print(error.localizedDescription)
                completion(nil)
            }
            guard let data = data else { return }
            let articles = try? JSONDecoder().decode(Articles.self,from: data )
            if let articles = articles {
                completion(articles.articles)
            }
        }.resume()
    }
}
다음으로 ViewModel을 구현했다.
ViewModel은 NewsViewModel과 ArticleViewModel로 나누어 구현했다.
NewsViewModel은 전체 Article의 배열을 View에 바인딩 시키기 위한 메소드들이 포함되어있다.
Article의 전체 개수를 전달하는 메소드- 인덱스 값에 따라
Article을 전달하는 메소드 News를 정렬하는 메소드
가 들어가도록 구현했다.
struct NewsViewModel {
    var articles: [Article]
}

extension NewsViewModel {
    var articleCount: Int {
        return articles.count
    }
    func articleIndex(_ i: Int) -> ArticleViewModel {
        return ArticleViewModel(article: articles[i])
    }
    mutating func sortArticle(by option: SortOption) {
        switch option {
        case .up:
            articles = articles.sorted(by: { $0.publishedAt?.formatStringToFullDate() ?? Date() < $1.publishedAt?.formatStringToFullDate() ?? Date()})
        case .down:
            articles = articles.sorted(by: { $0.publishedAt?.formatStringToFullDate() ?? Date() > $1.publishedAt?.formatStringToFullDate() ?? Date()})
        }
    }
}ArticleViewModel은 Article 하나의 세부적인 부분을 View에 바인딩하도록 구현했다.
struct ArticleViewModel {
    let article: Article
}
extension ArticleViewModel {
    var author: String {
        guard let author = article.author else { return "" }
        return author
    }
    var title: String {
        guard let title = article.title else { return "" }
        return title
    }
    var description: String? {
        guard let description = article.description else { return "" }
        return description
    }
    var publishedAt: String {
        guard var publishedAt = article.publishedAt else { return "" }
        publishedAt = publishedAt.replacingOccurrences(of: "T", with: " ")
        return publishedAt.components(separatedBy: ["Z"]).joined()
    }
}UITableView의 각 셀마다 들어갈 데이터들을 연산프로퍼티를 활용하여 정제, 전달하도록 했다.
지금 와서 생각해보니 각각의 연산프로퍼티가 아닌 하나의 함수로 전달해도 괜찮을 것 같다.
ViewController 에서는 NewsViewModel 변수를 만들어주고 NetworkService 함수를 사용하여 newsVM 변수를 초기화하고 데이터를 할당해주었다.
private func setUpData() {
        NetworkService().getArticles() { articles in
            if let articles = articles {
                self.newsVM = NewsViewModel(articles: articles)
            }
            DispatchQueue.main.async {
                self.newsTableView.reloadData()
            }
        }
    }
이후에 `TableView`를 새로고침하여 데이터가 `TableView`에 맞게 배치되도록 하였다.
extension NewsViewController: UITableViewDataSource {

    func tableView(_ tableView: UITableView, numberOfRowsInSection section: Int) -> Int {
        if let newVM = newsVM {
            return newVM.articleCount
        } else { return 0 }
    }

    func tableView(_ tableView: UITableView, cellForRowAt indexPath: IndexPath) -> UITableViewCell {
        guard let cell = tableView.dequeueReusableCell(withIdentifier: "News", for: indexPath) as? NewsTableViewCell else { fatalError("no matched newsTableView identifier") }

        if let newsVM = newsVM {
            let articleVM = newsVM.articleIndex(indexPath.row)
            cell.titleLabel.text = articleVM.title
            cell.authorLabel.text = articleVM.author
            cell.dataLabel.text = articleVM.publishedAt
            cell.descriptionLabel.text = articleVM.description
        }
        return cell
    }
}TableView의 DataSource로는 NewsViewModel과 ArticleViewModel의 메소드를 통해 전달하도록 구현했다.
newsVM의 articleIndex 메소드로 TableView의 셀마다 articleVM을 선언하고 ArticleViewModel의 연산 프로퍼티를 셀을 구성하는 요소들에 할당해주었다.
ViewController에서는 단순히 ViewModel 변수를 만들고 그 메소드를 통해 전달받은 데이터를 화면에 표시하도록 구현하였다.
후기
데이터가 없는 경우에 대한 예외처리도 존재하지 않고 아직 부족한 점이 많아보이는 프로젝트이지만 ViewModel에서 전달받은 데이터를 단순히 View에서 보여주기만 하도록 노력해본 프로젝트였다.
추후 NetworkService의 메소드를 사용하는 부분이나 정렬부분을 ViewModel에서 좀 더 다룰 수 있도록 하여 ViewModel과 ViewController의 역할을 보다 확실하게 분리해볼 예정이다.
또한 NetworkService, ViewModel에 대한 테스트 코드를 작성해볼 예정이다.
해당 프로젝트의 소스코드는 여기서 확인할 수 있다.
새롭게 궁금한 점
-
MVVM은 양방향 데이터 플로우를 연결하고 해결해주는 역할을 한다.
-
그렇다면 단방향 데이터 플로우는 뭘까? -
단방향 데이터 플로우를 구현하는 아키텍쳐와 패턴에는 뭐가 있을까 ?
-
기본적으로 양방향 데이터 바인딩을 지원하는 SwiftUI 에서 단방향 데이터 플로우를 구현할 수 있을까 ?
참조
https://42kchoi.tistory.com/292
https://github.com/AbMathur/MVVM_Swift

It's amazing how news apis can streamline access to a wealth of information, making projects like MVVM-based apps much more dynamic and informative. I recently found https://newsdata.io/ news api which provides incredibly valuable.