Navigation..
Navigation Component는 Fragment에서 화면간의 이동을 쉽게 구현하도록 도와주는 역할을 한다. Fragment간의 플로우를 시각적으로 볼수 있다는 특징이 있어 앱 플로우를 보거나 할때 유용하게 쓸 수 있다.
구성요소
-
Navigation Graph : 모든 네비게이션 관련 정보가 모여있는 XML 리소스. 사용자가 앱에서 갈 수 있는 모든 플로우를 보여주고 앱내의 프래그먼트를 한눈에 확인할 수 있다.
-
NavHostFragment : 네비게이션 그래프에 정의된 각 화면의 컨테이너 역할을 하는 프래그먼트. 액티비티나 프래그먼트 내에 포함되며, 네비게이션 그래프에 따라 화면을 표시하고 관리한다. 화면전환, 뒤로가기 동작을 처리하여 사용자의 탐색을 관리.
-
NavController : 사용자가 앱 내에서 이동할 때 NavHost에서 대상 콘텐츠를 정해주는 역할을 한다.
간단히 말하자면..
Navigation Graph의 경로를 따라 이동하거나 특정 화면으로 직접 이동하고자 할 때, 이 정보를 NavController에게 전달하여 NavController가 알맞은 화면을 NavHost에서 표시하도록 함.
사용장점 :
- 화면전환에 대한 표준화된 애니메이션 리소스
- 프래그먼트의 트랜잭션 처리로 간단한 화면전환
- Safe Args 플러그인을 사용하여 데이터를 대상 사이에서 안전하게 전달
👉 Navigation 사용하기
1) 권한 설정
dependencies {
    implementation "androidx.navigation:navigation-fragment:$nav_version"
    implementation "androidx.navigation:navigation-ui:$nav_version"
}
2) 네비게이션 그래프 설정
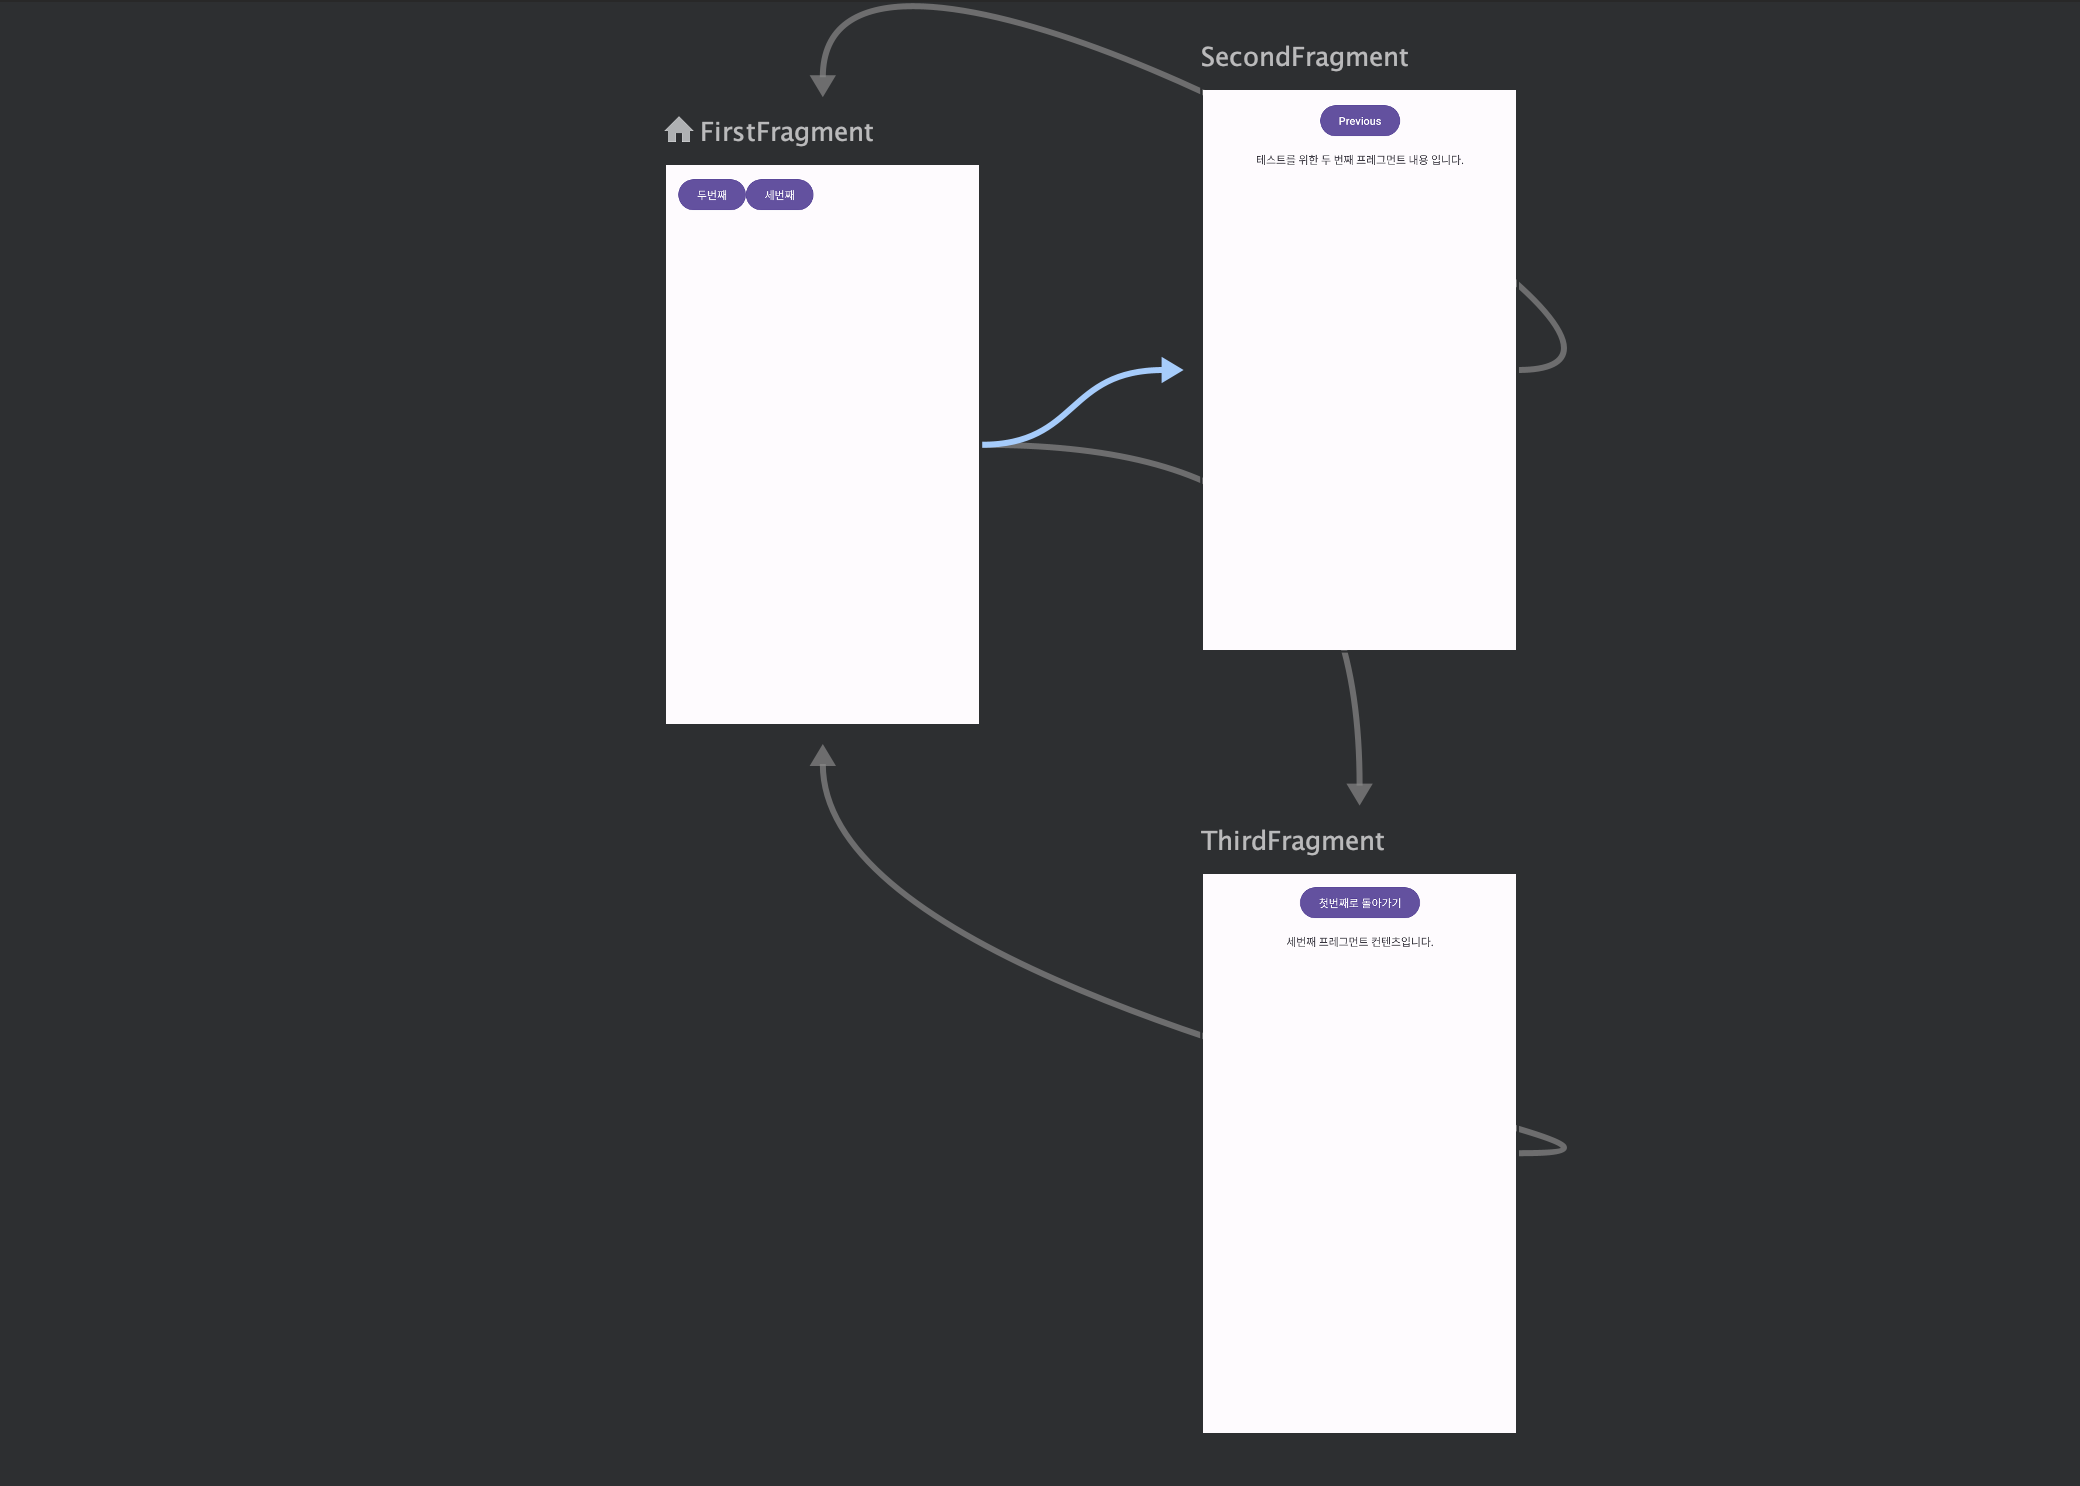
네비게이션 package를 생성 후, nav_grph xml 리소스를 만들어 프래그먼트를 추가해준다. 후에 코드에서 action을 지정하거나 디자인칸에서 선을 이어 경로를 정해준다.
startDestination 속성을 이용해 시작 프래그먼트를 지정해주거나 디자인탭에서 프래그먼트를 클릭하고 집모양 버튼을 눌러주면 시작 프래그먼트를 설정할 수 있다.
<?xml version="1.0" encoding="utf-8"?>
<navigation xmlns:android="http://schemas.android.com/apk/res/android"
            xmlns:app="http://schemas.android.com/apk/res-auto"
            xmlns:tools="http://schemas.android.com/tools"
            android:id="@+id/nav_graph"
            app:startDestination="@id/FirstFragment">

    <fragment
            android:id="@+id/FirstFragment"
            android:name="com.student.yejin.FirstFragment"
            android:label="첫번째 프레그먼트"
            tools:layout="@layout/fragment_first">

        <action
                android:id="@+id/action_FirstFragment_to_SecondFragment"
                app:destination="@id/SecondFragment"/>
        <action android:id="@+id/action_FirstFragment_to_ThirdFragment" app:destination="@id/ThirdFragment"/>
    </fragment>
    <fragment
            android:id="@+id/SecondFragment"
            android:name="com.student.yejin.SecondFragment"
            android:label="두번째 프레그먼트"
            tools:layout="@layout/fragment_second">

        <action
                android:id="@+id/action_SecondFragment_to_FirstFragment"
                app:destination="@id/FirstFragment"/>
    </fragment>
    <fragment
            android:id="@+id/ThirdFragment"
            android:name="com.student.yejin.ThirdFragment"
            android:label="세번째 프레그먼트"
            tools:layout="@layout/fragment_third">
        <action
                android:id="@+id/action_ThirdFragment_to_SecondFragment"
                app:destination="@id/FirstFragment"/>
    </fragment>
</navigation>
3) NavHostFragment 추가 (xml)
<fragment
    android:id="@+id/nav_host_fragment"
    android:name="androidx.navigation.fragment.NavHostFragment"
    android:layout_width="match_parent"
    android:layout_height="match_parent"
    app:navGraph="@navigation/nav_graph" />

    //activity_main 에 추가
4) 화면 간 전환
val navController = findNavController(R.id.nav_host_fragment)
navController.navigate(R.id.destination_id)
findNavController 안에는 xml에 만든 NavHostFragment의 아이디를 넣는다.
navigate 안에는 "@+id/action_FirstFragment_to_ThirdFragment" 와 같은 nav_graph에서 지정한 액션 아이디를 넣어주면 된다.
👉 마무리
화면 전환 뿐만 아니라 bundle을 사용해 값을 navigate로 보낼 수도 있다. 또한 바텀 네비게이션, 네비게이션 드로어에 사용하여 메뉴 아이템을 선택하거나 네비게이션 메뉴를 열 때 특정 화면으로 전환할 수 있다.
화면 전환에 대한 애니메이션 및 전환 효과 또한 쉽게 부여할 수 있으니 도전해보자..... (예진아)