타임리프 레이아웃
웹 화면 뒤적거리다 보면 아래 이미지의 Header, Navigation, Footer 영역에 해당되는 부분은 다른 화면에서도 공통적으로 사용되는 것을 찾아볼 수 있다.
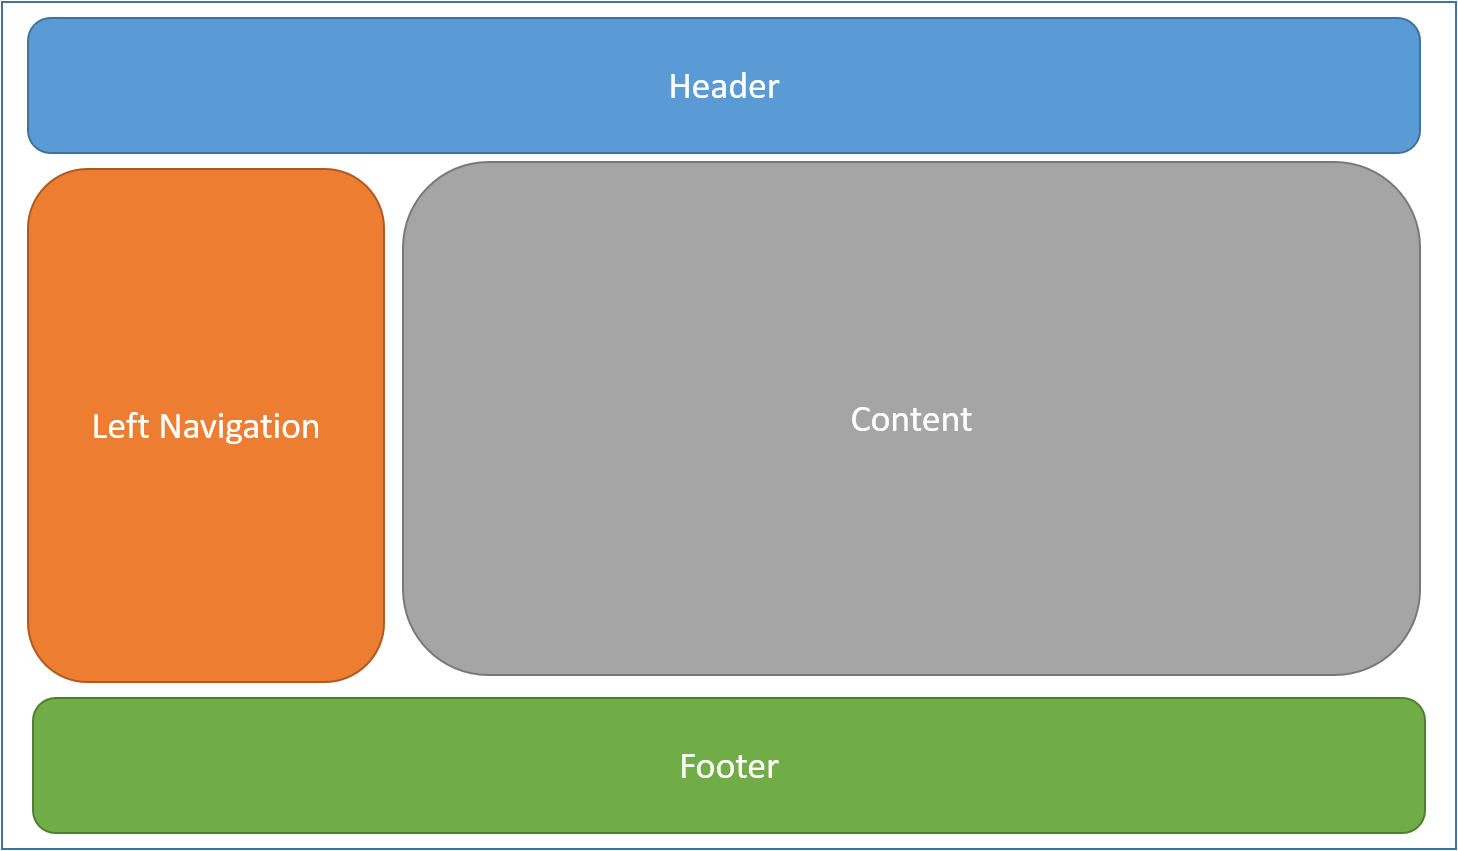
이미지 출처: layout
화면 단을 작업할 때 저런 공통적인 부분을 반복해서 만들지 않도록 레이아웃을 이용해서 영역을 분할하여 작업할 수 있다. 즉 각기 다른 Content만 작업하면 된다.
template Engine으로 Thymeleaf를 사용하고 있으니 thymeleaf-layout-dialect를 사용할 것이다.
thymeleaf layout dialect 사용 방법
Maven을 사용할 경우
<dependency>
	<groupId>nz.net.ultraq.thymeleaf</groupId>
    <artifactId>thymeleaf-layout-dialect</artifactId>
</dependency>
Gradle을 사용할 경우
implementation('nz.net.ultraq.thymeleaf:thymeleaf-layout-dialect')resoucre 디렉토리 구성
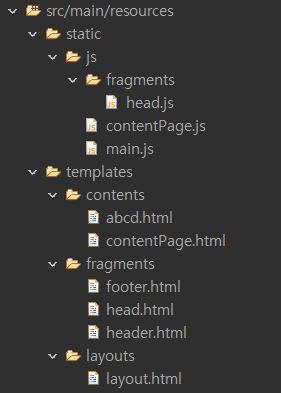
layout.html
모든 영역을 총괄하는 페이지이다.
<!DOCTYPE html>
<html lang="ko"
xmlns="http://www.w3.org/1999/xhtml"
xmlns:th="http://www.thymeleaf.org"
xmlns:layout="http://www.ultraq.net.nz/thymeleaf/layout">
<head th:replace="fragments/head :: headFragment"></head>
<th:block layout:fragment="script"></th:block>
<!-- [header] 영역 시작 -->
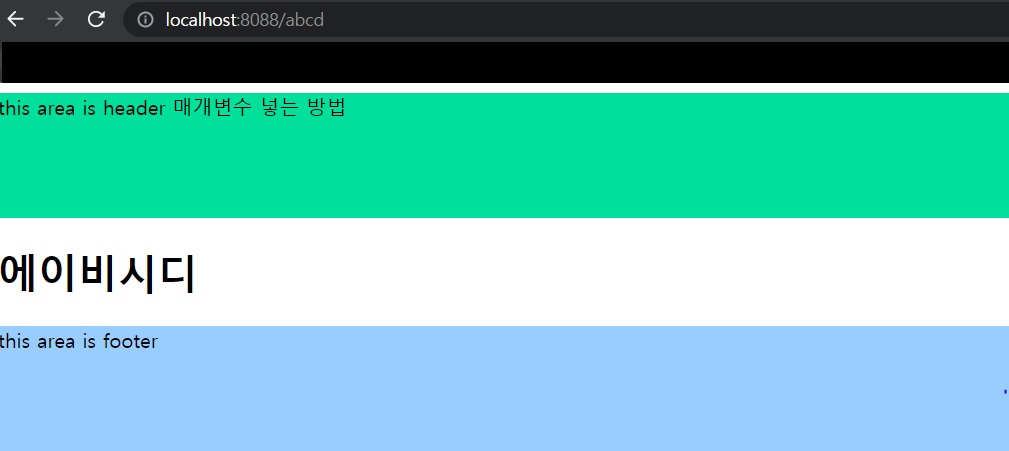
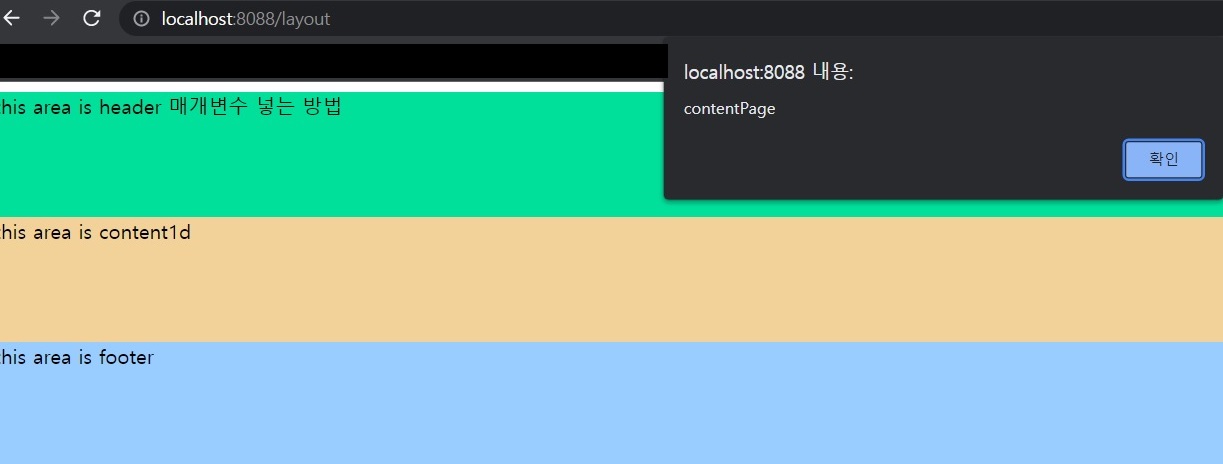
<header th:replace="fragments/header :: headerFragment('매개변수 넣는 방법')"></header>
<!-- [header] 영역 끝 -->
<!-- [content] 영역 시작 -->
<div layout:fragment="content"></div>
<!-- [content] 영역 끝 -->
<!-- [footer] 영역 시작 -->
<footer th:replace="fragments/footer :: footerFragment"></footer>
<!-- [footer] 영역 끝 -->
</html>모든 페이지에서 공통적으로 사용될 링크, 스크립트 등은 head.html에서 작성하면 되지만, 각 페이지만의 고유한 scirpt가 필요할 것이다.
이를 위해서 '<th:block layout:fragment="script"></th:block>'으로 위치만 잡아주고, content 영역에서 다시 '<th:block></th:block> '와 같이 작성해준다.
contentPage.html 참고할 것.
head.html
<!DOCTYPE html>
<html lang="ko" xmlns:th="http://www.thymeleaf.org">
	<head th:fragment="headFragment">
		<meta charset="UTF-8"/>
		<script src="https://code.jquery.com/jquery-3.2.1.min.js"></script>
		<script th:src="@{/js/fragments/head.js}"></script>

		<title>Title</title>
	</head>
</html>
header.html
<!DOCTYPE html>
<html lang="ko" xmlns:th="http://www.thymeleaf.org">
	<header th:fragment="headerFragment(param1)">
		<div style="width: 100%; height: 100px; background: #00e09b;">
			this area is header [[${param1}]]
		</div>
	</header>
</html>
footer.html
<!DOCTYPE html>
<html lang="ko" xmlns:th="http://www.thymeleaf.org">
	<footer th:fragment="footerFragment">
		<div style="width: 100%; height: 100px; background: #99ccff;">
			this area is footer
		</div>
	</footer>
</html>
contentPgae.html
content 영역이다.
<!DOCTYPE html>
<html 	xmlns:th="http://www.thymeleaf.org"
        xmlns:layout="http://www.ultraq.net.nz/thymeleaf/layout"
        layout:decorate="~{layouts/layout}">

	<th:block layout:fragment="script">
		<script th:src="@{/js/contentPage.js}"></script>
	</th:block>

	<div layout:fragment="content">
		<div style="width: 100%; height:100px; background: #f2d299;">
			this area is content1d
		</div>
	</div>
</html>
※
살펴보면 layout:decorate="~{layouts/layout}"> 에서
~{ } 이 부분이 낯설다.
사실 물결과 괄호 표시가 없었을 때 원하던대로 layout이 적용되지 않았다.
해결 방법은 spring boot의 특정 버전을 기준으로 아래와 같이 둘로 나뉘어 작성해야 한다.
layout:decorate="~{ blahbalh }"
layout:decorator="balhblah"
시험 삼아서 하나 더 content 페이지를 만들었다.
<!DOCTYPE html>
<html 	xmlns:th="http://www.thymeleaf.org"
        xmlns:layout="http://www.ultraq.net.nz/thymeleaf/layout"
        layout:decorate="~{layouts/layout}">

	<div layout:fragment="content">
		<h1>에이비시디</h1>
	</div>
</html>
이걸로 작성은 끝났다. 컨트롤러에서 호출해보자.
@GetMapping(value = "/layout")
    public String layout(){
        return "contents/contentPage";
    }
@GetMapping(value = "/abcd")
    public String abcd(){
        return "contents/abcd";
    }