옛날에 certbot을 사용했을 때는 도메인에 txt레코드를 직접 작성해서 인증했거나
web root에 직접 challenge 파일을 넣어주어 인증서를 수동으로 발급했었다..
요즘은 거의 다 자동으로 된다고 한다.
그리고 유명한 registrar들은 DNS Authenticator가 certbot에 구현되어 있다. 한 번 사용해보자.
RHEL9 환경을 기준으로 작성하였습니다.
먼저 certbot cloudflare dns authenticator를 설치한다. (각 배포판마다 패키지 이름이 다를 수 있습니다)
sh-5.1# sudo dnf install python3-certbot-dns-cloudflare -y
Last metadata expiration check: 0:33:55 ago on Thu 10 Nov 2022 01:41:05 PM KST.
Package python3-certbot-dns-cloudflare-1.30.0-1.el9.noarch is already installed.
Dependencies resolved.
Nothing to do.
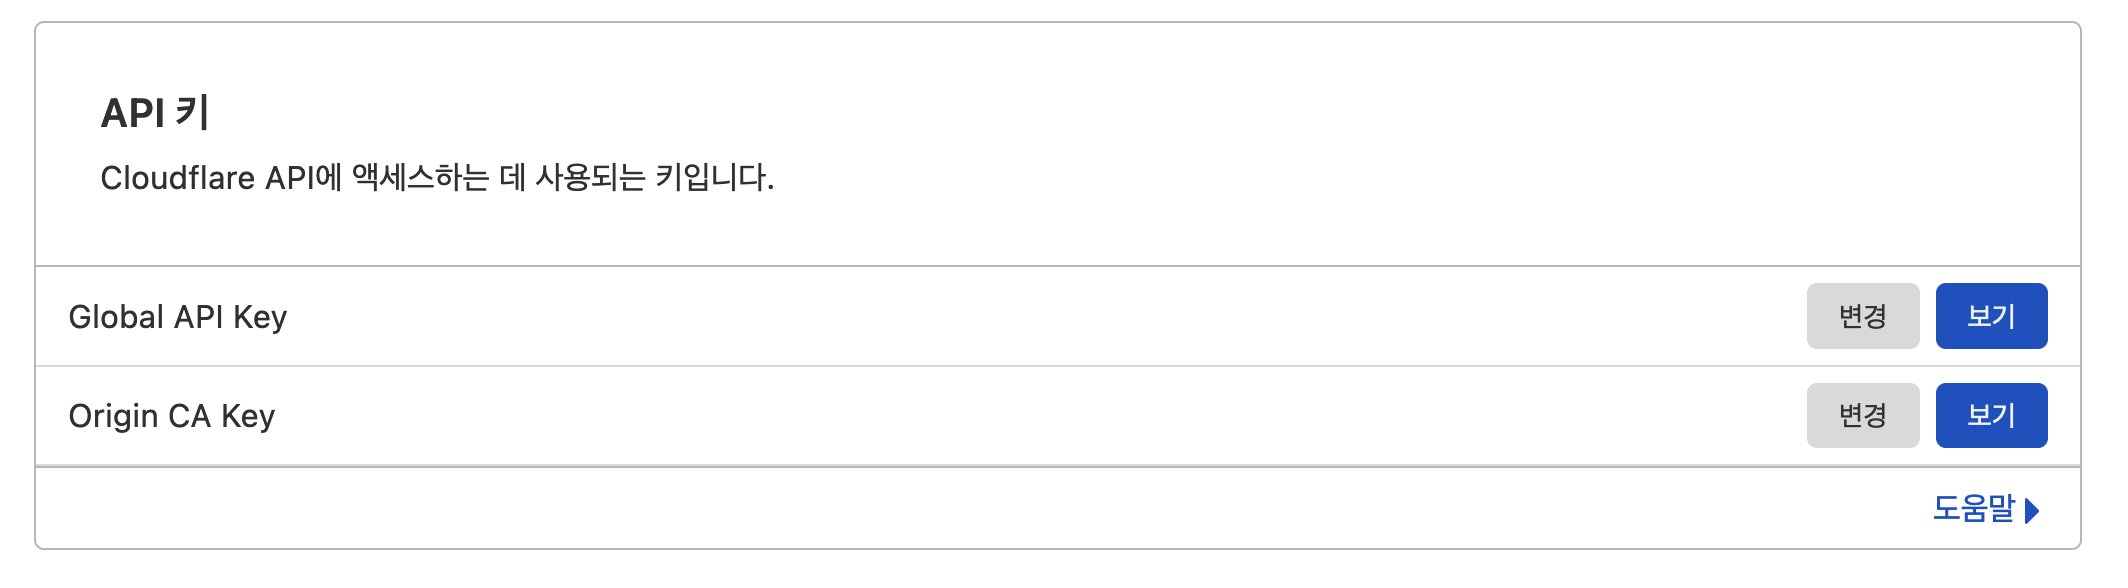
Complete!cloudflare에 가서 API 키를 가져온다.
내 프로필 -> API 토큰 또는 이 링크에 접속하여 Global API를 가져온다.
API 토큰을 가져온 후 서버에 API 토큰을 저장할 폴더를 하나 만들고, 간단한 ini 파일을 하나 생성한다.
자신의 클라우드 플레어 로그인 이메일과 위에서 가져온 API Key를 작성하도록 하자.
sh-5.1# mkdir /root/.secrets
sh-5.1# cat /root/.secrets/cloudflare.ini
dns_cloudflare_email = hurrhnn@naver.com
dns_cloudflare_api_key = [API Key]
준비는 끝났다. certbot 명령어를 입력하여 wildcard 인증서를 발급받아 보자.
ini 파일 위치와 자신의 도메인으로 알맞게 변경하여 명령어를 실행하도록 하자.
sh-5.1# sudo certbot certonly --dns-cloudflare --dns-cloudflare-credentials \
/root/.secrets/cloudflare.ini -d hurrhnn.xyz,*.hurrhnn.xyz \
--preferred-challenges dns-01

Saving debug log to /var/log/letsencrypt/letsencrypt.log
Certificate not yet due for renewal

You have an existing certificate that has exactly the same domains or certificate name you requested and isn't close to expiry.
(ref: /etc/letsencrypt/renewal/hurrhnn.xyz.conf)

What would you like to do?
- - - - - - - - - - - - - - - - - - - - - - - - - - - - - - - - - - - - - - - -
1: Keep the existing certificate for now
2: Renew & replace the certificate (may be subject to CA rate limits)
- - - - - - - - - - - - - - - - - - - - - - - - - - - - - - - - - - - - - - - -
Select the appropriate number [1-2] then [enter] (press 'c' to cancel): 1

- - - - - - - - - - - - - - - - - - - - - - - - - - - - - - - - - - - - - - - -
Certificate not yet due for renewal; no action taken.
- - - - - - - - - - - - - - - - - - - - - - - - - - - - - - - - - - - - - - - -
필자는 이미 사용하고 있고 재발급 날짜가 아니라서 아무것도 하지 않았다.
성공적으로 발급됬다면 /etc/letsencrypt/live/[your domain] 폴더에 인증서가 발급되었을 것이다.
sh-5.1# pwd
/etc/letsencrypt/live/hurrhnn.xyz
sh-5.1# ls
cert.pem chain.pem fullchain.pem privkey.pem README
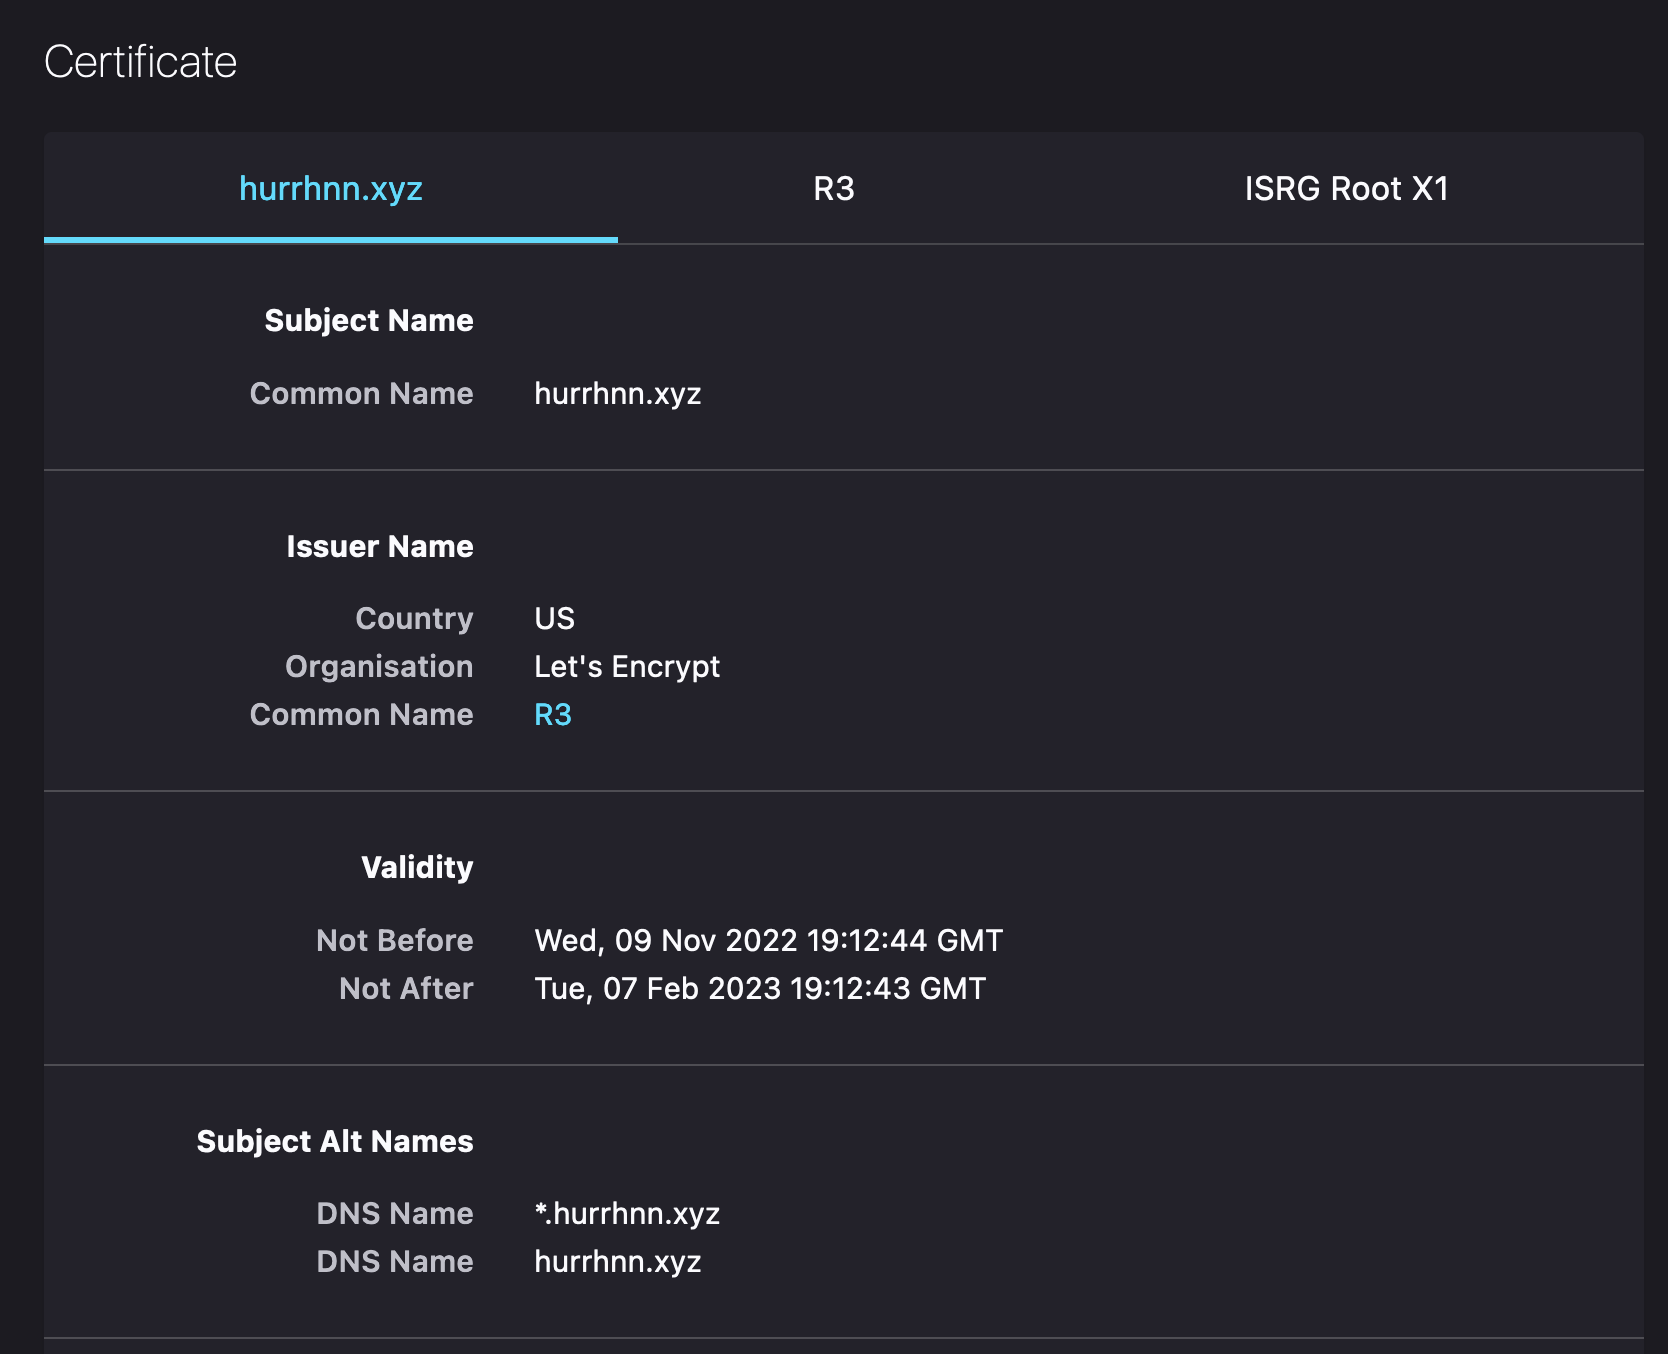
sh-5.1#마지막으로, nginx에 발급받은 인증서를 적용시키고 wildcard가 작동하는지 확인해본다.
sh-5.1# cat /etc/nginx/nginx.conf

... (중략)
upstream sonarqube {
    server 127.0.0.1:9099;
}

server {
        listen          8443 ssl;
        server_name     sonarqube.hurrhnn.xyz;
        ssl_session_timeout 5m;
        ssl_protocols TLSv1.2 TLSv1.3;
        ssl_ciphers 'EECDH+AESGCM:EDH+AESGCM:AES256+EECDH:AES256+EDH';
        ssl_prefer_server_ciphers  on;

        ssl_certificate /etc/letsencrypt/live/hurrhnn.xyz/fullchain.pem;
        ssl_certificate_key /etc/letsencrypt/live/hurrhnn.xyz/privkey.pem;

        access_log      /var/log/nginx/sonarqube/access.log;
        error_log       /var/log/nginx/sonarqube/error.log;

        ignore_invalid_headers off;

        location / {
            sendfile off;
            proxy_pass         http://sonarqube;
            proxy_redirect     default;
            proxy_http_version 1.1;

            proxy_set_header   Connection        $connection_upgrade;
            proxy_set_header   Upgrade           $http_upgrade;

            proxy_set_header   Host              $host;
            proxy_set_header   X-Real-IP         $remote_addr;
            proxy_set_header   X-Forwarded-For   $proxy_add_x_forwarded_for;
            proxy_set_header   X-Forwarded-Proto $scheme;
            proxy_max_temp_file_size 0;

            client_max_body_size       1024m;

            proxy_connect_timeout      300;
            proxy_send_timeout         300;
            proxy_read_timeout         300;
            proxy_buffering            off;
            proxy_request_buffering    off; # Required for HTTP CLI commands
            proxy_set_header Connection ""; # Clear for keepalive
        }
    }

 ... (생략)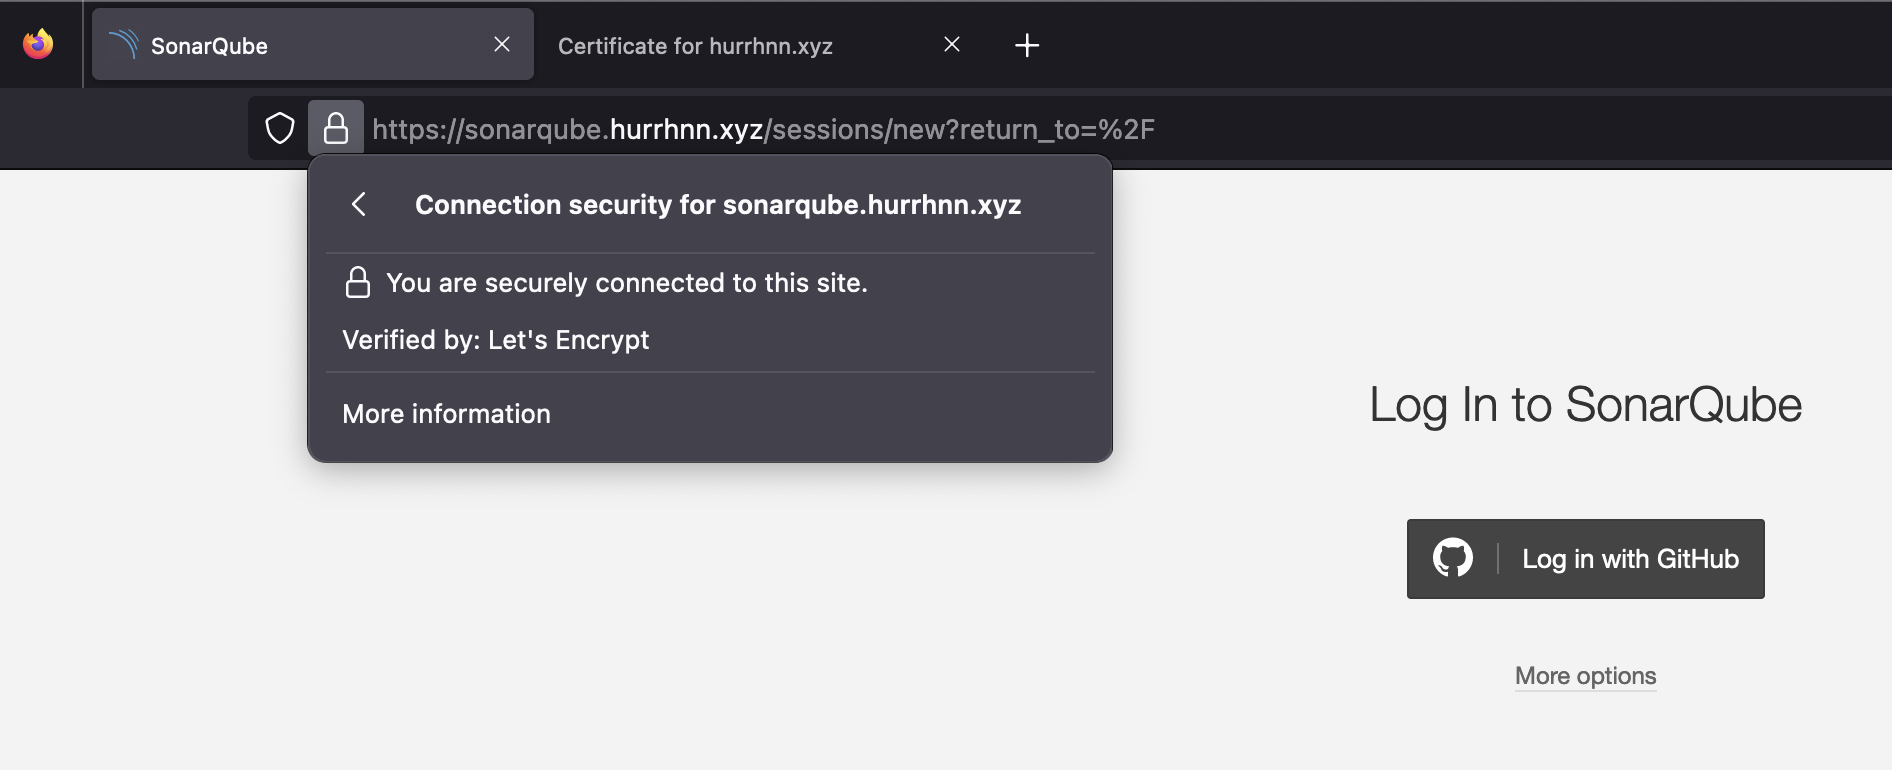
끝!
