Django : 파이썬 기반 웹 프레임워크
1. 가상환경 및 Django 설치
가상환경 : 프로젝트별 별도 패키지 관리
0. 프로젝트 저장소 생성
- 프로젝트를 저정할 저장소를 생성해 준다.
$ mkdir CRUD
$ cd CRUD
1. 가상환경 생성 및 실행
- 가상환경 폴더를
.gitignore로 설정을 해둔다.
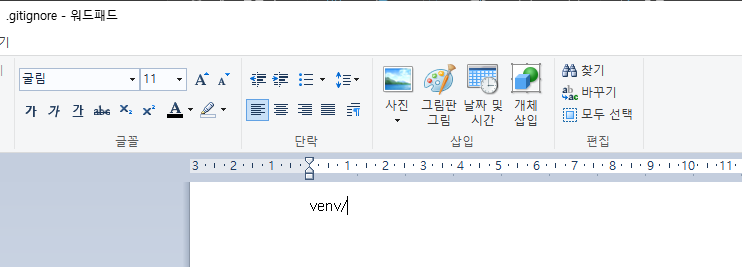
$ python -m venv venv
$ source venv/Scripts/activate
(venv) $
2. Django 설치 및 기록
$ pip list # 설치 전 어떤 패키지가 설치되어 있는지 확인
$ pip install django==3.2.13
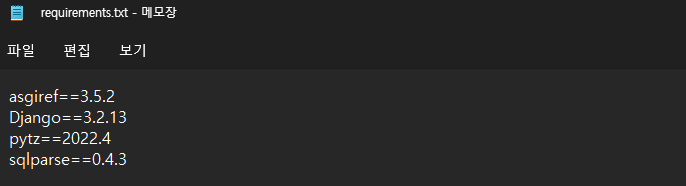
$ pip freeze > requirements.txt #환경 공유를 위해 현재 환경 저장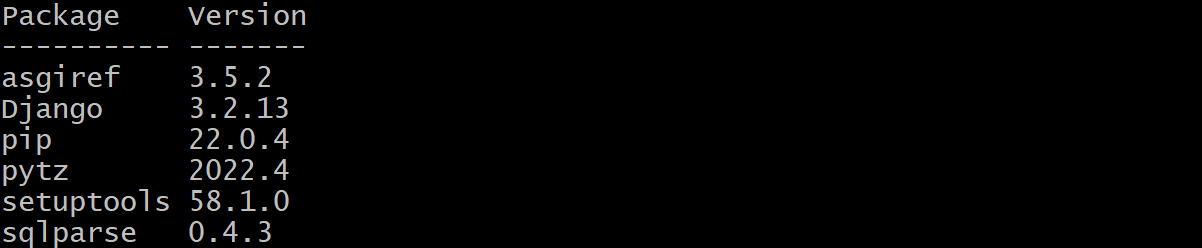
3. Django 프로젝트 생성
$ django-admin startproject pjt . #현재 위치에서 프로젝트를 생성2. app 생성 및 초기 설정
Django : 주요 기능 단위의 App 구조, App 별로 MTV를 구조를 가지는 모습 +
urls.py
1. app 생성
# python manage.py startapp [app_name]
$ python manage.py startapp articles
2. app 등록
settings.py파일의INSTALLED_APPS에 추가
INSTALLED_APPS = [
    'articles',
    ...
]
3. runserver
$ python manage.py runserver브라우저에서
localhost:8000url 요청 후 서버 확인
4. Model 정의 (DB 설계)
1. 클래스 정의
# articles/models.py
from django.db import models

class Article(models.Model):
    title = models.CharField(max_length=20)
    content = models.TextField()
    created_at = models.DateTimeField(auto_now_add=True) # 최초 생성시간 저장
    updated_at = models.DateTimeField(auto_now=True)  # 수정된 시간 저장
2. 마이그레이션 파일 생성
- app 폴더 내의
migrations폴더에 생성된 파일 확인
$ python manage.py makemigrations3. DB 반영(migrate)
$ python manage.py migrate5. urls.py 앱 단위 분리 및 연결
app 단위의 URL 관리
# pjt/urls.py
from django.contrib import admin
from django.urls import path, include    # include 사용 위해 import

urlpatterns = [
    ...
    path('articles/', include('articles.urls')),
    # articles 이름의 urls.py를 연결
]
# articles/urls.py
from django.urls import path
from . import views # 현재 디렉토리의 views.py를 import
app_name = 'articles'
urlpatterns = [
# http://127.0.0.1:8000/articles/
path('', views.index, name='index'), # views.py에서 index 함수 실행
...
]-
활용 :
articles:index=>/articles/ -
Template에서 활용 예시
{% url 'articles:index' %}- View에서 활용 예시
redirect('articles:index')3. CRUD 기능 구현
url 기능 구성
index: 게시글 목록
=> create에서 if else로 합치기 가능new: 글 작성 페이지 이동
create: 폼으로 데이터 생성
detail: index에서 글 눌러서 세부 정보 보여주기
update: detail에서 수정
delete: detail에서 삭제
0. ModelForm 선언
선언된 모델에 따른 필드 구성
(1) Form 생성
(2) 유효성 검사
# articles/forms.py
from django import forms
from .models import Article

class ArticleForm(forms.ModelForm):
    class Meta:
        model = Article   # Article이라는 model데이터에서
        fields = ['title', 'content'] # title, content 항목으로 폼을 만들어줘
모델폼 내부 속성
fields에 __all__ 적고 exclude를 추가해도 된다. 그리고 labels 속성을 통해 폼의 라벨을 변경할 수 있다.
		...
		fields = '__all__'
        exclude = ['created_at', 'updated_at', 'view_count']
        labels = {
        'title' : '리뷰 제목',
        'content' : '리뷰 내용',
        'movie_name' : '영화 제목',
        'grade' : '평점(0~10)',
        }
1. 게시글 목록 ( index ) _ Read
1. 게시글 목록 생성
(1) urls.py
# articles/urls.py
...
urlpatterns = [
  # http://127.0.0.1:8000/articles/
  path('', views.index, name='index'), # views.py에서 index 함수 실행
]
(2) views.py
from django.shortcuts import render

def index(request):
  articles = Article.objects.order_by('-pk') # pk기준 내림차순으로 모든 데이터
  context = {
    'articles' : articles
  }
  return render(request,'articles/index.html', context)
  # templates/articles/index.html을 렌더해줌.
(3) templates 앱 단위 분리

templates는 서로 다른 앱도 하나의 저장소 처럼 연동이 되기 때문에 앱별로 구분을 해주어야 한다.
(5) base.html 생성
프로젝트 폴더에 templates 폴더 생성 후 base.html 생성
<!-- crud_pjt/templates/base.html -->
<!DOCTYPE html>
<html lang="ko">
<head>
  <meta charset="UTF-8">
  <meta http-equiv="X-UA-Compatible" content="IE=edge">
  <meta name="viewport" content="width=device-width, initial-scale=1.0">
  <title>Document</title>
</head>
<body>
  <div class="container">
    {% block body %}
    {% endblock body %}
  </div>
</body>

</html>
settings.py에서 DIRS에 TEMPLATES 경로 추가해주기

(4) index.html 게시글 목록 생성
{% extends 'base.html' %}
{% block body %}
  <h1>게시글 목록</h1>
  {% for article in articles %}
  <h2>{{ article.title }}</h2>
  <p>{{ article.created_at }} | {{ article.updated_at }}</p>
  {% endfor %}
{% endblock body %}
2. 게시글 작성 ( create ) _ Create
사용자에게 HTML Form 제공, 입력받은 데이터를 처리 (ModelForm 로직으로 변경)
1. HTML Form 제공 ( new create )
(1) urls.py
...
urlpatterns = [
    ...
    path('create/', views.create, name='create'),
]
(2) views.py
...
from .forms import ArticleForm
...
def create(request):
article_form = ArticleForm()
context = {
'article_form': article_form
}
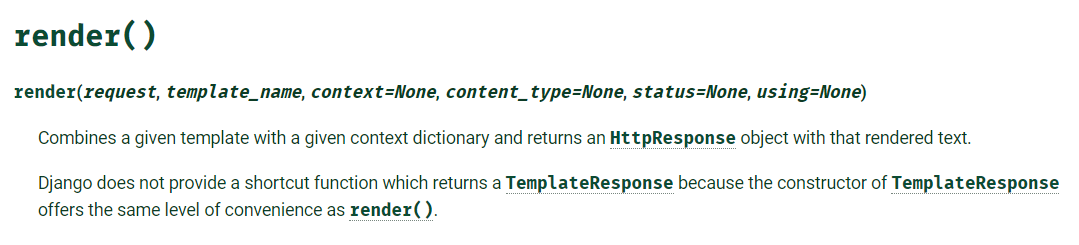
return render(request, 'articles/create.html', context=context)context = context는 사실 context만 적어줘도 된다.
함수 파라미터 3번째 값이 기본으로 context 파라미터 위치이므로 명시를 하지 않아도 변수를 넘겨준다. 명시 하기 위해서 context=context로 적었다.
장고 공식 문서 render( ) 설명
(3) articles/create.html
-
HTML Form 태그 활용시 핵심
-
어떤 필드를 구성할 것인지 (
name,value) -
어디로 보낼 것인지 (
action,method)
-
<h1>글쓰기</h1>
<form action="" method="POST">
  {% csrf_token %}                     <!-- post 전송시 csrf 암호화 필요 -->
  {{ article_form.as_p }}
  <input type="submit" value="글쓰기">
</form>
{{ form.as_p }}은
From rendering options이다.
as_p(): 각 field를 p태그로 랜더링as_ul(): 각 field를 li태그로 랜더링. ul은 직접 작성as_table(): 각 field를 tr태그로 랜더링. table은 직접 작성
2. 입력받은 데이터 처리
POST http://127.0.0.1:8000/articles/create/
게시글 DB에 생성하고 index 페이지로 redirect
- POST 요청 처리 흐름 (주의! invalid)
def create(request):
    if request.method == 'POST':
        article_form = ArticleForm(request.POST)
        if article_form.is_valid():
            article_form.save()
            return redirect('articles:index')
    else:
        article_form = ArticleForm()
    	context = {
        'article_form': article_form
    	}
    	return render(request, 'articles/create.html', context=context)
if 와 else 로 request가 GET인지, POST인지 판단하여 실행
이렇게 하면 create.html에서 action에 값을 주지 않아도 된다.
3. 상세보기 ( detail ) _ Read
특정한 글을 본다. 제목과 수정 시간만 뜨는 항목을 누르면 세부 내용 보여준다.
http://127.0.0.1:8000/articles/detail/<int:pk>/
1. index에서 제목 클릭 시 세부항목 페이지로 넘어감 ( detail )
GET http://127.0.0.1:8000/articles/detail/<int:pk>/
(1) index.html 에 detail 버튼 생성 ( a 태그 활용 )
...
<h2>
    <a href="{% url 'articles:detail' article.pk %}">    <!--pk 정보를 넘겨줌-->
      {{ article.title }}
    </a>
</h2>
...
(2) urls.py
urlpatterns = [
    ...
    path('detail/<int:pk>', views.detail, name='detail'),
]
(3) views.py
...
def detail(request, pk):
  article = Article.objects.get(pk=pk)
  context = {
    'title':article.title,
  }
  return render(request, 'articles/detail.html', context )
(4) detail.html
{% extends 'base.html' %}
{% block body %}
<h1>{{ article.title }}</h1>
<p>{{ article.content }}</p>
<a href="{% url 'articles:update' article.pk %}"> <!-- update url 추가 -->
  수정
</a>
<a href="{% url 'articles:delete' article.pk %}"> <!-- delete url 추가 -->
  삭제
</a>
<a href="{% url 'articles:index' %}">
  게시판 돌아가기
</a>
{% endblock body %}
4. 삭제하기 ( delete ) _ Delete
특정한 글을 삭제한다.
http://127.0.0.1:8000/articles/detail/<int:pk>/delete/
1. HTML POST 요청 보낼 주소 추가하기
(1) detail.html에 delete url 추가
...
<form action="{% url 'articles:delete' article.pk %}" method="POST">
  {% csrf_token %}
  <input type="submit" value="삭제">
</form>
...
(2) urls.py
urlpatterns = [
    ...
    path('delete/<int:pk>', views.delete, name='delete'),
]
(3) views.py
def delete(request, pk):
  article = Article.objects.get(pk=pk)
  print(f'method : {request.method}')
  if request.method == 'POST':
    article.delete()
    return redirect('articles:index')
  else:
    return redirect('articles:index', article.pk)
5. 수정하기
특정한 글을 수정한다. => 사용자에게 수정할 수 양식을 제공하고(GET) 특정한 글을 수정한다.(POST)
http://127.0.0.1:8000/articles/<int:pk>/update/
1. HTML
(1) datail.html에 update url 추가
...
<a href="{% url 'articles:update' article.pk %}">
  수정
</a>
...
(2) urls.py
urlpatterns = [
    ...
    path('<int:pk>/update/', views.update, name='update'),
]
(3) views.py
def update(request, pk):
  article = Article.objects.get(pk=pk)
  if request.method == 'POST':
    article_form = ArticleForm(request.POST, instance=article)
    if article_form.is_valid():
      article_form.save()
      return redirect('articles:index')
  else:
    article_form = ArticleForm(instance=article)
    context = {
      'article_form' : article_form
    }
    return render(request, 'articles/update.html', context)
추천 문서
