Button에 둥근 모서리의 회색 테두리 디자인을 적용해야할 일이 있었다. xml로 shape를 사용하여 background에 사용할 drawable를 만들어줬다.
그런데 Button에 drawable background가 제대로 적용되지 않는 것이다. 모양만 적용되고 색상은 덮이는 현상이 발생했다.
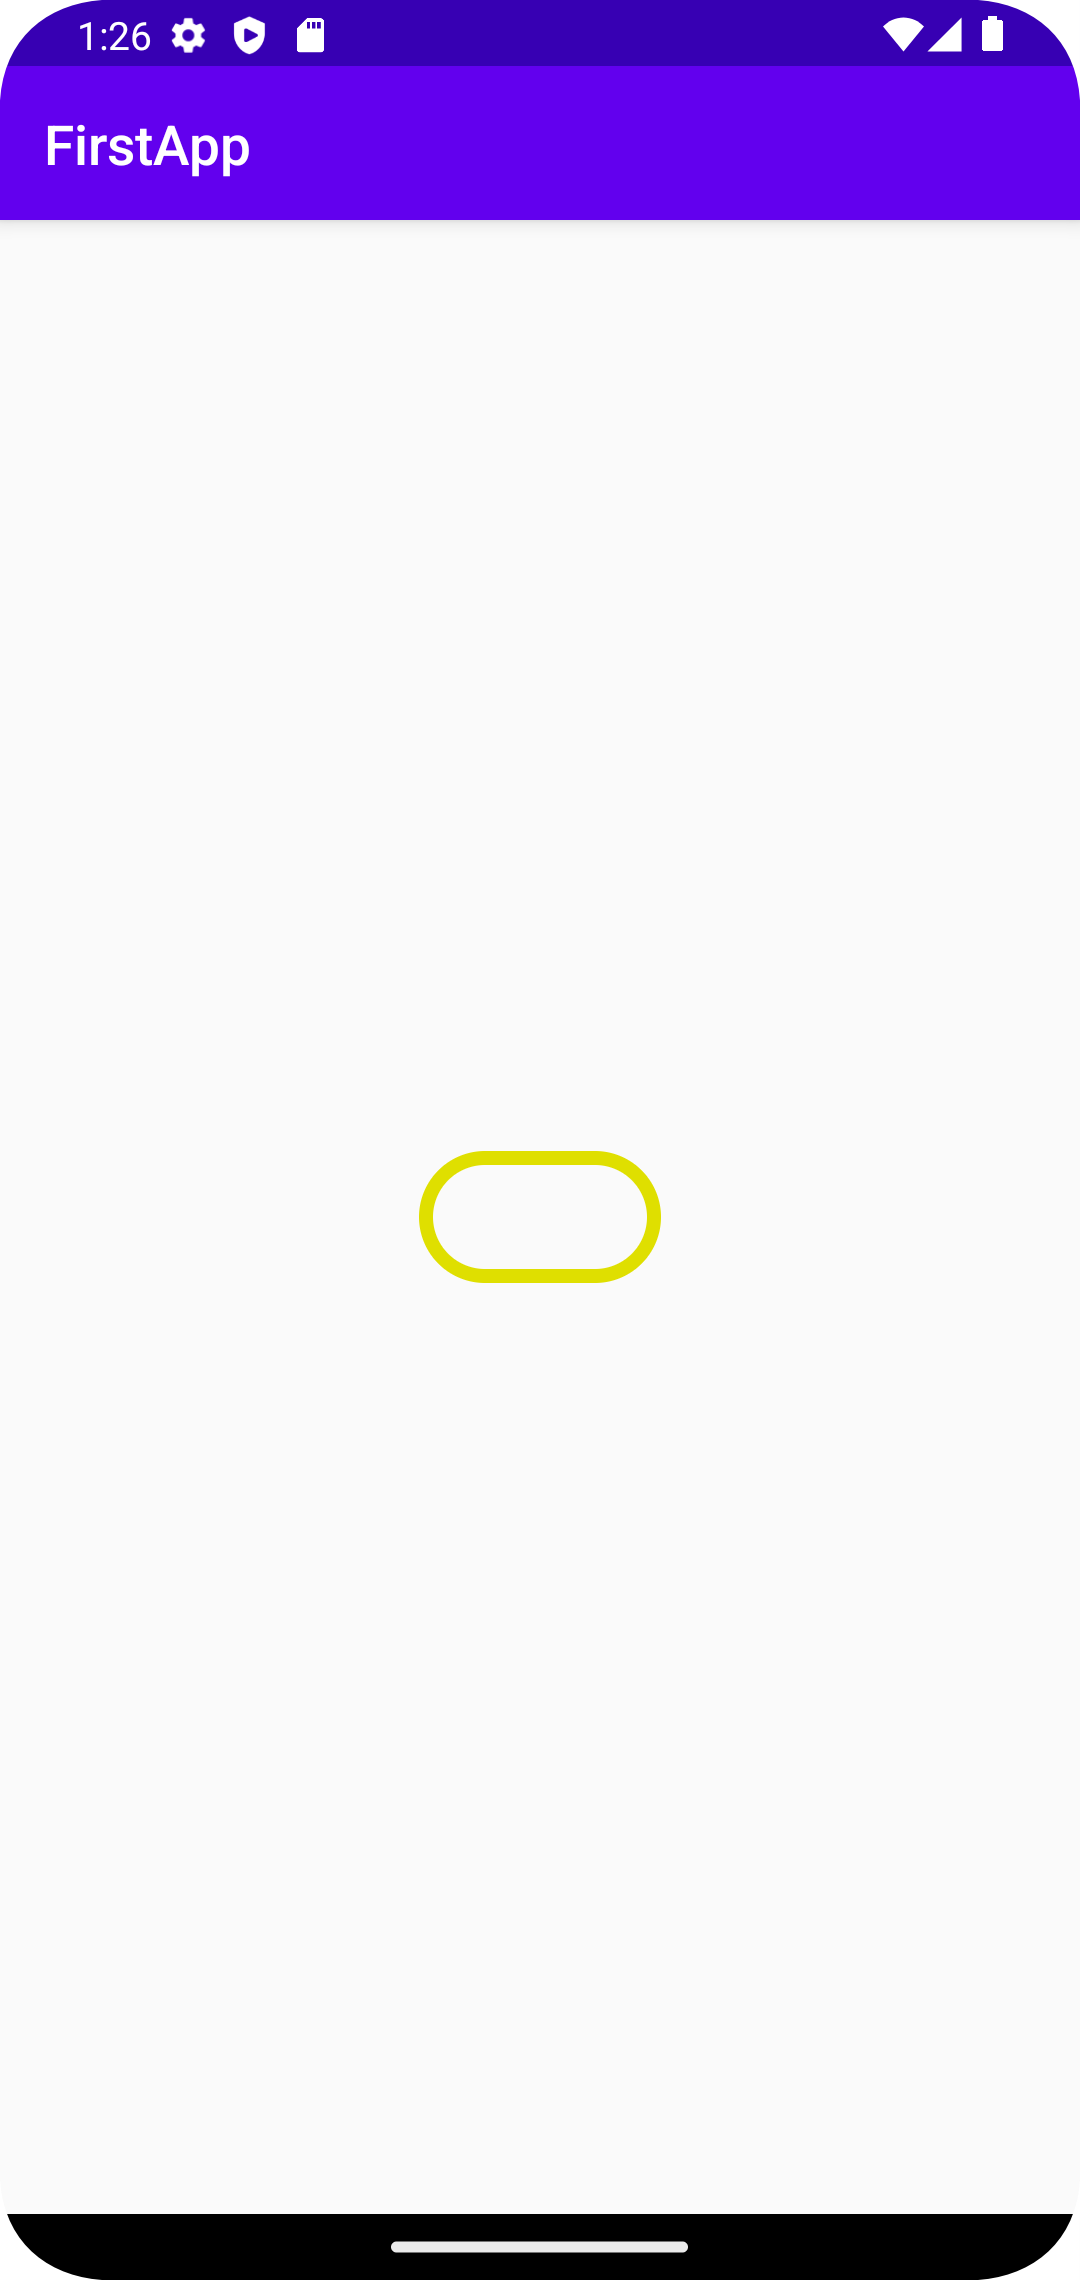
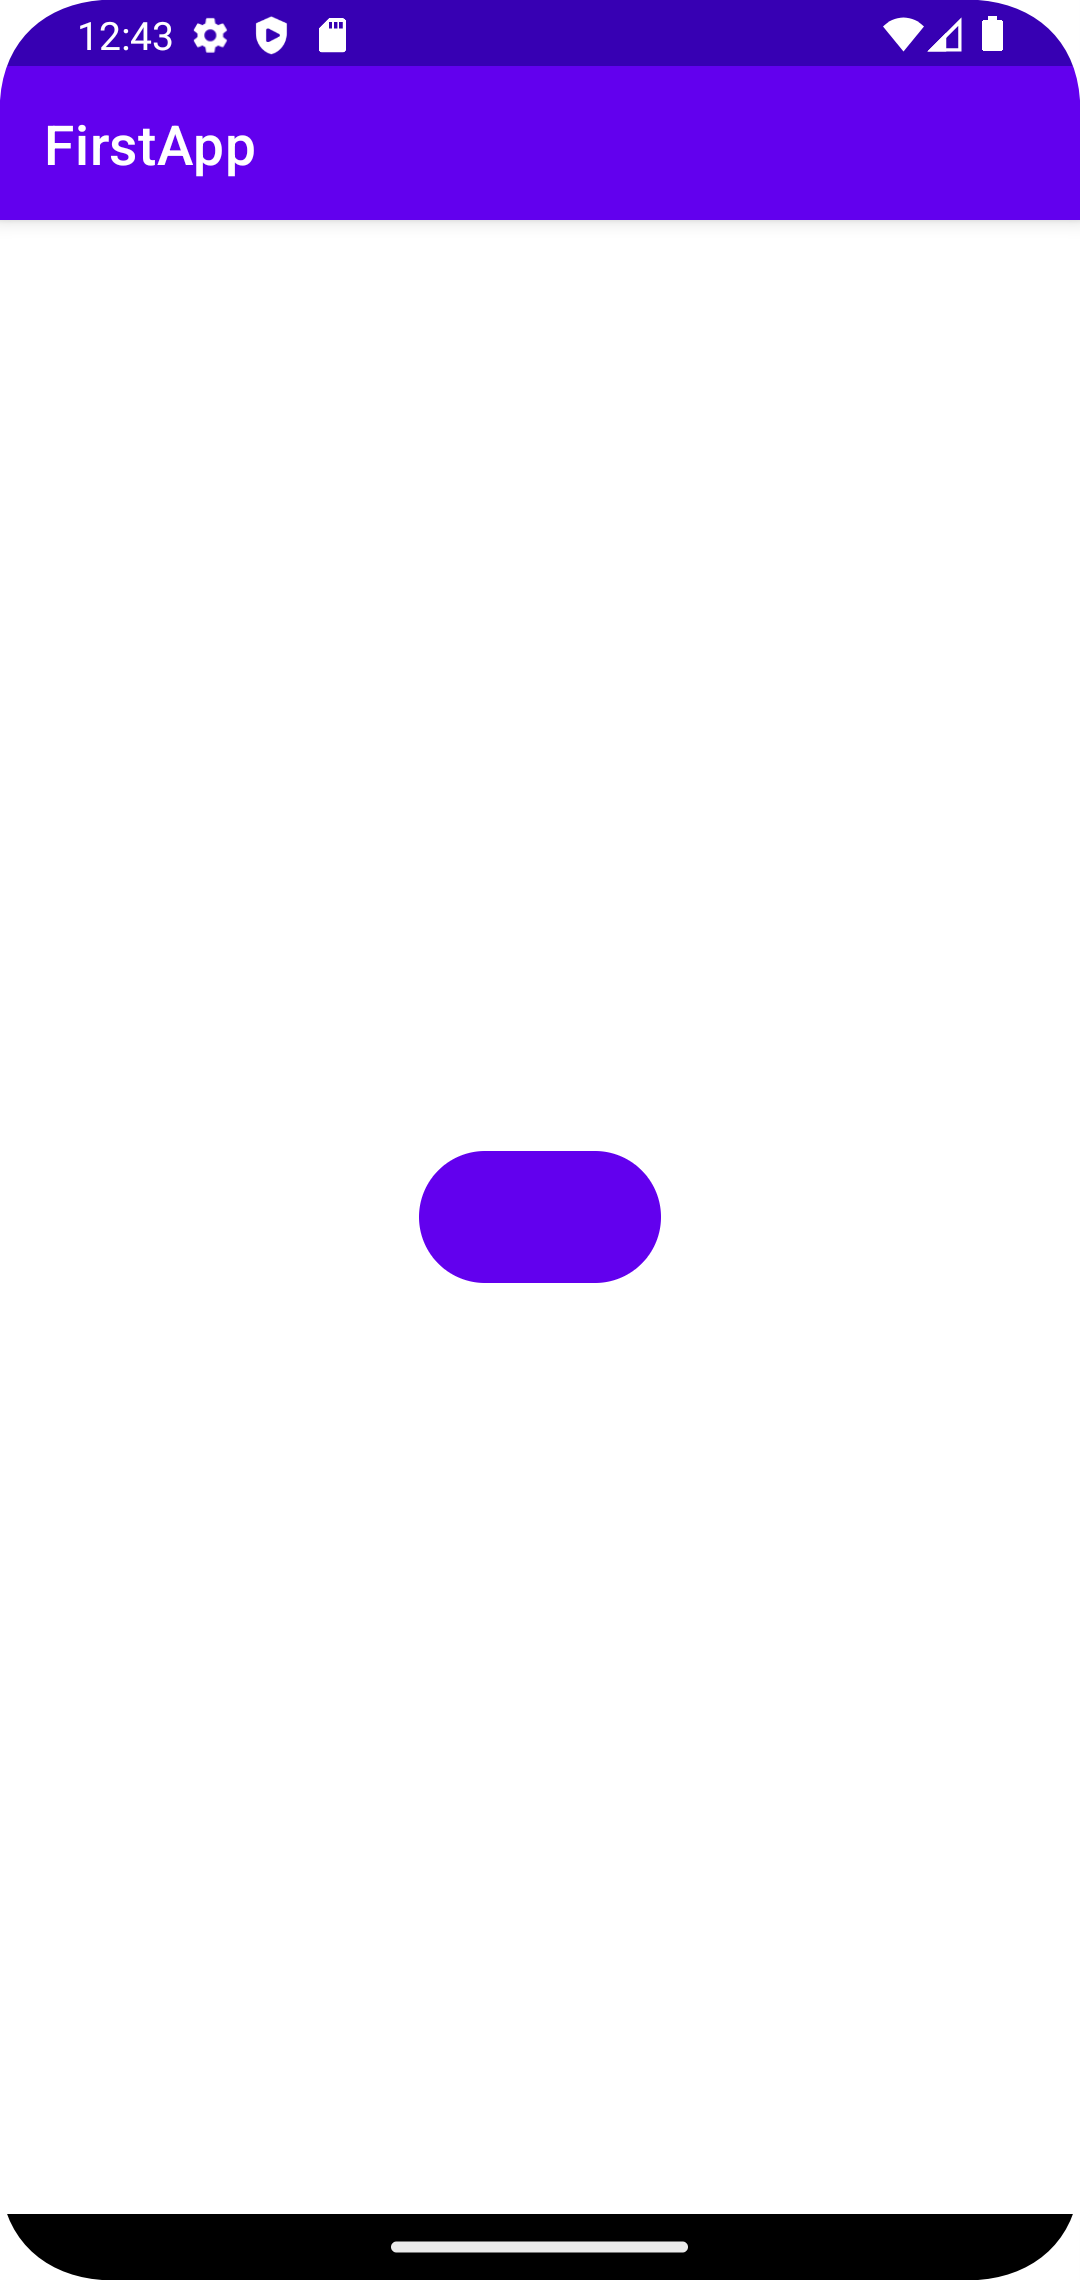
위가 내가 사용하고 싶었던 버튼 디자인, 아래가 background를 설정했지만 색상이 제대로 나오지 않은 상태이다.
구글링해보니 AppCompatButton을 사용하라는 방법이 나와서, 처음에는 아무 생각 없이 AppCompatButton을 사용했다.
AppCompat?
AppCompat은 Application Compatibility, 즉 호환성을 의미한다. 안드로이드가 OS 버전별로 API가 Deprecated되거나 변경되는데 개발자가 버전 분기를 처리하지 않아도 구글에서 AppCompat 라이브러리를 지원한다. AppCompatButton은 그 라이브러리의 Button으로, 호환성을 위한 Button이었던 것이다.
따라서 내가 background drawable을 적용하겠다고 AppCompatButton을 사용한 것은 의도가 빗나갔다고 볼 수 있었다.
어… 그럼 Button보다 AppCompatButton을 사용해야하나?
A Button which supports compatible features on older versions of the platform, including:
Allows dynamic tint of its background via the background tint methods in androidx.core.view.ViewCompat.
Allows setting of the background tint using R.attr.backgroundTint and R.attr.backgroundTintMode.
Allows setting of the font family using android.R.attr.fontFamily
This will automatically be used when you use Button in your layouts and the top-level activity / dialog is provided by appcompat. You should only need to manually use this class when writing custom views.
이전 버전의 플랫폼에서 호환되는 기능을 지원하는 버튼입니다:
androidx.core.view.ViewCompat의 배경 색조 메서드를 통해 배경의 동적 색조를 허용합니다.
R.attr.backgroundTint 및 R.attr.backgroundTintMode를 사용하여 배경 색조를 설정할 수 있습니다.
android.R.attr.fontFamily를 사용하여 글꼴 패밀리를 설정할 수 있습니다.
레이아웃에서 Button을 사용하고 최상위 Activity/Dialog가 AppCompat에 의해 제공될 때 자동으로 사용됩니다. 사용자 정의 뷰를 작성할 때만 이 클래스를 수동으로 사용해야 합니다.
AppCompatButton의 소스 코드 주석이다.
레이아웃에서 Button을 사용하고 최상위 Activity/Dialog가 AppCompat에 의해 제공될 때 자동으로 사용됩니다.
class MainActivity : AppCompatActivity() {우리가 사용하는 Activity는 생성할 때 기본적으로 AppCompatActivity를 상속 받는다. 따라서, 우리는 Button을 사용했지만 결국 내부는 AppCompatButton을 자동으로 사용한다.
그러면 더더욱 background가 먹혀야하는거 아닌가?
그래서 디버깅을 돌려봤다. AppCompatButton 사용한다며! 도대체 왜 안될까?
Button의 작동 순서를 한번 살펴보자
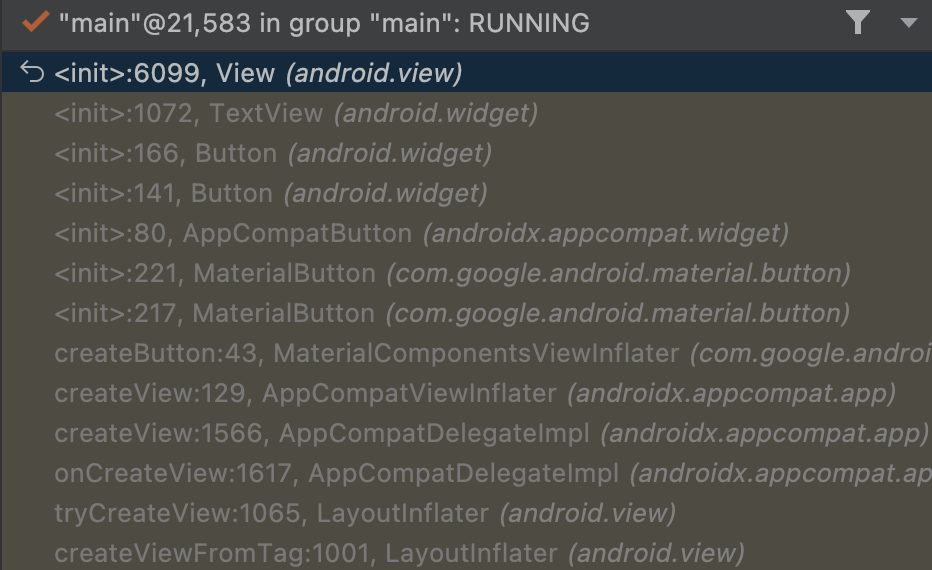
MaterialButton → AppCompatButton → Button 순으로 타고 들어가는 것을 확인할 수 있었다.
MaterialButton 뒤져보기
AppCompatButton에 background를 drawable로 잘 설정했었는데, Button을 사용해도 AppCompatButton을 사용한다면 되어야하는게 아닌가? 의문이 들어 안 뜯어본 나머지 하나, MaterialButton을 뜯어봤다.
문제는 이 곳에 있었다.
@Override
  public void setBackgroundDrawable(@NonNull Drawable background) {
    if (isUsingOriginalBackground()) {
      if (background != this.getBackground()) {
        Log.w(
            LOG_TAG,
            "MaterialButton manages its own background to control elevation, shape, color and"
                + " states. Consider using backgroundTint, shapeAppearance and other attributes"
                + " where available. A custom background will ignore these attributes and you"
                + " should consider handling interaction states such as pressed, focused and"
                + " disabled");
        materialButtonHelper.setBackgroundOverwritten();
        super.setBackgroundDrawable(background);
      } else {
        // ViewCompat.setBackgroundTintList() and setBackgroundTintMode() call setBackground() on
        // the view in API 21, since background state doesn't automatically update in API 21. We
        // capture this case here, and update our background without replacing it or re-tinting it.
        getBackground().setState(background.getState());
      }
    } else {
      super.setBackgroundDrawable(background);
    }
  }
MaterialButton의 setBackgroundDrawable 함수 내용이다.
MaterialButton은 자체 배경을 관리하여 고도, 모양, 색상 및 상태를 제어합니다.
배경 색조, 모양 모양 및 기타 속성을 사용할 수 있는 경우 사용하는 것이 좋습니다.
custom background는 이러한 속성을 무시하므로 눌림, 초점, 비활성화 등의 상호작용 상태를 처리하는 것을 고려해야 합니다.
MaterialButton에서는 이름처럼 Material 디자인을 사용하도록 하고 있고, background로 drawable를 사용하지 않도록 하고 있다. 사용하면 눌리는 효과 같은 상호작용 효과들이 없어지는 것은 물론, 무엇보다 색상 적용이 안된다. 따라서, 색상을 변경하고 싶은 경우 backgroundTint를 활용해야한다.
하지만 나는 테두리가 있는! 둥그런! 버튼을 사용해야 했다. tint로는 해결이 안된다고!
그래서 해결법.
AppCompatButton 사용하기
처음 사용한 방법도 되긴 된다.
android.widget.button 사용하기
<android.widget.Button
        android:id="@+id/btn_button"
        android:layout_width="wrap_content"
        android:layout_height="wrap_content"
        android:background="@drawable/back_rounded"
        app:layout_constraintTop_toTopOf="parent"
        app:layout_constraintStart_toStartOf="parent"
        app:layout_constraintEnd_toEndOf="parent"
        app:layout_constraintBottom_toBottomOf="parent"/>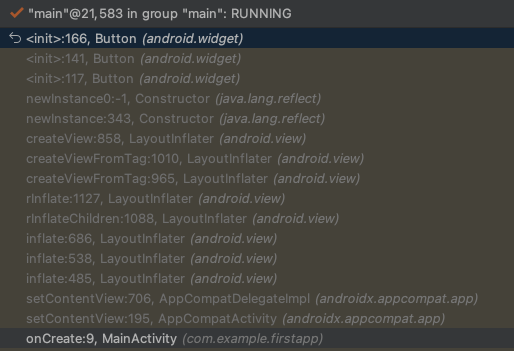
MaterialButton을 안쓰도록 하면 해결된다.
app:backgroundTint=@null 사용하기
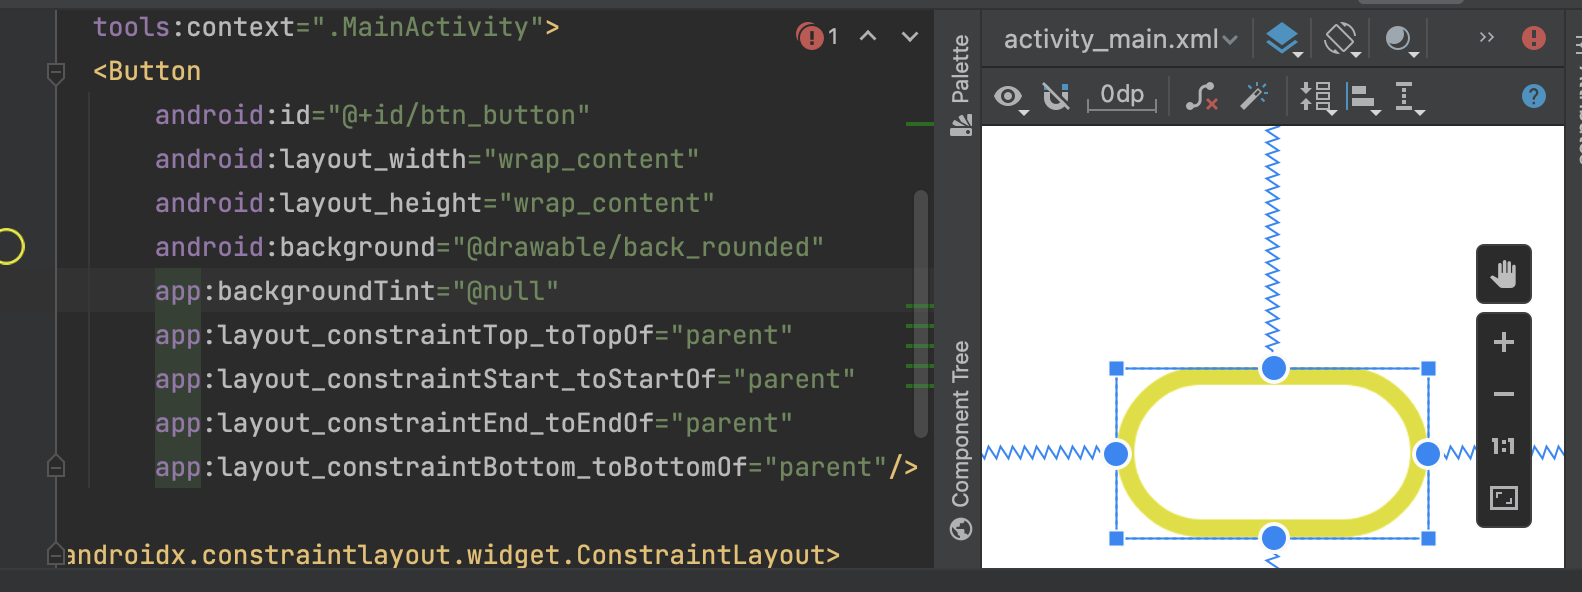
<Button
        android:id="@+id/btn_button"
        android:layout_width="wrap_content"
        android:layout_height="wrap_content"
        android:background="@drawable/back_rounded"
        app:backgroundTint="@null"
        app:layout_constraintTop_toTopOf="parent"
        app:layout_constraintStart_toStartOf="parent"
        app:layout_constraintEnd_toEndOf="parent"
        app:layout_constraintBottom_toBottomOf="parent"/>
MaterialButton → AppCompatButton으로 넘어올 backgroundTint를 null로 만들어버린다.
android:backgroundTint: 안드로이드 프레임워크에서 제공하는 기본 속성, 안드로이드 API 레벨 21부터 사용 가능, 배경 색상 설정
app:backgroundTint: AndroidX 라이브러리의 속성, AndroidX AppCompat 라이브러리 사용 시 사용 가능, AndroidX 라이브러리를 사용하는 경우 이 속성을 사용해야 함
테마를 Material 안쓰기
<resources xmlns:tools="http://schemas.android.com/tools">
    <!-- Base application theme. -->
    <style name="Theme.FirstApp" parent="Theme.AppCompat.DayNight.DarkActionBar">
		<!-- ... -->
두 번째와 비슷한 방법이다. 테마를 Material을 안써버리면 해결된다. 테마를 Material을 쓰기 때문에 MaterialButton을 사용하는 것이니!
이렇게 4가지 방법으로 해결을 할 수 있겠다. 배경 하나 설정한다는데 뭐이렇게 복잡한지… 나는 기본적으로 Material 테마를 사용하고 일부 버튼에 테두리가 필요했기에 두 번째 방법을 사용했다.
앞으로는 구글링만 대충 하고 사용하지 않고 왜 그렇게 되는지 이유에 집중해서 사용해야겠다는 결심의 계기가 되었다.

2개의 댓글

좋은 글 잘 읽었습니다.
이 AppCompatActivity에서는 AppCompatButton으로 변환되지만, 테마를 Material을 쓰면 MaterialButton이 되기 때문에 문제가 발생했던 거군요!
감사합니다 😁
항상 궁금하고 헷갈렸던 부분인데 정리 감사합니다!