앞서
spring-security를 활용하여 로그인 기능을 구현해보자.
패키지 및 클래스 추가

- 로그인 API 구현을 위해 각 레이어들을 추가시키도록 하자.
- controller패키지 -> AuthControoler.class
- service패키지 -> AuthService
- dto 패키지 -> userDto.class
JwtAuthenticationFilter 수정
package com.hkhong.study.config;

import com.hkhong.study.util.JwtUtil;
import jakarta.servlet.FilterChain;
import jakarta.servlet.ServletException;
import jakarta.servlet.http.HttpServletRequest;
import jakarta.servlet.http.HttpServletResponse;
import lombok.RequiredArgsConstructor;
import org.springframework.security.authentication.UsernamePasswordAuthenticationToken;
import org.springframework.security.core.context.SecurityContextHolder;
import org.springframework.security.core.userdetails.UserDetails;
import org.springframework.security.core.userdetails.UserDetailsService;
import org.springframework.security.web.authentication.WebAuthenticationDetailsSource;
import org.springframework.stereotype.Component;
import org.springframework.web.filter.OncePerRequestFilter;

import java.io.IOException;

@Component
@RequiredArgsConstructor
public class JwtAuthenticationFilter extends OncePerRequestFilter {

    private final JwtUtil jwtUtil;

    private final UserDetailsService userDetailsService;

    @Override
    protected void doFilterInternal(HttpServletRequest request, HttpServletResponse response, FilterChain chain)
            throws ServletException, IOException {

        String header = request.getHeader("Authorization");
        String token = null;
        String username = null;

        // 1. Authorization 헤더 확인
        if (header != null && header.startsWith("Bearer ")) {
            token = header.substring(7);
            username = jwtUtil.extractUsername(token);
        }

        // 2. 사용자 인증 처리
        if (username != null && SecurityContextHolder.getContext().getAuthentication() == null) {
            UserDetails userDetails = userDetailsService.loadUserByUsername(username);

            if (jwtUtil.validateToken(token,username)) {
                UsernamePasswordAuthenticationToken authentication =
                        new UsernamePasswordAuthenticationToken(userDetails, null, userDetails.getAuthorities());
                authentication.setDetails(new WebAuthenticationDetailsSource().buildDetails(request));
                SecurityContextHolder.getContext().setAuthentication(authentication);
            }
        }

        chain.doFilter(request, response);
    }
}- 일전에 작성했던JwtAuthenticationFilter 를 수정했다. (spring-security + JWT 이용 로그인(2) - spring-security 설정게시물 확인)
- 서버에 요청이 들어왔을때 제일 먼저 작동되는 부분이고, 토큰값을 검사하여 SecurityContext 에 유저정보를 저장해주는 코드이다.
1. Authorization 헤더 확인
// 1. Authorization 헤더 확인
if (header != null && header.startsWith("Bearer ")) {
    token = header.substring(7);
    username = jwtUtil.extractUsername(token);
}- Bearer: JWT는 일반적으로 Bearer가 붙어서 전달됨, 따라서 header.startsWith("Bearer ")로 접두사가 있는지 확인합니다. (Bearer^ 로 띄어쓰기 주의)
- jwtUtil.extractUsername(token): 만들어 놓았던 (JWT 토큰 만들기(2) 확인) JWT 유틸리티를 사용해 JWT 토큰에서 사용자 이름을 추출
2. 사용자 인증 처리
// 2. 사용자 인증 처리
if (username != null && SecurityContextHolder.getContext().getAuthentication() == null) {
    UserDetails userDetails = userDetailsService.loadUserByUsername(username);

    if (jwtUtil.validateToken(token,username)) {
        UsernamePasswordAuthenticationToken authentication =
                new UsernamePasswordAuthenticationToken(userDetails, null, userDetails.getAuthorities());
        authentication.setDetails(new WebAuthenticationDetailsSource().buildDetails(request));
        SecurityContextHolder.getContext().setAuthentication(authentication);
    }
}- username이 존재하고, 현재 SecurityContext에 인증 정보가 없는 경우에만 JWT 검증을 진행
- jwtUtil.validateToken(token, username): 추출한 토큰이 유효한지 검증
- UsernamePasswordAuthenticationToken authentication = ...: Spring Security에서 인증 객체인 UsernamePasswordAuthenticationToken을 생성
- userDetails (첫 번째 매개변수): 유저정보
- null (두 번째 매개변수): 보통 비밀번호와 같은 인증 자격 정보가 들어갑니다. 하지만 JWT 기반 인증에서는 비밀번호를 다시 사용할 필요가 없으므로 비밀번호 null로 설정
- userDetails.getAuthorities() (세 번째 매개변수): 사용자에게 부여된 권한 (아래 AuthService 구문 확인)
- ...setAuthentication(authentication): 마지막으로 인증정보 객체를 SecurityContext에 저장한다.
UserDto
package com.hkhong.study.dto;

import lombok.AllArgsConstructor;
import lombok.Builder;
import lombok.Getter;
import lombok.NoArgsConstructor;

@NoArgsConstructor
@AllArgsConstructor
@Builder
@Getter
public class UserDto {
    private String id;
    private String password;
}- 로그인에 필요한 입력정보를 받을 dto를 생성 해주었다.
AuthService
package com.hkhong.study.service;

import com.hkhong.study.util.JwtUtil;
import lombok.RequiredArgsConstructor;
import org.springframework.security.core.userdetails.User;
import org.springframework.security.core.userdetails.UserDetails;
import org.springframework.security.core.userdetails.UserDetailsService;
import org.springframework.security.core.userdetails.UsernameNotFoundException;
import org.springframework.security.crypto.password.PasswordEncoder;
import org.springframework.stereotype.Service;

@Service
@RequiredArgsConstructor
public class AuthService implements UserDetailsService {

    private static String userName = "hkhong";
    private static String password = "hkhong2024!";
    private final PasswordEncoder passwordEncoder;

    @Override
    public UserDetails loadUserByUsername(String username) throws UsernameNotFoundException {
        if (username.equals(userName)) {
            return User
                    .withUsername(userName)
                    .password(passwordEncoder.encode(password))
                    .roles("USER")
                    .build();
        } else {
            throw new UsernameNotFoundException("User not found");
        }
    }
}
1. 필드
    private static String userName = "hkhong";
    private static String password = "hkhong2024!";
private final PasswordEncoder passwordEncoder;- 실제 업무에서는 DB에 저장해놓은 유저정보를 조회하여 입력정보와 비교하여야 하지만.. 간단한 구현을 위해 static하게 하나의 계정정보를 선언해 두도록 하겠다.
- passwordEncoder: Spring Security에서 비밀번호를 안전하게 처리하기 위해 사용하는 인터페이스
2. 메서드
1. loadUserByUsername
@Override
public UserDetails loadUserByUsername(String username) throws UsernameNotFoundException {
    if (username.equals(userName)) {
        return User
                .withUsername(userName)
                .password(passwordEncoder.encode(password))
                .roles("USER")
                .build();
    } else {
        throw new UsernameNotFoundException("User not found");
    }
}- 상속받은 UserDetailsService 인터페이스에 loadUserByUsername 를 구현한 것이다.
- 이 메서드는 사용자가 로그인할 때 제공한 사용자 이름을 기준으로 UserDetails 객체를 반환하고, Spring Security는 이 정보를 사용하여 로그인 시 제공된 사용자 이름과 비밀번호를 검증한다.
- 간단한 코드라 코드설명 생략
AuthController
package com.hkhong.study.controller;

import com.hkhong.study.dto.UserDto;
import com.hkhong.study.service.AuthService;
import com.hkhong.study.util.JwtUtil;
import lombok.RequiredArgsConstructor;
import org.springframework.http.ResponseEntity;
import org.springframework.security.authentication.AuthenticationManager;
import org.springframework.security.authentication.BadCredentialsException;
import org.springframework.security.authentication.UsernamePasswordAuthenticationToken;
import org.springframework.security.core.Authentication;
import org.springframework.security.core.AuthenticationException;
import org.springframework.security.core.context.SecurityContextHolder;
import org.springframework.security.core.userdetails.UserDetails;
import org.springframework.security.core.userdetails.UserDetailsService;
import org.springframework.security.crypto.password.PasswordEncoder;
import org.springframework.web.bind.annotation.PostMapping;
import org.springframework.web.bind.annotation.RequestBody;
import org.springframework.web.bind.annotation.RequestMapping;
import org.springframework.web.bind.annotation.RestController;

@RequiredArgsConstructor
@RestController
@RequestMapping("/")
public class AuthController {

    private final AuthenticationManager authenticationManager;
    private final JwtUtil jwtUtil;
    private final AuthService authService;

    private final UserDetailsService userDetailsService;
    private final PasswordEncoder passwordEncoder;

    @PostMapping("login")
    public ResponseEntity<?> login(@RequestBody UserDto userDto) {
        try {

            // 1. 로그인 요청 (username과 password)
            String username = userDto.getId();
            String password = userDto.getPassword();

            // 2. UsernamePasswordAuthenticationToken 생성
            UsernamePasswordAuthenticationToken authenticationToken = new UsernamePasswordAuthenticationToken(userDto.getId(), userDto.getPassword());

            // 3. AuthenticationManager 호출
            Authentication authentication = authenticationManager.authenticate(authenticationToken);

            // 4. UserDetailsService 호출 하여 UserDetailsService가 사용자의 UserDetails 정보 호출
            UserDetails userDetails = userDetailsService.loadUserByUsername(userDto.getId());

            // 5. UserDetails 확인 하여 UserDetails의 정보와 입력한 정보가 일치하는지 확인
            if (userDetails != null && passwordEncoder.matches(userDto.getPassword(), userDetails.getPassword())){
                // 인증 성공
                // 6. SecurityContext 객체 저장
                // SecurityContextHolder에 인증 후 객체를 저장해 SecurityContext에 사용자 정보 보관
                SecurityContextHolder.getContext().setAuthentication(authentication);

                // JWT 토큰 생성 및 반환
                String jwtToken = jwtUtil.generateToken(userDto.getId());
                return ResponseEntity.ok(jwtToken);
            }else {
                throw new BadCredentialsException("Invalid User");
            }

        } catch (AuthenticationException e) {
            throw new RuntimeException("Invalid Authentication Information");
        }
    }
}- 전 게시물에 올렸던 스프링시큐리티 아키텍처 동작순서를 코드로 작성한것이다. 코드 설명은 주석에 적힌 내용으로 대체하도록 하겠다.
로그인 호출
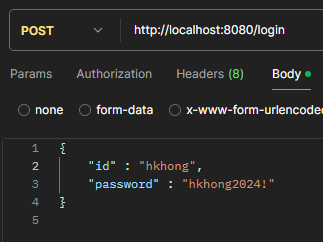

- 포스트맨으로 로그인API 호출시 토큰값이 잘 넘어오는걸 확인할 수 있다.
마치며
스프링시큐리티와 JWT를 이용한 로그인을 구현해 보았다. good
