미들웨어 이야기를 하기에 앞서!
넥스트는 자체 서버가 있다는거 다들 아시죠?
Next.js 애플리케이션은 Node.js 기반의 서버에서 동작하며, SSR을 제공해주는 SPA 이기도 합니다.
Next.js 서버는 프론트엔드 환경을 제공해주는 서버입니다.
NextRequest
NextRequest는 Web Request API 에 부가적인 편의 메소드를 추가해 확장한 것입니다.
cookies
쿠키를 이용하기 위해선 NextRequest를 이용해야 합니다.
set(name)
// Given incoming request /home
let response = NextResponse.next()
// Set a cookie to hide the banner
response.cookies.set('show-banner', 'false')
// Response will have a `Set-Cookie:show-banner=false;path=/home` header
return response
get(name)
// Given incoming request /home
let response = NextResponse.next()
// { name: 'show-banner', value: 'false', Path: '/home' }
response.cookies.get('show-banner')
(이 외에도 getAll() 등 메소드 제공)
이런식으로 쿠키에 있는 값을 가져올 수 있습니다.
nextUrl
// Given a request to /home, pathname is /home
request.nextUrl.pathname
// Given a request to /home?name=lee, searchParams is { 'name': 'lee' }
request.nextUrl.searchParams
url에 있는 파라미터들도 이용할 수 있습니다.
이 외에도 요청에 대한 Ip 주소, 현재 위치 등등 메소드를 제공하고 있습니다!
NextResponse
우리가 프론트 단에서 api 코드를 작성할 때, 응답값을 줘야하는데 그때 이용하는 것이 NextResponse 입니다.
json()
import { NextResponse } from 'next/server'

export async function GET(request: Request) {
  return NextResponse.json({ error: 'Internal Server Error' }, { status: 500 })
}
json 형식은 위와같이 사용하면 됩니다.
redirect()
import { NextResponse } from 'next/server'

return NextResponse.redirect(new URL('/new', request.url))
리다이렉트를 이용해서 특정 주소로 넘길 수도 있습니다.
이 외에도 다양한 기능을 제공하고 있습니다!
그러면 쿠키 서버, 클라이언트 컴포넌트에서 사용가능한가요?
const token = cookieStore.get('ACCESS_TOKEN')그래서 위처럼 쿠키를 가져와서 사용하는 것이
서버 컴포넌트 에선 가능하지만
클라이언트 컴포넌트 에서는 불가능합니다.
왜냐??
NextRequest는 SSR API 이기 때문에 CSR인 클라이언트 컴포넌트에서는 사용할 수가 없습니다...
그러면 클라이언트 컴포넌트에서는 쿠키를 사용할 수 없나요..?
그래서 이때 라우트핸들러를 이용하면 됩니다!
app/api/route.ts 이런식으로 만들게 되면 HTTP 메소드를 지원하며 NextRequest 와 NextResponse 까지 사용할 수 있게 됩니다.
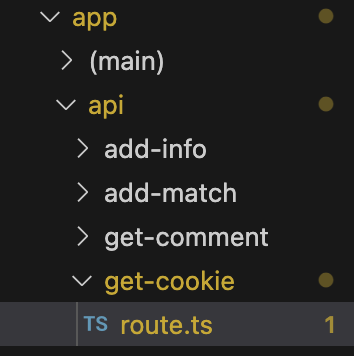
이와 같이 폴더 구조를 정의해줍니다.
import { cookies } from 'next/headers'

export async function GET(request: Request) {
  const cookieStore = cookies()
  const token = cookieStore.get('ACCESS_TOKEN')

  return Response.json({ token: token?.value })
}
코드를 위와 같이 작성해줍니다.
(참고로, 저희의 경우 백엔드에서 토큰이 쿠키에 심어져서 날아왔기 때문에 next/header를 이용해야 했습니다.)
해당 API를 실제 페이지에서 호출합니다!
const res = await fetch(`${basePath}/api/get-cookie`, {
        method: 'GET',
      })
여기서 basePath는 실제 프론트가 배포되는 주소라고 생각하시면 됩니다!
(로컬이라면 http://localhost:3000 이 되겠죠?)
이런식으로 쿠키를 가져와서 다른 요청을 날릴 때 쿠키를 넣어서 보내면 됩니다!
라우트 핸들러에서 바로 쿠키 호출
import { baseURL } from '@/lib/utils'
import { cookies } from 'next/headers'
import { NextRequest, NextResponse } from 'next/server'

export async function GET(): Promise<any> {

  try {
    const res = await fetch(`${baseURL}/test`, {
      method: 'GET',
      headers: {
        Authorization: `${cookies().get('ACCESS_TOKEN')?.value!}`,
        'Content-Type': 'application/json',
      },
    })

    if (!res.ok) {
      console.log('Failed to post additional information', res.status)
      const msg = `테스트 실패 status:${res.status}`
      return NextResponse.json({ msg })
    }
    console.log('Failed to post additional information', res.status)
    return res.body
  } catch (error) {
    console.log('게시글 대기자 조회 에러', error)
    return NextResponse.json({ errorMessage: `테스트 실패 ${error}` })
  }
}
아니면 위와 같이 라우트 핸들러에서 바로 쿠키를 가져와서 헤더에 넣어서 보내줄 수도 있습니다!
만일 서버 컴포넌트라면?
import React from 'react'
import { Badge } from '@/components/ui/Badge'

import ImageProfile from '@/components/common/ImageProfile'
import { GetPostType } from '@/types/boardType'
import { cookies } from 'next/headers'
import { baseURL } from '@/lib/utils'

export default async function page({ params: { id } }: { params: { id: number } }) {
  async function getPost(id: number) {
    const res = await fetch(baseURL + `/test`, {
      method: 'GET',
      headers: {
        Authorization: `${cookies().get('ACCESS_TOKEN')?.value!}`,
        'Content-Type': 'application/json',
      },
    })
    if (!res.ok) {
      throw new Error('response not ok!')
    }

    return res.json()
  }


   const getPostData = async () => {
    const newData = await getPost(id)
     setData(newData)
   }

   useEffect(() => {
     getPostData()
   }, [])

  return (
    <>
      {data === undefined && <div>데이터가 로딩되지 않앗습니다.</div>}
      {data !== undefined && (
        <>
...(생략)
위와 같이 바로 코드내에서 쿠키를 이용할 수 있습니다!
참고 블로그
