회사에서 너무 정적인 사이트만 만드는 느낌이라 엄청 동적인 프로젝트를 만들고 싶단 생각이 들기 시작했다.
요즘 핫하다는 인터렉티브 웹사이트에 대해 찾아보다가, 패스트캠퍼스 인터렉티브 강의를 발견하여 결제했다.
(사실 canvas가 뭔지도 모르고 그냥 인터렉티브에 꽂혀서 결제해버렸다...ㅎㅎ)
오늘 살짝 맛보기 한 canvas가 무엇인지 강의에선 설명해주지 않아 찾아본 내용대로 정리해보고자 한다.
(html, css, javascript로만 구현한다길래 사실 좀 만만히 봤는데...
canvas...... 머리 좀 꽤나 써야할 것 같다ㅠㅠ)
📌 HTML에서 canvas 란?
<canvas>element는 웹페이지에서 그래픽을 그릴 때 사용하는 컨테이너이다.
- 선분, 사각형, 원, 문자, 이미지를 추가하는 메서드가 존재한다.
- 그래픽을 그리기 위해 자바스크립트를 사용해야 한다.
<canvas>element에는 width, height 두 속성만 있으며, width, height를 지정하지 않으면 처음 width는 300px, height는 150px이다.
📌 canvas method 살펴보기
const canvas = document.getElementById("number");       //id로 canvas element에 접근
const ctx = canvas.getContext("2d");                    //2d 그래픽을 그릴 수 있는 메서드를 지닌 HTML5 오브젝트
const x = 32;                                           //원점 x 좌표
const y = 32;                                           //원점 y 좌표

const radius = 30;                                      //반지름
const startAngle = 0;                                   //0도
const endAngle = Math.PI * 2;                           //360도

ctx.fillStyle = "rgb(0,0,0)";                           //채우기 색 설정
ctx.beginPath();                                        //새로운 경로 생성, 경로 생성 후 그리기 명령들은 경로를 구성하고 만드는데 사용
ctx.arc(x, y, radius, startAngle, endAngle);            //x,y위치에 원점을 두고, radius 반지름을 가지고, startAngle에서 시작하여 endAngle에서 끝나며 주어진 방향(옵션 기본값은 시계방향)으로 호 그림
ctx.fill();                                             //경로의 내부를 채워서 내부가 채워진 도형을 그린다. 열린도형은 자동으로 닫히므로 closePath()호출 필요 X

ctx.strokeStyle = "rgb(255,255,255)";                   //윤곽선의 색 설정
ctx.lineWidth = 3;                                      //윤곽선의 두께
ctx.beginPath();                                        //새로운 경로 생성
ctx.arc(x, y, radius, startAngle, endAngle);            //원 생성
ctx.stroke();                                           //윤곽선을 이용하여 형 그림

ctx.fillStyle = "rgb(255,255,255)";                     //채우기 색 설정
ctx.font = "32px sans-serif";                           //문자 폰트 크기, 글씨체
ctx.textAlign = "center";                               //문자 정렬
ctx.textBaseline = "middle";                            //베이스 라인 정렬 설정
ctx.fillText("1", x, y);                                //주어진 x,y 위치에 주어진 "1" 텍스트를 채움, 최대폭 maxwidth 옵션값
📌 dpr, fps
📍 dpr (devicePixelRatio)
각 device 마다 1픽셀을 구성하고 있는 칸의 개수가 다르다.
따라서 모든 device에서 canvas를 선명하게 보이도록 하기 위해서 dpr에 따른 비율로 canvas와 ctx.scale을 지정해줘야 한다.
기본적으로 캔버스의 한 단위는 1픽셀이다.
scale은 배율을 조정하는 것으로, dpr에 따라 scale을 해준다.
ctx.scale(x, y)
- x : 수평 방향의 배율
- y : 수직 방향의 배율
const canvas = document.querySelector("canvas");

const ctx = canvas.getContext("2d");
const dpr = window.devicePixelRatio;

const canvasWidth = innerWidth;
const canvasHeight = innerHeight;

canvas.style.width = canvasWidth + "px";
canvas.style.height = canvasHeight + "px";

canvas.width = canvasWidth * dpr;
canvas.height = canvasHeight * dpr;
ctx.scale(dpr, dpr);
📍 fps (Frame per Second)
canvas에서 animation이 계속해서 실행되도록하는 함수를 활용하기 위해선 함수 안에서
window.requestAnimationFrame(함수)를 실행하여 계속적으로 함수 자신이 자신을 실행시키도록 해야 한다.
다만, 모든 device의 모니터 주사율에 따라 animation 시간 간격이 상이하다. 예를 들어 게이밍 노트북이 144hz 모니터 주사율을 갖고 있다면 1초에 144번이 실행된다.
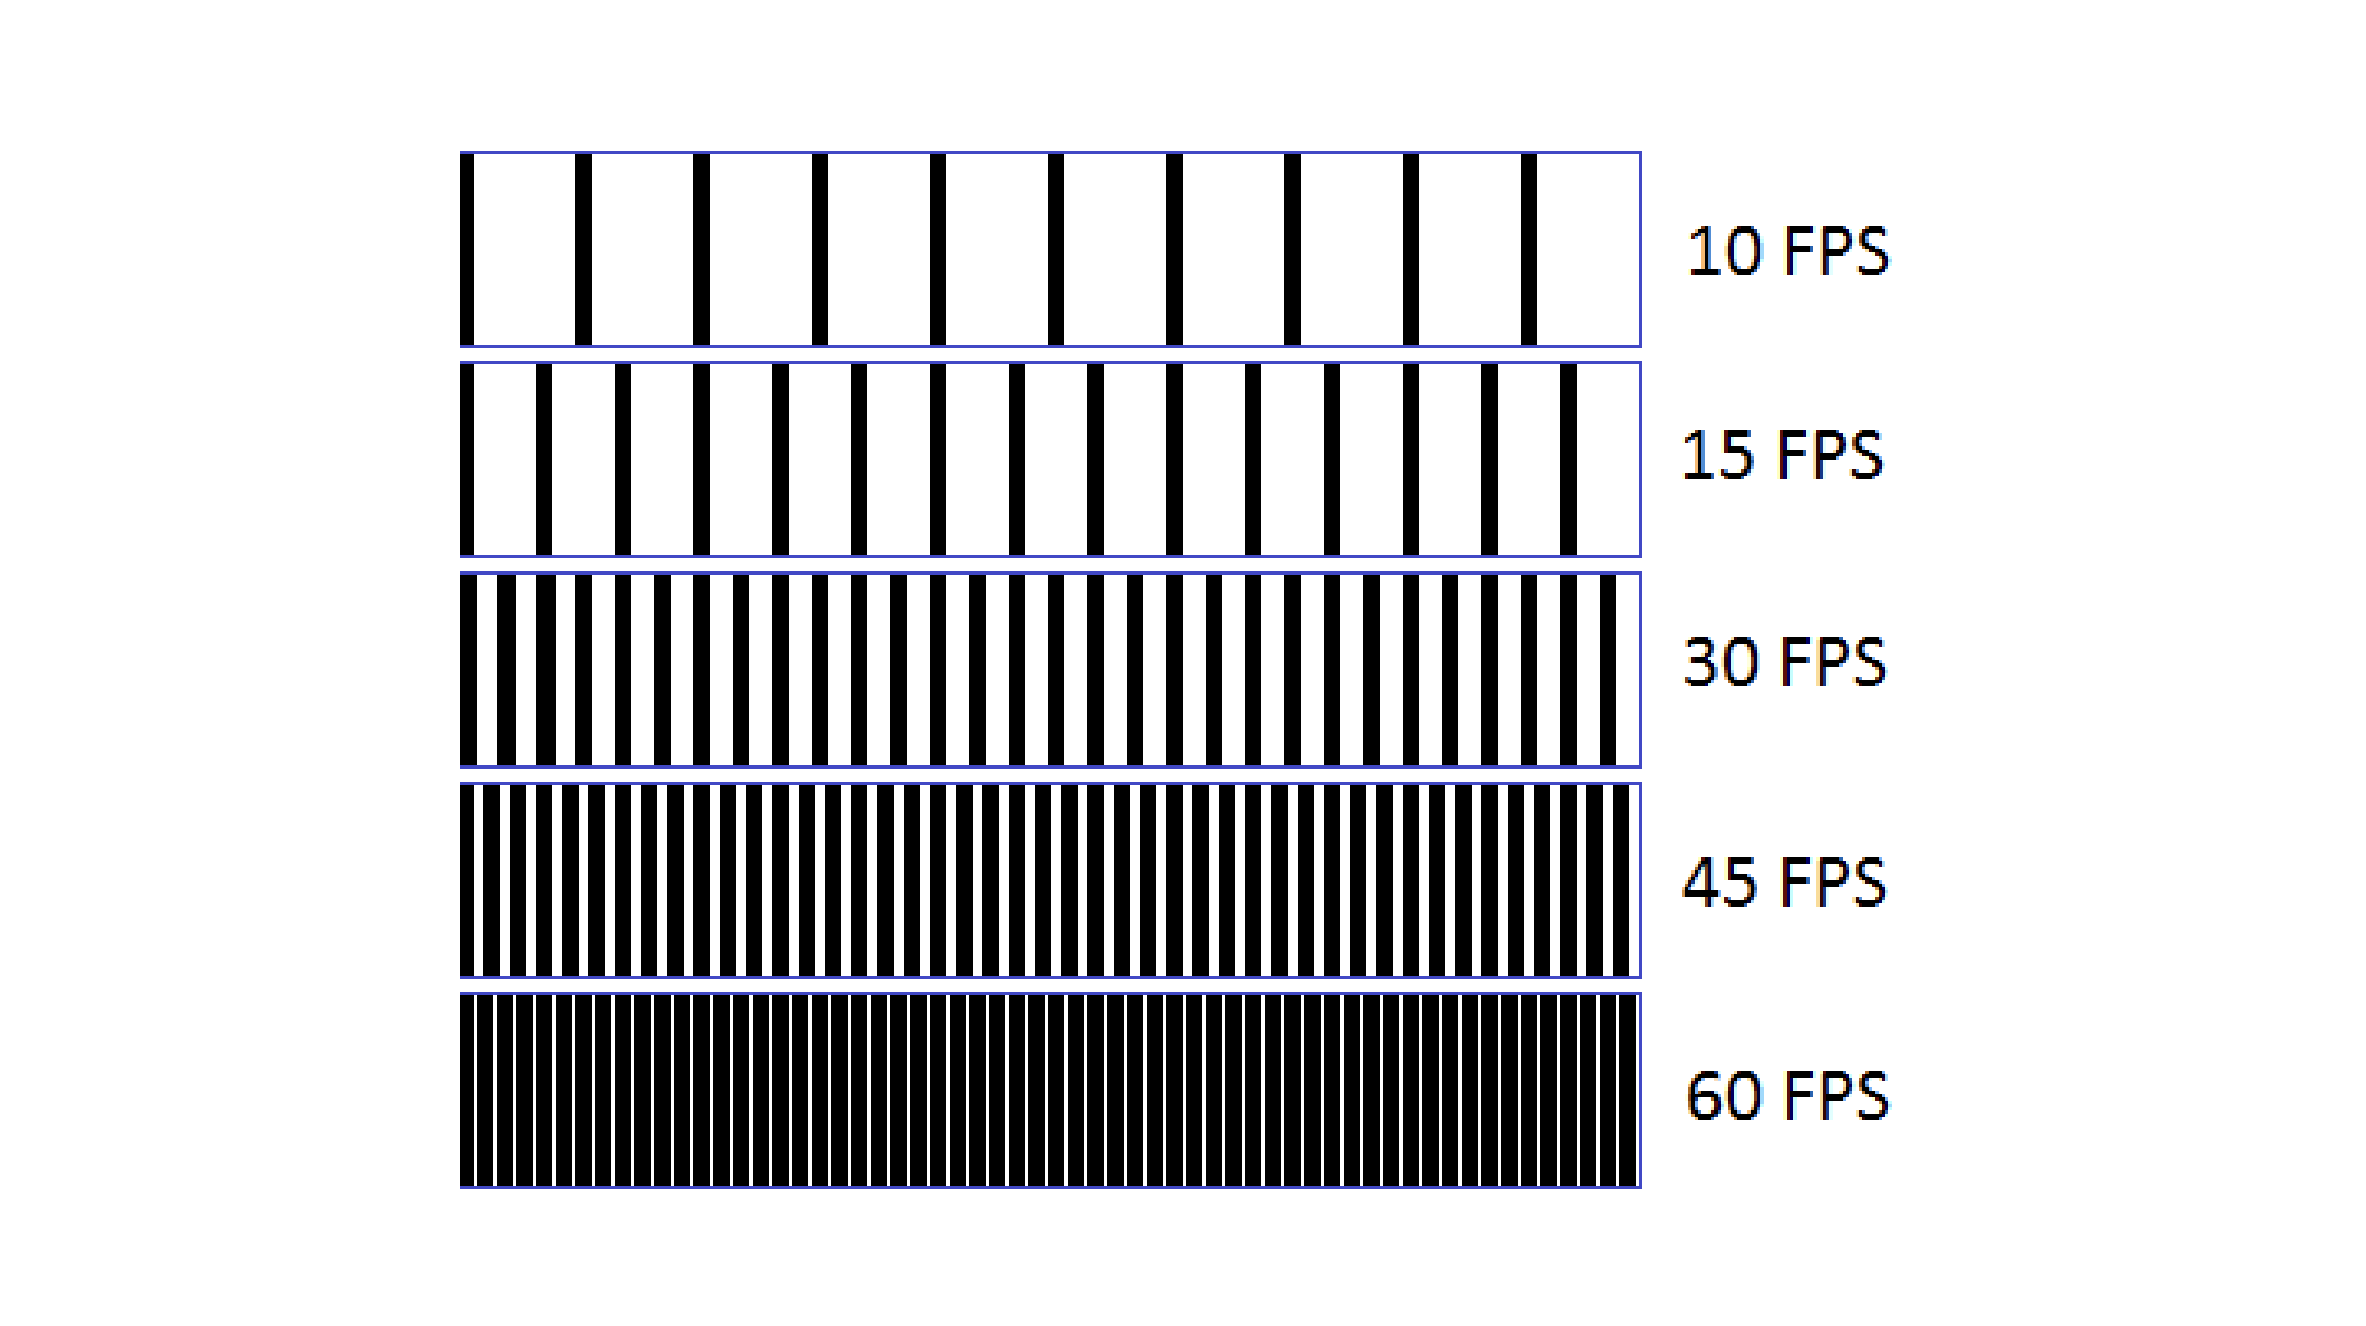
모든 모니터에서 일정한 횟수로 애니메이션을 실행시키기 위해서 fps 개념을 사용한다.
사실 이 설명은 들었는데도 이해가 잘 안된다... 추후에 다시 되새겨 봐야겠다.
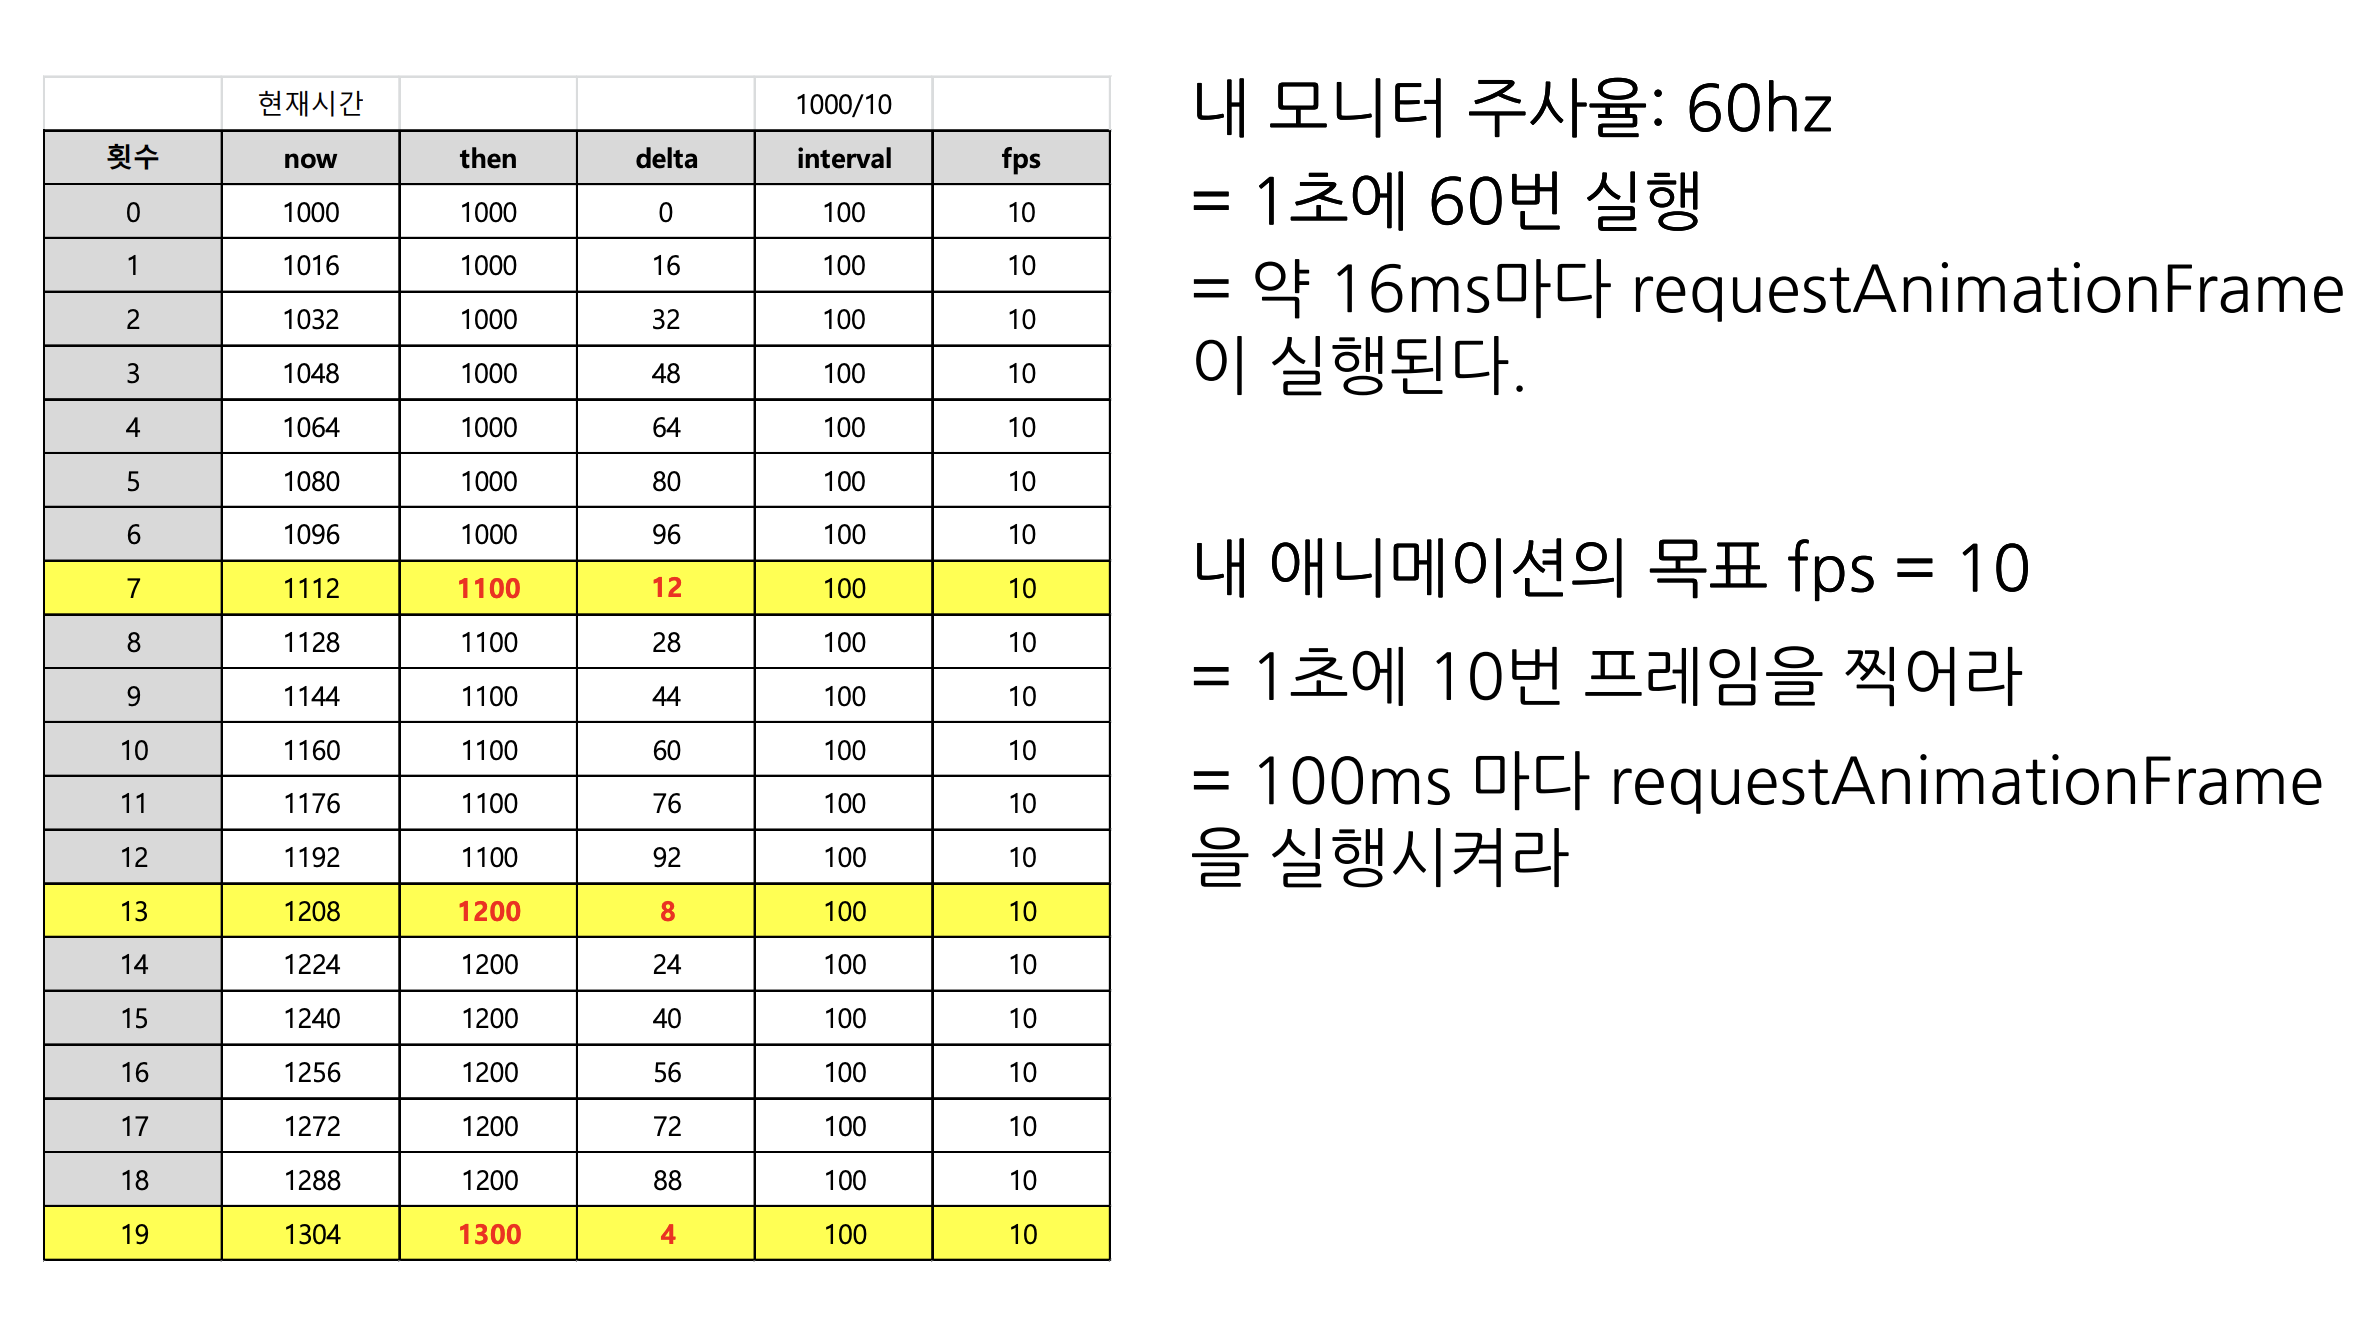
아무리 주사율이 낮은 모니터라고 하더라도, 최근 디바이스들은 최소 60hz는 되기 때문에 모든 디바이스에서 60fps를 기준으로 animation을 실행한다면 가장 자연스러운 애니메이션 효과를 선보일 수 있다.
function animate() {
window.requestAnimationFrame(animate);
now = Date.now();
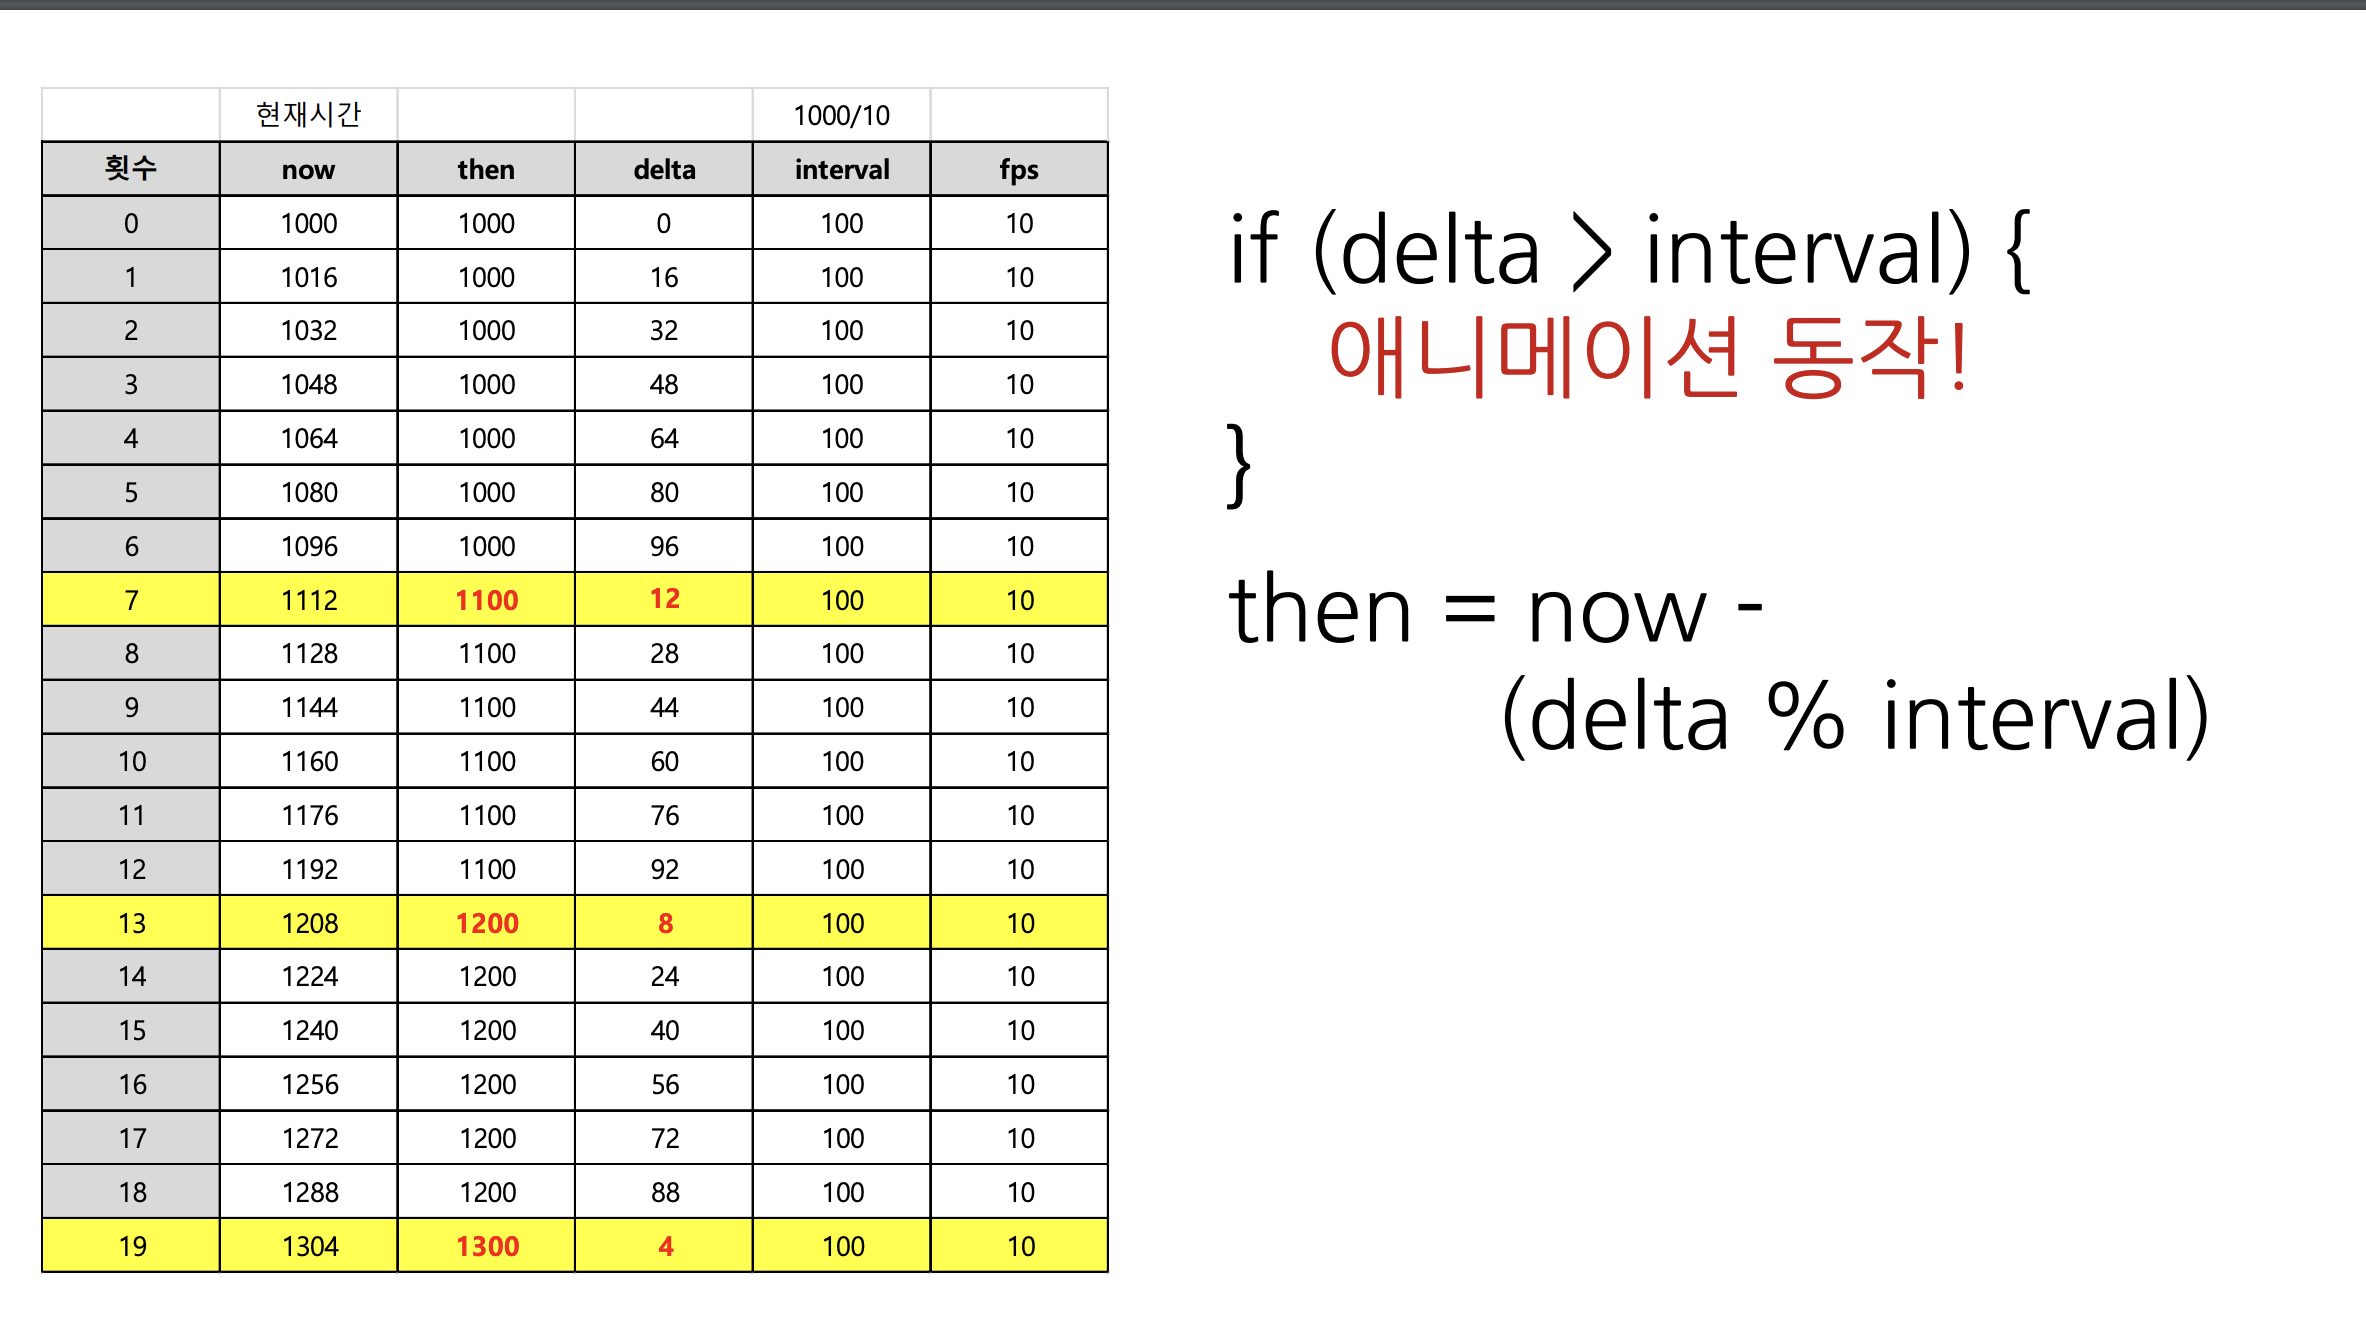
delta = now - then;
if (delta < interval) return;
ctx.clearRect(0, 0, canvasWidth, canvasHeight);
particles.forEach((particle) => {
particle.update();
particle.draw();
if (particle.y - particle.radius > canvasHeight) {
particle.y = -particle.radius;
particle.x = randomNumBetween(0, canvasWidth);
particle.radius = randomNumBetween(50, 100);
particle.vy = randomNumBetween(1, 5);
}
});
then = now - (delta % interval);
}
animate();< 참고 : https://yunzema.tistory.com/66
https://hipdizzy.tistory.com/100 >