/
본 컨텐츠는 nomadcoder의 React JS 마스터 클래스를 수강 후 개인 학습 용도로 재구성하였습니다.
/
🚦Styled-components
1️⃣ components의 태그를 바꾸되 스타일은 변경 시키지 않은 경우 as를 사용
적용 전
import styled from 'styled-components';

const Father = styled.div`
  display: flex;
`;

const Btn = styled.button`
  color: white;
  background-color: tomato;
  border:0;
  border-radius: 15px;
`;


function App() {
  return (
      <Father as="header">
		<Btn>Log in</Btn>
      </Father>
  );
}

export default App;
위 코드는 아래의 결과를 보여 줍니다.
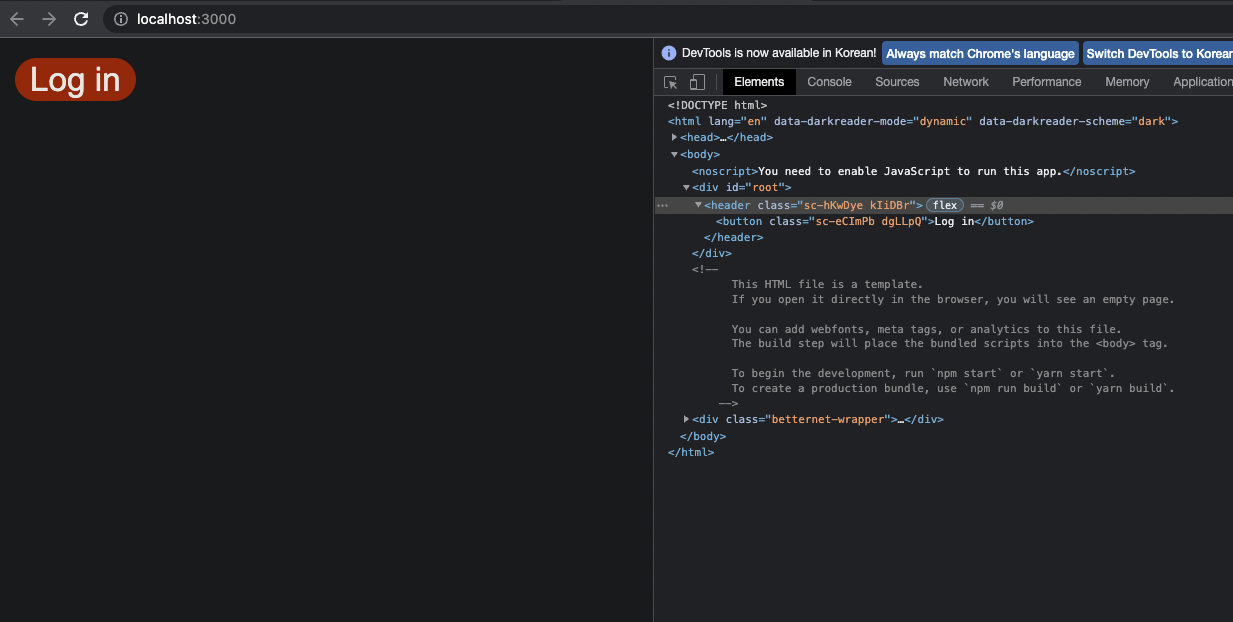
로그인이 있는 부분을 보면 button태그로 되어 있는데 이를 a태그로 쓰고 싶다면 as를 사용하면 됩니다.
적용 후
// 생략
...
const Btn = styled.button`
  color: white;
  background-color: tomato;
  border:0;
  border-radius: 15px;
`;


function App() {
  return (
      <Father as="header">
		<Btn as="a" href="/">Log in</Btn>
      </Father>
  );
}

// 생략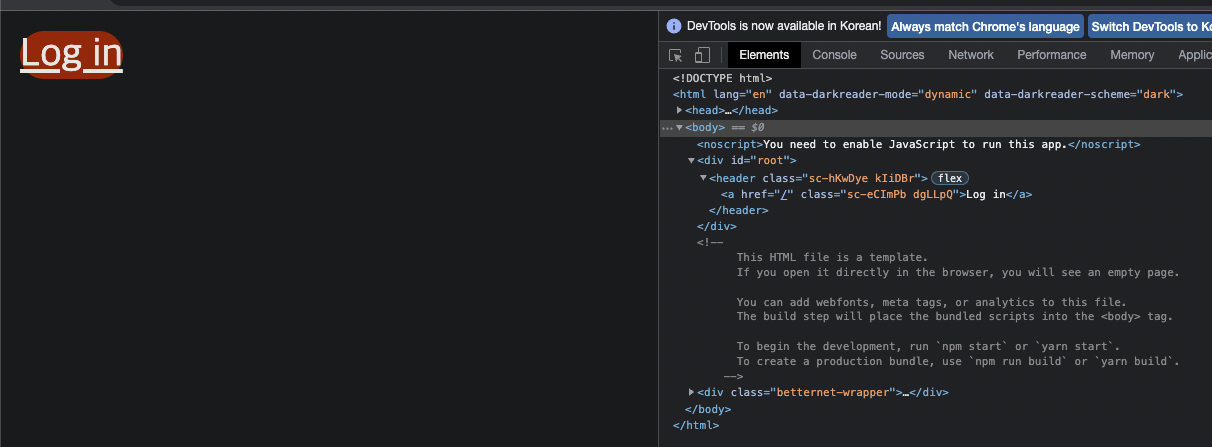
Father에는 as의 값으로 header로주고 Btn에는 as의 값으로 a를 주고 href를 /로 걸어 주었는데 잘 적용된 것이 보입니다.
2️⃣ styled-components를 이용하여 html elements 변경
이 방식은 자주 쓰는 방식은 아니지만 styled components를 이용해서 html elements를 제어 할 수 있는 기능중 하나입니다.
적용 시
code
import styled from 'styled-components';

const Father = styled.div`
  display: flex;
`;

const Btn = styled.button`
  color: white;
  background-color: tomato;
  border:0;
  border-radius: 15px;
`;

const Input = styled.input.attrs({required: true, minLength:10})`
  background-color: tomato;
`;

function App() {
  return (
      <Father as="header">
        {/* <Btn as="a" href="/" >
        Log in
        </Btn> */}
        <Input />
        <Input />
        <Input />
        <Input />
        <Input />
        <Input />
        <Input />
      </Father>
  );
}

export default App;
적용된 모습
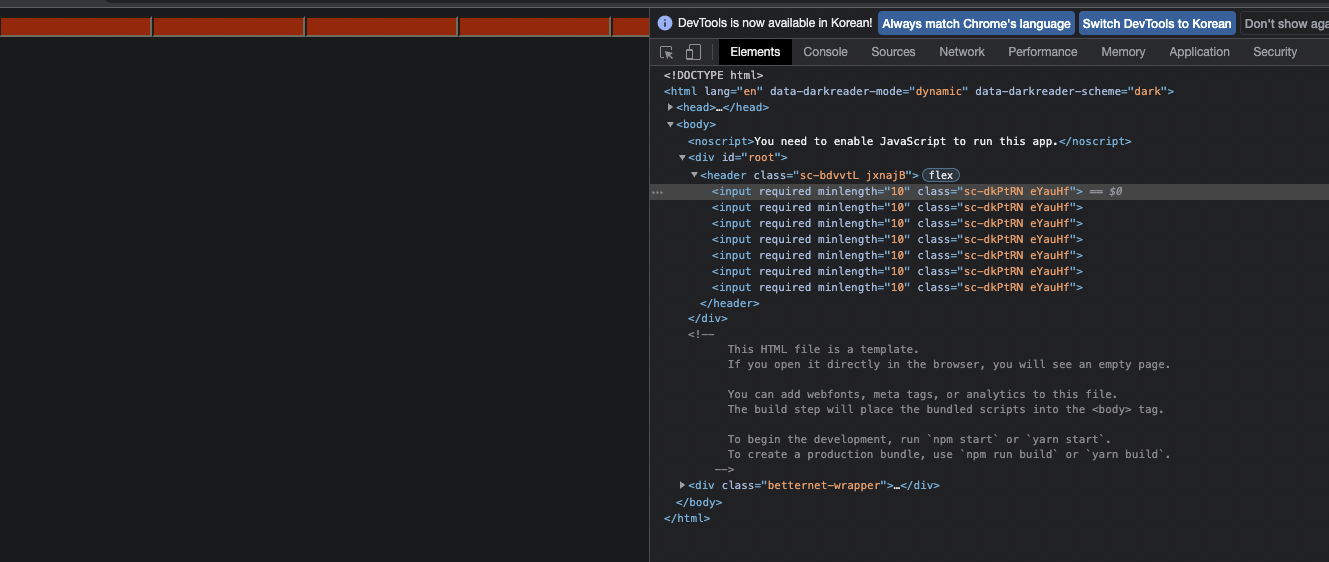
만약 input tag에 required와 minLength를 주고 싶은데 이 태그들이 n개 이상이라면 이를 일일히 명시하여 작성하는 것은 코드 중복이 일어나는 부분인데요.
이를 해결 할 수 있는 부분이 바로 styled.input.attrs() 를 이용하는 겁니다. 이럴 경우 global하게 element가 부여됩니다.

어제보다 오늘 그리고 오늘 보다 내일...