Get Started를 읽으며 멋대로 번역했습니다. 생략되거나 변경된 내용이 있습니다.
본문
Introduction
PHP와 같은 언어로 채팅 애플리케이션을 작성하는 것은 매우 어려웠습니다. 변경 사항에 대해 서버를 폴링하고 타임 스탬프를 추적하는 작업이 포함되며 예상보다 훨씬 느립니다.
Socket은 전통적으로 대부분의 실시간 채팅 시스템을 설계하여 클라이언트와 서버간의 양방향 통신 채널을 제공하는 솔루션이었습니다. 이는 서버가 클라이언트에 메시지를 푸시할 수 있음을 의미합니다. 채팅 메시지를 작성할 때마다 서버가 메시지를 받아 다른 모든 연결된 클라이언트에 푸시한다는 아이디어가 있습니다.
The web framework
Node.js 웹 프레임워크인 express 를 사용합니다.
npm init -y
npm install express@4.15.2
설치가 완료된 뒤에 index.js 파일을 생성하여 아래 내용을 추가합니다.
var app = require('express')();
var http = require('http').createServer(app);

app.get('/', (req, res) => {
  res.send('<h1>Hello world</h1>');
});

http.listen(3000, () => {
  console.log('listening on *:3000');
});
위 코드는 다음을 의미합니다.
- Express는
app을 HTTP 서버에 제공 할 수있는 함수 핸들러로 초기화합니다 (2행 참조). - 우리는 웹 사이트 홈을 방문했을 때 호출되는 경로 핸들러
/를 정의합니다. - http 서버가 포트 3000에서 수신하도록 합니다.
다음 명령어를 사용해 서버를 실행시킬 수 있습니다.
node index.jsServing HTML
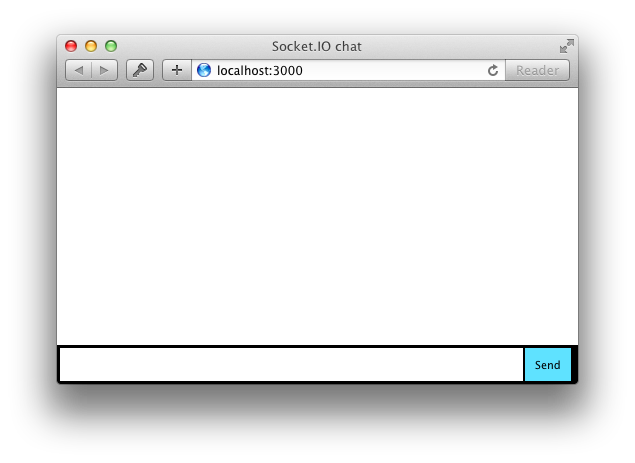
이제 HTML 문자열을 응답하는 대신에 index.html을 만들어 대신 제공합니다. 대신 sendFile을 사용하도록 경로 핸들러를 리펙토링 해 보겠습니다.
index.js
app.get('/', (req, res) => {
  res.sendFile(__dirname + '/index.html');
});
index.html
<!doctype html>
<html>
  <head>
    <title>Socket.IO chat</title>
    <style>
      * { margin: 0; padding: 0; box-sizing: border-box; }
      body { font: 13px Helvetica, Arial; }
      form { background: #000; padding: 3px; position: fixed; bottom: 0; width: 100%; }
      form input { border: 0; padding: 10px; width: 90%; margin-right: 0.5%; }
      form button { width: 9%; background: rgb(130, 224, 255); border: none; padding: 10px; }
      #messages { list-style-type: none; margin: 0; padding: 0; }
      #messages li { padding: 5px 10px; }
      #messages li:nth-child(odd) { background: #eee; }
    </style>
  </head>
  <body>
    <ul id="messages"></ul>
    <form action="">
      <input id="m" autocomplete="off" /><button>Send</button>
    </form>
  </body>
</html>
Intergrating Socket.IO
Socket.IO는 두 파트로 구성됩니다.
- Node.js HTTP Server 와 통합(또는 마운트)되는 서버
- 브라우저 측 socket.io-client에서 로드되는 클라이언트 라이브러리
Getting-started를 하는 동안 socket.io는 자동으로 클라이언트를 제공하므로 지금은 서버에만 모듈을 설치하면 됩니다.
npm install socket-ioindex.js
var app = require('express')();
var http = require('http').createServer(app);
var io = require('socket.io')(http);

app.get('/', (req, res) => {
  res.sendFile(__dirname + '/index.html');
});

io.on('connection', (socket) => {
  console.log('a user connected');
});

http.listen(3000, () => {
  console.log('listening on *:3000');
});http를 전달하여 socket.io의 새 인스턴스를 초기화했습니다. 그런 다음 들어오는 소켓에 대한 연결 이벤트를 수신하고 콘솔에 기록합니다.
이제 index.html의 </body> 엔드 태그 전에 다음 코드를 추가합니다.
<script src="/socket.io/socket.io.js"></script>
<script>
  var socket = io();
</script>
io 글로벌 변수를 (및 엔드 포인트 GET /socket.io/socket.io.js)을 가지는 socket.io-client 를 로드합니다. 이 것이 필요한 코드 전부입니다.
클라이언트 측 JS 파일의 로컬 버전을 사용하려면 node_modules/socket.io-client/dist/socket.io.js 에서 찾을 수 있습니다.
io()를 호출 할 때 URL을 지정하지 않습니다. 기본적으로 페이지를 제공하는 호스트에 연결을 시도하기 때문입니다.
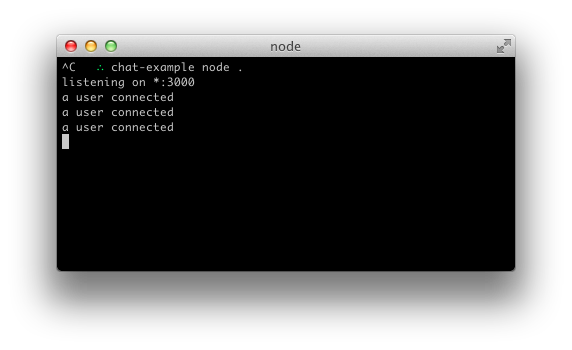
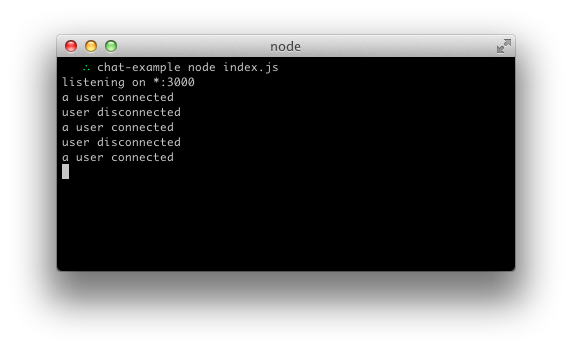
이제 프로세스를 다시 시작하고 (Control + C를 누르고 node index.js를 다시 실행하여) 웹 페이지를 새로 고치면 콘솔에 "a user connected"가 표시됩니다. 여러 탭을 열어 보면 여러 메시지가 표시됩니다.

각 소켓은 연결이 끊어질 때 특별한 disconnect 이벤트를 발생시킵니다. 다음 코드로 확인할 수 있습니다.
io.on('connection', (socket) => {
  console.log('a user connected');
  socket.on('disconnect', () => {
    console.log('user disconnected');
  });
});
Emitting events
Socket.IO의 기본 아이디어는 원하는 데이터와 함께 원하는 이벤트를 보내고 받을 수 있다는 것입니다. JSON으로 인코딩 할 수있는 모든 개체가 가능하며 바이너리 데이터도 지원됩니다.
사용자가 메시지를 입력하면 서버가 이를 채팅 메시지 이벤트로 가져 오도록 만들어 보겠습니다. index.html의 스크립트 섹션은 이제 다음과 같아야합니다.
index.html
<script src="/socket.io/socket.io.js"></script>
<script src="https://code.jquery.com/jquery-3.4.1.min.js"></script>
<script>
  $(function () {
    var socket = io();
    $('form').submit(function(e) {
      e.preventDefault(); // prevents page reloading
      socket.emit('chat message', $('#m').val());
      $('#m').val('');
      return false;
    });
  });
</script>
index.js
io.on('connection', (socket) => {
  socket.on('chat message', (msg) => {
    console.log('message: ' + msg);
  });
});
Broadcasting
다음 목표는 서버에서 나머지 사용자에게 이벤트를 내보내는 것입니다.
모든 사람에게 이벤트를 보내기 위해 Socket.IO는 io.emit() 메서드를 제공합니다.
io.emit('some event', { someProperty: 'some value', otherProperty: 'other value' }); // This will emit the event to all connected sockets특정 emitting 소켓을 제외한 모든 사람에게 메시지를 보내려면 해당 소켓에서 방출(emit)하는 broadcast 플래그가 있습니다.
io.on('connection', (socket) => {
  socket.broadcast.emit('hi');
});
다음 경우, 단순화를 위해 보낸 사람을 포함한 모든 사람에게 메시지를 보냅니다.
io.on('connection', (socket) => {
  socket.on('chat message', (msg) => {
    io.emit('chat message', msg);
  });
});
그리고 클라이언트 측에서는 채팅 메시지 이벤트를 캡처 할때 페이지에 포함합니다. 이제 전체 클라이언트 측 JavaScript 코드는 다음과 같습니다.
<script>
  $(function () {
    var socket = io();
    $('form').submit(function(e){
      e.preventDefault(); // prevents page reloading
      socket.emit('chat message', $('#m').val());
      $('#m').val('');
      return false;
    });
    socket.on('chat message', function(msg){
      $('#messages').append($('<li>').text(msg));
    });
  });
</script>
Homework
응용 프로그램을 개선하기위한 몇 가지 아이디어는 다음과 같습니다.
- 누군가 연결하거나 연결을 끊을 때 연결된 사용자에게 메시지를 브로드 캐스트합니다.
- 별명에 대한 지원을 추가합니다.
- 메시지를 보낸 사용자에게 동일한 메시지를 보내지 마세요. 대신 Enter를 누르는 즉시 메시지를 직접 추가하십시오.
- "{사용자}가 입력 중입니다"기능을 추가합니다.
- 누가 온라인 상태인지 보여주세요.
- 비공개 메시지를 추가합니다.
- 개선 사항을 공유하십시오!
