📌 AlertController
AlertController는 사용자에게 몇몇 선택지를 제공하는데, 각각의 선택지를 AlertAction이라 한다.
AlertAction Style
- default: 기본
- cancel: 선택 취소. AlertController마다 하나씩만 사용할 수 있음.
- destructive: 이 action을 선택하는 데 주의를 요함.
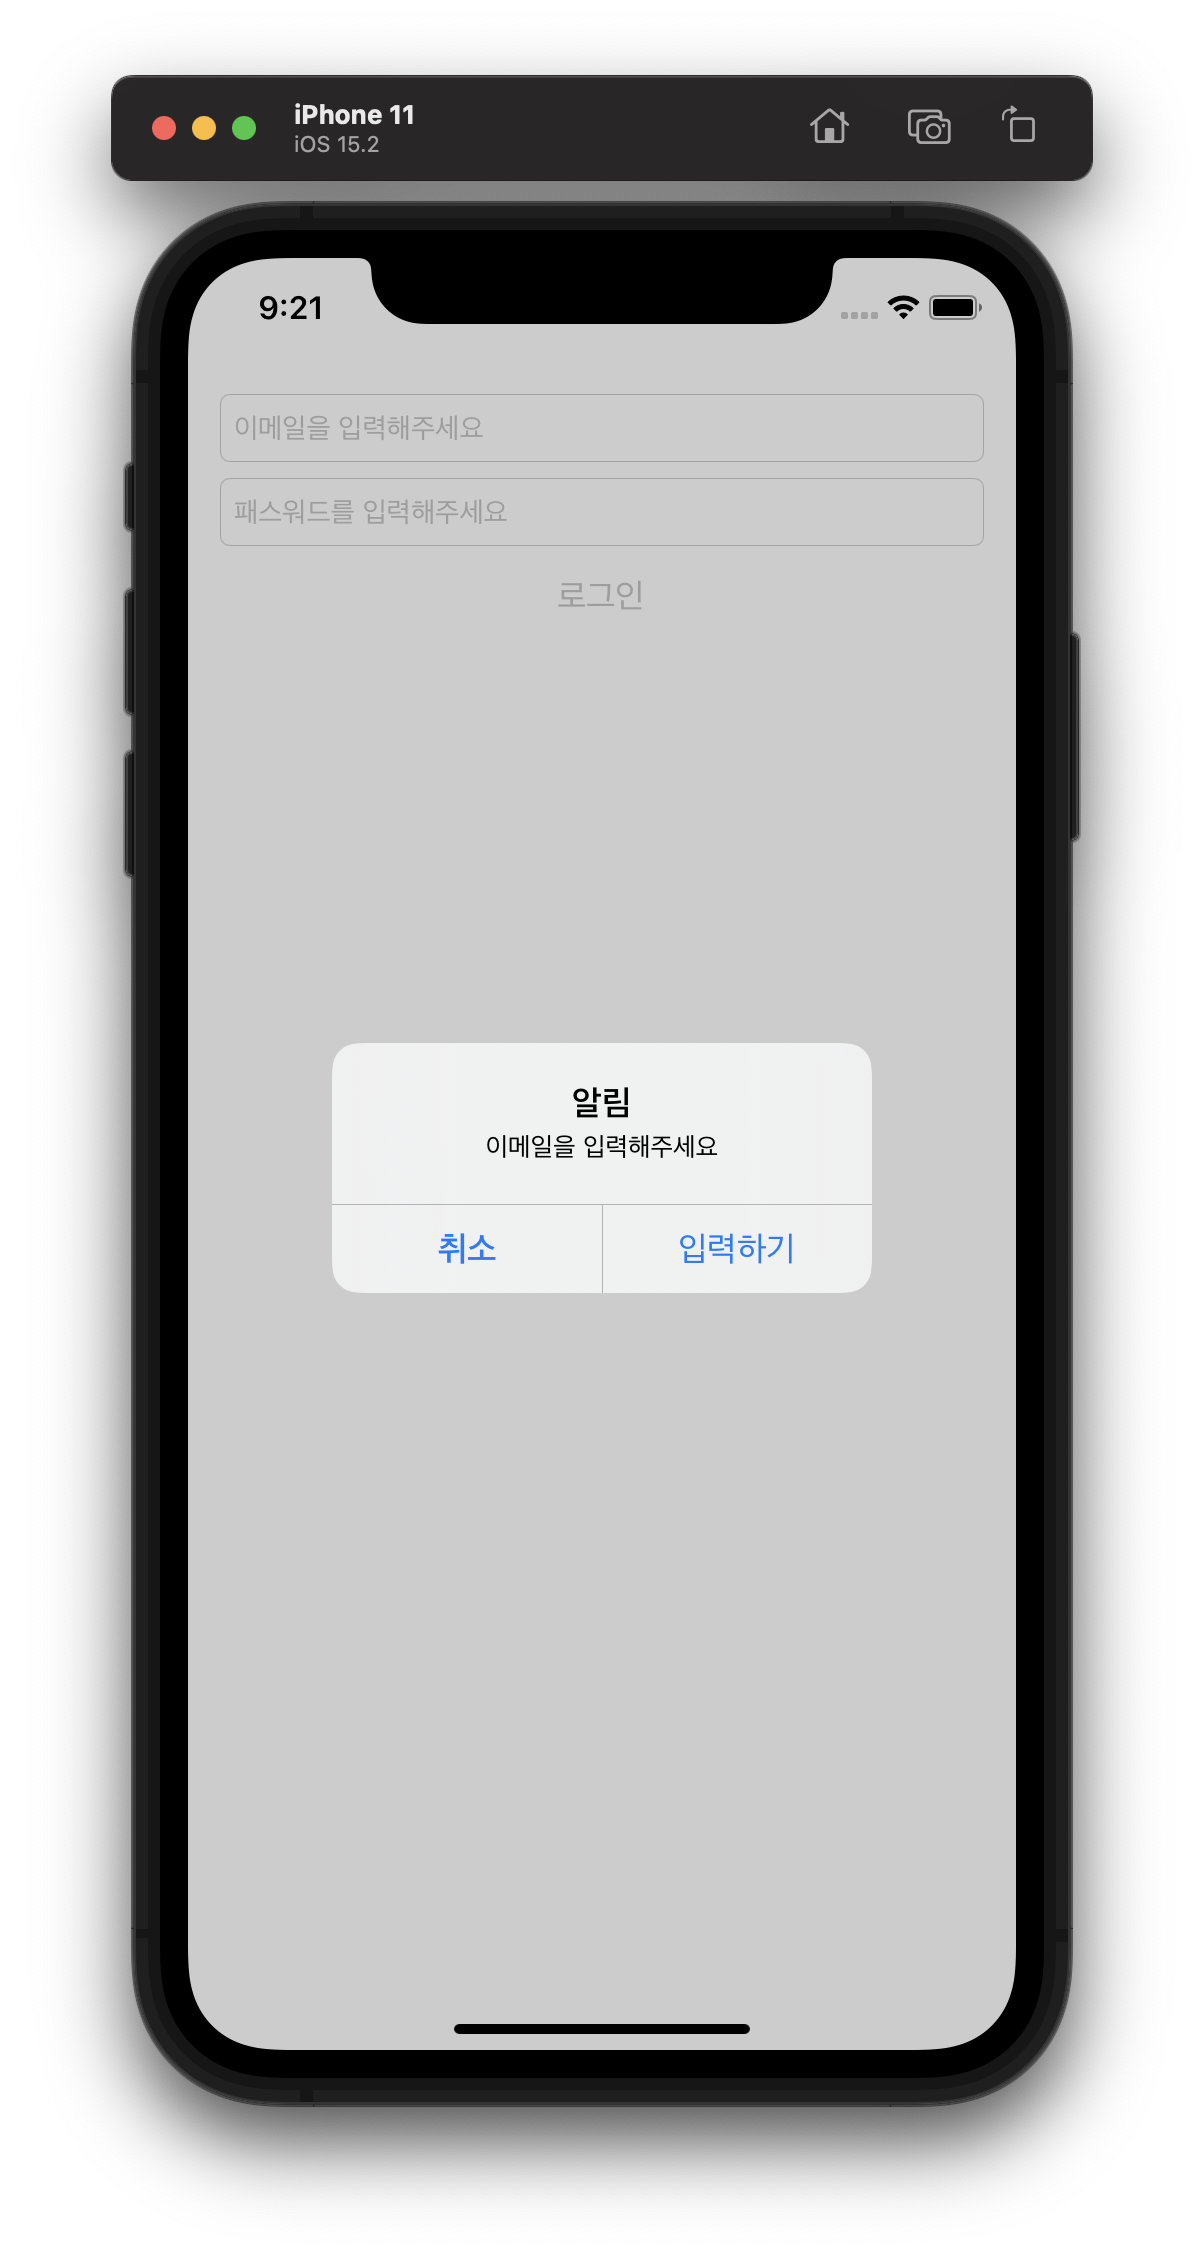
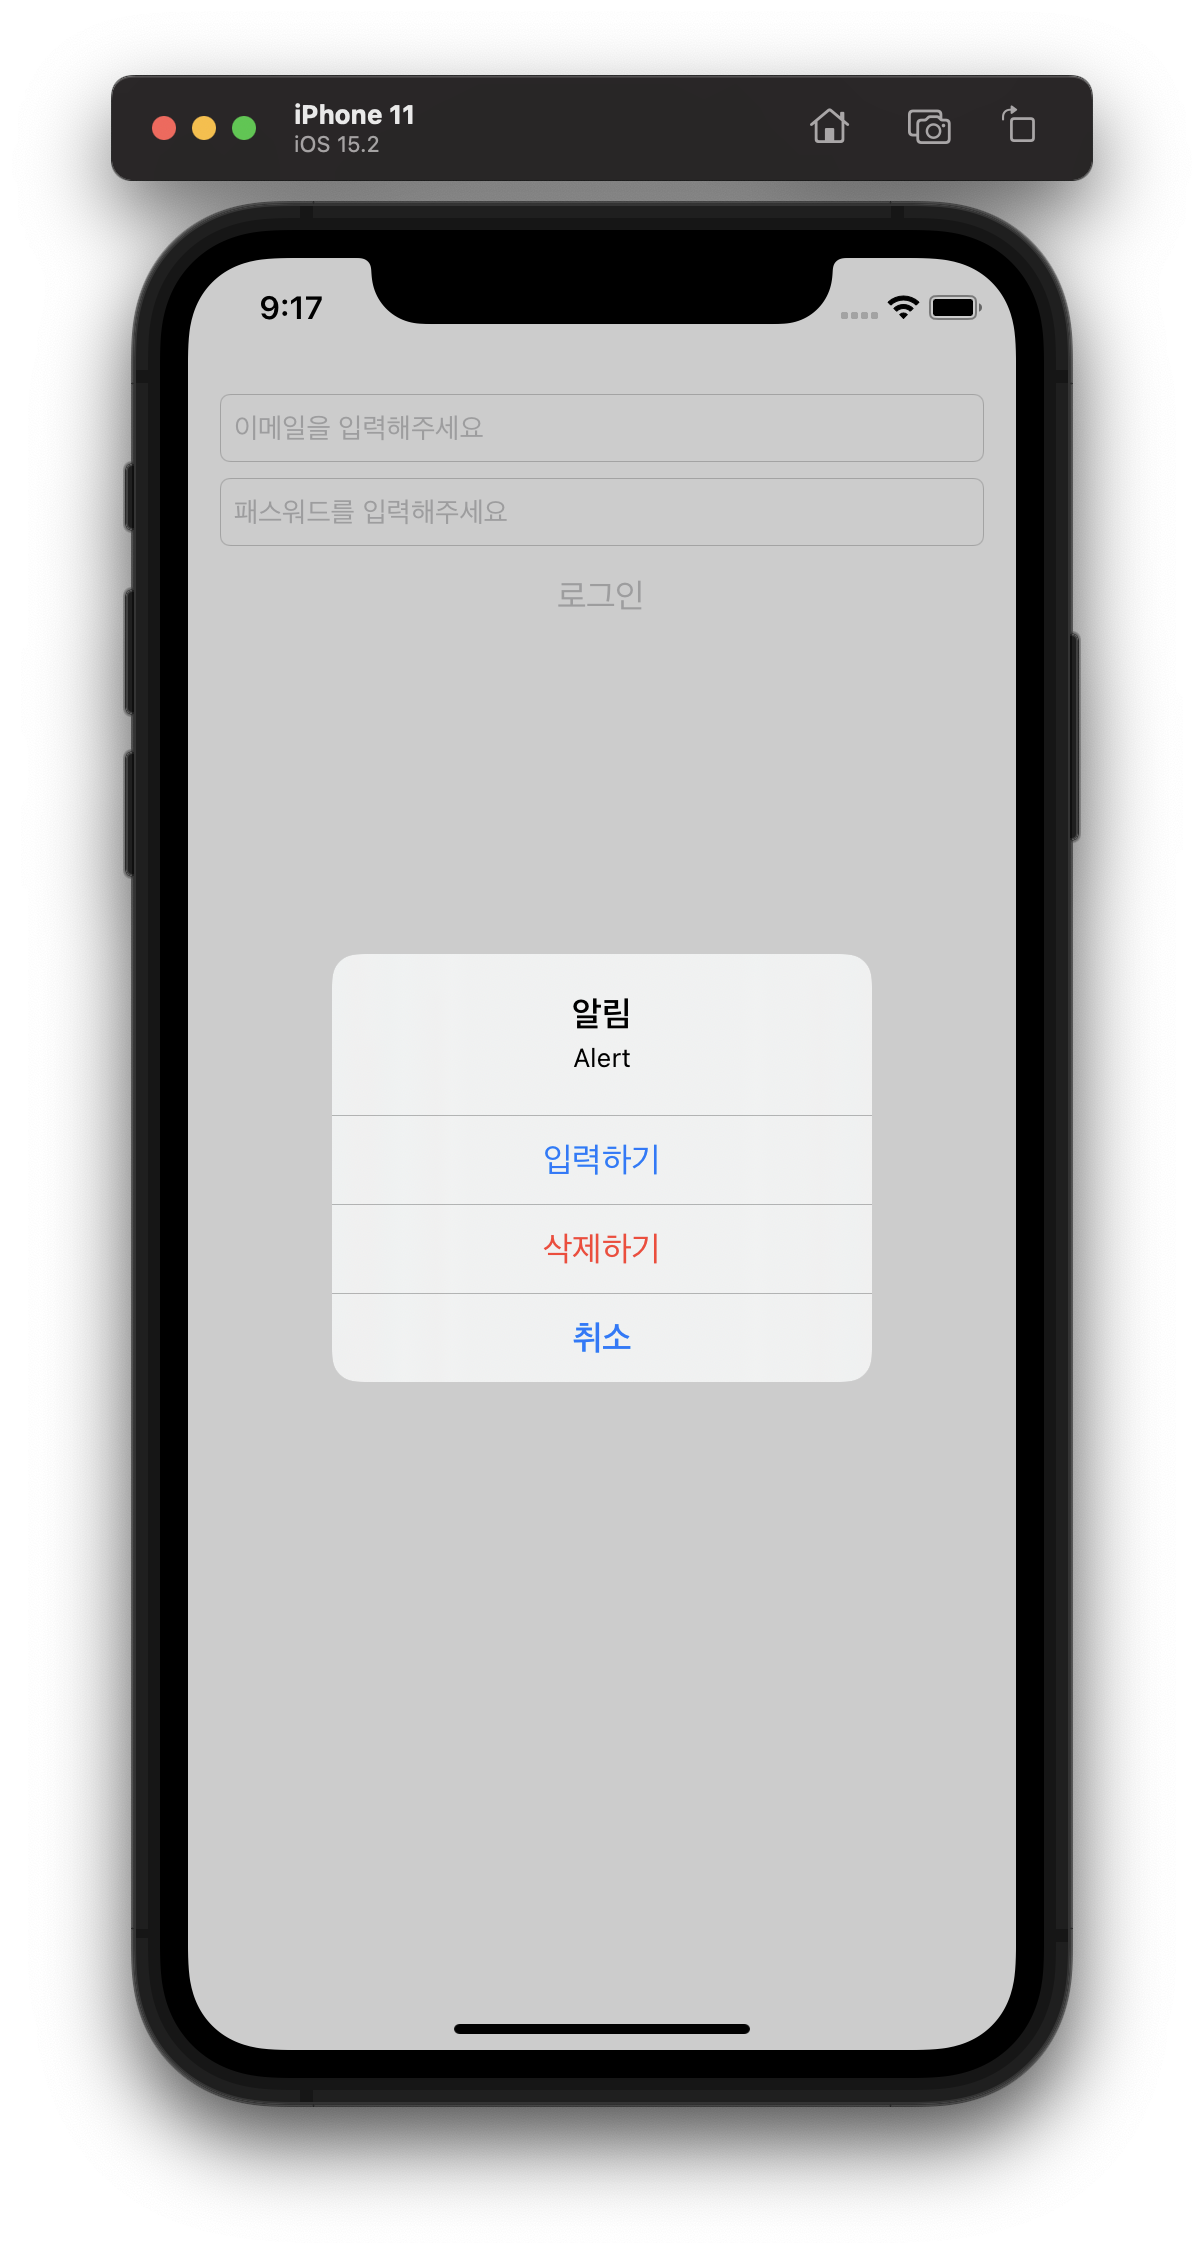
AlertController Style
- alert
cancel 버튼의 위치는 action의 수에 따라 달라진다. action이 2개일 경우 왼쪽에 위치하고, 3개일 경우 최하단에 위치한다.
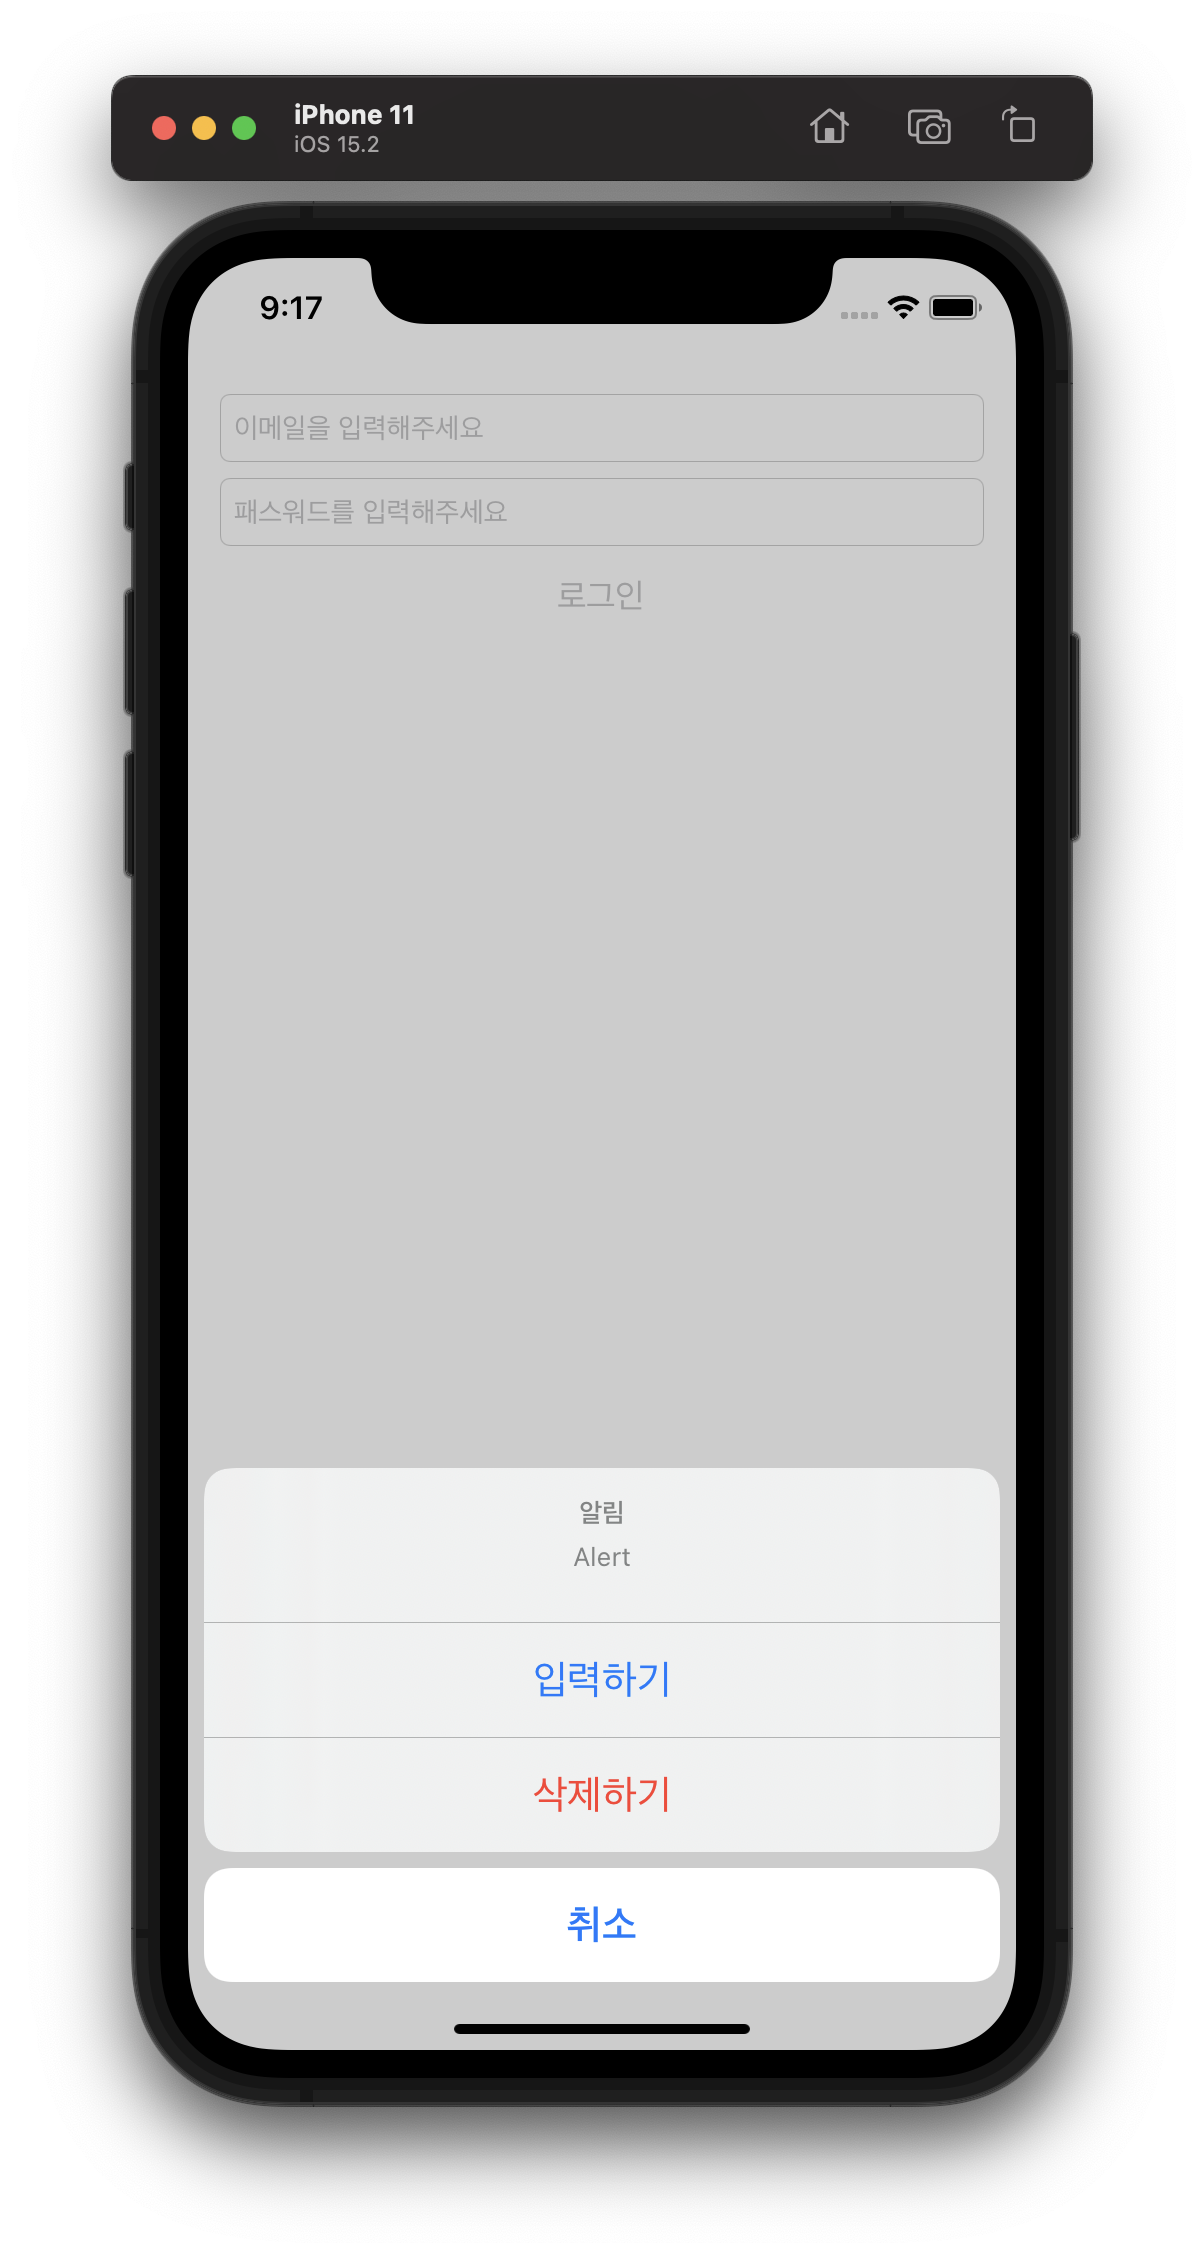
- actionSheet
action의 수에 상관없이 최하단에 위치한다.
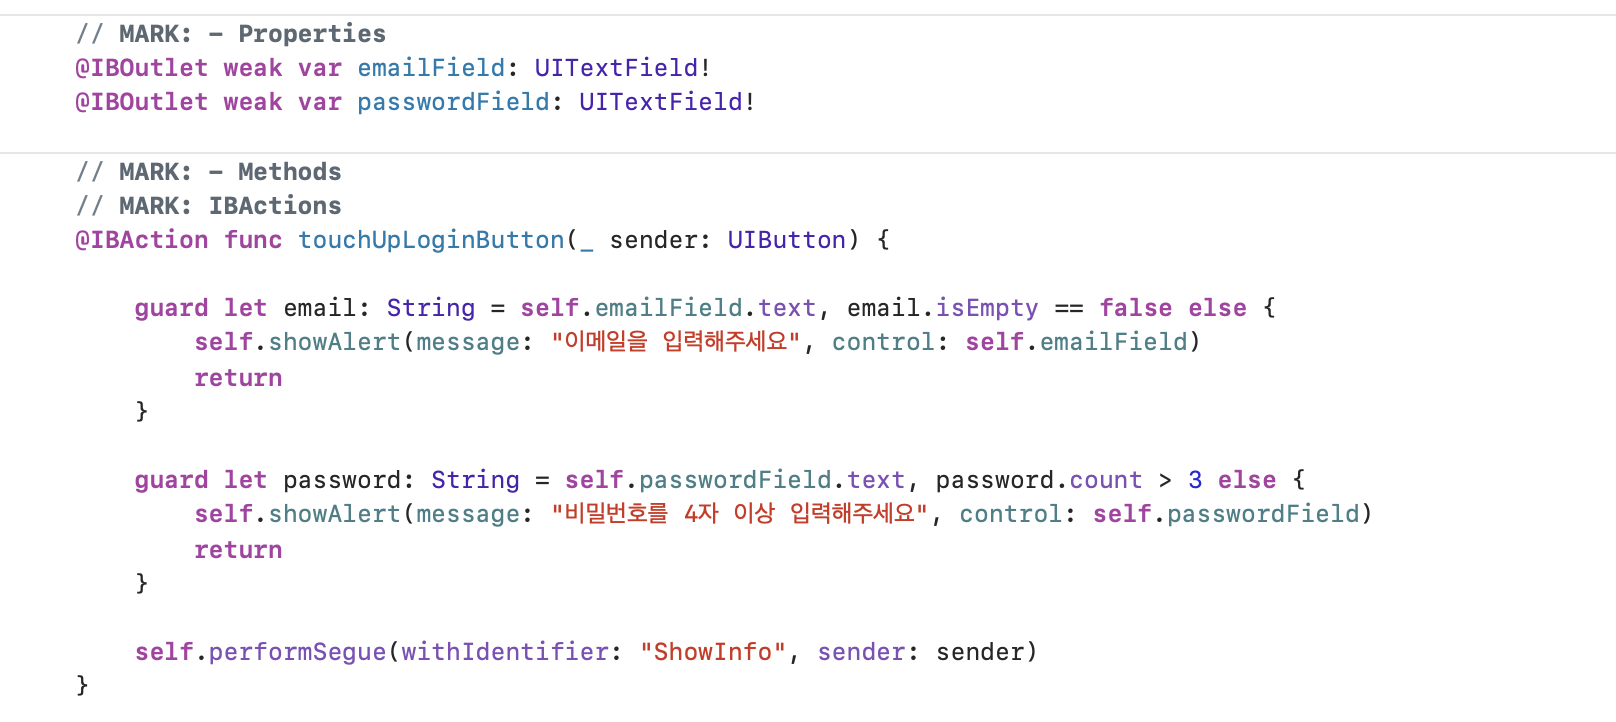
 [입력하기] 버튼을 누르면 이메일 혹은 비밀번호 TextField에 커서가 띄워지도록 이렇게 만들어줄 수도 있다. UIAlertAction의 마지막 매개변수인 handler 클로저에는 사용자가 이 action을 선택했을 때 실행할 코드 묶음이 들어간다.
toBeFirstResponder 매개변수로 컨트롤을 받아오므로 이 컨트롤을 FirstResponder로 만들어주는 코드를 클로저에 넣어주면 된다.
✏️ AlertAction handler 클로저 뜯어보기
일단 우리를 괴롭게 하는 [weak toBeFirstResponder]를 빼고 코드를 보자.
let okAction: UIAlertAction
	= UIAlertAction(title: "입력하기",
                    style: UIAlertAction.Style.default) {(action: UIAlertAction) in
                    	toBeFirstResponder?.becomeFirstResponder()}
UIAlertAction의 마지막 매개변수인 handler가
UIAlertAction을 매개변수로 받고 리턴타입이 Void인 클로저인 것이다.
여기서는 리턴타입이 생략된 후행클로저로 구현되어 있다.
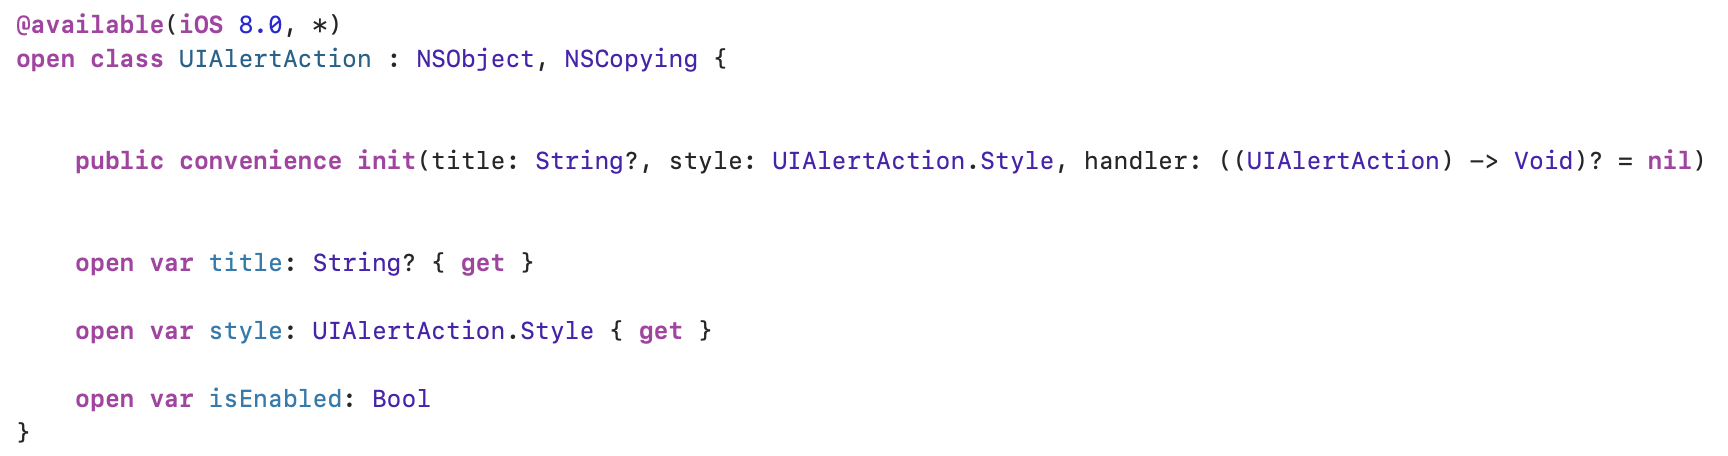 UIAlertAction의 정의부로 이동해서 확인해보면 handler의 정의가 우리가 추측한 것이 맞다는 것을 알 수 있다.
입력하기 버튼을 누르면 이 okAction 자기자신이 handler의 action으로 넘어간다. 하지만 우리의 코드는 handler 안에서 이 action을 사용하진 않는다. toBeFirstResponder로 받아온 컨트롤을 FirstResponder로 만들어줄 뿐이다.
그럼 okAction 자기자신이 진짜 action으로 넘어오는 게 맞을까? 확인해보자. handler를 따로 빼서 함수 alertHandler로 만들어주고, 이 함수 안에서 action의 title을 로그로 확인해본다.
okAction과 cancelAction의 handler에 이 함수를 넘겨주어서 코드를 재사용했고, 호출은 self.alertHandler(_:)로 해주든 alertHandler로 해주든 상관 없이 정상동작한다. << 왜 ????
func alertHandler(_ alertAction: UIAlertAction) {
    guard let actionTitle = alertAction.title else {
        return
    }
    print("alertHandler >> \(actionTitle)")
}

private func showAlert(message: String, control toBeFirstResponder: UIControl?) {
    let alert: UIAlertController = UIAlertController(title: "알림",
                                                     message: message,
                                                     preferredStyle: UIAlertController.Style.alert)

    let okAction: UIAlertAction = UIAlertAction(title: "입력하기",
                                                style: UIAlertAction.Style.default,
                                                handler: self.alertHandler(_:))

    let cancelAction: UIAlertAction = UIAlertAction(title: "취소",
                                                    style: UIAlertAction.Style.cancel,
                                                    handler: alertHandler)

    alert.addAction(okAction)
    alert.addAction(cancelAction)

    self.present(alert, animated: true) {
        print("얼럿 화면에 보여짐")
    }
}
입력하기 버튼과 취소 버튼을 차례로 눌러주었고, 로그가 제대로 찍히는 모습이다.
✏️ 순환참조
이제 그럼 [weak toBeFirstResponder]를 추가한 원래 코드로 돌아와보자.
let okAction: UIAlertAction
	= UIAlertAction(title: "입력하기",
                    style: UIAlertAction.Style.default) { [weak toBeFirstResponder] (action: UIAlertAction) in
                    	toBeFirstResponder?.becomeFirstResponder() }
weak은 왜 쓰는 걸까? 순환참조에 대해 미리 알 필요가 있다.
ARC(Automatic Reference Counting)
- 참조된 횟수(reference count)를 추적해 더 이상 참조되지 않는 인스턴스를 메모리에서 해제해 주는 것
순환참조
- 서로가 서로를 참조하고 있어서 메모리 해제가 절대 되지 않는 상황
- ARC가 메모리 해제에 대한 개발자의 부담을 덜어주기는 하지만 자칫 잘못하면 순환참조가 발생할 수도 있음
weak
- 해당 인스턴스의 소유권을 가지지 않고, 주소값만 가지고 있는 포인터 개념
- 자신이 참조하는 인스턴스의 참조 횟수(reference count)를 증가시키지 않음
>> https://babbab2.tistory.com/83 요기 글 정독해보기 !! <<
결국 [weak toBeFirstResponder]는, 강한 참조 순환을 방지하기 위한 클로저의 캡쳐 리스트이다.
얘기가 많이 샜다. 다시 첫 코드캡쳐로 돌아가자. 마지막 줄에 present 메소드도 후행 클로저를 사용하는데, completion이라는 이름을 갖는 매개변수에 클로저를 넣어준 것이다. 마찬가지로 이 모달 애니메이션을 띄운 후에 실행할 코드 묶음이 들어간다.
매개변수 이름이 handler, completion인 것들은 대부분 클로저를 전달받는다.
📌 JSONDecoder
JSON 파일을 Asset에 등록하여 사용할 때 필요한 클래스이다.
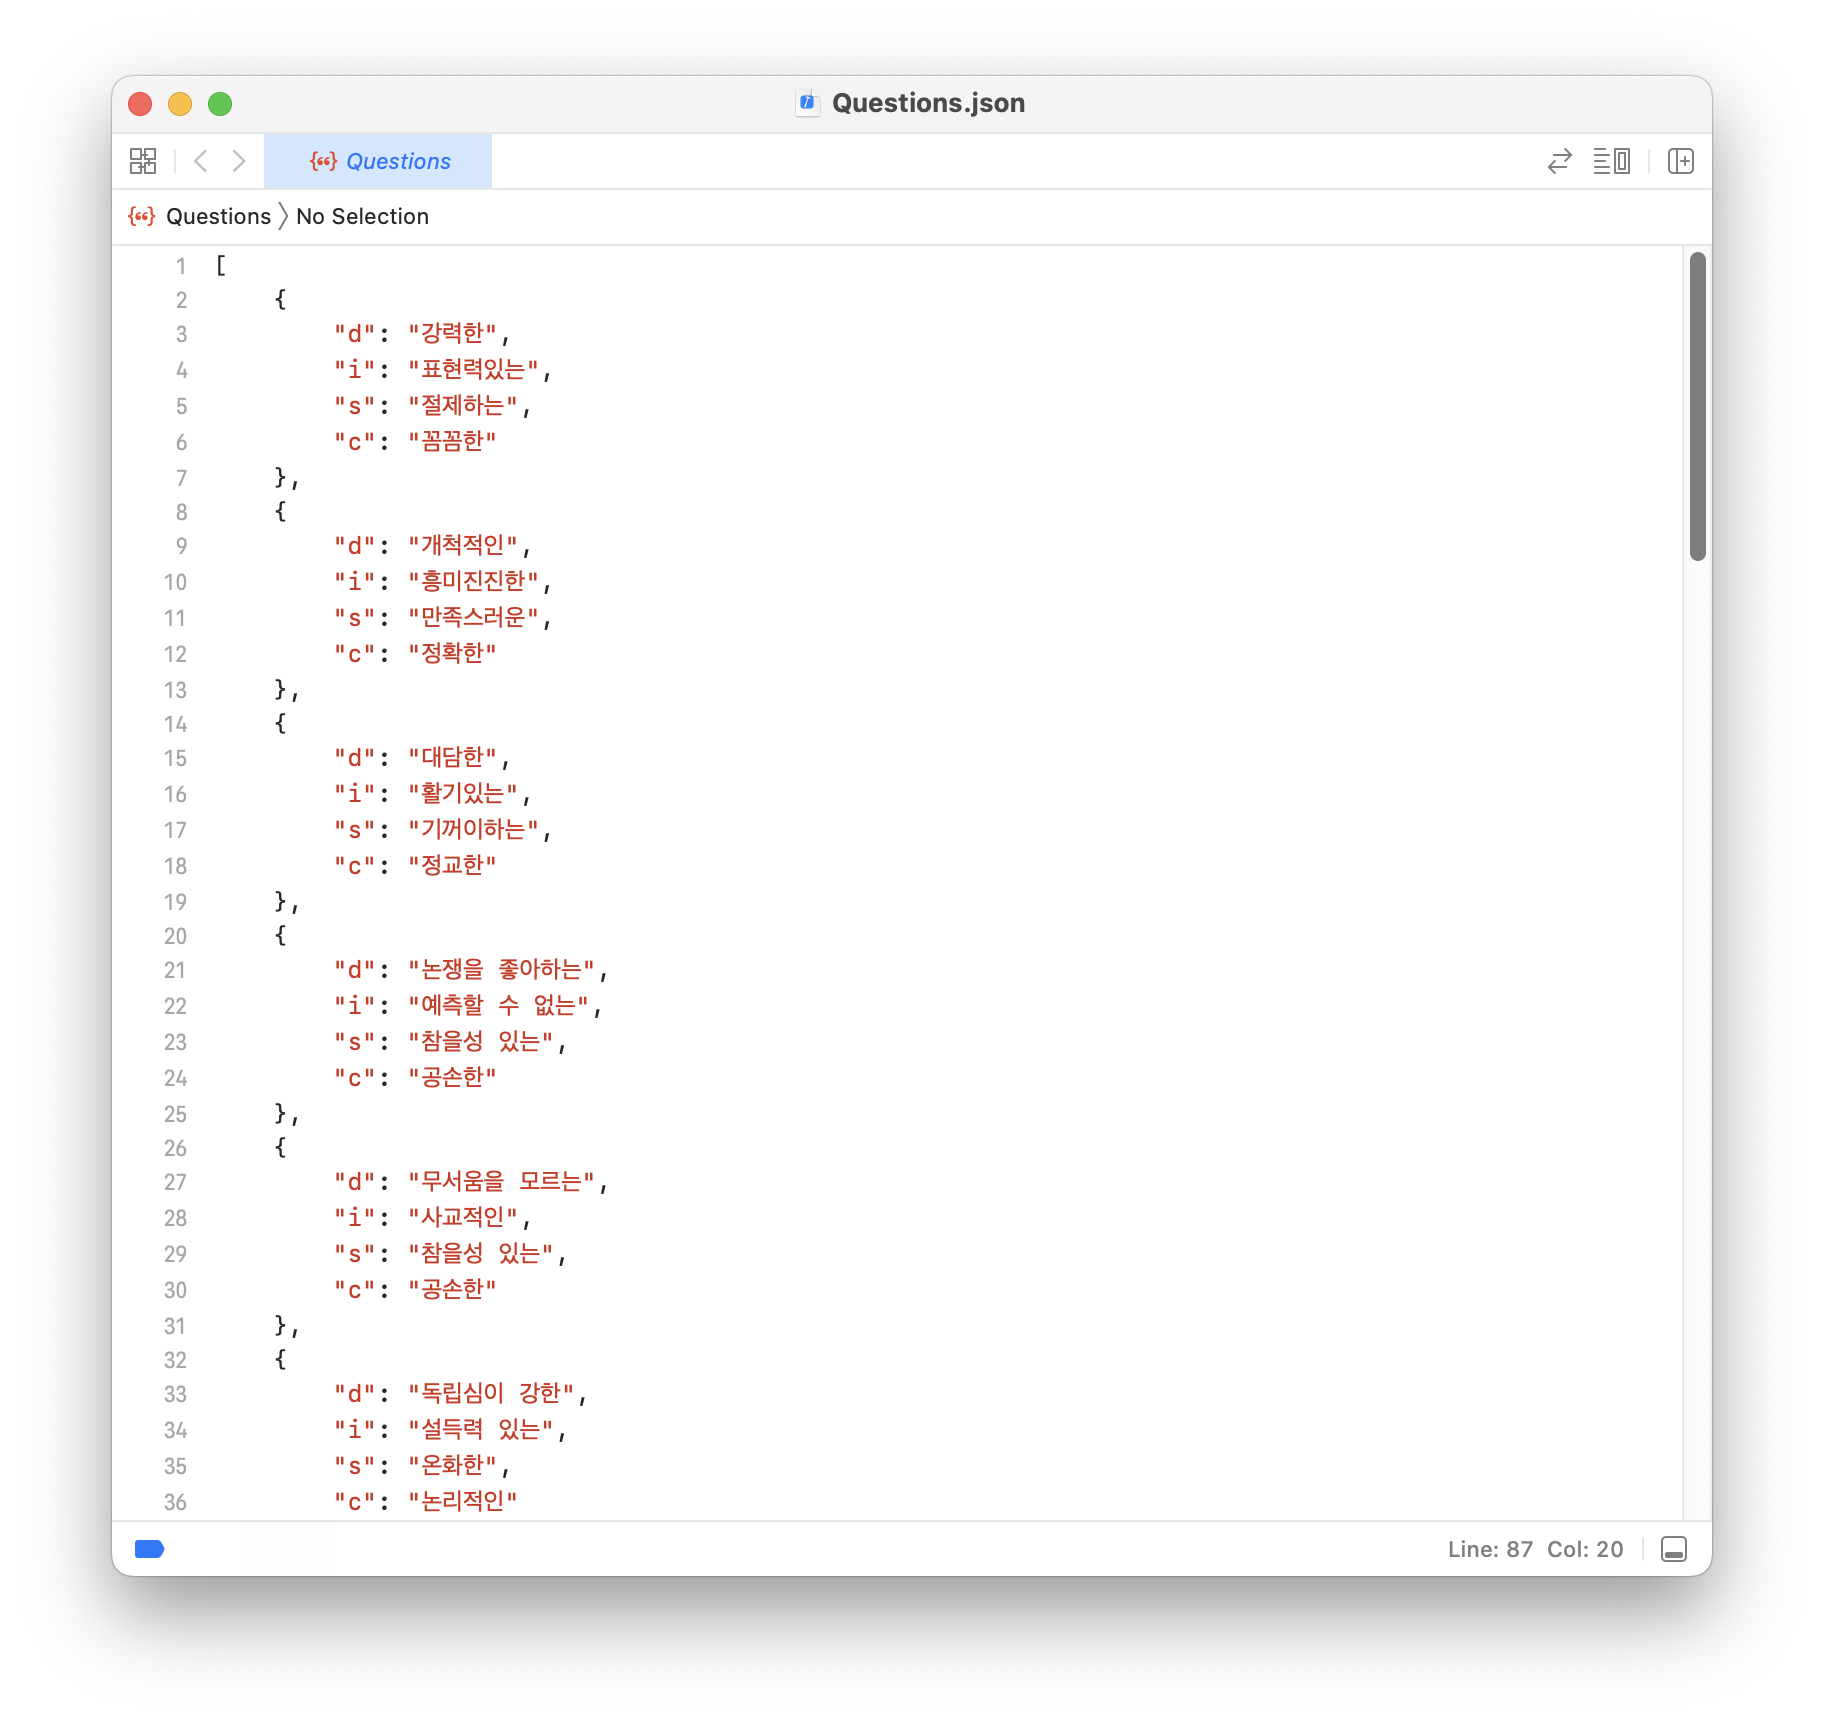 이렇게 생긴
 Questions.json 파일을 가져와보자.
 프로젝트에 JSON 파일을 Asset에 등록할 때, dataset 확장자로 삽입해야 한다. 우리의
 Questions.dataset 에는 Contents.json과 Questions.json이 들어있다. NSDataAsset 클래스를 이용하면 이 dataset을 코드에서 가져와 사용할 수 있다.
Question.swift
import Foundation
import UIKit

struct Question: Codable {
    let d: String
    let i: String
    let s: String
    let c: String
}

extension Question {
    static var all: [Question] = {
        guard let dataAsset: NSDataAsset = NSDataAsset(name: "Questions") else {
            return []
        }

        let jsonDecoder: JSONDecoder = JSONDecoder()

        do {
            return try jsonDecoder.decode([Question].self, from: dataAsset.data)
        } catch {
            return []
        }
    }()
}
all 변수에는 [Question] 배열을 리턴하는 함수를 저장한다. 이 함수를 들여다보자.
Asset을 가져올 때는 파일이 없을 수도 있기 때문에 옵셔널 바인딩을 해 주는 것이 안전하다. guard let 구문으로 이를 수행했다. Asset을 무사히 가져왔다면 JSONDecoder 인스턴스를 만들어서 decode의 from 인자에 넣어준다. 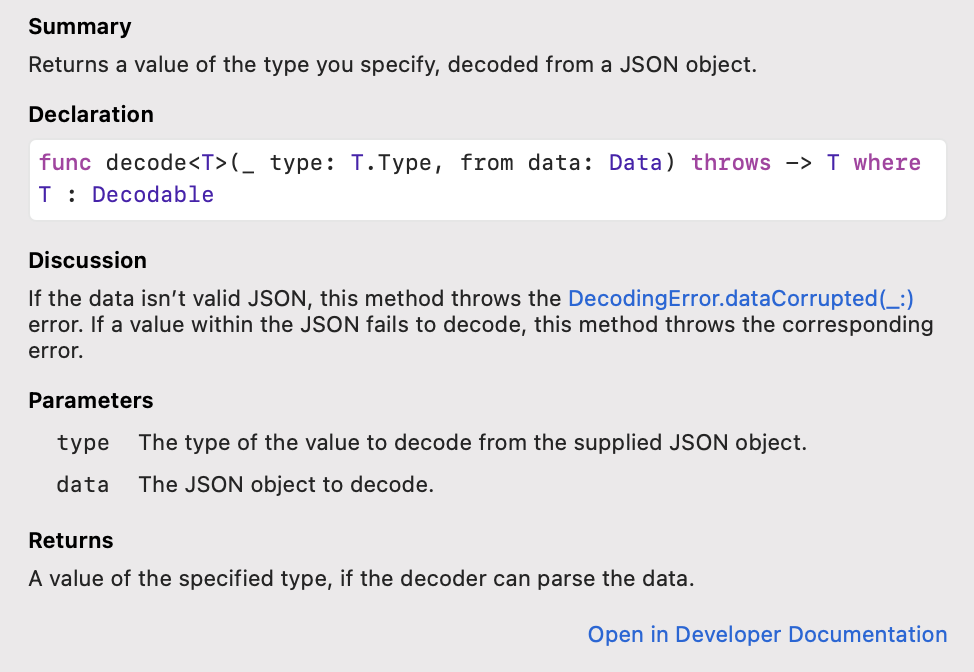 decode 정의부를 보면 throws로 구현되어 있다. 디코딩 도중에 에러가 발생할 가능성을 내포한 메소드이므로 decode를 사용할 때 try를 반드시 같이 써주어야 한다.
JSON Data의 Key값(d, i, s, c)이 Codable을 따르는 구조체 Question의 프로퍼티명(d, i, s, c)과 동일하면 그 변수의 값에 Value를 파싱한다. 이렇게 1대1 매칭이 되어야만 에러 없이 사용할 수 있다.
CodingKey
하지만 프로퍼티명을 Key값과 다르게 사용하고 싶을 경우, 방법은 있다.
struct Coffee: Codable {
	var drink: String
    var price: Double
    var brand: String

    enum CodingKeys: String, CodingKey {
    	case drink = "nameOfBeverage"
        case price
        case brand = "nameOfBrand"
    }
}
Codable 타입은 CodingKeys라는 이름을 가진 nested 열거형을 정의할 수 있다.
- 이 열거형은
CodingKey프로토콜을 채택해야 한다. - 이 열거형은 타입의 인스턴스가 인코딩 또는 디코딩될 때 case에 해당하는 속성들이 전부 있어야 한다고 선언하는 역할을 한다.
- 이 열거형의 case들의 이름은 프로퍼티들의 이름과 일치해야 하고, key값과 프로퍼티명을 다르게 사용할 거라면
case drink = "nameOfBeverage"처럼 key값을 String 타입으로 매칭해주면 된다.