우선 HTTP에 관해 복습을 먼저 해본다.
HTTP 는 두가지로 이루어져 있다.
-> 요청(request)과 응답(response)
요청(request)
요청은 메소드 + url 로 이루어져 있다.
- GET - READ
- POST - CREATE
- PUT - UPDATE
- PATCH - UPDATE
- DELETE - DELETE
- OPTIONS -
url 은 미니노드서버 과제의 POST /upper , POST /lower 가있다.
응답(response)
응답은 상태코드 + 상태메세지 로 이루어져 있다.
- 200 : 성공
- 300 : 리디렉션
- 400 : 실패 (클라이언트)
- 500 : 실패 (서버)
간단한 서버 만들어보기
Node.js HTTP 처리 과정을 잘 이해하게 해주는 문서 -> HTTP 트랜잭션 해부
Visual Studio Code 에 위의 문서를 참고하여 서버를 만들어본다.
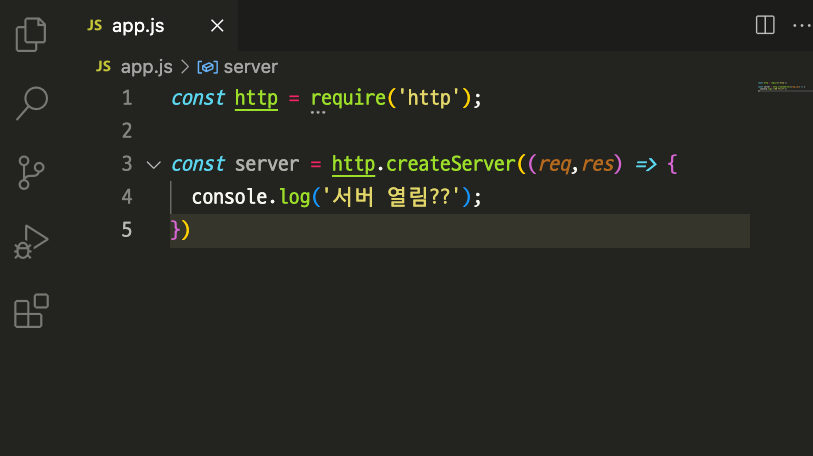
여기서 터미널에 node app.js 로 서버를 실행시켜보면 아무런 반응이 없다.
이유는 문서를 살펴보면 요청을 실제로 처리하려면 listen 메서드가 server객체에서 호출되어야한다고 나와있다.
->
const http = require('http');
const server = http.createServer((req,res) => {
console.log('서버 열림??');
})
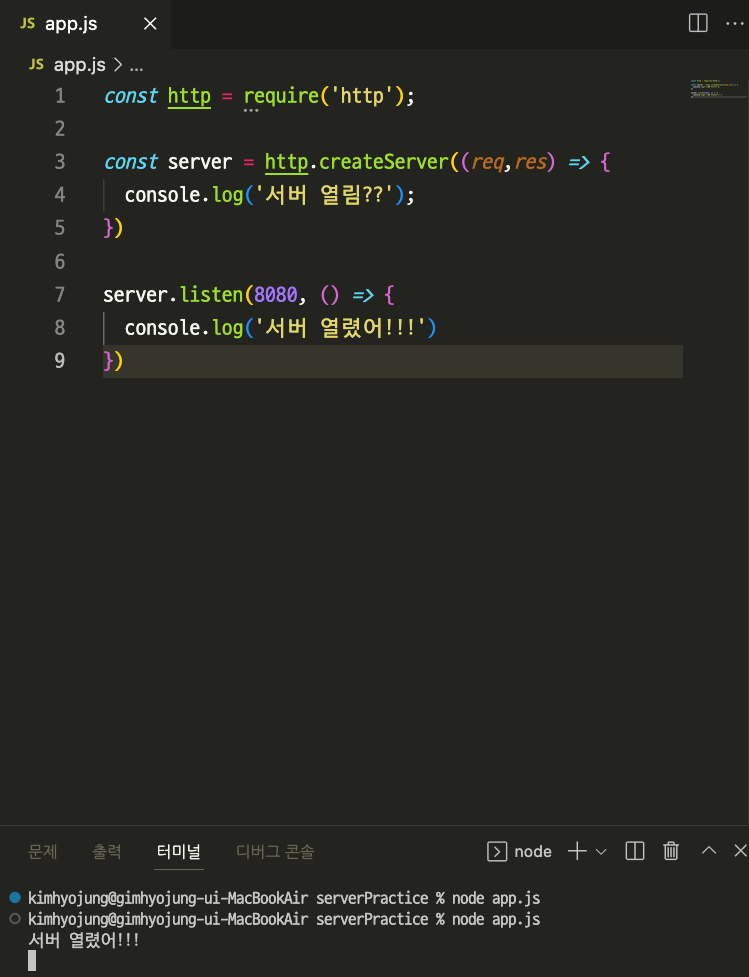
server.listen(8080, () => { // 문서에 8080포트로 받고있어서 그대로 썻고 매개변수로 콜백함수를 넣을수 있어서 인자로 넣어줬다.
console.log('서버 열렸어!!!')
})
// 이렇게 만들고 node app.js 로 실행시키니
// 서버 열렸어!!! 를 응답으로 받아왔다.POSTMAN 에서도 요청을 해본다.
-> GET / localhost:8080
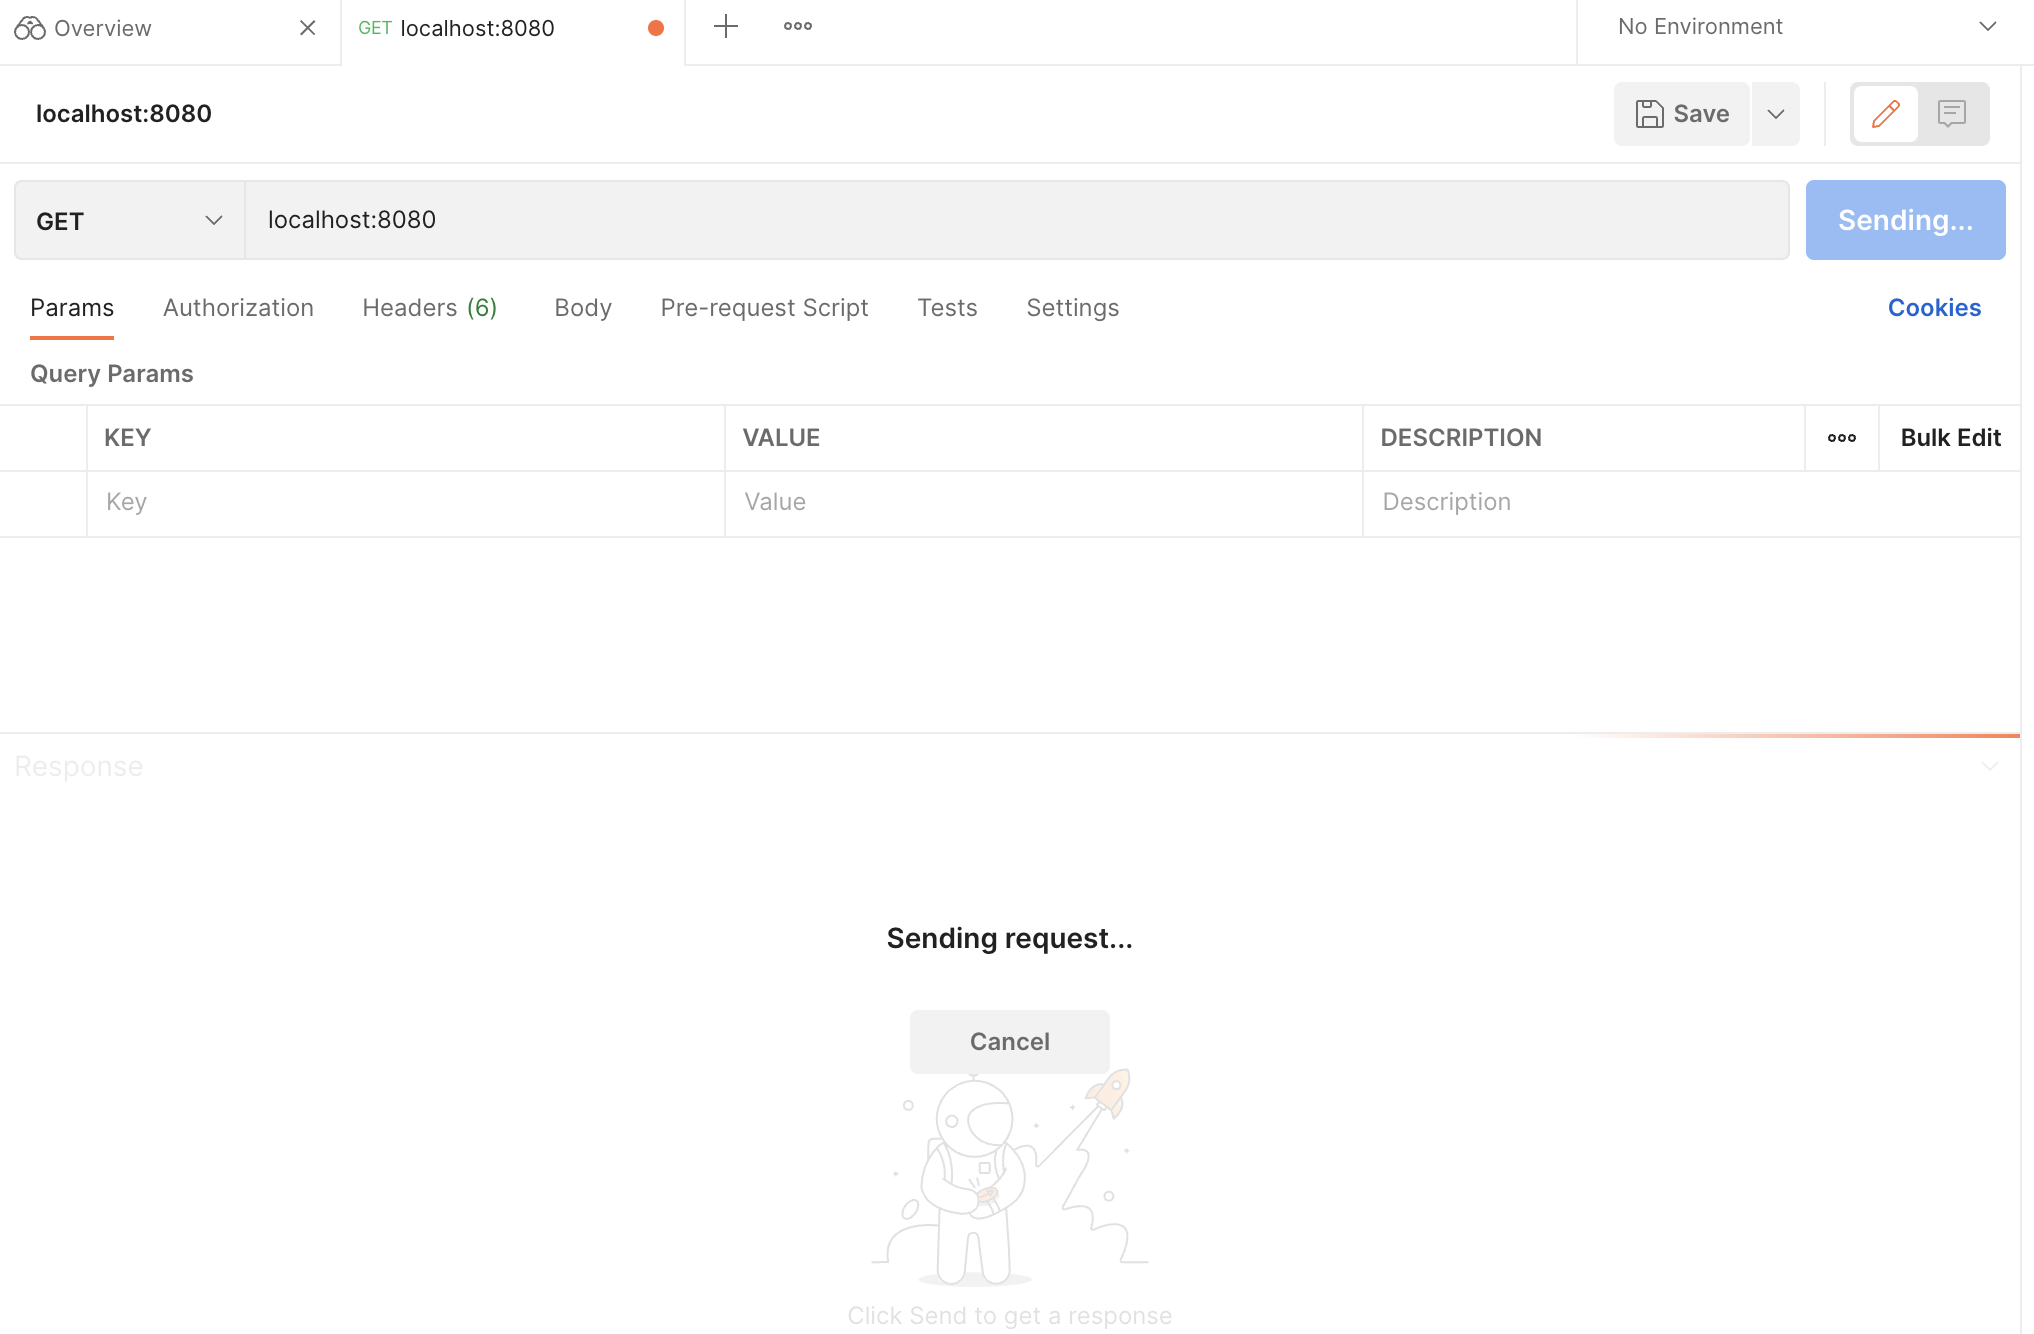
요청을 했으나 응답이 오질 않는다.
이유는 코드에 응답이 없기때문이다.
그래서 응답을 써본다.
-> response.end()
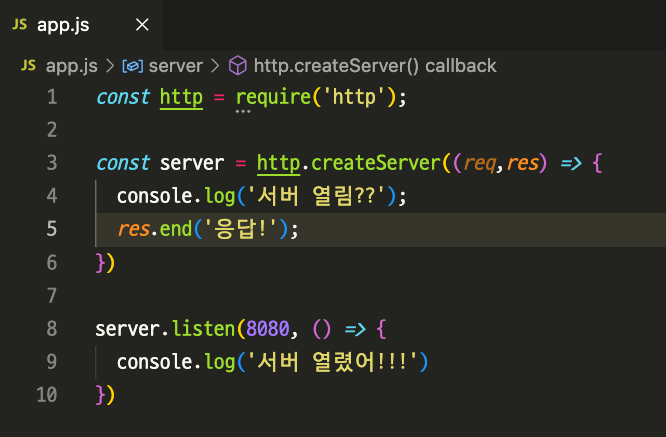
이렇게 쓰고 저장한 후 POSTMAN에 요청을 해보았지만 응답은 여전히 오질 않는다.
이유는 서버를 다시 켜고(-> node app.js로 서버 키고) POSTMAN에 요청을 해야 응답을 받을수 있다.

이렇게 불편하게 다시 껏다 키고 껏다 키고 하면서 확인하는걸 편하게 해줄 툴이 있다.
-> nodemon 이라는 툴이다.
-> npx nodemon app.js 로 서버를 실행시키면 코드를 수정하고 저장할때마다 자동으로 서버가 다시 열린다.
서버를 끌땐 -> ctrl + c
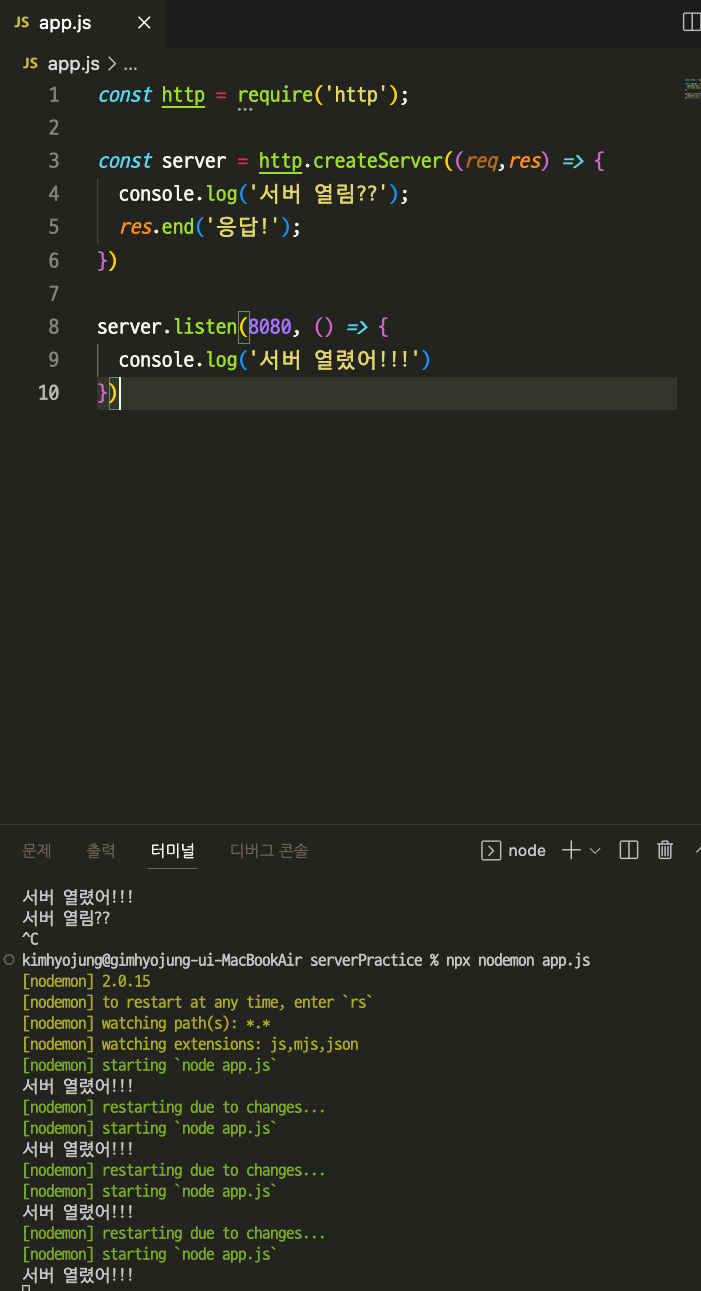
위의 사진처럼 저장할때마다 계속 서버가 열린다.
이제 미니노드서버과제를 풀어본다.
HTTP트랜잭션해부 문서에 메서드,url,헤더 부분 글에 Node가 request 객체에 유용한 프로퍼티를 넣어두었으므로 이 작업은 비교적 쉽게 할 수 있다고 나와있다.
즉 request객체에 method, url ,headers 라는 프로퍼티를 넣어 두었다는 것이다.
그럼 구조분해할당을 이용하여
-> const {method, url} = request 활용할 수 있다.
const http = require('http');

const server = http.createServer((request,response) => {
  const {method, url} = request // 구조분해할당으로 넣어주고
  console.log(method, url) // 찍어본다.
  response.end('응답!');
})

server.listen(8080, () => {
  console.log('서버 열렸어!!!')
}) 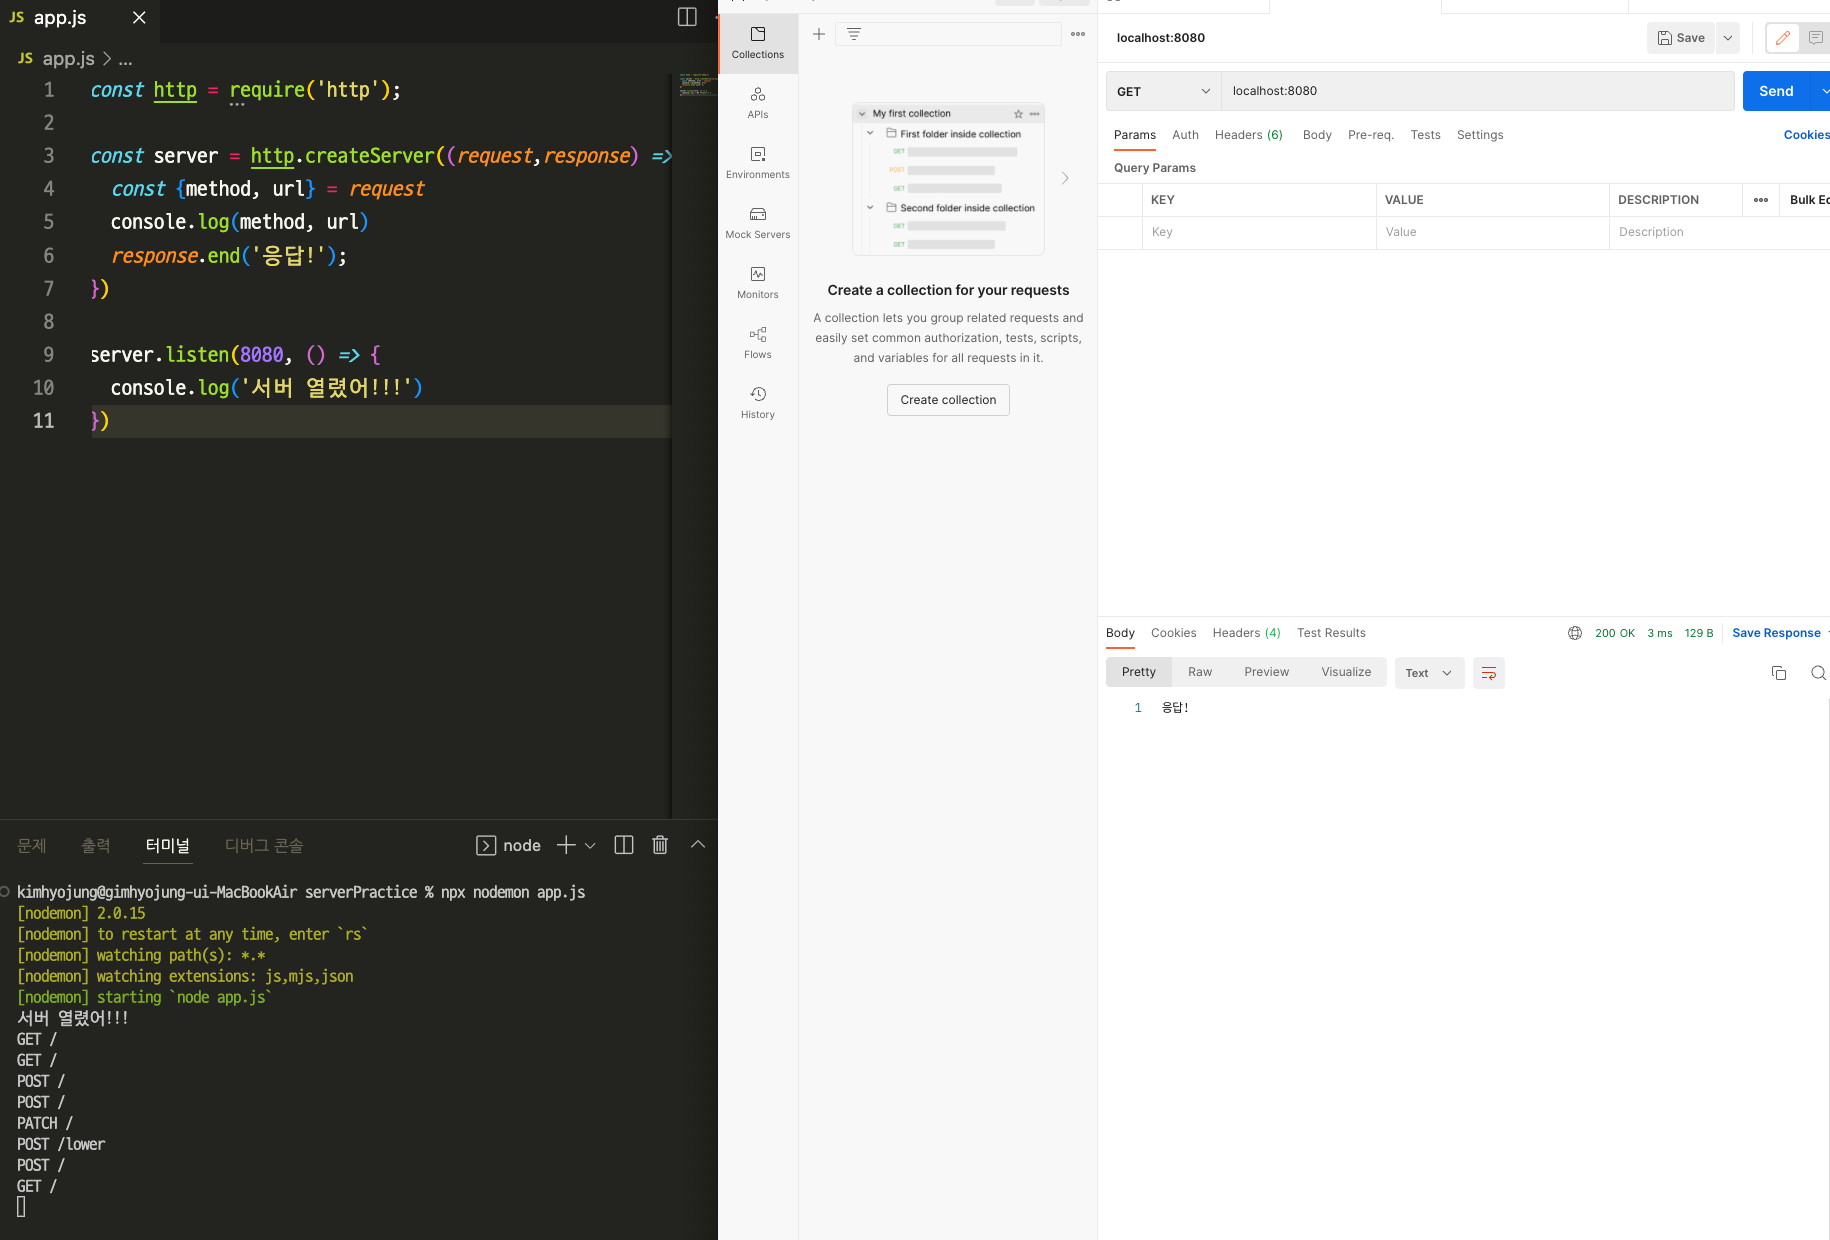
-> POSTMAN에서 요청을 보내면 터미널에 그대로 찍힌다.
이제 과제에서 원하는 대로 조건에 맞게 코드를 작성할 수 있다.
const http = require('http');

const server = http.createServer((request,response) => {
  const {method, url} = request
  console.log(method, url);
  if(method === 'POST' && url === '/lower'){
    // 메서드가 POST이면서 url이 /lower 일때
    response.end('lower로 옴')
  }
  else if(method === 'POST' && url === '/upper'){
    // 메서드가 POST이면서 url이 /upper 일떄
  }

  response.end('응답!');
})

server.listen(8080, () => {
  console.log('서버 열렸어!!!')
})
에러
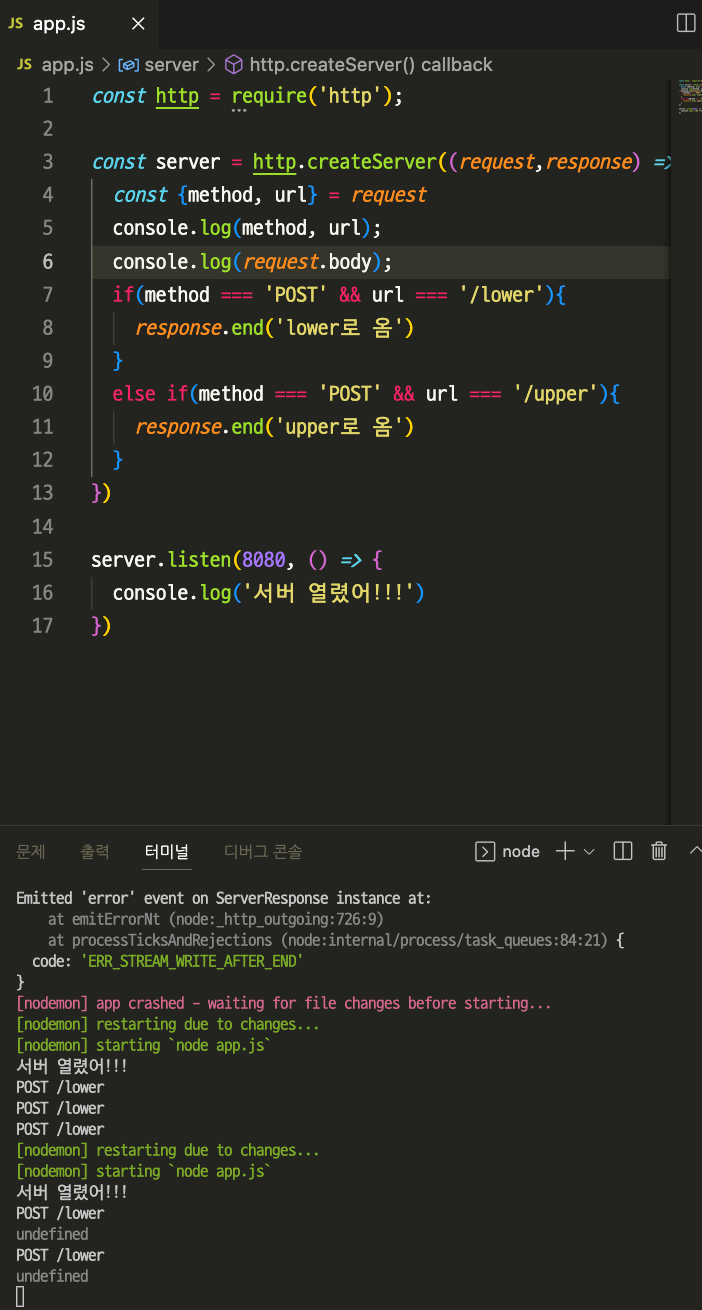
위처럼 쓰고 POSTMAN에 POST /lower 요청을 해보면
->
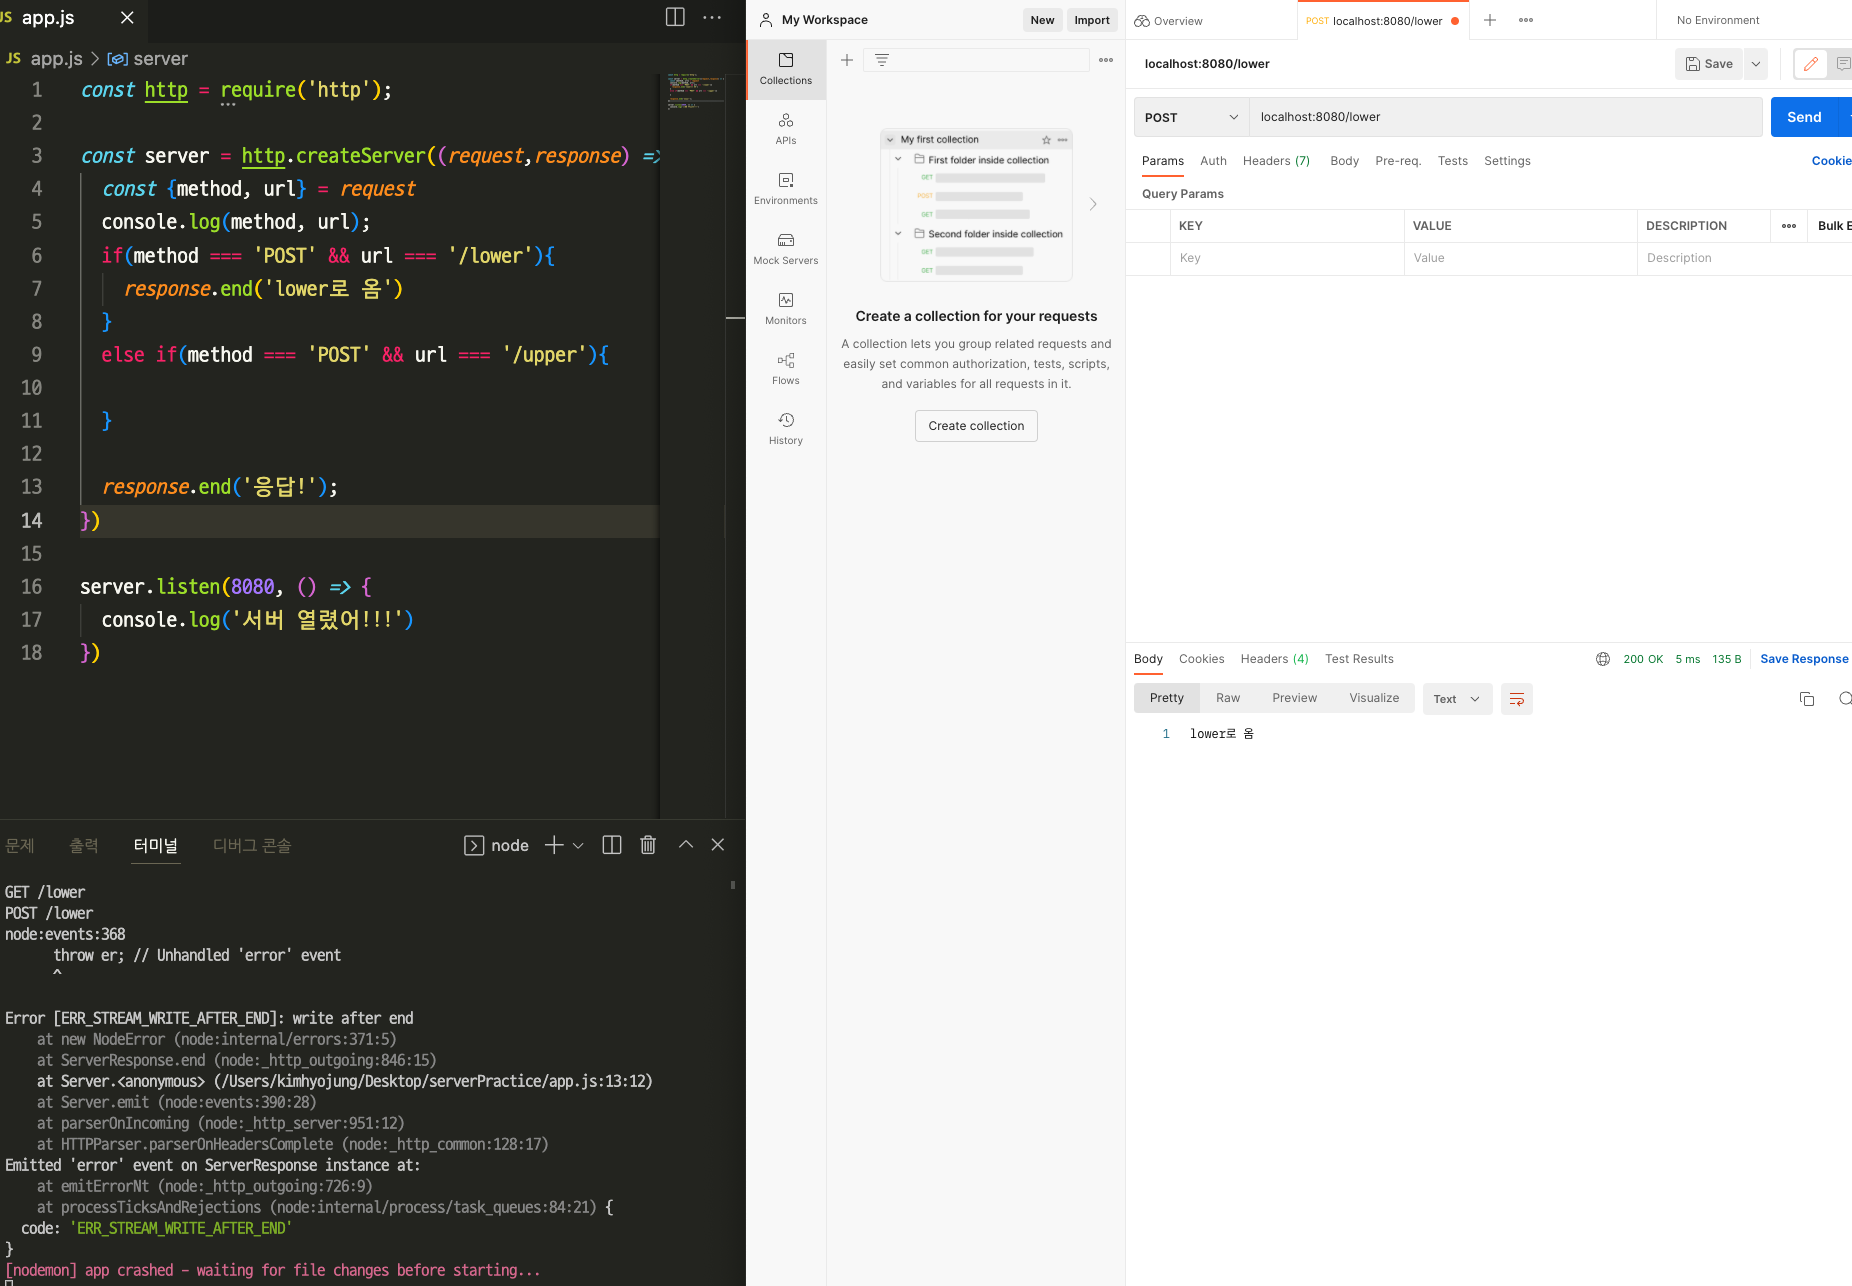
이런식으로 에러가 나온다.
이유는 HTTP 요청을 한번하면 응답도 한번오게 되어있다.
하지만 여기서 if문 /lower에서 response.end('lower로 옴')응답 한번을 하고 else if문 밑에 있는 response.end('응답!') 에서 한번더 응답을 하기 때문에
Error [ERR_STREAM_WRITE_AFTER_END]: write after end
라는 에러메세지가 나온다.
response.end('응답!') 을 지우고 저장한 뒤 다시 POSTMAN에 요청을 보내면
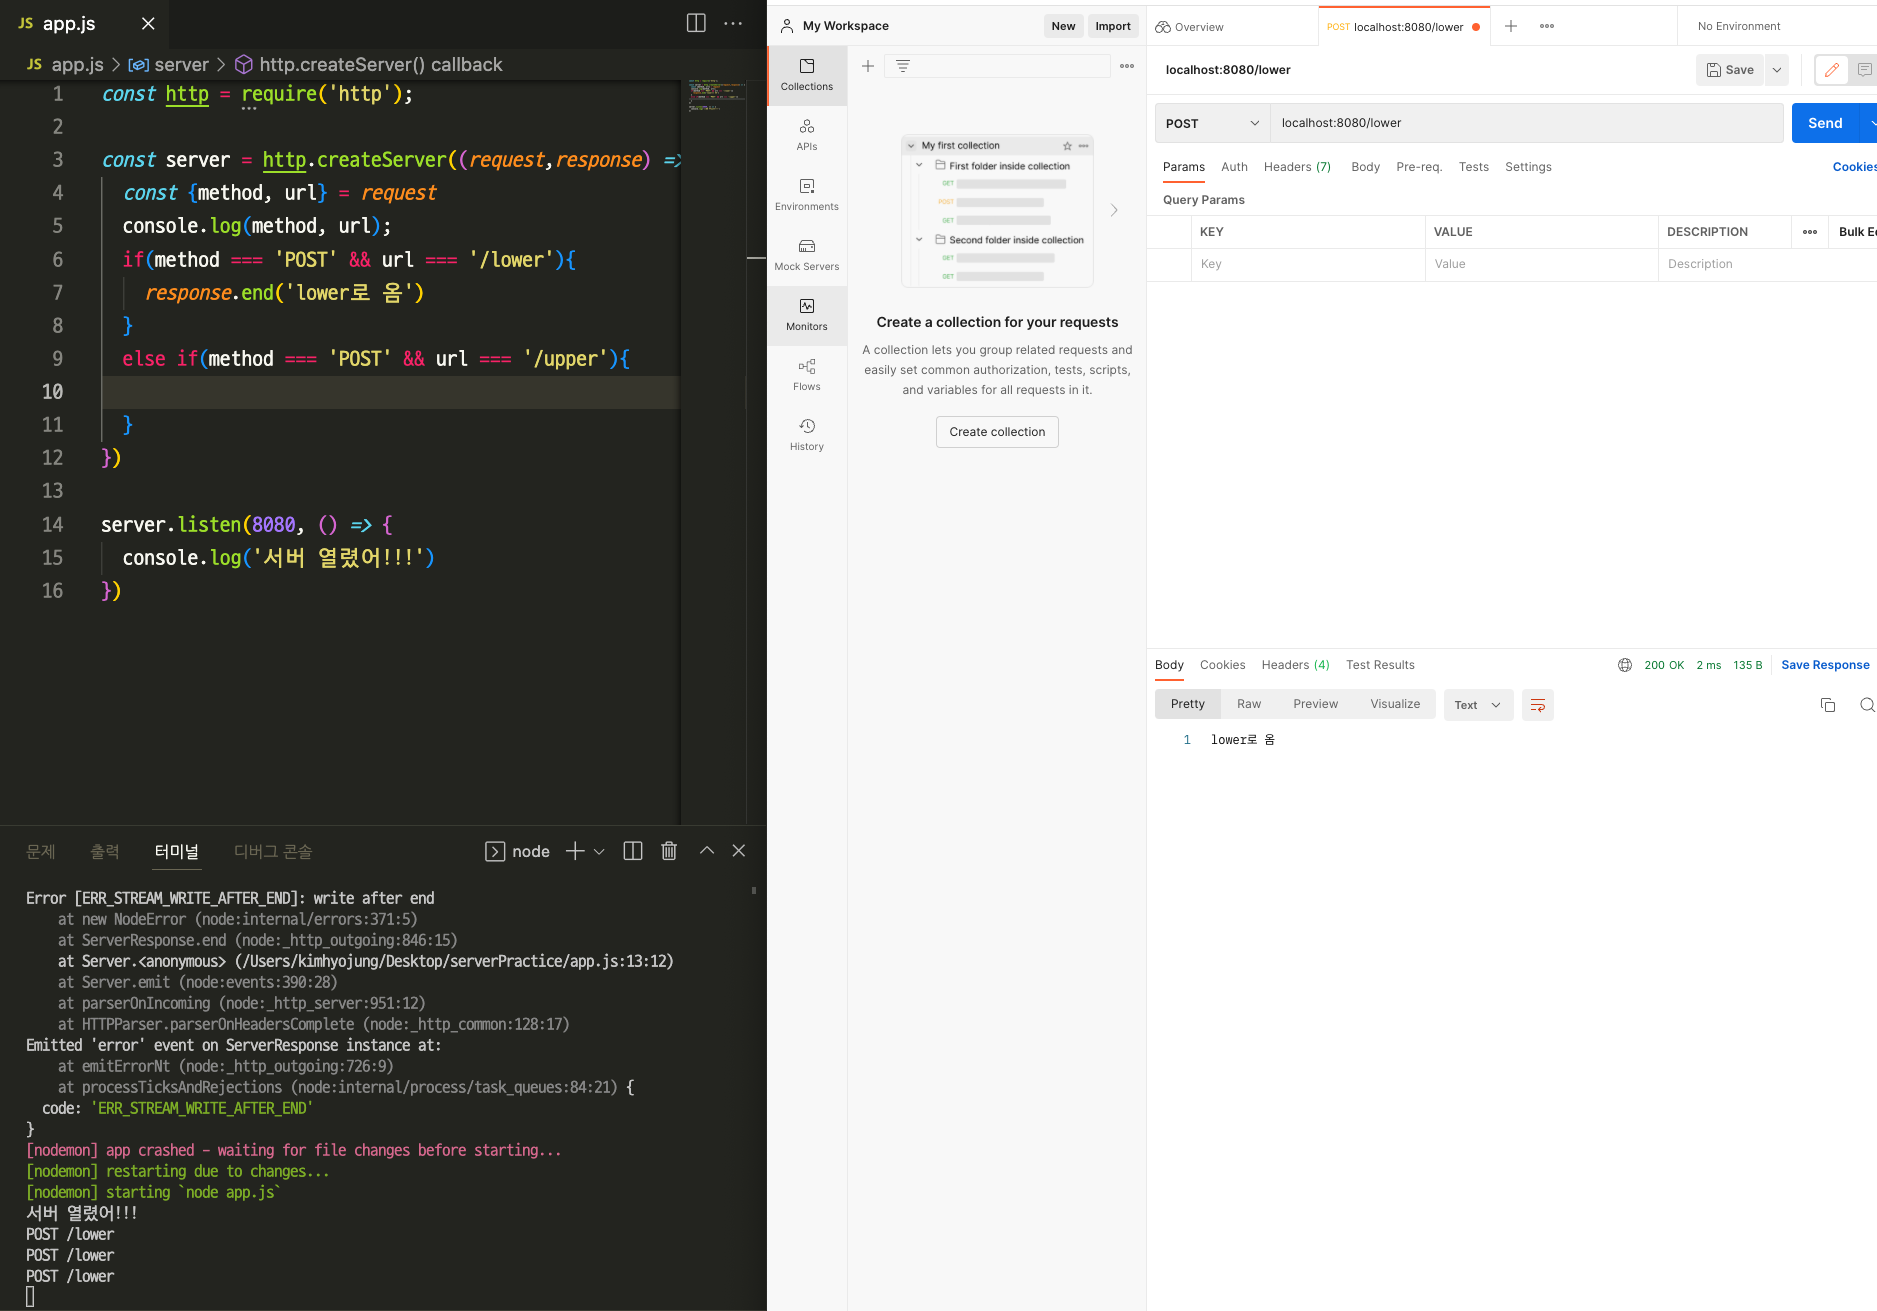
정상적으로 나오는걸 볼 수 있다.
하지만 이제 위처럼 하드코딩이 아닌 이제부터 body에 'HellO'같은 문자열을 받으면
POST /lower 요청을 받으면 'hello'로 응답을 받는 결과를 만들어야한다.
그럼 request에 body가 필요하다.
request에 유용한 프로퍼티가 있다고 했으니 body도 있지않을까? 싶어
console.log(request.body)를 쓰고 POSTMAN에 요청을 해본다.
const http = require('http');

const server = http.createServer((request,response) => {
  const {method, url} = request
  console.log(method, url);
  console.log(request.body); // body가 있는지 보자.
  if(method === 'POST' && url === '/lower'){
    response.end('lower로 옴')
  }
  else if(method === 'POST' && url === '/upper'){
    response.end('upper로 옴')
  }
})

server.listen(8080, () => {
  console.log('서버 열렸어!!!')
}) 
-> undefined 가 나온다. -> 프레임워크 express에서는 request.body를 받아올 수 있지만 일단 여기서는 express를 사용하지않고 해보자
HTTP 트랜잭션 해부 문서의
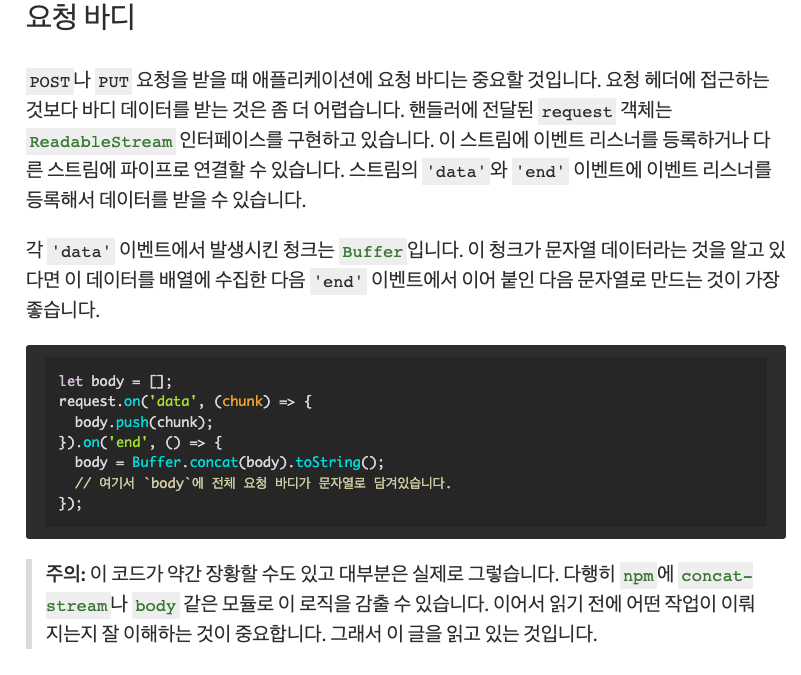
이부분을 참고해서 해본다.
const http = require('http');

const server = http.createServer((request,response) => {
  const {method, url} = request
  // console.log(method, url);
  // console.log(request.body);
  let body = [];
  request.on('data', (chunk) => { // data가 있을때,
  body.push(chunk);
  }).on('end', () => { // data가 end(끝났을때),
  body = Buffer.concat(body).toString();
  console.log(body); //body가 찍히는 지 보자.
    if(method === 'POST' && url === '/lower'){ // if문과 else if 문 으로 쓰여진 이 코드들은 비동기적으로 쓰여야하기 때문에 이 안에 담겨야 한다.
      response.end('lower로 옴')
    }
    else if(method === 'POST' && url === '/upper'){
      response.end('upper로 옴')
    }
  });
})
server.listen(8080, () => {
  console.log('서버 열렸어!!!')
})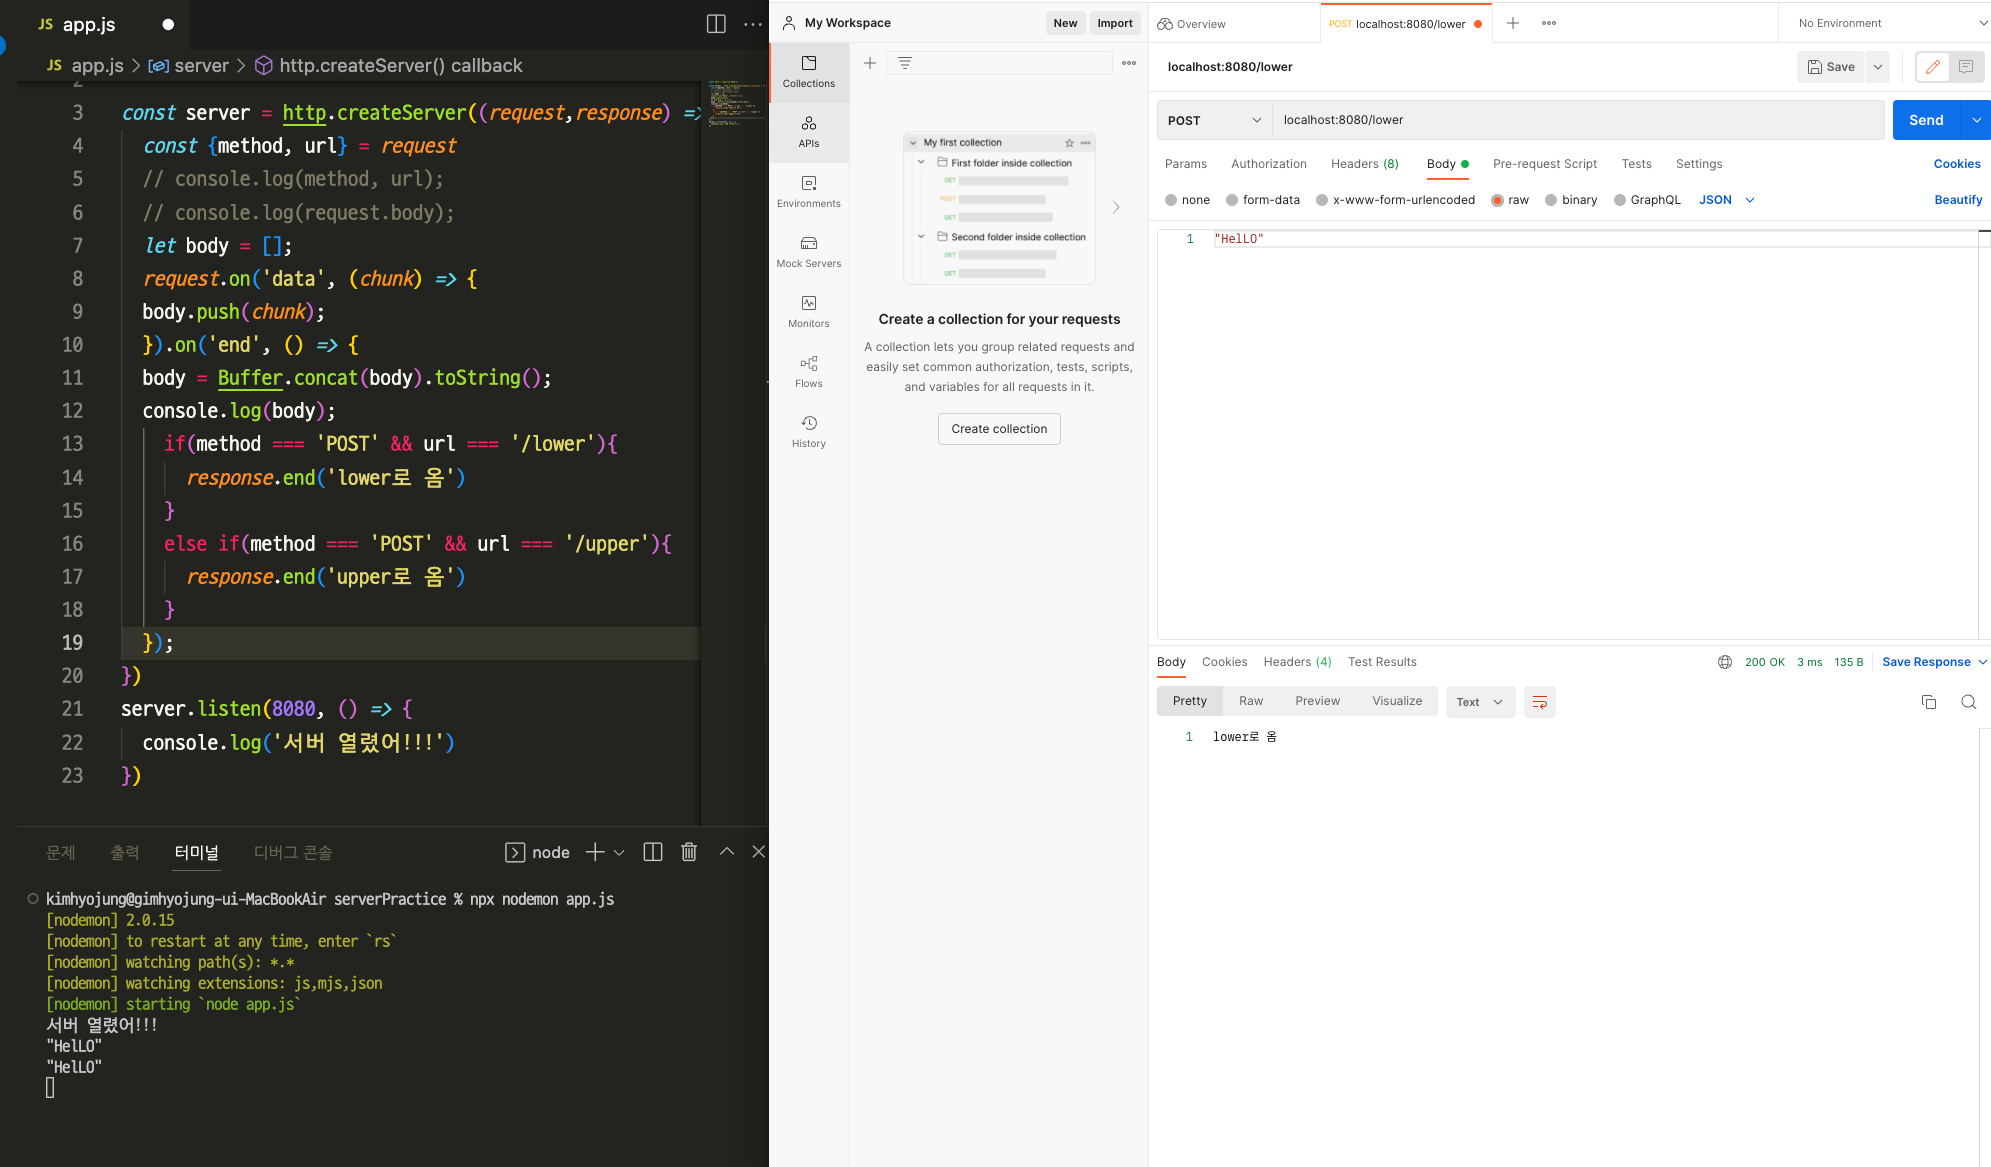
body가 나온다. -> 이제 body를 사용할 수 있다.
if(method === 'POST' && url === '/lower'){
      response.end(body.toLowerCase())
    }
    else if(method === 'POST' && url === '/upper'){
      response.end(body.toUpperCase())
    }
->
CORS 사용해서 하기
CORS로 권한 확인을 위한 defaultCorsHeader를 만든다.
'Access-Control-Allow-Origin': 'http://localhost:3000' // http:localhost:3000 은 허용해줄게!const http = require('http');
const server = http.createServer((request,response) => {
const {method, url} = request
// console.log(method, url);
// console.log(request.body);
let body = [];
request.on('data', (chunk) => {
console.log(chunk);
body.push(chunk);
}).on('end', () => {
console.log(Buffer);
body = Buffer.concat(body).toString();
console.log(body);
if(method === 'OPTIONS'){ // 메서드가 OPTIONS일때
response.writeHead(200, defaultCorsHeader);
response.end()
}
if(method === 'POST' && url === '/lower'){
response.writeHead(200, defaultCorsHeader);
response.end(body.toLowerCase())
}
else if(method === 'POST' && url === '/upper'){
response.writeHead(200, defaultCorsHeader); // 왜 요청마다 defaultCorsHeader를 넣어줘야하냐? Node의 약속이다 . express에서는 귀찮게 다 할 필요가 없다
response.end(body.toUpperCase())
}
});
})
server.listen(8080, () => {
console.log('서버 열렸어!!!')
})
const defaultCorsHeader = {
'Access-Control-Allow-Origin': 'http://localhost:3000', // http://localhost:3000 은 허용해줄게!
'Access-Control-Allow-Methods': 'GET, POST, PUT, DELETE, OPTIONS',
'Access-Control-Allow-Headers': 'Content-Type, Accept',
'Access-Control-Max-Age': 10
}위 코드의 흐름을 보면 현재 서버는 8080포트를 사용하고 있고,
권한 허용을 http://localhost:3000 은 허용해준다고 코드를 써두었다.
서버실행에서는 node app.js 나 npx nodemon app.js를 써주면 된다.
클라이언트 실행에서는 client 파일을 웹브라우저에 드래그해서 실행시키는 방법과 특정 포트로 클라이언트를 실행하고 싶다면 serve 를 이용할 수 있다.
-> npx serve -l 포트번호
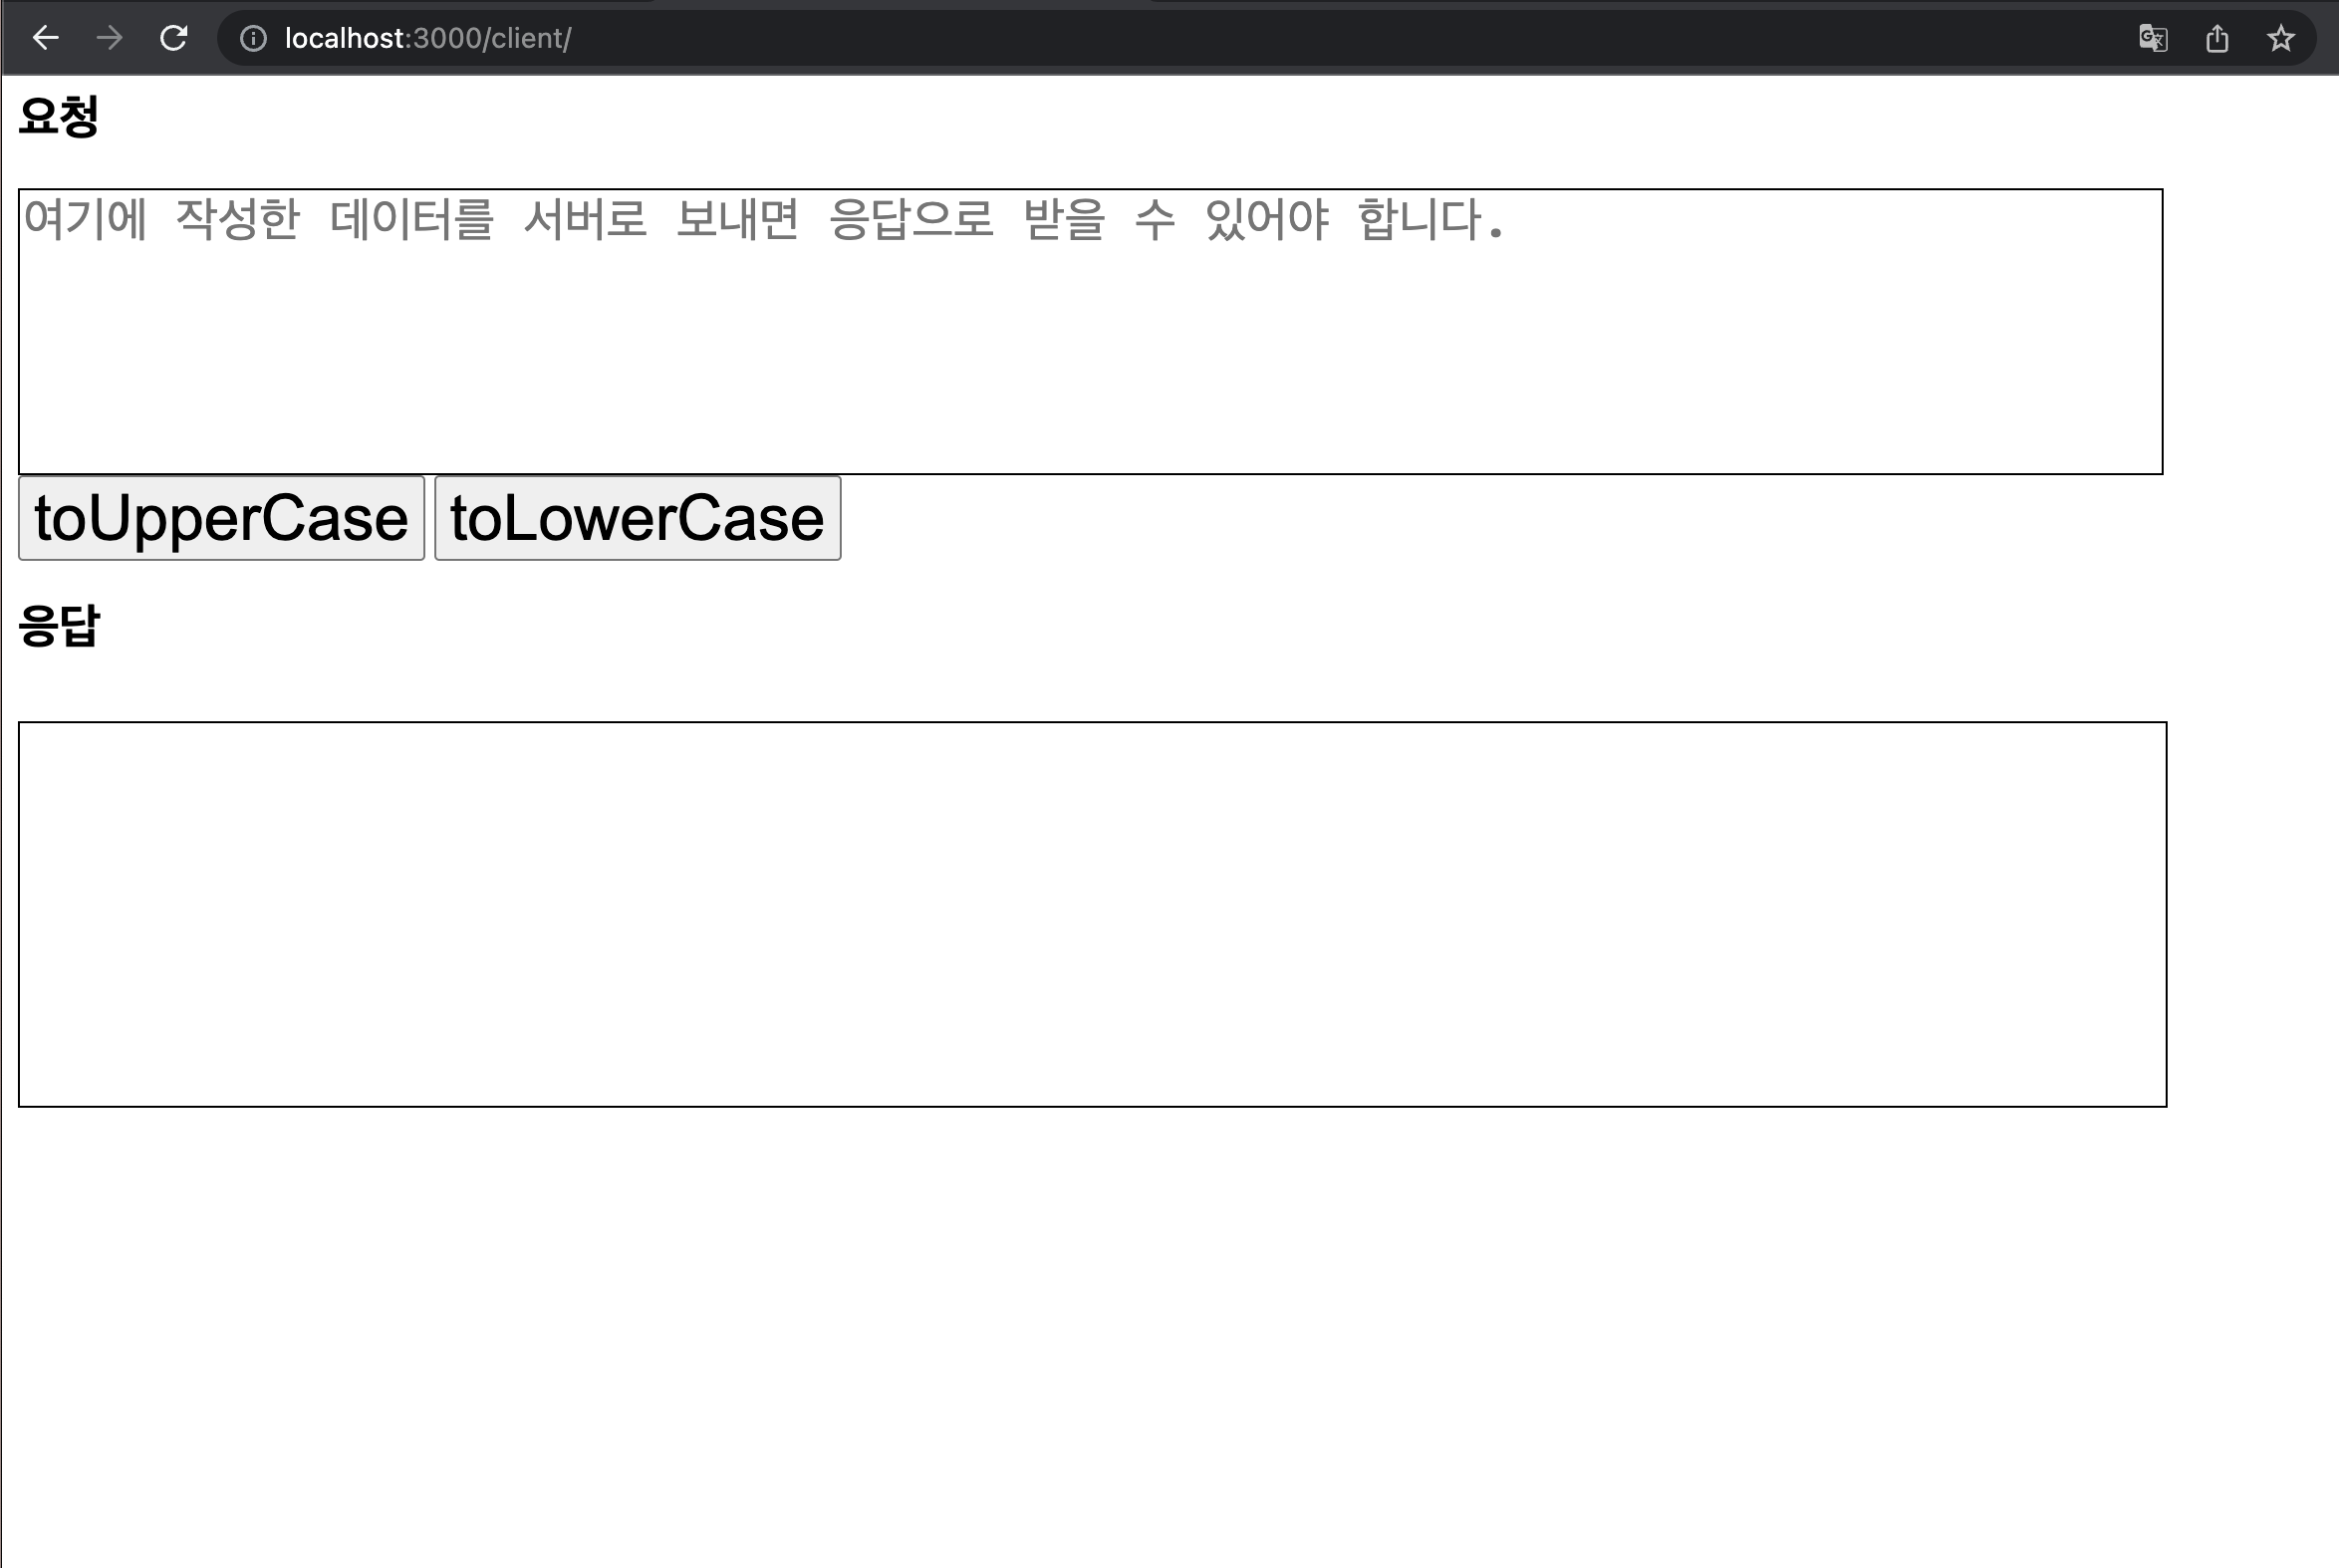
위와 같이 localhost:3000에서는 권한 허용이 되어서 브라우저에 잘 나온다.
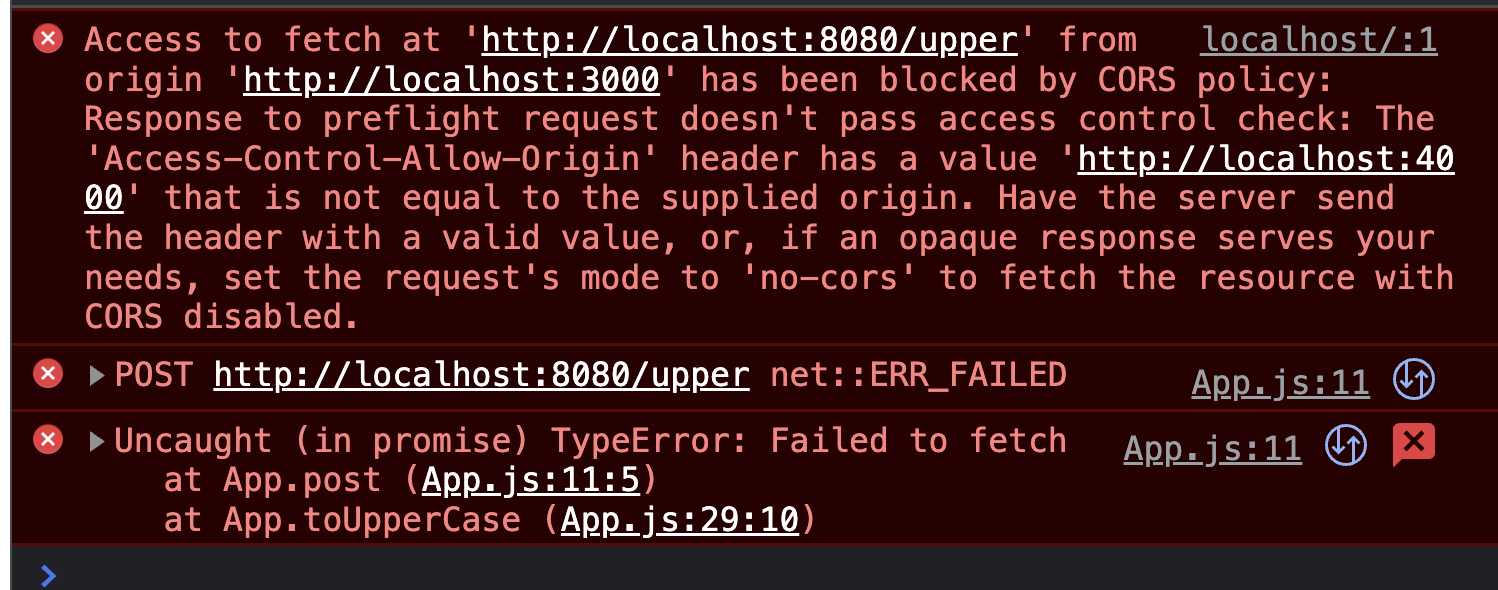
하지만 아래와 같이 포트번호를 바꿔본다.
-> 'Access-Control-Allow-Origin':'http://localhost:4000'
그리고 http://localhost:3000 클라이언트에서 실행해보면 아래와 같은 CORS 에러가 나온다.
다시 http://localhost:3000으로 작성해주고 실행시켜본다.
프리플라이트요청이 잘오는지 확인해보기
OPTIONS 메서드로 프리플라이트요청이 잘오는지 확인해보기 위해
if문 분기별로 console.log(method, url)을 넣어본다.
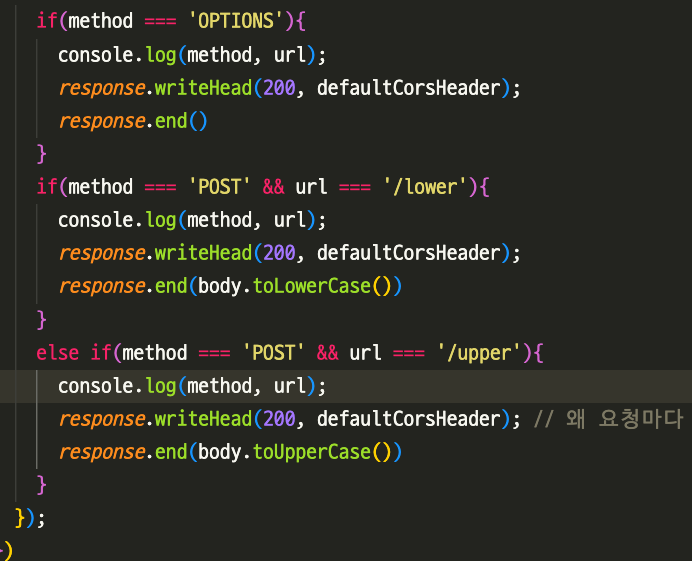
그리고 클라이언트에서 요청을 보내보면
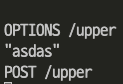
위와 같이 OPTIONS /upper 로 먼저 프리플라이트 요청이 오고
권한 확인후에
POST /upper로 실제 요청을 해서 응답을 받아온다!
이렇게 미니노드서버를 만들어보았다.