Java+Spring으로만 프로젝트 하다가, 회사에서 코프링 이야기가 나와서 간단한 CRUD부터 해보려고 한다.
프로젝트 세팅
https://start.spring.io/ 에서 dependencies를 추가한다.
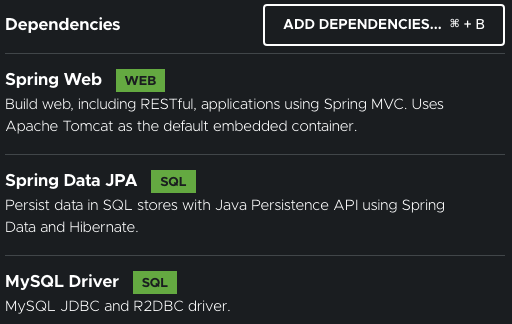
web, jpa, mysql driver를 추가했다.
프로젝트 생성을 완료 한 후,텍스트
Kotlin과 JPA를 함께 사용하기 위해 추가할 게 있다.
Entity를 data class로 만들기 보다 일반 class로 만들려고 한다.
(참고 : https://techblog.woowahan.com/2675/)
build.gradle.kts
plugins {
	id("org.springframework.boot") version "2.6.7"
	id("io.spring.dependency-management") version "1.0.11.RELEASE"
	kotlin("jvm") version "1.6.21"
	kotlin("plugin.spring") version "1.6.21"
	kotlin("plugin.jpa") version "1.6.21"
	kotlin("plugin.allopen") version "1.6.21" //💚
	kotlin("plugin.noarg") version "1.6.21" //💜
}

...
(중략)
...

//💚
allOpen {
	annotation("javax.persistence.Entity")
}

//💜
noArg {
	annotation("javax.persistence.Entity")
}
allopen 💚
Entity와 property 함수를 open해주어야 하는데,
spring boot kotlin tutorial에서도 권장한 allopen 플러그인을 사용해준다. 자동으로 모든 클래스(property)를 open시켜주는 allopen plugin
noarg 💜
no-arg constructor의 반복 작업을 줄이기 위하여 추가한다.
하이버네이트에서는 인자 없는 생성자가 필요하여 기본 생성자를 자동으로 만들어주는 noarg plugin
mysql, jpa 설정
application.properties
spring.datasource.url=jdbc:mysql://localhost:3306/DB이름?autoReconnect=true
spring.datasource.username=계정이름
spring.datasource.password=계정암호
spring.datasource.driver-class-name=com.mysql.jdbc.Driver

spring.jpa.hibernate.ddl-auto=update
spring.jpa.generate-ddl=true
spring.jpa.show-sql=true

spring.jpa.properties.hibernate.show_sql=true
spring.jpa.properties.hibernate.format_sql=true
logging.level.org.hibernate.type.descriptor.sql=trace
이렇게 간단한 설정을 마쳤다.
다음엔 본격적으로 구현을 시작해보자!


backend developer