타임리프(Thymeleaf)
PDF파일 참고 : https://www.notion.so/File-18783ac56bd54cfeb702d52439295251#2393b9eeacdf46d68f0783c38e6cbe3f
JSP는 실제 데이터가 존재할경우에만 UI 구현하지만 타임리프는 먼저 HTML 먼저 생성, 이후에 타임리프로 데이터 변환(좋음!) -> 웹 디자이너와 개발자의 협업이 가능해짐
- controller 폴더 - ThymeleafController 자바 클래스 생성
- templates - 경로생성 (th) - th경로 내부에 thymeleaf01.html 파일 생성
- Thymeleaf 사용 시 html 태그에 namespace 등록해줘야함( html 태그에 th: 형태로 속성을 사용하는것이 가능해짐 )
무조건 넣어야되는거니까 템플릿에 추가해서 자동적용되도록 하기
<html lang="ko" xmlns:th="http://www.thymeleaf.org">
기본 변수 사용법
${변수명} : 변수 출력, 컨트롤러에서 템플릿으로 전달한 변수명을 입력
- 텍스트 연산
- "안녕하세요" + ${name} + "님, 환영합니다."
- |안녕하세요 ${name}님, 환영합니다|
- html 태그에 th: 속성을 사용하여 데이터를 출력하는 형태를 사용
${변수명}: 변수 출력, 컨트롤러에서 템플릿으로 전달한 변수명을 입력 - 배열도 저장이 가능함
- 컨트롤러
String str[] = {"사과", "바나나", "배", "포도"};
mv.addObject("arrstr", str);

List<String> arrList = new ArrayList<>();
arrList.add("사과");
arrList.add("바나나");
arrList.add("배");
arrList.add("포도");
mv.addObject("arrList", arrList);- html
<p th:text="${arrstr}"></p>
<p th:text="${arrList}"></p>
- dto 폴더- TestDto 자바 클래스 파일 생성
- 컨트롤러 코드 추가
TestDto dt = new TestDto();
dt.setNum1(100);
dt.setNum2(200);
dt.setResult(dt.getNum1() + dt.getNum2());
mv.addObject("dt", dt);- html 코드 추가
<p th:text="${dt}"></p>
<p th:text="${dt.num1}"></p>
<p th:text="${dt.num2}"></p>
<p th:text="${dt.result}"></p>
- 콘트롤러 코드 추가
dt1.setNum1(1000);
dt1.setNum2(2000);
dt.setResult(3000);

dt2.setNum1(10);
dt2.setNum2(20);
dt2.setResult(30);

List<TestDto> dtiList = new ArrayList<>();
dtiList.add(dt);
dtiList.add(dt1);
dtiList.add(dt2);

mv.addObject("dtoList", dtiList);- html 코드 추가
<p th:text="${dtoList}"></p>
*{...}: 선택 변수, 타임리프로 전달된 데이터 중 ArrayList 나 Java Object 같은 형태의 데이터를 사용할 경우, '변수명.멤버변수명' 으로 사용해야 하지만 변수명을 생략하고 멤버변수명으로만 사용하고 싶을 경우 사용함
위에 객체이름 선언해두고 밑에는 멤버변수명만 사용
html 코드 추가
    <div th:object="${dt}">
        <p th:text="*{num1}"></p>
        <p th:text="*{num2}"></p>
        <p th:text="*{result}"></p>
        <p th:text="${dt.num1}"></p>
        <p th:text="${dt.num2}"></p>
        <p th:text="${dt.result}"></p>
    </div>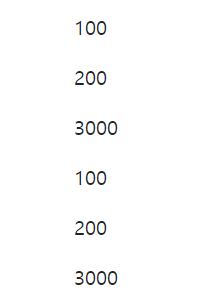
#{...}: 메시지 출력, 미리 지정해 놓은 문자열을 화면에 출력, message.properties 생성하고 해당 파일에 메시지를 등록. 다국어 지원으로 인하여 여러 개의 동일한 메시지에 여러가지 언어를 적용할 수 있음
- resources 폴더 아래에 message.properties 파일 생성
- message.properties
	test=this is test
	hello=hello world!
home.welcome=반갑습니다.- html 코드 추가
<div class="my-4">
    <p th:text="#{test}"></p>
    <p th:text="#{hello}"></p>
</div>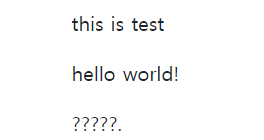
기본이 영어라서 한글로 작성하면 ????로 나옴 -> 영어로 넣어주거나 파일을 만들어줘야함
resources 폴더 내부에 messages.ko_KR.properties 파일 생성 - 코드 작성
test=테스트 입니다.
hello=헬로 월드!
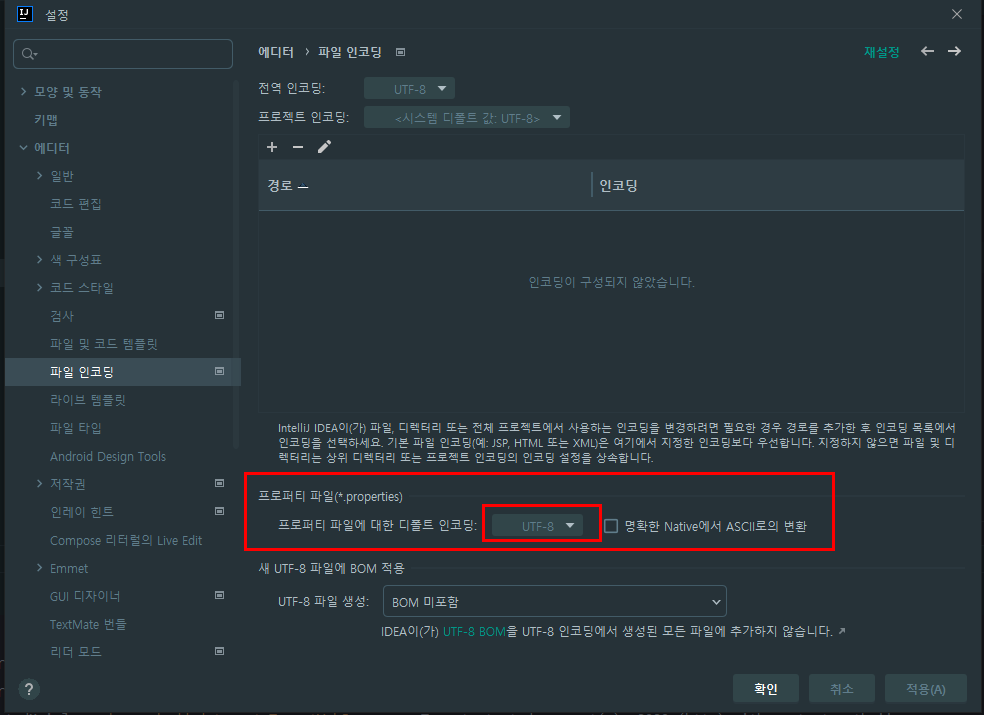
home.welcome=안녕하세요 반갑습니다.파일 - 설정 - 파일 인코딩 - UTF-8 로 다 바꾸기
application.properties에 한줄 추가
spring.messages.fallback-to-system-locale=false
: 감지된 지역 정보에 대한 파일 설정
true -> 시스템 지역 정보 사용
false -> messages.properties 파일 사용
resources 폴더 내부에 messages.en_US.properties 파일 생성 - 코드 작성
test=this is test
hello=hello world!
home.welcome=welcome.@{...}: URL 링크를 입력(경로 입력도 가능함)
html 코드 추가
<div class="my-4" th:with="num=2">
<!--    @{...} : URL 링크를 입력 -->
	<a href="http://www.daum.net}" th:href="@{http://daum.net}">다음 홈페이지</a><br>
	<a href="#" th:href="@{/board/openBoardDetail?idx=2}" class="btn btn-primary">글쓰기 페이지</a><br>
	<a href="#" th:href="@{|/board/openBoardDetail?idx=${num}|}" class="btn btn-primary">상세 글 페이지(변수 사용)</a>
</div>
문자열 사용법
-
th 폴더 내부에 thymeleaf02.html 파일 생성
-
컨트롤러에 코드 추가
@RequestMapping("th/thymeleaf02")
    public String thymeleaf02() throws Exception {
        return "th/thymeleaf02";
}- thymeleaf02.html 코드 추가
<div class="container mt-5">
  <!--  문자열 : '' 사이에 문자열을 입력, || 사이에 문자열을 입력, + 기호로 문자열 연결 가능 -->
  <div class="my-4" th:with="num=10">
    <p th:text="'문자열 출력'"></p>
    <p th:text="'문자열을' + ' + ' + '기호를 사용하여 ' + '연결할 수 있음'"></p>
    <p th:text="|문자열 연결 연산자 없이 문자열 연결 사용하기|"></p>
    <p th:text="'문자열 사이에 변수 사용 : ' + ${num}"></p>
    <p th:text="|변수 num의 값 : ${num} "></p>
  </div>
</div>

  <div class="my-4">
<!--    ''없이 "" 내부에만 있는것은 문자열로 인식 안함. 아래 값들은 모두 숫자로 인식 : 바로바로 연산된 결과가 나옴 -->
    <p th:text="12345"></p>
    <p th:text="100 + 200"></p>
    <p th:text="3.14"></p>
    <p th:text="0.5 + 1.5525"></p>
    <p th:text="(0.5 + 1.5)"></p>
    <p th:text="true"></p>
    <p th:text="false"></p>
  </div>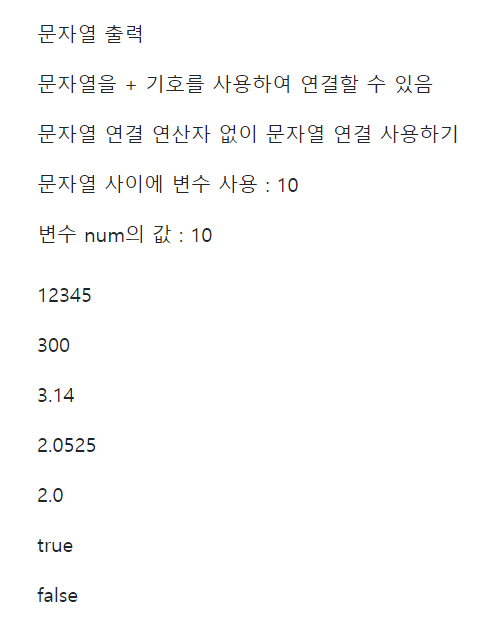
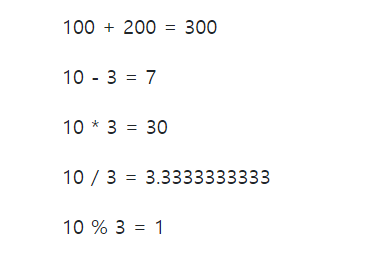
- 사칙 연산
  <div class="my-4">
<!--    문자열과 계산식을 같이 쓰려면 계산식에는 () 꼭 씌워줘야 함 -->
    <p th:text="'100 + 200 = ' + (100 + 200)"></p>
    <p th:text="'10 - 3 = ' + (10 - 3)"></p>
    <p th:text="|10 * 3 = | + (10 * 3)"></p>
    <p th:text="|10 / 3 = | + (10 / 3)"></p>
    <p th:text="|10 % 3 = | + (10 % 3)"></p>
</div>-
-
비교연산
<!--  비교 연산 -->
  <div class="my-4">
    <p th:text="|10 > 5 : | + (10 > 5)"></p>
    <p th:text="|10 < 5 : | + (10 < 5)"></p>
    <p th:text="|10 >= 10 : | + (10 >= 10)"></p>
    <p th:text="|10 <= 10 : | + (10 <= 10)"></p>
    <p th:text="|10 == 10 : | + (10 == 10)"></p>
    <p th:text="|10 != 10 : | + (10 != 10)"></p>
  </div>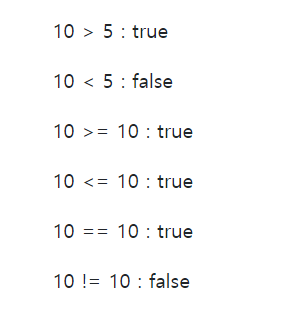
- 논리 연산
<!--  논리 연산 -->
  <div class="my-4 border">
    <p th:text="|10 > 5 and 10 < 5 : | + (10 > 5 and 10 < 5)"></p>
    <p th:text="|10 > 5 or 10 < 5 : | + (10 > 5 or 10 < 5)"></p>
  </div>
- 삼항 연산자 사용
<!--  삼항 연산자 사용 가능 -->
  <div class="my-5 p-3 border">
    <p th:text="|10 > 5 ? '10이 더 큽니다' : '10이 더 작습니다' -> |  + (10 > 5 ? '10이 더 큽니다' : '10이 더 작습니다')"></p>
    <p th:text="|10 < 5 ? '10이 더 큽니다' : '10이 더 작습니다' -> |  + (10 > 5 ? '10이 더 큽니다' : '10이 더 작습니다')"></p>
  </div>
- th:text, th:utext 속성
utext : 표현하는 문자열에 html 태그가 포함되어 있을 경우 html 태그를 화면에 출력하고 html 태그 이외의 문자를 출력
<!--  th:text, th:utext 속성의 차이점 : utext는 html태그를 인식함 -->
  <div class="my-5 p-3 border">
    <div th:text="'타임리프의 text 속성 사용 시 시작태그와 끝태그 사이의 문자가 출력됨'"></div>
    <div th:utext="'타임리프의 utext 속성 사용 시 시작태그와 끝태그 사이의 문자가 출력됨'"></div>
    <br>
    <div th:text="'<p>text 속성으로 p태그 출력</p>'"></div>
    <div th:utext="'<p>utext 속성으로 p태그 출력</p>'"></div>
  </div>
- 기본 객체 출력
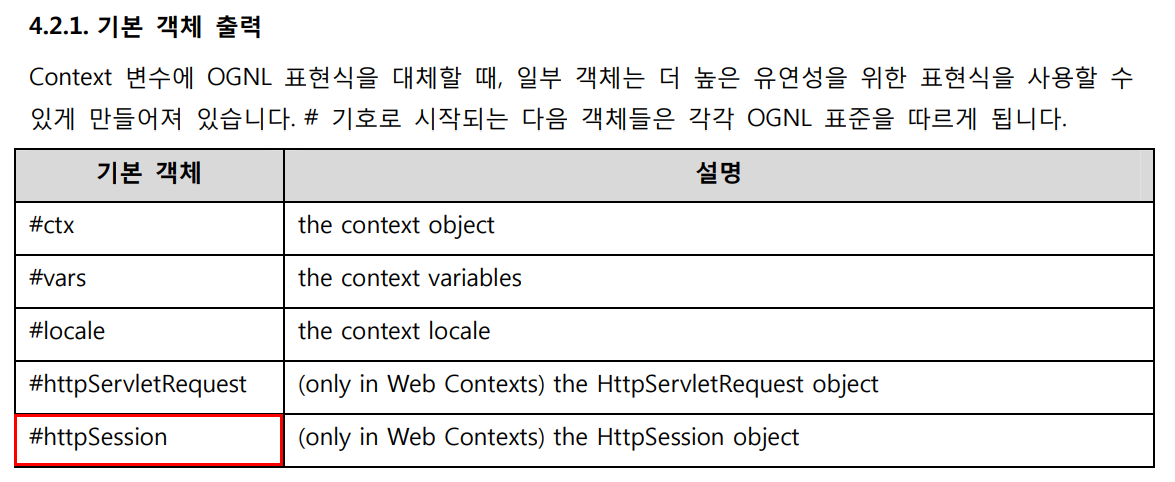
- 유틸리티 객체 표현


- 컨트롤러 코드 추가
@RequestMapping("/th/thymeleaf03")
    public ModelAndView thymeleaf03() throws Exception {
        ModelAndView mv = new ModelAndView("th/thymeleaf03");

        List<String> strList = new ArrayList<>();
        strList.add("자장면");
        strList.add("돼지국밥");
        strList.add("안심돈까스");

        Map<String, String> strMap = new HashMap<>();
        strMap.put("칸다소바", "마제소바");
        strMap.put("금룡", "고기짬뽕");
        strMap.put("서브웨이", "이탈리안BLT");

        mv.addObject("strList", strList);
        mv.addObject("strMap", strMap);

        return mv;
}- th폴더 내부에 thymeleaf03.html 파일 추가
- html 코드 추가
<div class="my-4 p-3 border">
    <p th:text="${strList}"></p>
    <p th:text="${strMap}"></p>
  </div>
어트리뷰트(attr)
th:attr : th:html속성과 유사한 역할을 한다.
thymeleaf03.html 코드 추가
    <div class="my-3 p-3 border">
<!--        속성 설정하기 : thymeleaf에는 일반적으로 사용되는 거의 모든 html 태그의 속성이 th: 형태로 구현되어 있음  -->
<!--        th:attr - 지정한 html 태그에 원하는 속성 및 값을 입력할 수 있는 속성  -->
<!--        타임리프에서는 th:attr 속성보다 th:html 속성 형태로 사용하는 것을 추천함  -->
      <a href="http://localhost:8080" th:href="@{http://www.daum.net}" th:text="'다음 홈페이지'">로컬 서버</a><br>
      <a href="http://localhost:8080" th:attr="href=@{http://www.daum.net}" th:text="'다음 홈페이지'">로컬 서버</a>
      <a href="http://localhost:8080" th:attr="href=@{http://www.naver.com}, alt='네이버', target='_blank'">네이버</a><br>
</div>- attrappen(뒤에 붙이는 것), attrprepend(앞에 붙이는 것) : 지정한 html 속성에 값을 추가할 경우 사용
<!--        attrappen(뒤에 붙이는 것)/attrprepend(앞에 붙이는 것) : 지정한 html 속성에 값을 추가할 경우 사용  -->
<a href="/board/openBoardDetail?idx=" th:attrappend="href=3" th:text="'상세글 열기'"></a>
<button class="btn-primary" type="button" th:attrprepend="class='btn '">클릭</button>- 고정값 불린 어트리뷰트
- thymeleaf로 만드는 checkbox 속성 true/false
<div class="my-4 p-3 border"> <input type="checkbox" class="form-check" checked>체크 있음 <input type="checkbox" class="form-check">체크 없음 <input type="checkbox" class="form-check" th:checked="true">thymeleaf로 체크 있음 <input type="checkbox" class="form-check" th:checked="false">thymeleaf로 체크 있음 </div> - 체크박스 예제
<div class="my-4 p-3 border">
     <input type="checkbox" class="form-check" checked>체크 있음
     <input type="checkbox" class="form-check">체크 없음
     <input type="checkbox" class="form-check" th:checked="true">thymeleaf로 체크 있음
     <input type="checkbox" class="form-check" th:checked="false">thymeleaf로 체크 있음
     <br>
     <input type="radio" class="form-check" name="ra1" checked>선택1
     <input type="radio" class="form-check" name="ra1">선택2
     <input type="radio" class="form-check" name="ra1">선택3
     <br>
     <input type="radio" class="form-check" name="ra2">선택2-1
     <input type="radio" class="form-check" name="ra2" th:checked="true">선택2-2
     <input type="radio" class="form-check" name="ra3">선택2-3
     <br>
     <select class="form-control">
         <option>선택1</option>
         <option>선택2</option>
         <option th:selected="true">선택3/option>
     </select>
 </div>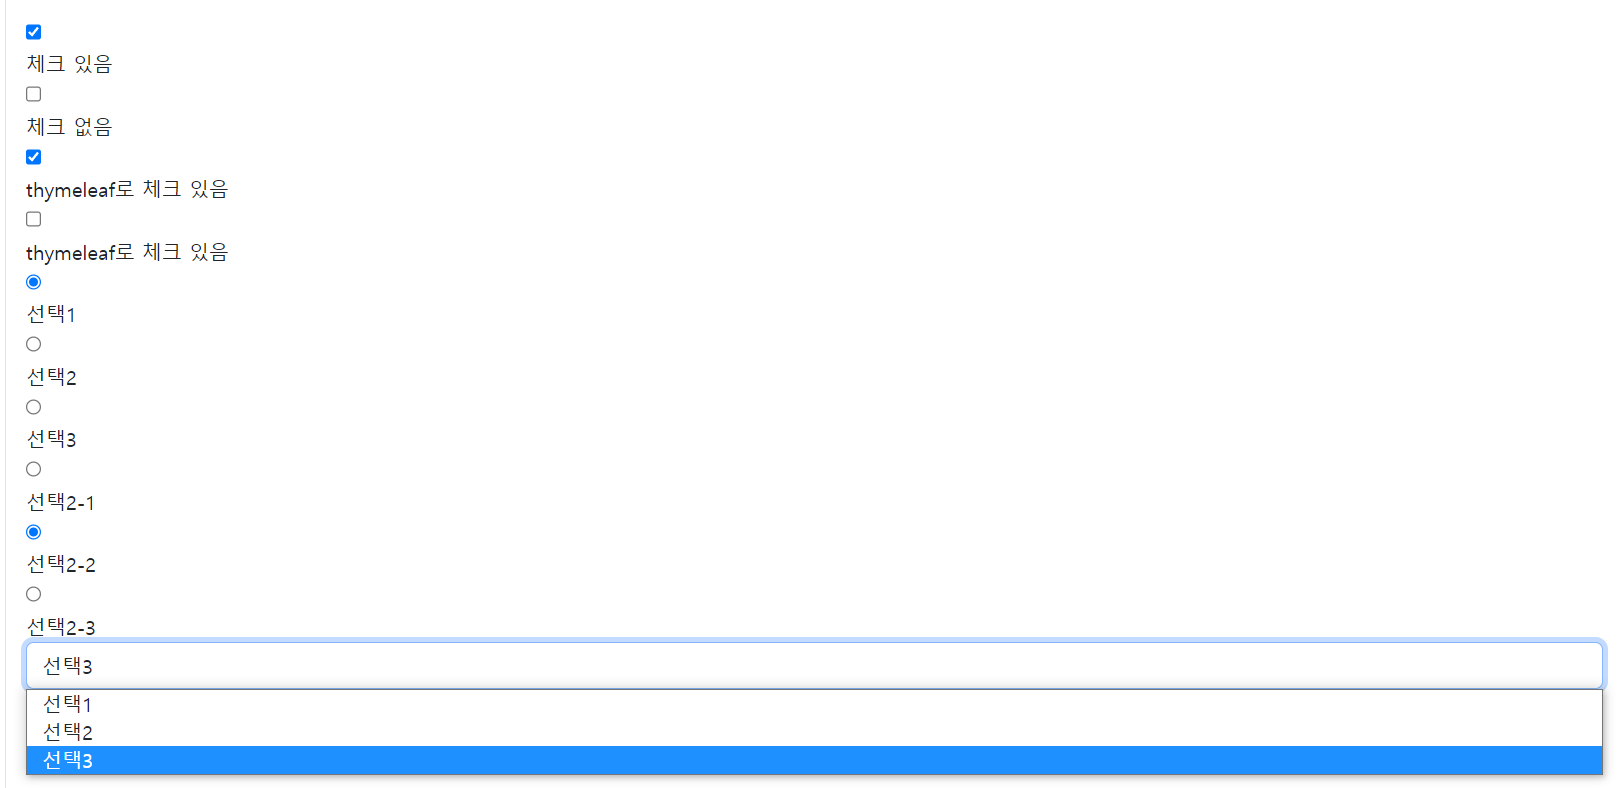
- thymeleaf로 만드는 checkbox 속성 true/false
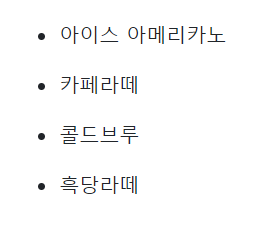
반복문 : each 속성 사용
th:each- ArrayList 처럼 반복 가능한 객체의 데이터를 전달받아 지역변수에 하나씩 꺼내어 담아 사용하는 방식. each가 실행된 태그부터 반복 출력 됨
자바의 [발전된 형태의 for 문]과 비슷한 사용법- 사용법
th:each="지역변수명" : ${컨트롤러에서 전달한 변수명} - thymeleaf04.html 생성
<div class="container mt-5">
    <div class="my-5 p-3 border">
<!--        반복문 : each - ArrayList 처럼 반복 가능한 객체의 데이터를 전달받아 지역변수에 하나씩 꺼내어 담아 사용하는 방식  -->
<!--                 자바의 [발전된 형태의 for 문]과 비슷한 사용법   -->
        <div>
            <ul>
                <li th:each="item : ${coffeeList}">
                    <p th:text="${item}"></p>
                </li>
            </ul>
        </div>
    </div>
</div>-
-
타임리프의 if/unless 기능
html 코드 추가
    <div class="my-4 p-3 border">
<!--        if/unless : 타임리프는 전통적인 방식의 if-else 문이 없음(else if 문도 없음)    -->
<!--        if문과 unless문을 사용하여 if ~ else 문을 구현  -->
<!--        if : 지정된 조건의 결과가 true 일 경우 자신을 포함하여 아래의 문장을 실행   -->
<!--        unless : 지정된 조건의 결과가 false 인 경우 자신을 포함하여 아래의 문장을 실행-->
<!--        if/unless 를 같은 조건으로 함께 사용 시, if ~ else 문을 구현할 수 있음 -->
        <ul>
            <li th:if="${#lists.size(coffeeList)} > 0" th:each="item : ${coffeeList}">
                <p th:text="${item}"></p>
            </li>
            <li th:unless="${#lists.size(coffeeList)} > 0">
                <p th:text="'데이터 없음'"></p>
            </li>
        </ul>
    </div>
each 문 추가 옵션
each 문 추가 옵션
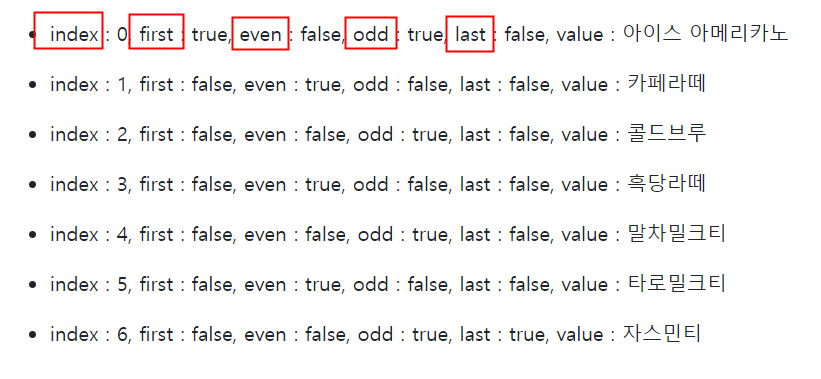
index : 0부터 시작하는 현재 index 번호
count : 1부터 시작하는 현재 index 번호
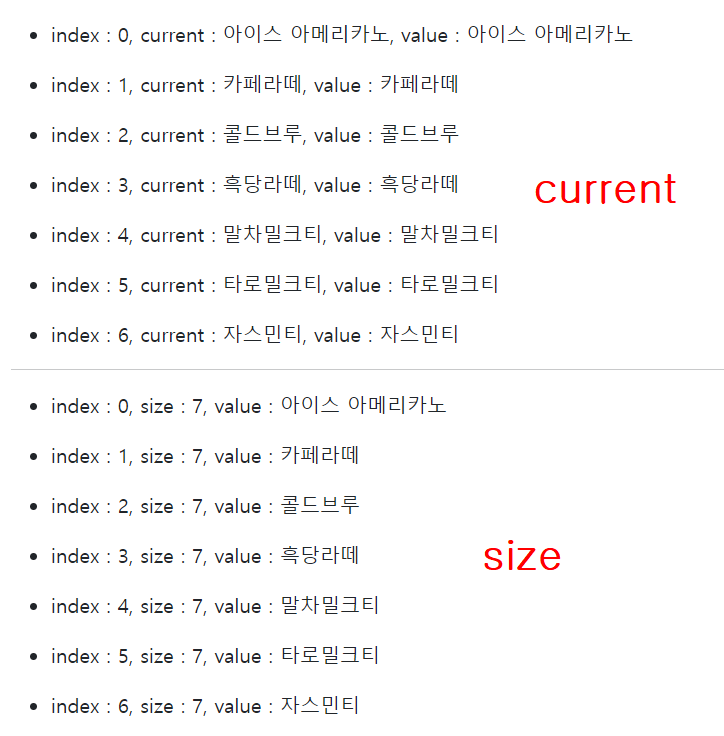
size : 해당 반복 객체의 총 크기
current : 현재 변수 값
even : 현재 번호가 짝수번호인지 확인, bool 타입
odd : 현재 번호가 홀수 번호인지 확인, bool 타입
first : 현재 번호가 시작 번호인지 확인, bool 타입
last : 현재 번호가 마지막 번호인지 확인, bool 타입
사용법
th:each="지역변수명" : ${컨트롤러에서 전달한 변수명}
th:each="지역변수명, 옵션" : ${컨트롤러에서 전달한 변수명}
- html 코드
        <ul>
            <li th:each="item : ${coffeeList}">
                <p th:text="${item}"></p>
            </li>
        </ul>

        <hr>

        <ul>
            <li th:each="item, i : ${coffeeList}">
                <p th:text="|index : ${i.index}, value : ${item}|"></p>
            </li>
        </ul>
        <hr>
        <ul>
            <li th:each="item, i : ${coffeeList}">
                <p th:text="|index : ${i.index}, count : ${i.count}, value : ${item}|"></p>
            </li>
        </ul>
        <hr>
        <ul>
            <li th:each="item, i : ${coffeeList}">
                <p th:text="|index : ${i.index}, current : ${i.current}, value : ${item}|"></p>
            </li>
        </ul>
        <hr>
        <ul>
            <li th:each="item, i : ${coffeeList}">
                <p th:text="|index : ${i.index}, size : ${i.size}, value : ${item}|"></p>
            </li>
        </ul>
        <hr>
        <ul>
            <li th:each="item, i : ${coffeeList}">
                <p th:text="|index : ${i.index}, first : ${i.first}, even : ${i.even}, odd : ${i.odd}, last : ${i.last}, value : ${item}|"></p>
            </li>
        </ul>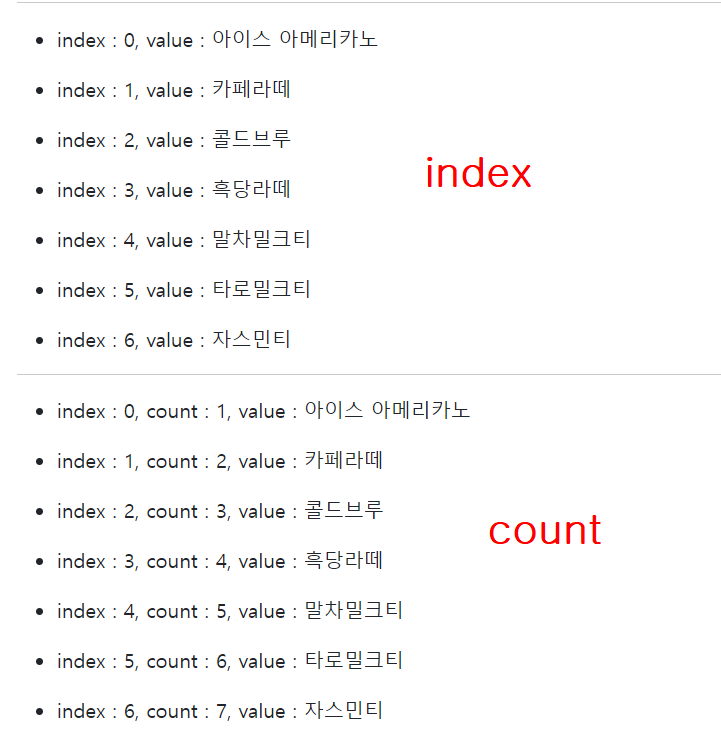
템플릿
- 컨트롤러에 추가
    @RequestMapping("/th/thymeleaf05")
    public String thymeleaf05() throws Exception {
        return "th/thymeleaf05";
}- templates 폴더에 layout 폴더 생성 - footer.html, header.html 파일 생성
- th 폴더에 thymeleaf05.html 파일 생성
- header.html
<!DOCTYPE html>
<html lang="ko" xmlns:th="http://thymeleaf.org">
<head>
    <meta charset="UTF-8">
    <title>fragment 사용하기</title>
    <link rel="stylesheet" href="/css/bootstrap.css" th:href="@{/css/bootstrap.css}">
    <script src="/js/jquery-3.6.1.js" th:src="@{/js/jquery-3.6.1.js}"></script>
    <script src="/js/bootstrap.bundle.js" th:src="@{/js/bootstrap.bundle.js}"></script>
</head>
<body>
<header class="container mt-4 p-5" th:fragment="frag-header">
    <div class="container-fluid p-5 bg-secondary bg-opacity-50">
        <h1 class="display-4 text-center">Header 화면</h1>
        <p class="text-muted lead text-center">fragment를 사용하여 가져온 header 파일</p>
    </div>
</header>
</body>
</html>- footer.html
<!DOCTYPE html>
<html lang="ko" xmlns:th="http://thymeleaf.org">
<head>
    <meta charset="UTF-8">
    <title>Title</title>
    <link rel="stylesheet" href="/css/bootstrap.css" th:href="@{/css/bootstrap.css}">
    <script src="/js/jquery-3.6.1.js" th:src="@{/js/jquery-3.6.1.js}"></script>
    <script src="/js/bootstrap.bundle.js" th:src="@{/js/bootstrap.bundle.js}"></script>
</head>
<body>
<footer class="container-fluid mt-5 p-5 border-top" th:fragment="frag-footer">
    <p class="text-center">fragment로 가져온 footer 영역</p>
    <p class="text-center lead text-muted">made by Gwak</p>
</footer>
</body>
</html>- 메인 html 파일에 헤더, 푸터 추가
<div th:insert="~{/layout/header :: frag-header}">

<div th:insert="~{/layout/footer :: frag-footer}">
thymeleaf05.html
<!DOCTYPE html>
<html lang="ko" xmlns:th="http://thymeleaf.org">
<head>
    <meta charset="UTF-8">
    <title>fragment 사용하기</title>

    <link rel="stylesheet" href="https://cdn.jsdelivr.net/npm/bootstrap@5.2.2/dist/css/bootstrap.min.css">
    <script src="https://ajax.googleapis.com/ajax/libs/jquery/3.6.1/jquery.min.js"></script>
    <script src="https://cdn.jsdelivr.net/npm/bootstrap@5.2.2/dist/js/bootstrap.bundle.min.js"></script>
    <link rel="stylesheet" href="/css/bootstrap.css" th:href="@{/css/bootstrap.css}">
    <script src="/js/jquery-3.6.1.js" th:src="@{/js/jquery-3.6.1.js}"></script>
    <script src="/js/bootstrap.bundle.js" th:src="@{/js/bootstrap.bundle.js}"></script>

<!--    <script th:inline="javascript">-->
<!--        // let thValue = ${obj}; : 이렇게 데이터 들고오기 불가능-->
<!--        let thValue=-->
<!--    </script>-->

</head>
<body>
<!--
    fragment : 타임리프를 사용하여 공통적으로 사용되는 페이지를 현재 페이지에 포함시킴
        사용법 :
            공통 페이지 : 외부에서 사용할 태그에 th:fragment="이름" 형태로 선언
            사용 페이지 : th:insert, th:replace, th:include 를 사용하여 fragment로 선언된 페이지를 불러옴
                ~{가져올 영역 파일 경로 :: fragment이름}
                 insert : fragment로 지정된 영역을 현재 태그의 자식 태그로 추가
                 replace : fragment로 지정된 영역을 현재 태그로 변경(교체)
                 include : fragment로 지정된 영역의 자식 태그를 현재 태그의 자식 태그로 추가
-->

<!--
        fragment 로 매개변수 전달하기
        fragment 설정 시 - th:fragment="이름(변수명1, 변수명2, ...) 로 설정
        사용 시 - th:inser="~{파일경로 :: 이름(데이터1, 데이터2, ...)}
        해당 fragment에서 ${변수명} 으로 사용 가능
-->
<div th:insert="~{/layout/header :: frag-header}">

</div>

<main class="container my-5 p-5">
    <div class="row">
        <div class="col-sm text-center">
            <h1>메인 컨텐츠 영역</h1>
            <p>원래 thymeleaf05 파일에 존재하는 영역</p>
        </div>
    </div>
</main>

<div th:insert="~{/layout/footer :: frag-footer}">

</div>
<br><hr><br>

<h3>insert 사용 시</h3>
<div id="insert" th:insert="~{/layout/footer :: frag-footer}"></div>

<h3>replace 사용 시</h3>
<div id="replace" th:replace="~{/layout/footer :: frag-footer}"></div>

<h3>include 사용 시</h3>
<div id="include" th:include="~{/layout/footer :: frag-footer}"></div>

<br><hr><br>

<div th:insert="~{/layout/footer :: frag-foot01}"></div>
<div th:insert="~{/layout/footer :: frag-foot02}"></div>

<br><hr><br>

<div th:insert="~{/layout/header :: frag-head01(10, 20)}"></div>

</body>
</html>
header.html
<!DOCTYPE html>
<html lang="ko" xmlns:th="http://thymeleaf.org">
<head>
    <meta charset="UTF-8">
    <title>fragment 사용하기</title>
        <link rel="stylesheet" href="https://cdn.jsdelivr.net/npm/bootstrap@5.2.2/dist/css/bootstrap.min.css">
        <script src="https://ajax.googleapis.com/ajax/libs/jquery/3.6.1/jquery.min.js"></script>
        <script src="https://cdn.jsdelivr.net/npm/bootstrap@5.2.2/dist/js/bootstrap.bundle.min.js"></script>

<body>
<header class="container mt-4 p-4" th:fragment="frag-header">
    <div class="container-fluid p-5 bg-secondary bg-opacity-10 rounded-5">
        <h1 class="display-4 text-center">Header 화면</h1>
        <p class="text-muted lead text-center">fragment를 사용하여 가져온 header 파일</p>
    </div>
</header>
<header class="container mt-4 p-4" th:fragment="frag-head01(item1, item2)">
    <div class="container-fluid p-5 bg-secondary bg-opacity-10 rounded-5">
        <h1 class="display-4 text-center">Header 화면</h1>
        <p class="text-muted lead text-center">fragment를 사용하여 가져온 head01 파일</p>
        <p th:text="|매개변수 item1 : ${item1}|"></p>
        <p th:text="|매개변수 item2 : ${item2}|"></p>
    </div>
</header>
</body>
</html>
footer.html
<!DOCTYPE html>
<html lang="ko" xmlns:th="http://thymeleaf.org">
<head>
    <meta charset="UTF-8">
    <title>Title</title>
    <link rel="stylesheet" href="https://cdn.jsdelivr.net/npm/bootstrap@5.2.2/dist/css/bootstrap.min.css">
    <script src="https://ajax.googleapis.com/ajax/libs/jquery/3.6.1/jquery.min.js"></script>
    <script src="https://cdn.jsdelivr.net/npm/bootstrap@5.2.2/dist/js/bootstrap.bundle.min.js"></script>

</head>
<body>
<footer class="container-fluid mt-5 p-5 border-top" th:fragment="frag-footer">
    <p class="text-center">fragment로 가져온 footer 영역</p>
    <p class="text-center lead text-muted">made by Gwak</p>
</footer>
<footer class="container-fluid bg-info m-3 p-5 rounded-5 bg-opacity-25" th:fragment="frag-foot01">
    <p class="text-center">fragment로 가져온 frag-foot01 영역</p>
</footer>
<footer class="container-fluid bg-success m-3 p-5 rounded-5 bg-opacity-25" th:fragment="frag-foot02">
    <p class="text-center">fragment로 가져온 frag-foot02 영역</p>
</footer>
</body>
</html>