목표
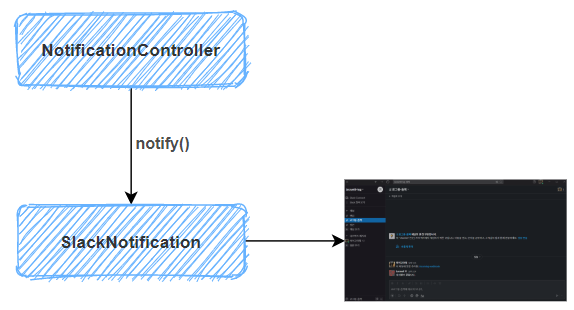
1. 비즈니스 로직에서 Laravel 함수인 notify(new SlackNotification())를 호출합니다.
2. notify()를 호출하면, SlackNotification에서 전처리 작업을 합니다.
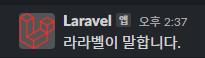
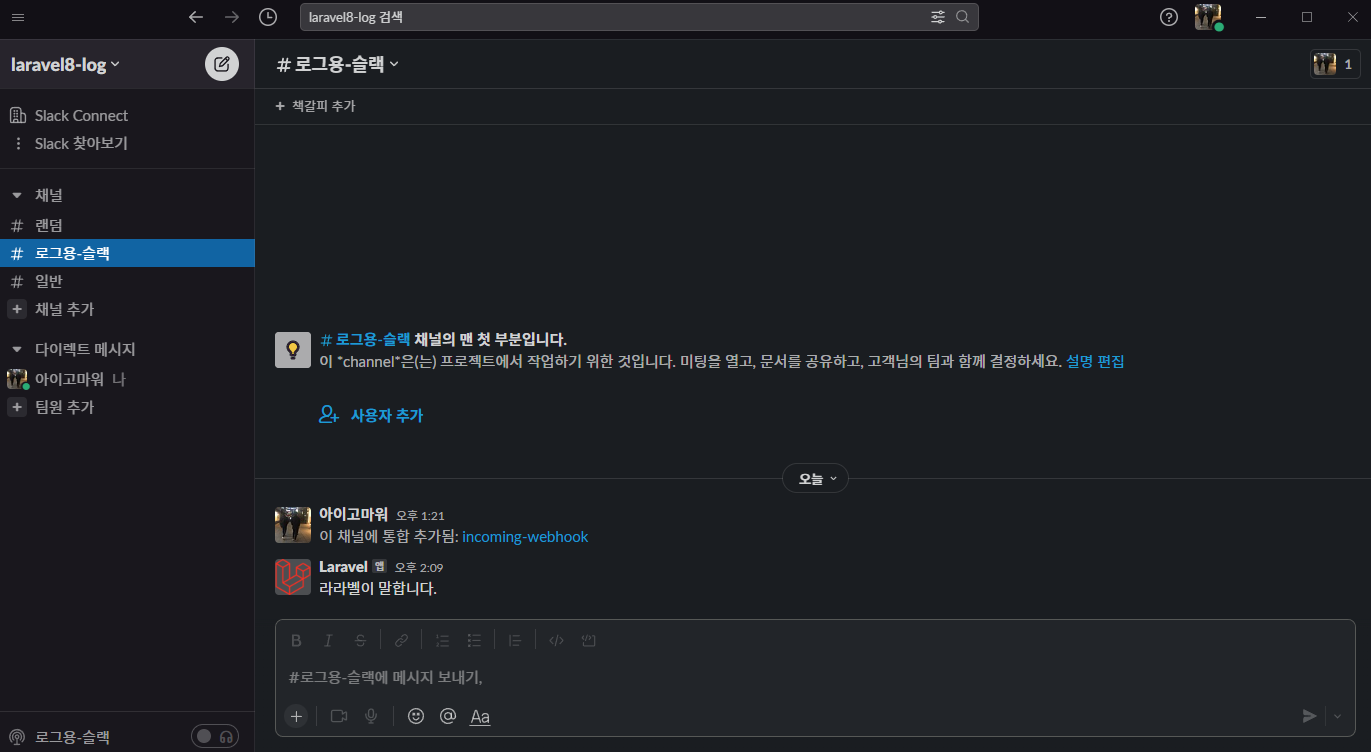
3. Slack에 메세지가 나타납니다.
과정
-
Slack Notification 패키지를 설치합니다.
composer require laravel/slack-notification-channel -
Slack Notification을 만들어 줍니다.
여기서 slack 알림 전처리 작업을 합니다.
php artisan make:notification SlackNotification<?php namespace App\Notifications; use ... class SendNotification extends Notification { use Queueable; private $message; public function __construct($message) { $this->message = $message; } public function via($notifiable) { return ['slack']; } public function toSlack($notifiable): SlackMessage { return (new SlackMessage) ->from('Laravel') ->image('https://laravel.com/img/favicon/favicon.ico') ->content($this->message); } }2-1.
__constructor에서 보낼 메세지를 설정했습니다.
2-2.via()에서default값인mail에서slack으로 변경해줍니다.
2-3. 위에서 설치한slack notification패키지가 잘 설치 되면toSlack을 사용 할 수있습니다.
toMail또한toSlack으로 변경해 줍니다.
2-4. 여기서 매개변수인$notifiable은 이후 알림을 보내기 위해use Notifiable한Model의 값을 가져옵니다.// Models/User.php class User extends Authenticatable { use Notifiable; } // NotificationController.php class NotificationController{ public function slackNotification(){ //Notifiable을 use한 Model인 user에서 notify를 호출할 수 있습니다. // 1. 한번 호출 $user = User::first(); $message = '라라벨이 말합니다.'; $user->notify(new SlackNotification($message)); // 2. 전부다 호출 $users = User::all(); Notification::send($users, new SlackNotification($message)); // 위에서 말한 매개변수인 $notifiable은 여기의 각 $user가 됩니다. // $message는 생성자의 인자로 사용 되겠지요. } } -
Slack 설정파일을 설정합니다.
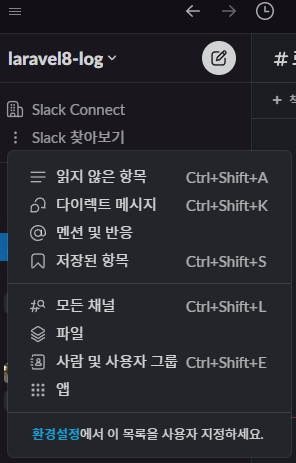
3-1. 2022-7월 기준
Slack 찾아보기에서앱을 클릭해 줍니다.
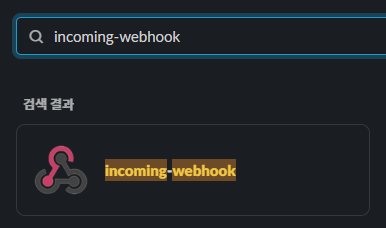
3-2. incoming-webhook을 찾아 클릭해 줍니다.
3-3. Slack에 추가합니다.

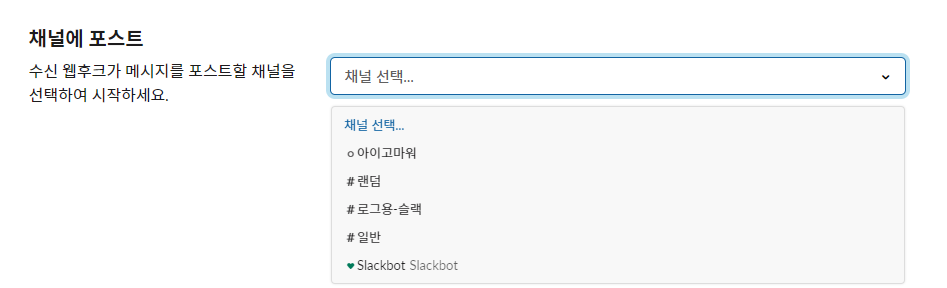
3-4. 원하는 채널을 선택해 줍니다.
3-5. 웹 후크 URL의 모든 URL을 복사해 둡니다.

<?php class User extends Authenticatable { use Notifiable; public function routeNotificationForSlack(): string { return config('services.notification.slack_webhook_url'); } } // config/services.php // config에 추가 'notification' => [ 'slack_webhook_url' => env('SLACK_WEBHOOK_URL'), ] //.env 에 추가 SLACK_WEBHOOK_URL=https://hooks.slack.com/services... -
####라우트 등록 및 실행
// web.php
Route::get('/slack-notification', [NotificationController::class, 'slackNotification']);