Redux Toolkit이란?🧐
Redux Toolkit은 Redux를 보다 편리하고 효율적인 사용하기 위해
Redux 에서 공식적(Offical)으로 개발한 Redux의 패키지이다.
Redux Toolkit은 기존 Redux의 다음과 같은 문제들에 대해 해결하기 위해 만들어졌다.
- "Configuring a Redux store is too complicated" : Redux store의 설정이 너무 복잡하다
- "I have to add a lot of packages to get Redux to do anything useful" : Redux를 유용하기 사용하기 위해서는 또다른 많은 패키지를 추가해야 한다
- "Redux requires too much boilerplate code" : Redux로 작업하기 위해서는 많은 Boilerplate 코드가 필요하다"
- 출처: Getting Started - Redux Toolkit 공식 문서
Redux Toolkit 설치⤴️
Redux Toolkit을 사용하기에 앞서서, Redux Toolkit을 설치해주어야 한다.
Redux Toolkit의 설치 방법은 2가지가 있다.
Create React App로 React 프로젝트 생성시 함께 추가하기
Create React App으로 React 프로젝트를 처음부터 생성할 경우
아래의 코드처럼 Redux를 추가해주면 React 프로젝트와 Redux를 함께 설치할 수 있다.
npx create-react-app my-app --template redux기존 프로젝트에 추가하기
기존 프로젝트에 Redux Toolkit을 추가하는 경우에는 다음과 같이 Redux Toolkit를 패키지에 추가해주면 된다.
# NPM
npm install @reduxjs/toolkit

# Yarn
yarn add @reduxjs/toolkit
Redux Toolkit 기초 구문📝
지난 React Redux 입문 글에서 React Redux를 이용해서
간단한 To-do List를 만들어보았는데, 이번에는 그 코드를 Redux Toolkit를 이용하여 한번 더 리팩토링을 해보고자 한다.
Redux Toolkit을 이용하여 To-do List를 작성해보며
Redux Toolkit의 기초 구문에 대해 알아보자.
템플릿 코드
React Redux로 작성된 이 템플릿 코드를 Redux Toolkit을 이용하여 리팩토링을 해보자.
1️⃣ createAction
// store.js

// Action Type명: Action을 식별하기 위한 문자열
const ADD_TODO = "ADD_TODO";
const DELETE_TODO = "DELETE_TODO";

// Action Creator
const addToDo = (text) => {
  return {
    type: ADD_TODO,
    text
  };
};

// Action Creator
const deleteToDo = (id) => {
  return {
    type: DELETE_TODO,
    id
  };
};

//...중략//

// Action Creator의 묶음
export const actionCreators = {
  addToDo,
  deleteToDo
};
위와 같이 기존의 React Redux로 만들어진 store.js 파일에서
Action에 대해 작성된 코드는 다음과 같은 2가지 문제점이 있다.
기존의 Action 정의 방법에 대한 과제
Action Type명을 정의해줘야하는 번거로움addToDo와deleteToDo라는Action생성 함수인Action Creator를 하나하나 일일이 만들어줘야하는 번거로움
이것은 Redux Toolkit의 createAction을 사용하면 해결할 수 있다.
// store.js

import { createStore } from "redux";
import { v4 as uuidv4 } from "uuid";
import { createAction } from "@reduxjs/toolkit";

// createAction: Action Creator함수를 생성함
// createAction의 첫번째 인자는 type
// "ADD_TODO", "DELETE_TODO"는 각각의 action의 이름(type)을 뜻함
const addToDo = createAction("ADD_TODO");
const deleteToDo = createAction("DELETE_TODO");

const reducer = (toDos = [], action) => {
  switch (action.type) {
    case addToDo.type:
      // createAction으로 만든 action은 default로 type와 payload를 가짐
      // payload에 데이터를 담음
      return [{ text: action.payload, id: uuidv4() }, ...toDos];
    case deleteToDo.type:
      // createAction으로 만든 action은 default로 type와 payload를 가짐
      // payload에 데이터를 담음
      return toDos.filter((toDo) => toDo.id !== action.payload);
    default:
      return toDos;
  }
};

const toDosStore = createStore(reducer);

// Action Creator의 묶음
export const actionCreators = {
  addToDo,
  deleteToDo
};

export default toDosStore;
위의 코드는 createAction을 사용하여 Action 정의를 개선시킨 코드이다.
createAction을 사용함으로써 Action creator 함수를 생성하는 코드를 단축시키는 것에 성공했다.
(주석이 많아서 좀 길어보이지만😅)
createAction은 Action Creator 함수를 생성해준다.
// createAction의 첫번째 인자는 type
// "ADD_TODO", "DELETE_TODO"는 각각의 action의 이름(type)을 뜻함
const addToDo = createAction("ADD_TODO");
const deleteToDo = createAction("DELETE_TODO");createAction의 인자로 Action의 type을 넣어줘야 한다.
그러므로 기존 코드의 아래 코드처럼 Action type을 정의하기 위한 코드와 Action Creator 함수를 따로 작성해줄 필요가 없어지게 된다.
const ADD_TODO = "ADD_TODO";
const DELETE_TODO = "DELETE_TODO";

const addToDo = (text) => {
  return {
    type: ADD_TODO,
    text
  };
};

const deleteToDo = (id) => {
  return {
    type: DELETE_TODO,
    id
  };
};
// =========> 이 코드들은 createAction을 사용하면 작성할 필요가 없게 됨!
자, 그럼 createAction으로 새롭게 정의된 Action creator 함수인
addToDo와 deleteToDo의 내용을 확인해보자.

- type: Action을 식별하기 위한 문자열
- payload: Action이 받아온 데이터
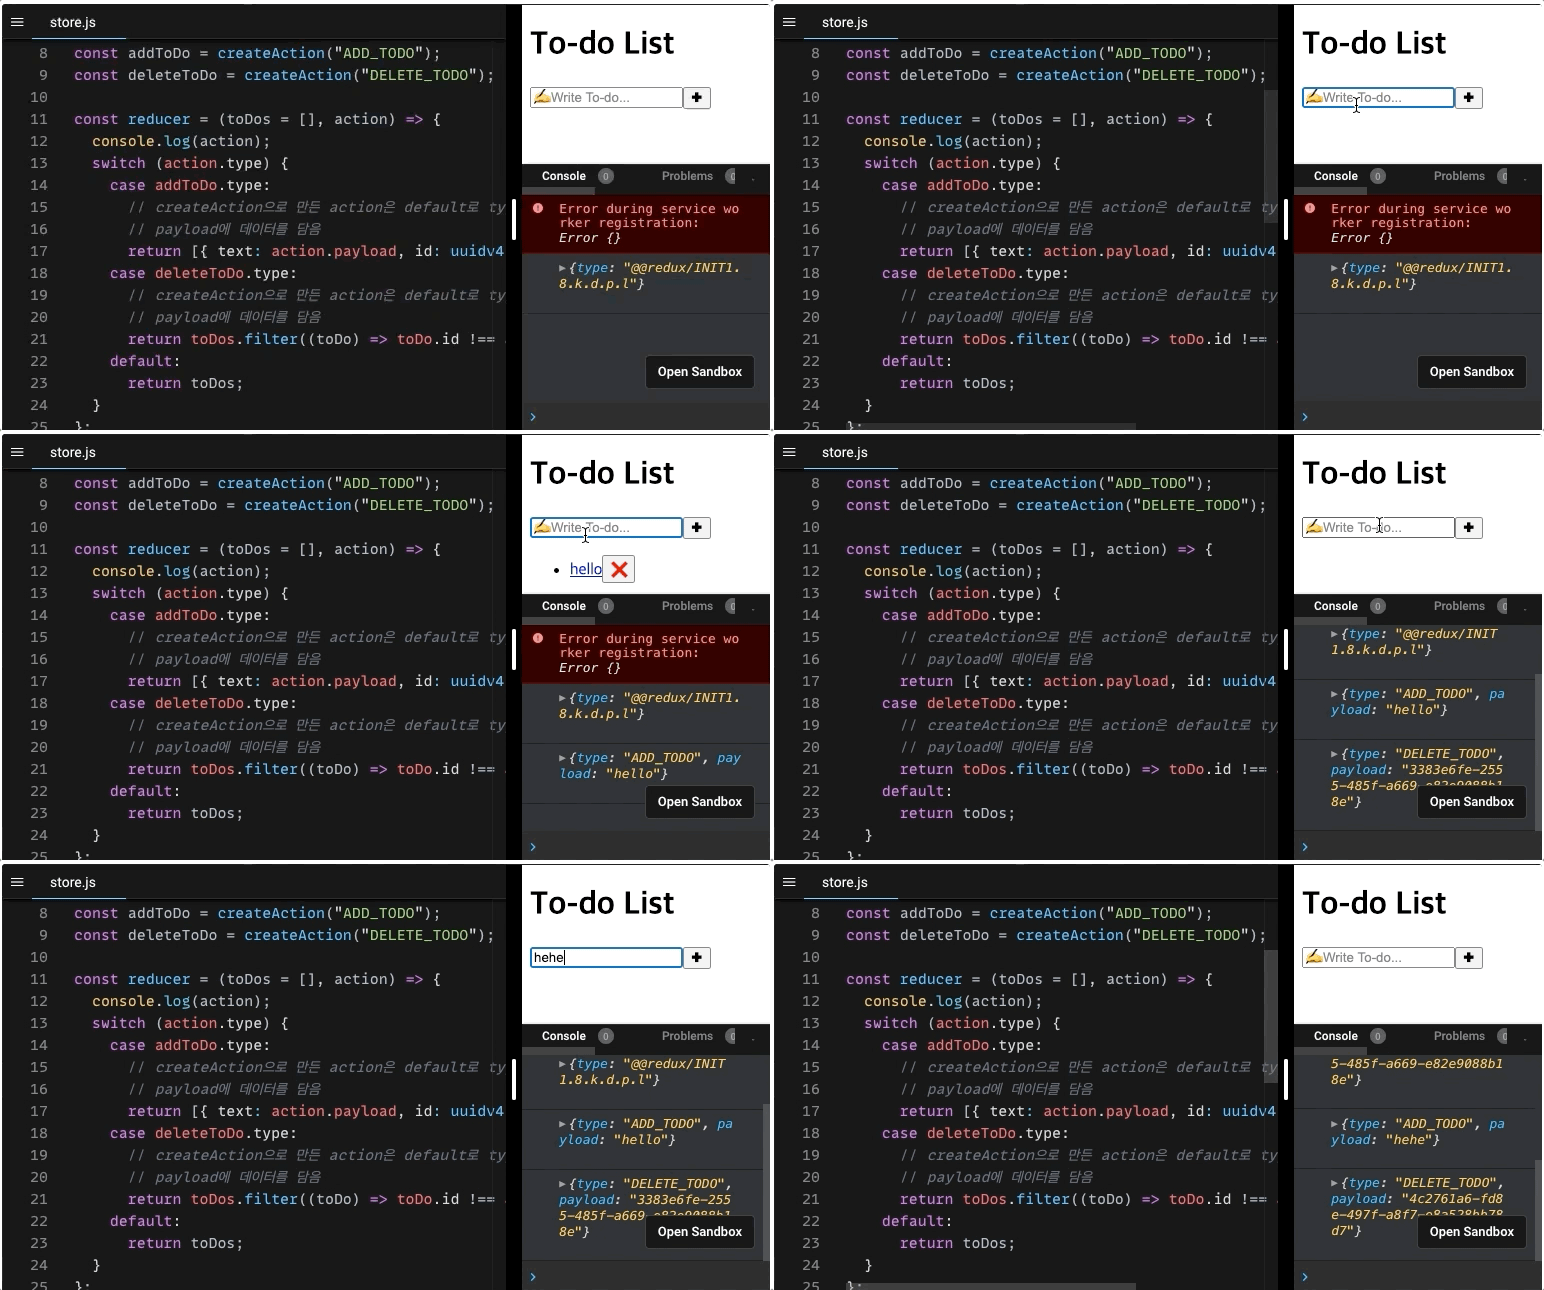
createAction의 인자로 설정한 내용이 type로 잘 정의되어 있는 것을 볼 수 있다.
createAction으로 새롭게 정의된 Action creator 함수는
Object가 반환되며, type과 payload라는 값을 Default로 갖게 된다.
// store.js

const reducer = (toDos = [], action) => {
  switch (action.type) {
    case addToDo.type:
      // createAction으로 만든 action은 default로 type와 payload를 가지며
      // payload에 데이터를 담음
      return [{ text: action.payload, id: uuidv4() }, ...toDos];
    case deleteToDo.type:
      // createAction으로 만든 action은 default로 type와 payload를 가짐
      // payload에 데이터를 담음
      return toDos.filter((toDo) => toDo.id !== action.payload);
    default:
      return toDos;
  }
};
이렇게 Action이 잘 생성되었으니 reducer 함수의 각 case를
createAction으로 새롭게 정의된 Action creator 함수의 type로 설정해준다.
그리고 중요한 점!
createAction으로 새롭게 정의된 Action creator 함수는
Default로 type과 payload라는 값을 갖게 되며
Action으로 받아온 데이터를 payload에 담는다!
return 구문에서 addToDo, deleteToDo Action이 받아 오는 값을 action.payload로 수정해준다.

이렇게 문제없이 코드가 잘 움직이는 것을 확인할 수 있다.
2️⃣ createReducer
이번에는 createReducer라는 메소드를 사용해보고자 한다.
createReducer는 reducer 함수의 작성을 간결하게 개선시킬 수 있으며,
state를 mutate하는 것을 가능하게 해준다는 장점이 있다!
먼저 기존의 reducer 함수의 코드를 살펴보자.
// store.js

const reducer = (toDos = [], action) => {
  switch (action.type) {
    case addToDo.type:
      // createAction으로 만든 action은 default로 type와 payload를 가짐
      // payload에 데이터를 담음
      return [{ text: action.payload, id: uuidv4() }, ...toDos];
    case deleteToDo.type:
      // createAction으로 만든 action은 default로 type와 payload를 가짐
      // payload에 데이터를 담음
      return toDos.filter((toDo) => toDo.id !== action.payload);
    default:
      return toDos;
  }
};
기존의 reducer 함수 정의 방법에 대한 과제
switch문과 같은 조건문을 이용하여 각 type에 대한 조건 논리를 작성하는 점.- Redux의 3원칙 중 하나인 "State is read-only"에 따라, state를 변경(mutate)하지 못한다.
기존의 reducer 함수에서 가장 크게 눈에 띄는 것은 바로 switch 문이다.
switch 문을 사용해서 action.type를 체크한 뒤
각 case에 대해 특정 로직을 실행하도록 작성되어 있다.
(reducer 함수에서 반드시 switch 문만을 사용하는 것은 아니다.
if문과 반복문을 이용해서 reducer 함수에서 원하는 조건 논리를 만들 수도 있긴 하다.)
이는 많은 Boilerplate 코드를 요구하게 된다.
또한, Redux의 3원칙 중 하나인 "State is read-only"에 따라
state를 변경(mutate)할 수 없기 때문에 (state의 불변성을 지키기 위해)
spread 연산자를 사용하여 새로운 state를 만들어야했다.
때문에 코드의 가독성을 떨어뜨리게 하는 원인이 되었다.
이 과제들은 createReducer를 사용함으로써 해결할 수 있다.
// store.js

import { createStore } from "redux";
import { v4 as uuidv4 } from "uuid";
import { createAction, createReducer } from "@reduxjs/toolkit";

// createAction: Action Creator함수를 생성함
// createAction의 첫번째 인자는 type
// "ADD_TODO", "DELETE_TODO"는 각각의 action의 이름(type)을 뜻함
const addToDo = createAction("ADD_TODO");
const deleteToDo = createAction("DELETE_TODO");

// createReducer: Reducer 함수를 생성
// createReducer의 첫번째 인자: initial State
const reducer = createReducer([], {
  // [addToDo]: action이 addToDo일 때
  [addToDo]: (state, action) => {
    // state에 새로운 데이터를 push함으로써 state를 mutate함
    // state를 mutate하는 경우에는 state을 return해주지 않아도 됨
    state.push({ text: action.payload, id: uuidv4() });
  },
  // [deleteToDo]: action이 deleteToDo일 때
  [deleteToDo]: (state, action) =>
    // filter 조건의 true가 되는 값으로 새로운 state을 만들어서 return함
    // 새로운 state를 만드는 경우에는 state을 return해줘야함
    state.filter((toDo) => toDo.id !== action.payload)
});

const toDosStore = createStore(reducer);

// Action Creator의 묶음
export const actionCreators = {
  addToDo,
  deleteToDo
};

export default toDosStore;
일단 createReducer를 사용함으로써, switch 문이 사라졌다.
그리고 가장 중요한 포인트는 바로 아래의 코드이다.
[addToDo]: (state, action) => {
  // state에 새로운 데이터를 push함으로써 state를 mutate함
  // state를 mutate하는 경우에는 state을 return해주지 않아도 됨
  state.push({ text: action.payload, id: uuidv4() });
}
- Redux Toolkit's
createReducerandcreateSliceautomatically use Immer internally to let you write simpler immutable update logic using "mutating" syntax. This helps simplify most reducer implementations.- Writing Reducers with Immer - Redux Toolkit 공식 문서
addTodo에서 state.push({...})를 하고 있다.
JavaScript의 Array.push는 기존 배열의 끝에 요소를 추가하는 메소드로,
요소를 추가한 또다른 새로운 배열을 생성하는 것이 아니라 기존 배열에 요소를 추가하기 때문에
배열 자체를 있는 그대로 변경시켜버리는 것이 특징이다.
때문에, Array.push를 사용하면 state의 불변성이 훼손되버리게 된다.
그러나 위의 공식 문서에서 안내하고 있는 것처럼,
Redux Toolkit의 createReducer는 내부적으로 Immer를 사용하기 때문에
state를 mutate하는 것을 가능하게 해준다.

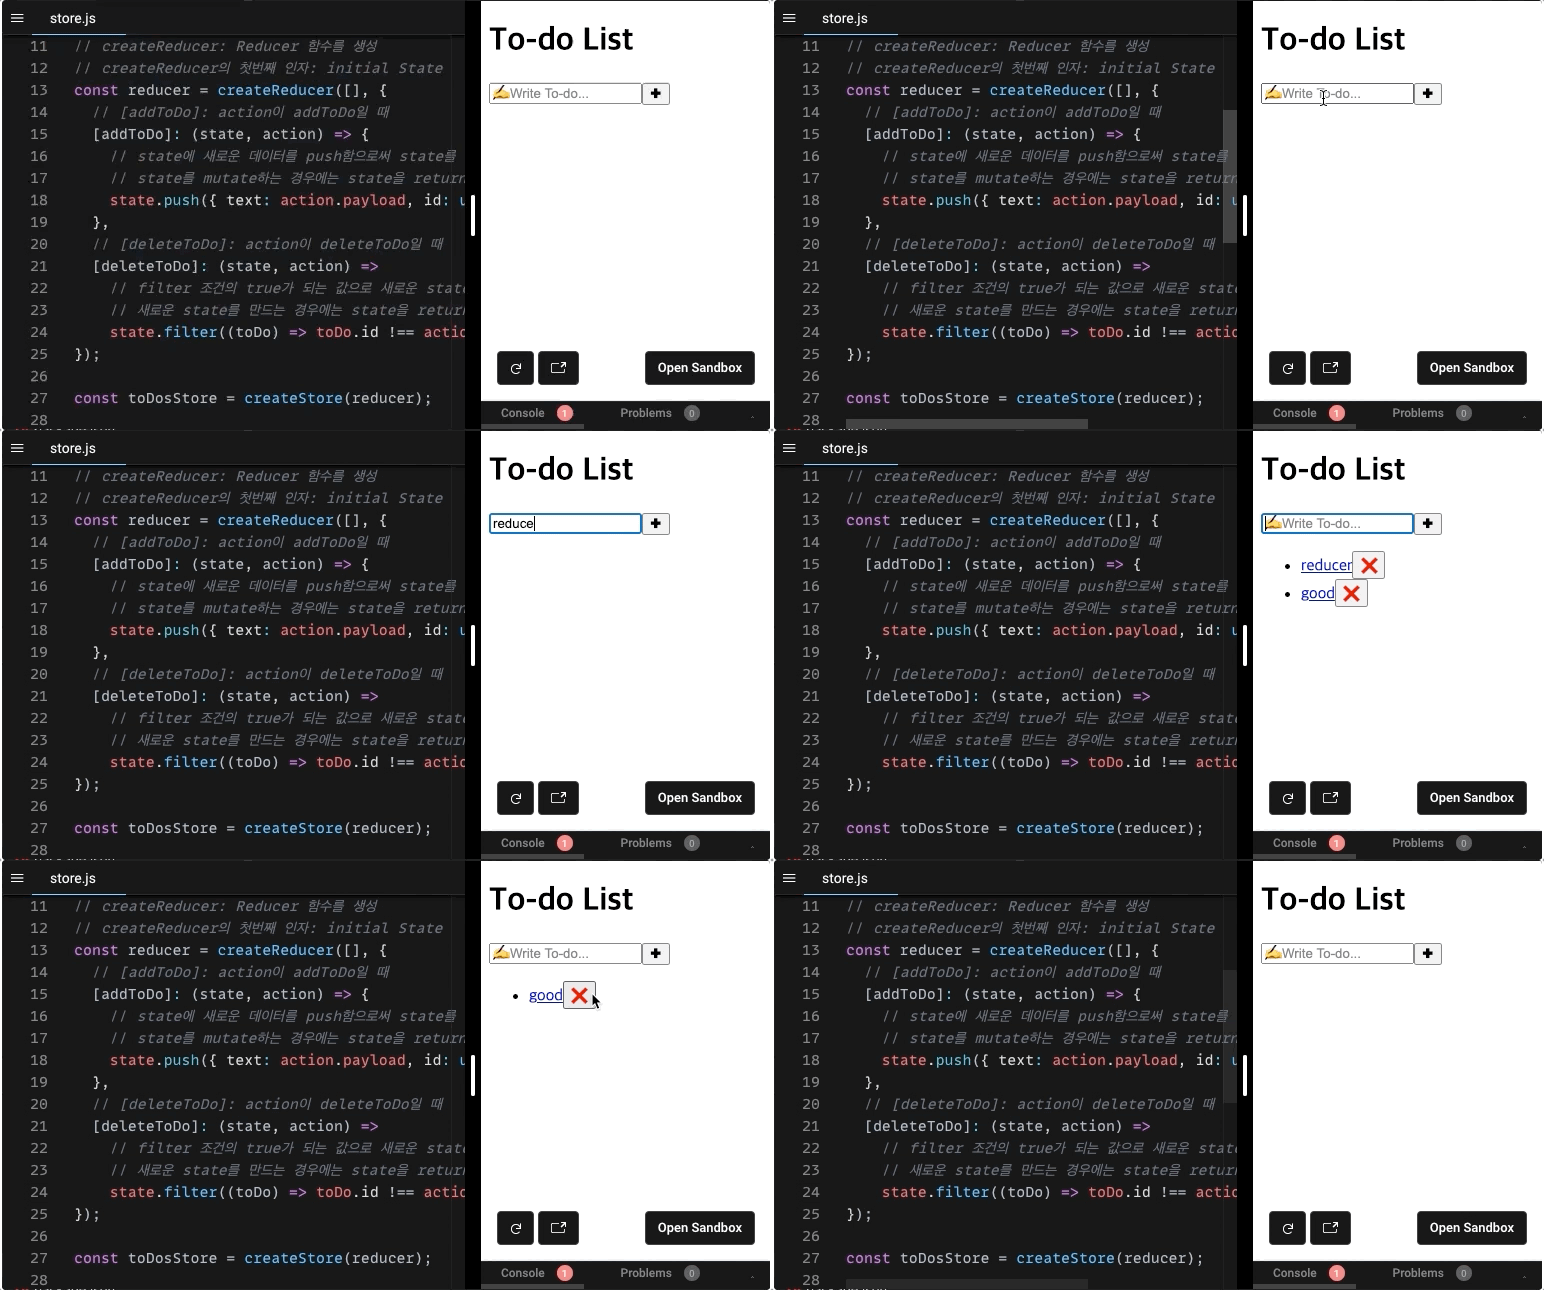
역시 문제 없이 코드가 구동되고 있는 모습을 볼 수 있다.
3️⃣ configureStore
// store.js (기존에 store를 생성할 때 사용했던 방법)

import { createStore } from "redux";
const toDosStore = createStore(reducer);
기존에 Redux에서 Store를 생성할 때는 위와 같이 createStore()를 사용했지만
Redux Toolkit에서는 configureStore()를 사용한다.
configureStore는 Redux 미들웨어와 함께 store를 생성할 수 있게 해준다.
// store.js (configureStore를 사용하여 store를 생성)

import { configureStore } from "@reduxjs/toolkit";
const toDosStore = configureStore({ reducer });
기존의 createStore와 비교하면 코드 자체는 크게 다르지 않지만,
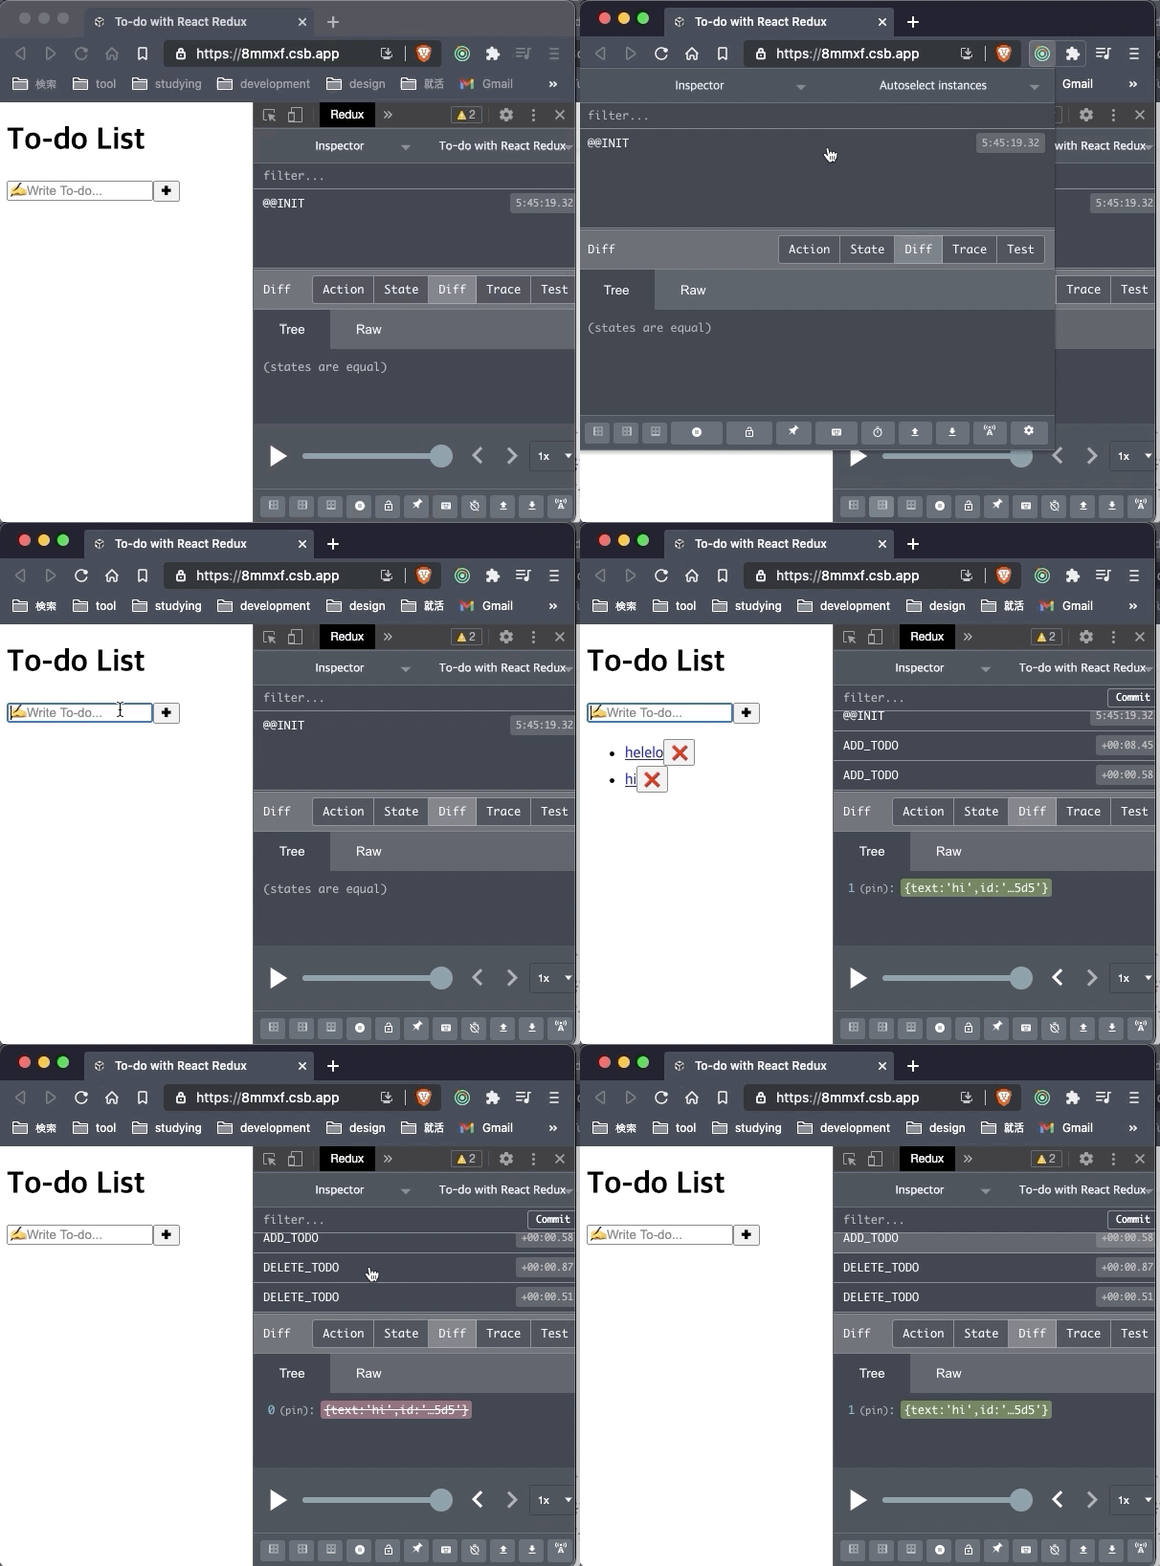
configureStore를 통해 생성 된 store는 Redux DevTools을 사용할 수 있게 된다.
Redux DevTools은 dispatch된 action과 history 그리고 state 변경사항들을 쉽게 볼 수 있다.

↑ 간단히 Redux DevTools을 사용하는 모습.
(용량 압박 때문에 많은 것을 찍지는 못했다😅)
4️⃣ createSlice
위에서 사용해본 createAction과 createReducer로 코드를 간단하게 줄이는 것에 성공했다.
그치만 여기서 Redux Toolkit의 createSlice라는 기능을 사용하면 코드를 더더더 압축시킬 수 있다!
createSlice는 Action과 Reducer 함수의 생성을 동시에 행할 수 있게 해줌으로써
createAction과 createReducer로 작성된 코드를 현저하게 줄일 수 있다.
즉, Action과 Reducer 함수를 한번에 만들 수 있다는 것이다.
// store.js

import { v4 as uuidv4 } from "uuid";
import { configureStore, createSlice } from "@reduxjs/toolkit";

const toDos = createSlice({
  name: "toDosReducer",
  initialState: [],
  reducers: {
    // Action creator
    add: (state, action) => {
      state.push({ text: action.payload, id: uuidv4() });
    },
    // Action creator
    remove: (state, action) =>
      state.filter((toDo) => toDo.id !== action.payload)
  }
});

export const { add, remove } = toDos.actions;

export default configureStore({ reducer: toDos.reducer });createSlice는 다음과 같은 옵션을 가진 Object를 받는다.
createSlice의 옵션
- name : 모듈의 이름
- initialState :
state의 초기값을 설정- reducers :
reducer를 작성한다. 이때reducer의Key값으로Action함수가 자동으로 생성된다
위의 코드처럼, createSlice는 reducer와 Action을 가지고 있는 Slice Object를 가지고 있다.
이렇게 만들어진 toDos의 내부를 확인하면

createSlice 내부에서 state, 모듈의 이름,
reducer, action에 대한 정의가 한번에 이루어진 모습을 확인할 수 있다.
이렇게 만들어진 Slice Object로부터 Destructuring assignment을 사용하면
아래와 같이 Action Creator와 reducer를 뽑아낼 수 있다.
const { add, remove } = toDos.actions;
const { reducer } = toDos;
위의 코드에서는 뽑아낸 Action을 다른 컴포넌트에서 사용하기 위해
다음과 같이 export해줬다.
export const { add, remove } = toDos.actions;이렇게 간단하게 각 Action Creator를 뽑아낼 수 있기 때문에
아래의 코드도 작성할 필요가 없게 됐다.
// store.js

// Action Creator의 묶음
export const actionCreators = {
  addToDo,
  deleteToDo
};
// =========> 이 코드는 기재할 필요가 없어짐!
이제 새롭게 만들어져서 export된 Action들을
Home.js 컴포넌트와 ToDo.js에서 사용할 수 있도록 코드를 수정해준다.
// routes/Home.js
import { add } from "../store";

// ...중략

function mapDispatchToProps(dispatch) {
  return {
    addToDo: (text) => dispatch(add(text))
  };
}

// components/ToDo.js
import { remove } from "../store";

// ...중략

function mapDispatchToProps(dispatch, ownProps) {
  return {
    deleteToDo: () => dispatch(remove(ownProps.id))
  };
}
이렇게해서 새롭게 완성된 To-do List는...
Demo 🔍
아주 간결한 코드와 함께 문제 없이 잘 움직이고 있다😋
마치며 💬
간단한 예제로 Redux Toolkit을 사용해보면서,
Redux를 보다 더 효율적으로 사용할 수 있게 도와준다는 것을 경험할 수 있었다.
Redux를 더 편하게 다룰 수 있게 연습해서 Redux Toolkit의 진가를 뽐낼 수 있는
프로젝트를 만들어보고 싶다☺️
