RxSwift를 21일간 공부하는 루틴
"Rx를 기깔나게 쓰는 신입개발자 도전" 시작 🚀
지난 tableview 글에 이어 계속 작성해보겠다.
구현목표
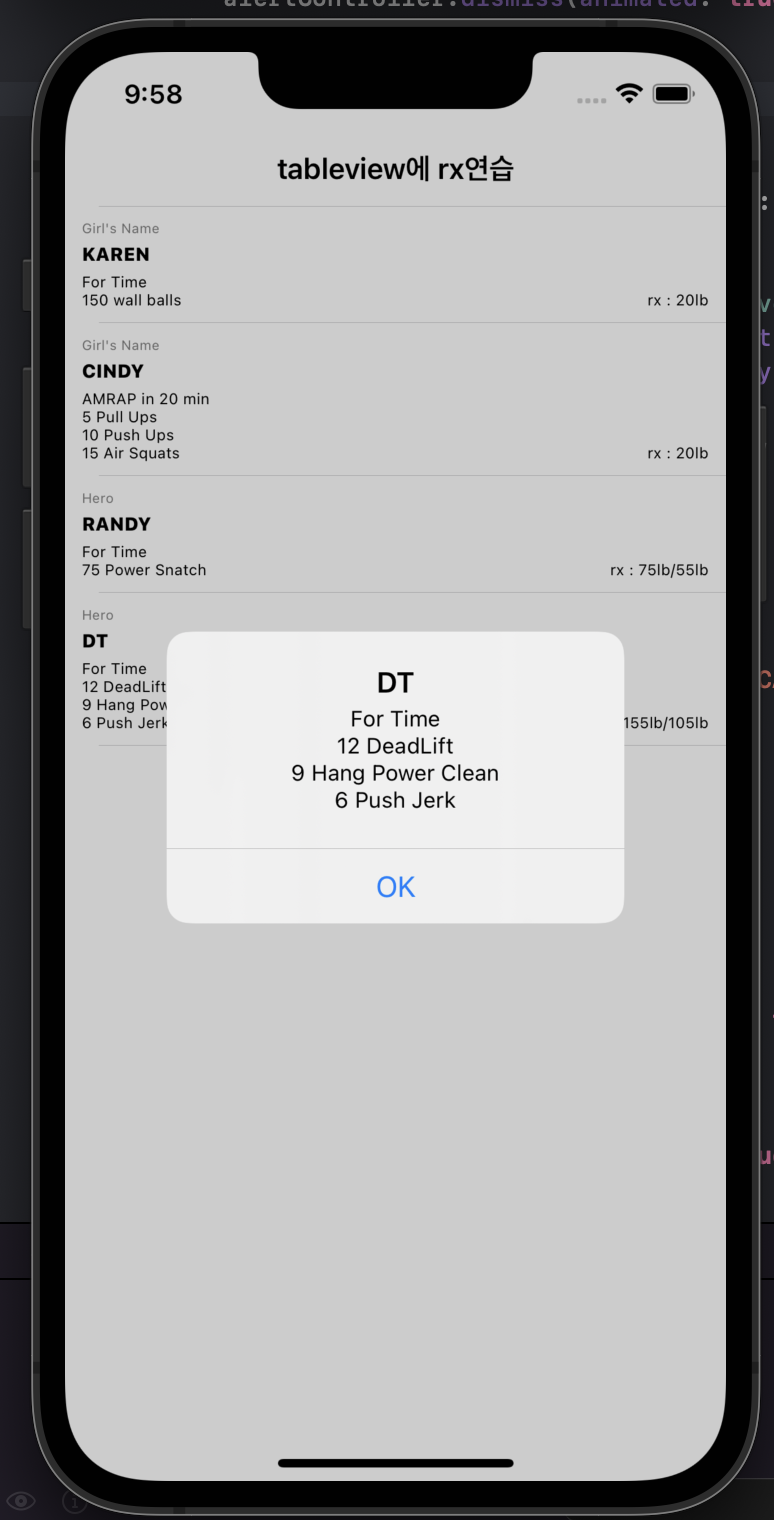
2. 각 셀을 탭 했을때, alert으로 운동이름과, 상세동작을 띄어준다.
물론 alertController는 충분히 rx 를 사용하지 않고도 구현할 수 있다.
alcertController에 alertAction을 구현해주면 된다.
그 다음, alertAction 을 받아, action 에 따른 기능을 구현하면된다.
이번에는 단순히 ok action 만 있는 alert을 만들어보겠다.
구현1 : extension
우선, UIViewController를 extension 하여 alert을 띄어주는 함수를 구현해보았다.
    // 하나의 액션을 표시하는 alert wrapping
    func showAlert(title : String, message: String? = nil) -> Observable<ActionType> {

        return Observable.create { [weak self] observer in
            let alertController = UIAlertController(title: title, message: message, preferredStyle: .alert)
            let okAction = UIAlertAction(title: "OK", style: .default) { _ in
                // event 전달
                observer.onNext(.ok)
                observer.onCompleted()
            }
            alertController.addAction(okAction)

            self?.present(alertController, animated: true, completion: nil)

            return Disposables.create {
                alertController.dismiss(animated: true, completion: nil)
            }
        }
여기서 ActionType은 직접 구현한 enum이다.
//MARK: 어떤 액션을 선택했는지 알기위함
enum ActionType {
    case ok
    case cancel
}
alertController 에 alertAction을 추가해주는 부분은 cocoatouch와 같다.
다만 다른점은 cocoatouch의 경우 action의 handler에 구현해야 할 기능을 직접 구현했다면, rx의 경우는 event를 방출하게 된다.
observer.onNext(.ok) 은 alertAction을 전달해주는 것이다.
물론 위의 코드처럼 ActionType을 Observable로 받아서, alert을 띄울때 subscribe 를 하고 switch 구문을 통해 원하는 기능을 넣을 수 있다.
tableView.rx.modelSelected(CrossfitMovements.self)
    .flatMap { [unowned self] wods in
        self.showAlert(title: wods.name, message: wods.movements)
    }
    .subscribe(onNext : { actionType in
        switch actionType {
        case .ok :
            print("ok")
        default :
            break
        }
    })
이렇게 tabelview의 cell을 선택시 모델 struct 를 주게되고,
이를 받아 flatMap을 통해 showAlert에서 return 하는 Observable<ActionType> 으로 변환할 수 있다.
그리고 구독을 통해 actiontype을 받고 case 구문으로 액션을 눌렀을때의 기능을 구현해 줄 수 있다.
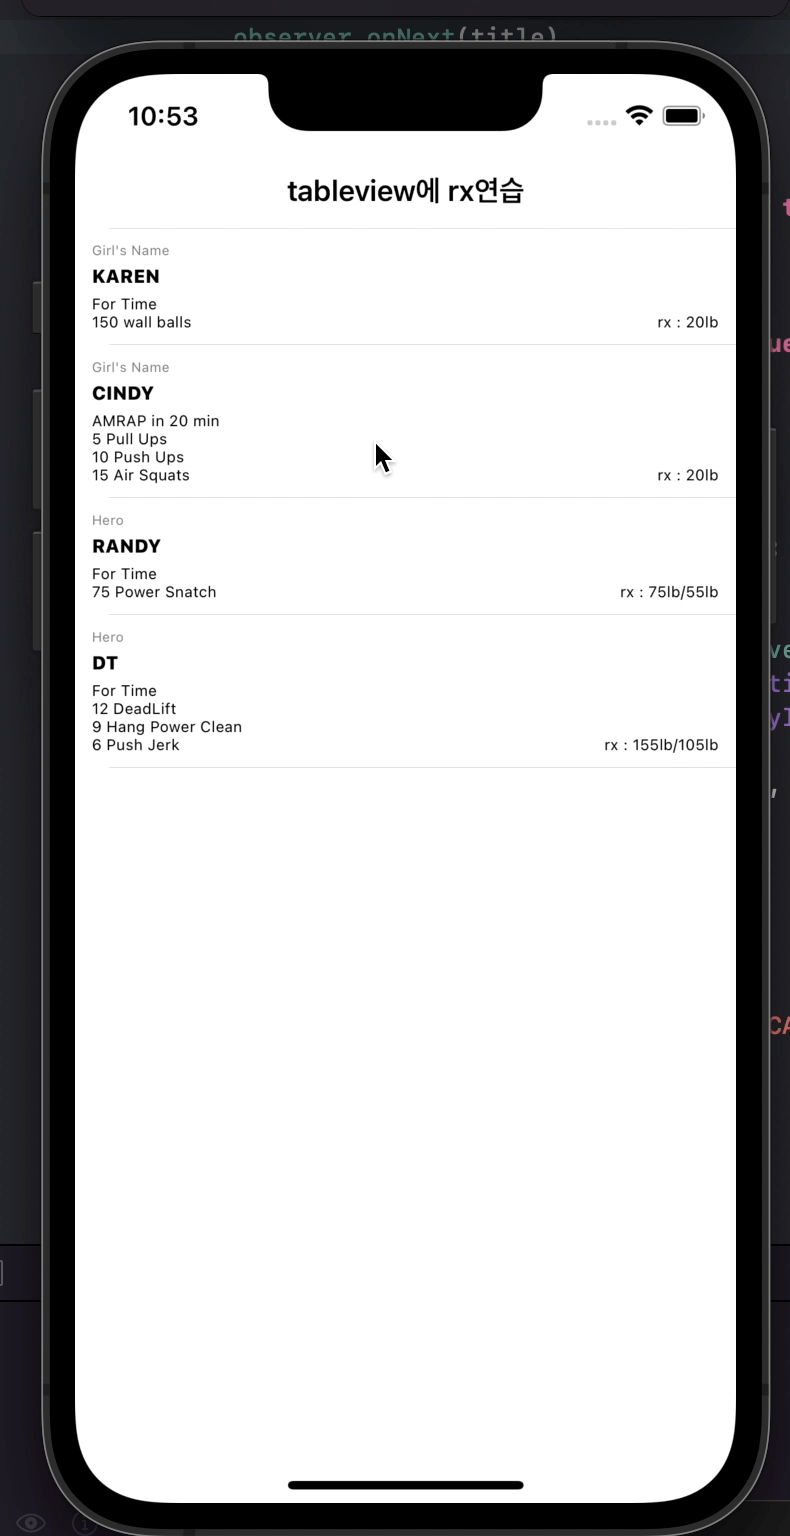
변형
showAlert 이 다른 타입의 Observable을 return 할 수 도 있다.
만약 string event 를 방출하게된다면, 이를 전달받아 navigation title이 받을 수도 있다.
tableView.rx.modelSelected(CrossfitMovements.self)
    .flatMap { [unowned self] wods in
        self.showAlert(title: wods.name, message: wods.movements)
    }
    .bind(to: self.rx.title)
    .disposed(by: disposeBag)
이렇게 string event를 받고 이를 rx.title과 binding 해줄 수 있다.
rx를 쓰면, 확실히 데이터 흐름이 직관적으로 보이는 것을 확인 할 수 있다.
이런 부분때문에 rx를 쓰지 않을까 싶다.
전체코드는 링크를 걸어놓았다.