프로젝트를 위해 이미지 업로드 기능을 구현했다.
이미지를 배포할 땐 주로 aws의 S3 스토리지에 저장한다.
S3 버킷 만들기
참고
https://velog.io/@jinseoit/AWS-S3-bucket
버킷 생성 후 키를 발급 받는다.
구현 과정
1. 환경 설정
// aws
implementation platform("software.amazon.awssdk:bom:2.25.64")
implementation "software.amazon.awssdk:s3"
application.yml
cloud:
  aws:
    s3:
      bucket: ${S3_BUCKET_NAME}
    stack.auto: false
    credentials:
      accessKey: ${CLOUD_ACCESS_KEY}
      secretKey: ${CLOUD_SECRET_KEY}
2. S3Config 생성
@Configuration
public class S3Config {
    @Value("${cloud.aws.credentials.accessKey}")
    private String accessKey;
    @Value("${cloud.aws.credentials.secretKey}")
    private String secretKey;

    @Bean
    public S3Client s3Client() {
        AwsBasicCredentials credentials =
                AwsBasicCredentials.create(accessKey, secretKey);

        return S3Client.builder()
                .credentialsProvider(StaticCredentialsProvider.create(credentials))
                .region(Region.US_EAST_1)
                .build();
    }

}- AwsBasicCredentials: 호출자가 AWS 접근 키와 시크릿 액세스를 구성자에 전달한다
- region: 해당 버킷의 리전 설정
3. AwsFileService 구현
S3에 이미지를 저장하는 로직을 구현한다.
@Service
@RequiredArgsConstructor
public class AwsFileService {
    private final S3Client s3Client;

    @Value("${cloud.aws.s3.bucket}")
    private String bucket;

    public String saveProfileImg(MultipartFile multipartFile, Long memberId) throws IOException {
        return uploadProfileImg(multipartFile, memberId);
    }

    public String uploadProfileImg(MultipartFile file, Long memberId) throws IOException {
    	// 1
        if (file.getContentType() == null ||
                !file.getContentType().startsWith("image/")) {
            throw new MemberException(MemberErrorCode.FILE_TYPE_ERROR);
        }

		//2
        String originalName = file.getOriginalFilename();
        String ext = originalName.substring(originalName.lastIndexOf("."));
        String fileName = "profile/" + memberId + "/" + UUID.randomUUID() + ext;

		//3
        PutObjectRequest putObjectRequest = PutObjectRequest.builder()
                .bucket(bucket)
                .key(fileName)
                .contentType(file.getContentType())
                .build();

		//4
        s3Client.putObject(
                putObjectRequest,
                RequestBody.fromInputStream(file.getInputStream(), file.getSize())
        );

        return getPublicUrl(fileName);
    }

	//5
    private String getPublicUrl(String key) {
        return "https://" + bucket + ".s3.amazonaws.com/" + key;
    }
}- MultipartFile: Http에서 파일을 전송할 때 쓰는 멀티파트 파일을 쉽게 다룰 수 있게 하는 스프링 인터페이스
- getContentType(): 파일의 콘텐츠 유형을 반환. 타입이 null이거나 image가 아닐 시 타입 예외 발생시킴 (타입 예: image/jpeg, image/png, application/pdf)
- getOriginalFilename(): 클라이언트의 파일 시스템에서 원래 파일명을 반환
-
"profile/" + memberId + "/" + UUID.randomUUID() + ext:
- profile 이미지 저장용이라 용도 지정
- UUID로 랜덤 번호 지정
- originalFileName에서 ext(확장자) 추출
-
PutObjectRequest: S3에 객체를 업로드하기 위한 요청 정보를 담는 클래스
-
S3Config에서 S3Client를 Bean으로 등록해두고, 이를 주입받아 PutObjectRequest를 통해 S3에 객체를 저장한다.
-
S3에 저장된 객체에 접근할 수 있는 public URL 문자열을 생성하여 반환한다.
4. Dto 구현
public class MemberReqDto {

    @Data
    public static class ProfileInfo{
        @NotNull
        MultipartFile profileImage;

        @NotBlank
        String nickName;
    }
}
db에는 imageUrl이 String 타입으로 저장되지만, 입력 받을 때는 MultipartFile로 입력받아야한다.
그냥 requestBody로 받을 시, HTTP Body에 username=kim&age=20과 같이 &로 구분해서 전송하기 때문에 multipart/form-data으로 입력받기 위함이다.
이렇게 해둬야 Swagger에서도 이미지 파일로 등록할 수 있다.
5. 컨트롤러 구현
    @PatchMapping(value = "/profile",
            consumes = MediaType.MULTIPART_FORM_DATA_VALUE)
    public ApiResponse<Void> updateProfile(@RequestHeader("Authorization") String token, @ModelAttribute MemberReqDto.ProfileInfo dto){
        memberService.updateProfile(token, dto);
        return ApiResponse.success(null);
}- consumes = MediaType.MULTIPART_FORM_DATA_VALUE
입력값에 MultipartFile이 있음을 정의 - @RequestBody가 아니라 @ModelAttribute로 받아와야 한다
(RequestBody 는 multipart/form-data 형식을 처리할 수 없음)
6. 서비스 구현
@Transactional
    @Override
    public void updateProfile(String token, MemberReqDto.ProfileInfo dto) {
        String email = getEmailByAccessToken(token);
        Member member = getMemberByEmail(email);

        MultipartFile profileImage = dto.getProfileImage();
        String nickname = dto.getNickName();


        try {
            String imageUrl = awsFileService.saveProfileImg(profileImage, member.getId());
            memberRepository.updateProfile(imageUrl, nickname, member.getId());
        } catch (IOException e) {
            throw new MemberException(MemberErrorCode.IMAGE_UPLOAD_FAIL);
        }
    }
앞서 만든 awsFileService를 사용하여 S3에 저장 후, 반환된 url을 업데이트 한다.
실행 결과
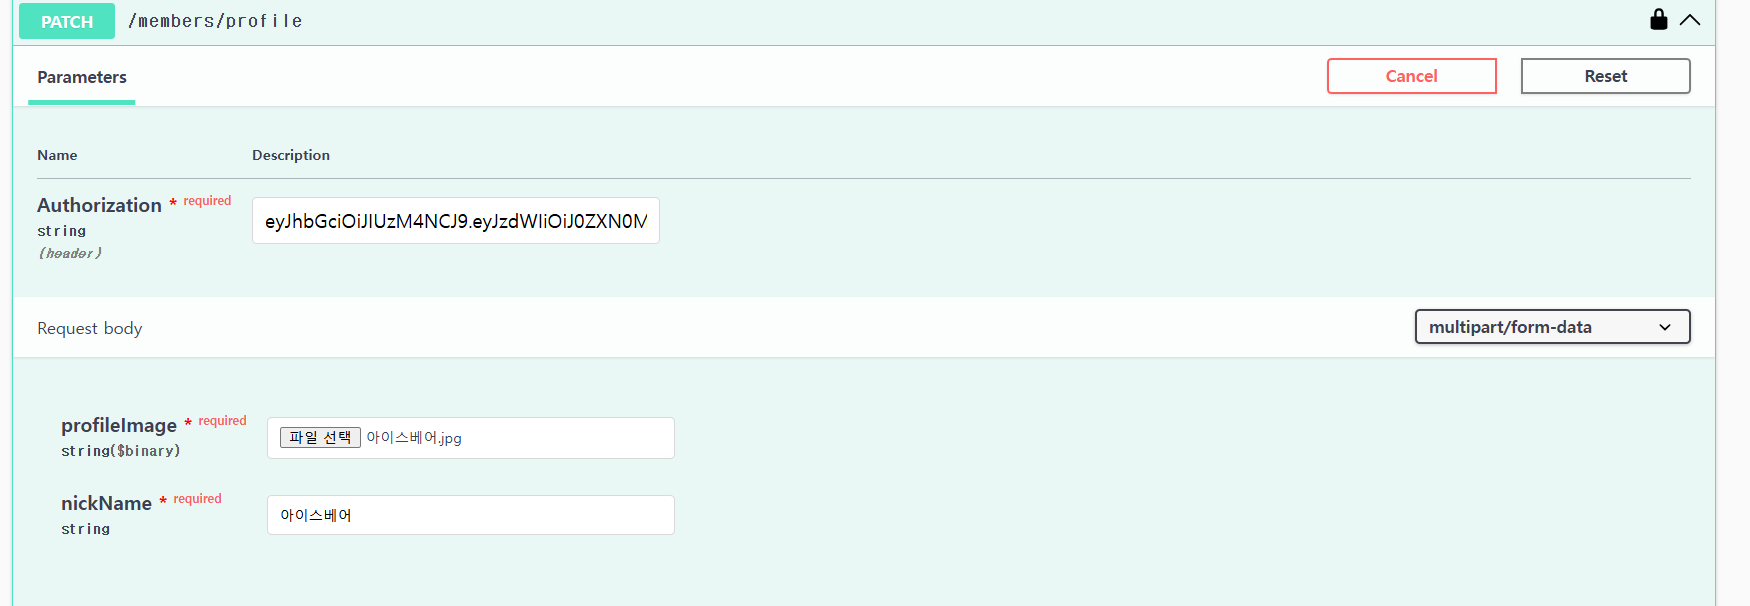
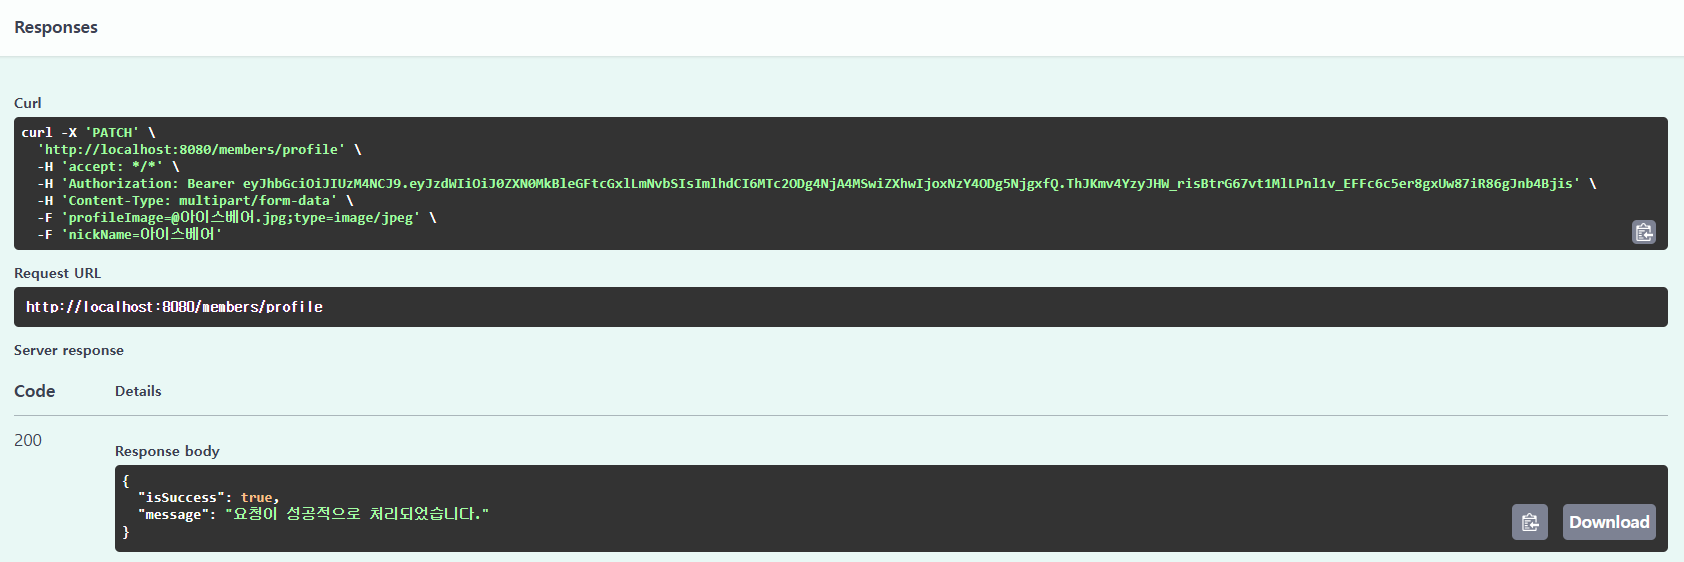
db에 저장된 링크를 들어가보면 배포된 사진이 나온다.

참고
- 블로그
https://velog.io/@dh1010a/Spring-Spring-Boot-AWS-S3%EB%A5%BC-%EC%9D%B4%EC%9A%A9%ED%95%9C-%EC%9D%B4%EB%AF%B8%EC%A7%80-%EC%97%85%EB%A1%9C%EB%93%9C-%EA%B5%AC%ED%98%84#aws-s3-%EC%84%A4%EC%A0%95
https://velog.io/@sun-8/HTTP-multipartform-data-%EC%99%80-RequestBody-ModelAttribute-%EA%B4%80%EA%B3%84 - 공식 문서
https://docs.spring.io/spring-framework/docs/current/javadoc-api/org/springframework/web/multipart/MultipartFile.html#getContentType()

감자의 공부기록🥔