
지난 글에서 실습용 카프가 구축을 위한 ec2 발급까지 진행 하였고, 이어서 주키퍼, 브로커 설치 및 간단한 설정 방법 및 개념을 알아보겠습니다.
인스턴스에 자바 설치
카프카 브로커를 실행하기 위해선 인스턴스에 JDK가 필요하다. 이유는 카프카 프로커는 스칼라와 자바로 작성되어 JVM 환경 위에서 실행되기 때문이다. 터미널로 구축된 ec2 인스턴스로 ssh 접속 후 아래와 같이 입력하자

주키퍼, 카프카 브로커 실행
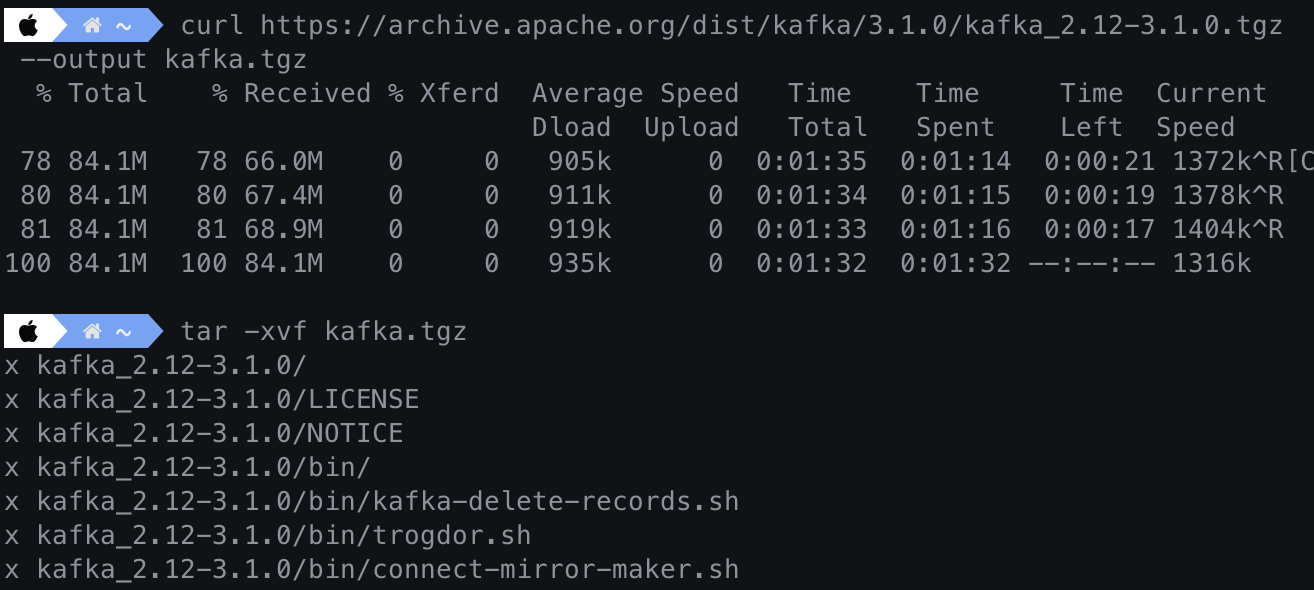
카프카 브로커를 실행하기 위해서는 바이너리 패키지 다운로드가 필요하다. (다운로드 링크)
바이너리 패키지는 두 가지 버전이 존재하는데 스칼라 2.13 버전을 선택했다.

tgz 링크를 클릭하면 바이너리 패키지의 HTTP URL 확인이 가능한데, 복사 후 터미널을 통해 패키지를 다운 받는다.

디렉토리가 생성되면 해당 디렉토리로 이동한다.
카프카 브로커 힙 메모리 설정
카프카 패키지의 힙 메모리는 카프가 브로커는 1G, 주키퍼는 512MB로 기본 설정되어 있다. 카프카 브로커와 주키퍼를 기본 설정과 함께 동시 실행하면 1.5G의 메모리가 필요하개 되는데, 현재 생성한 인스턴스(t2.micro)는 1G 의 메모리를 가지고 있으므로 Cannot allocate memory 에러가 출력되면서 실행되지 않는다.
따라서 적당한 용량의 힙 메모리 사이즈를 환경변수로 지정할 필요가 있다.
$ vi ~/.bashrc 명령으로 아래와 같이 export KAFKA_HEAP_OPTS 이하 내용을 추가하자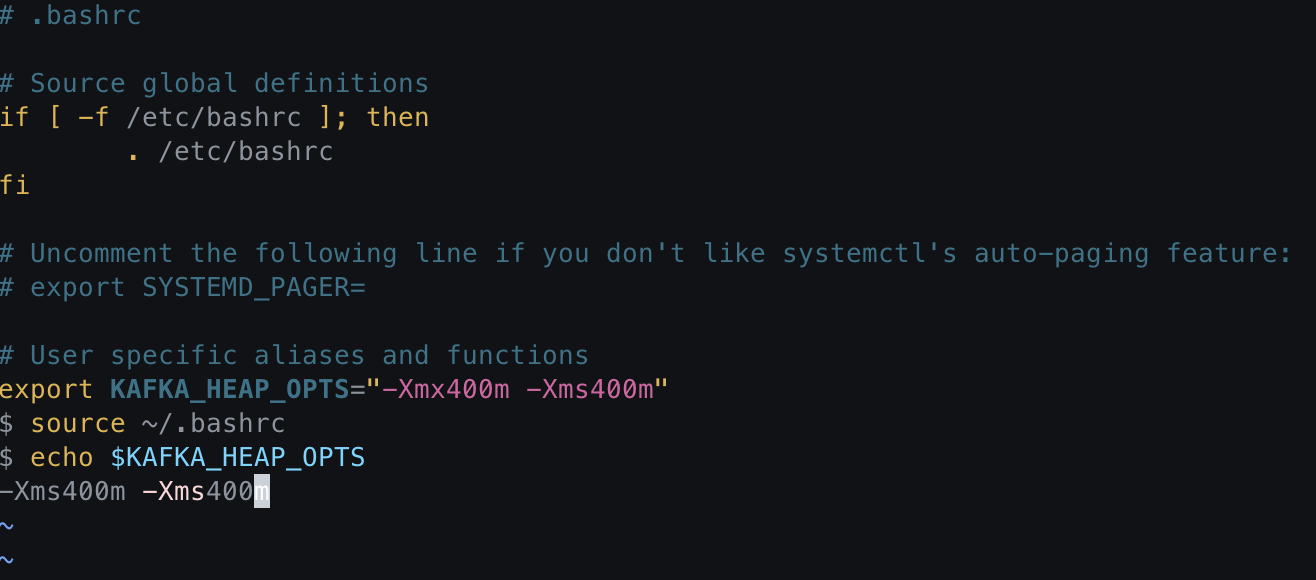
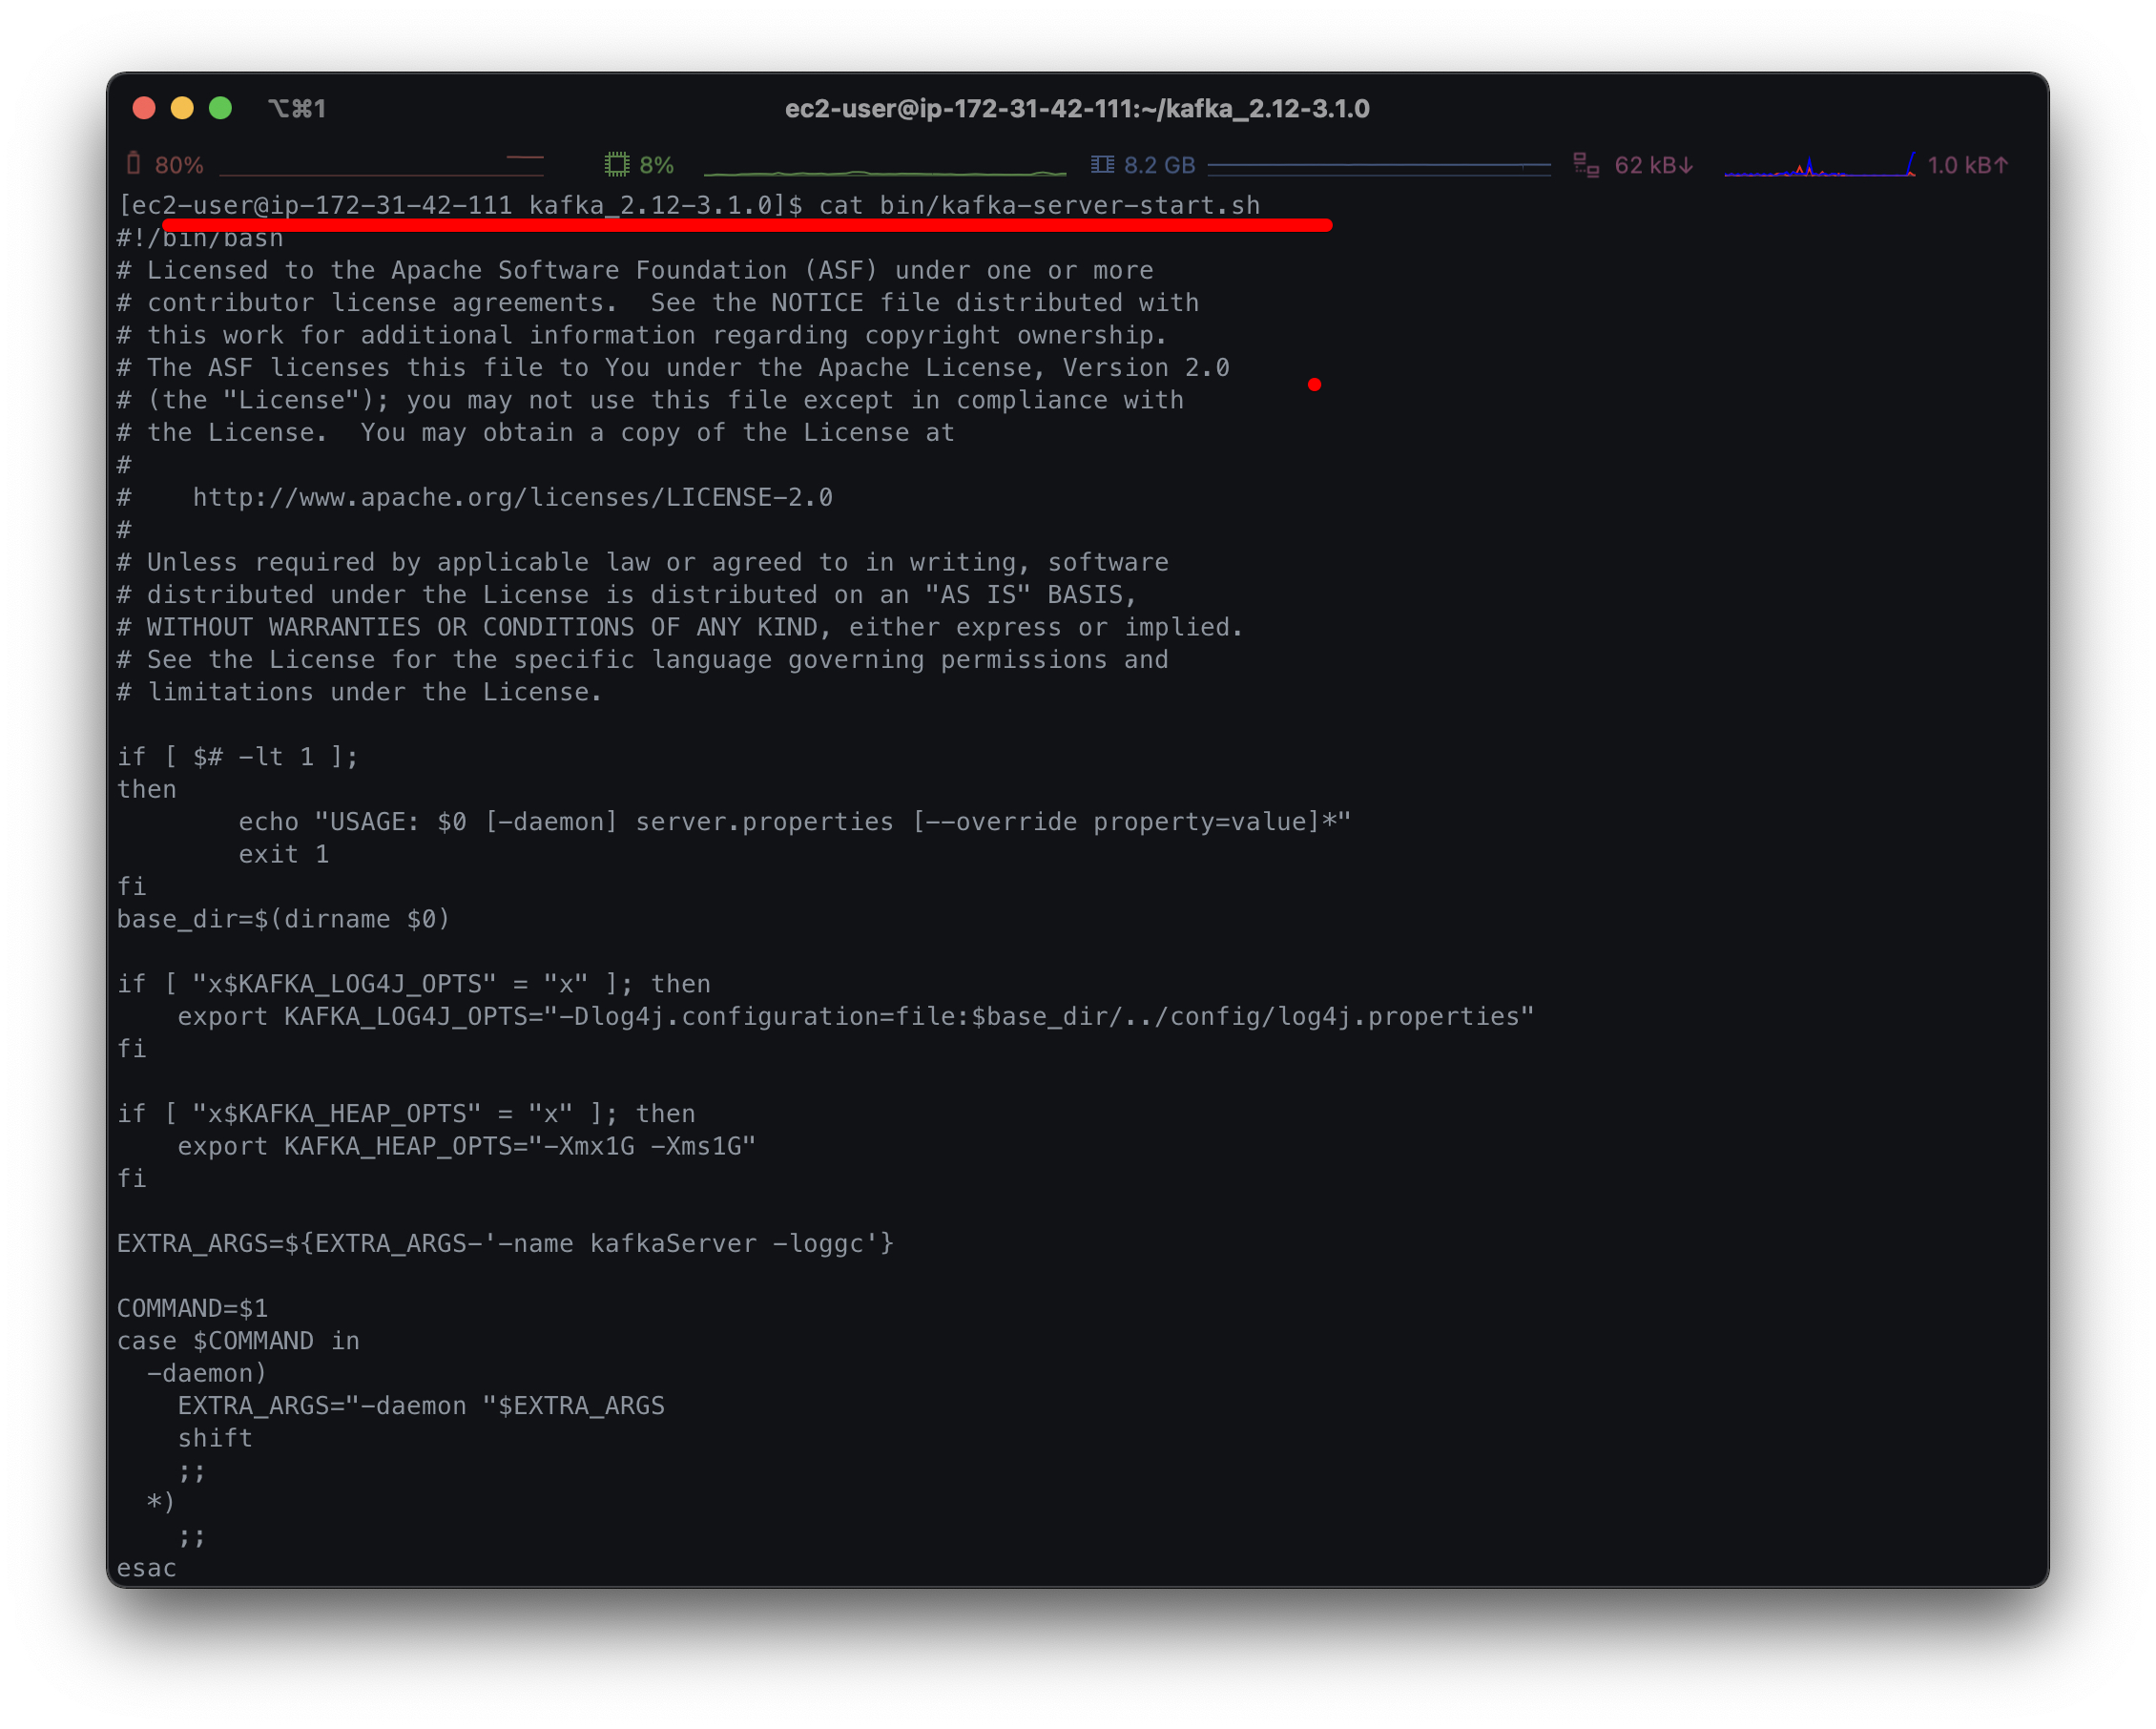
위 설정된 환경 변수는 카프카 브로커 실행 시 bin/kafka-server-start.sh 스크립트에서 확인 가능하다.
카프카 브로커 실행 옵션 설정
config 폴더 내 server.properties 파일에는 카프카 브로커가 클러스터 운영에 필요한 옵션들을 지정할 수 있다. 현재는 실습용 브로커를 실행할 것이기 때문에 advertised.listener만 설정하면 되는데 advertised.listener는 카프카 클라이언트 또는 커맨드 라인툴을 브로커와 연결할 때 사용된다.
수정 방법은 현재 접속된 인스턴스 퍼블릭IP와 카프카 기본 포트인 9092를 PLAINTEXT://와 함께 붙여넣고 advertised.listener를 주석 해제한다.
EC2 인스턴스 퍼블릭IP에 고정 IP를 할당하지 않는 한 인스턴스를 재시작 할 때 마다 IP가 변경되게 되고, 그렇게 되면 server.properties 의 advertised.listener IP값과 페이지 맨 하단에 나오게 되는 hosts 파일을 변경해줘야 하는 번거로움이 있다;;
$ vi config/server.properties############################# Server Basics #############################
# The id of the broker. This must be set to a unique integer for each broker.
broker.id=0 --1 실행하는 카프카 브로커의 번호 (다른 카프카 브로커와 동일한 id일 경우 실행되지 않는다)
############################# Socket Server Settings #############################
# The address the socket server listens on. It will get the value returned from
# java.net.InetAddress.getCanonicalHostName() if not configured.
# FORMAT:
# listeners = listener_name://host_name:port
# EXAMPLE:
# listeners = PLAINTEXT://your.host.name:9092
#listeners=PLAINTEXT://:9092 --2 카프카 브로커가 통신을 위해 열어둘 인터페이스 IP
# Hostname and port the broker will advertise to producers and consumers. If not set,
# it uses the value for "listeners" if configured. Otherwise, it will use the value
# returned from java.net.InetAddress.getCanonicalHostName().
advertised.listeners=PLAINTEXT://3.35.11.248:9092 --3 카프카 클라이언트 혹은 라인툴에서 접속할 때 사용되는 IP와 port 정보를 입력한다.
# Maps listener names to security protocols, the default is for them to be the same. See the config documentation for more details
#listener.security.protocol.map=PLAINTEXT:PLAINTEXT,SSL:SSL,SASL_PLAINTEXT:SASL_PLAINTEXT,SASL_SSL:SASL_SSL --4 SSL 관련 보안 설정 시 프로토콜 매핑을 위한 설정
# The number of threads that the server uses for receiving requests from the network and sending responses to the network
num.network.threads=3 --5 네트워크 통신처리에 사용할 네트워크 스레드 수
# The number of threads that the server uses for processing requests, which may include disk I/O
num.io.threads=8 --6 카프카 브로커 내부에서 사용할 스레드 수
# The send buffer (SO_SNDBUF) used by the socket server
socket.send.buffer.bytes=102400
# The receive buffer (SO_RCVBUF) used by the socket server
socket.receive.buffer.bytes=102400
# The maximum size of a request that the socket server will accept (protection against OOM)
socket.request.max.bytes=104857600
############################# Log Basics #############################
# A comma separated list of directories under which to store log files
log.dirs=/tmp/kafka-logs --6 통신을 통해 가져온 데이터를 파일로 저장할 디렉토리 위치
# The default number of log partitions per topic. More partitions allow greater
# parallelism for consumption, but this will also result in more files across
# the brokers.
num.partitions=1 --8 토픽을 생성할 때 기본 설정되는 파티션 수
-- 중략 --
############################# Log Retention Policy #############################
# The following configurations control the disposal of log segments. The policy can
# be set to delete segments after a period of time, or after a given size has accumulated.
# A segment will be deleted whenever *either* of these criteria are met. Deletion always happens
# from the end of the log.
# The minimum age of a log file to be eligible for deletion due to age
log.retention.hours=168 --9 카프카 브로커가 저장한 파일이 삭제되기까지 걸리는 시간
# A size-based retention policy for logs. Segments are pruned from the log unless the remaining
# segments drop below log.retention.bytes. Functions independently of log.retention.hours.
#log.retention.bytes=1073741824
# The maximum size of a log segment file. When this size is reached a new log segment will be created.
log.segment.bytes=1073741824 --10 카프카 브로커가 저장한 파일의 최대 크기
# The interval at which log segments are checked to see if they can be deleted according
# to the retention policies
log.retention.check.interval.ms=300000 --11 브로커가 파일을 삭제하기 위해 체크하는 시간 간격
############################# Zookeeper #############################
# Zookeeper connection string (see zookeeper docs for details).
# This is a comma separated host:port pairs, each corresponding to a zk
# server. e.g. "127.0.0.1:3000,127.0.0.1:3001,127.0.0.1:3002".
# You can also append an optional chroot string to the urls to specify the
# root directory for all kafka znodes.
zookeeper.connect=localhost:2181 --12 브로커와 연동할 주키퍼의 IP와 port
# Timeout in ms for connecting to zookeeper
zookeeper.connection.timeout.ms=18000 --13 주키퍼의 세션 타임아웃 시간
주키퍼 실행
주키퍼는 카프카의 클러스터 설정 정보, 컨트롤러 정보를 담고 있어 카프카를 실행하는데 필수 애플리케이션이다. 실 운영에선 3대 이상의 서버로 구성하여 사용하며, 실습 목적으로 1대만 실행시켜 본다.
-- 주키퍼 백그라운드 실행 명령
$ bin/zookeeper-server-start.sh -daemon config/zookeeper.properties

-- JVM 프로세스 상태롤 보는 명령
-v 옵션은 JVM에 전달된 인자 (힙 메모리, log4j 설정 등)
-m 옵션은 main 메소드에 전달된 인자
$ jps -vm
브로커 실행
-daemon 옵션으로 카프카 브로커를 백그라운드 모드로 실행 가능하고 kafka-server-start.sh 명령으로 브로커 실행이 가능하다.
또한 jps 명령으로 주키퍼와 브로커 프로세스의 동작 여부를 알 수 있고, tail 명령어로 로그 확인이 가능하다.
$ bin/kafka-server-start.sh -daemon config/server.properties
$ jps -m
$ tail -f logs/server.log
카프카 통신 확인
여기까지 EC2 인스턴스에 카프카 주키퍼와 브로커를 설치 및 실행했고, 원격으로 카프카 브로커로 정보를 요청하는 명령을 내려 정상 통신되는지 확인 해보자
카프카 바이너리 패키지는 카프카 브로커에 대한 정보를 가져올 수 있는 kafka-broker-api-versions.sh 명령을 제공 하는데 이를 통해 연결이 잘 되었는지 확인 가능하다
바이너리 패키지 다운로드를 위해 EC2 인스턴스에 접속된 터미널이 아닌 로컬 터미널을 실행한다
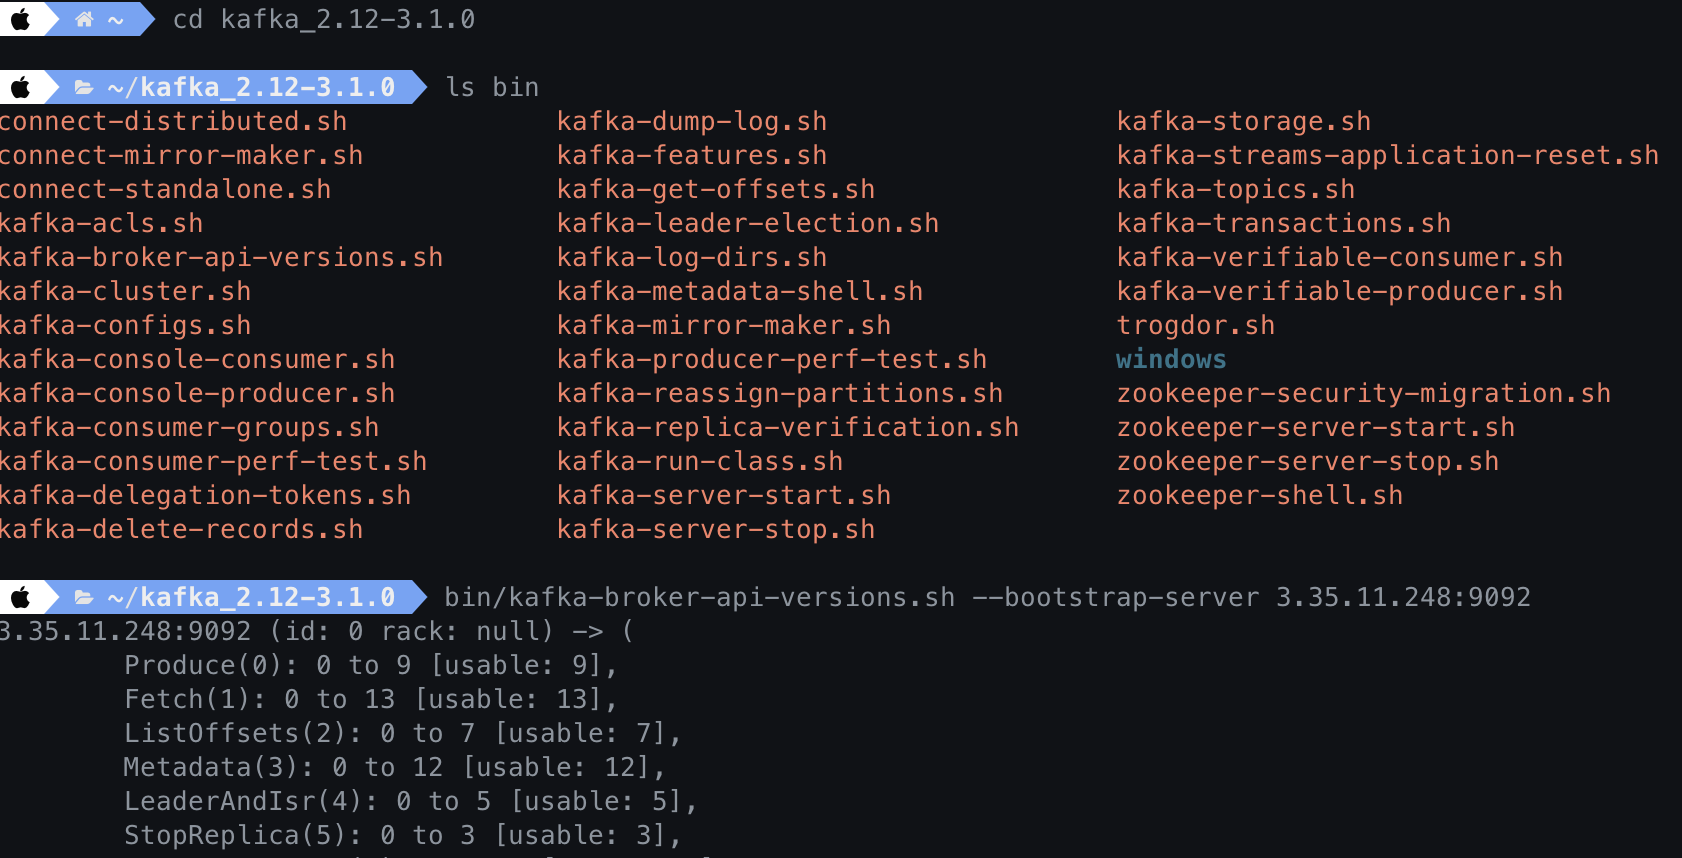
카프카 커맨드 라인 툴들 확인 가능하다
kafka-broker-api-versions.sh 명령어와 --bootstrap-server에 인스턴스IP와 9092 포트를 넣으면 원격으로 카프카의 버전과 broker.id, rank 등 옵션 정보들이 확인 가능하다.
hosts 설정
host 파일을 설정하여 my-kafka 호스트 이름과 함께 클러스터IP와 포트를 매핑하여 호스트 이름만으로 통신 되도록 설정하면 좋다. 언제나 그렇듯 IP는 개설한 인스턴스의 퍼블릭IP로
$ sudo vi /etc/hosts

##
# Host Database
#
# localhost is used to configure the loopback interface
# when the system is booting.  Do not change this entry.
##
3.35.11.248     my-kafka <-- 추가!
😊👍🏻