👏 SES란?
Simple Email Service로 AWS의 Email 전송 서비스를 이용할 수 있는 라이브러리이다.
📗 SES AWS 세팅
📄 AWS 환경 구축하기

시작 전 region이 자신의 지역이 맞는지 꼭 확인하고 시작하자!
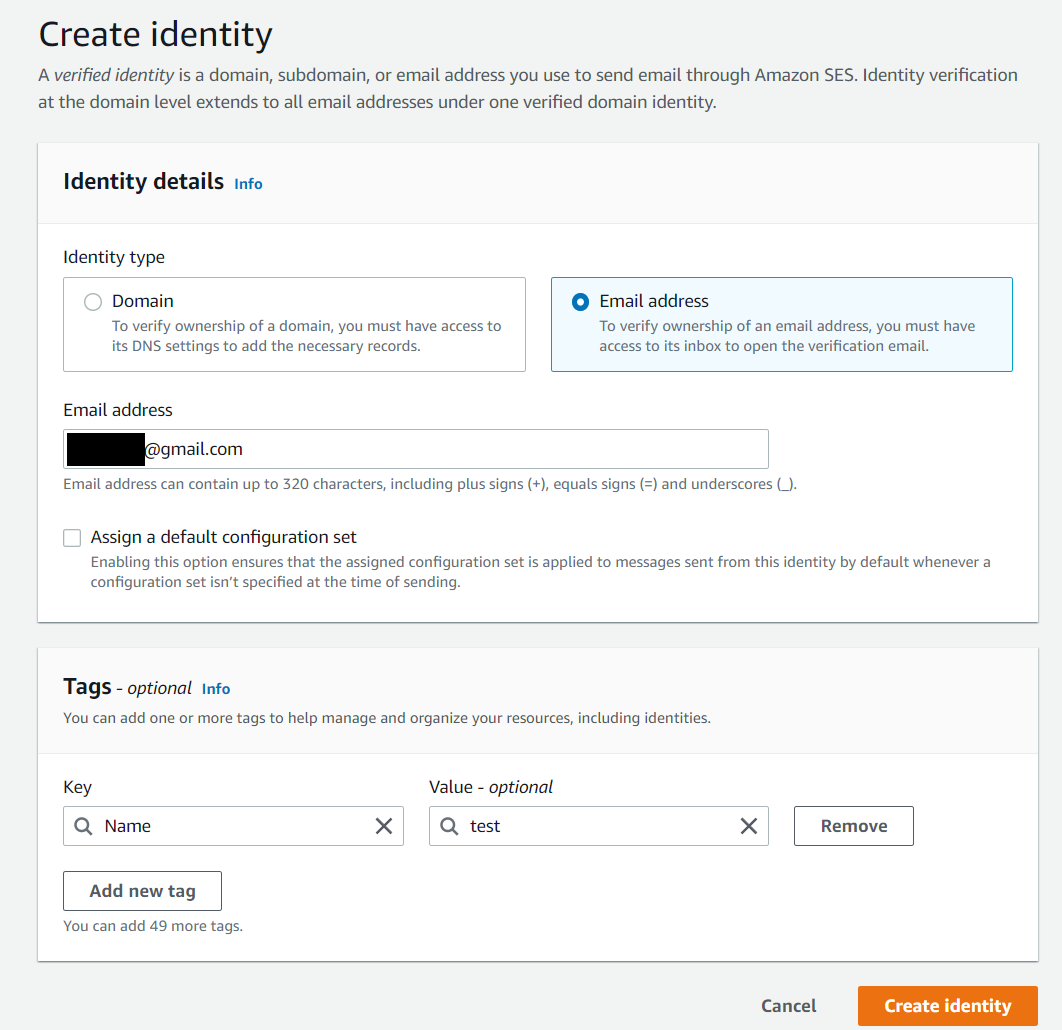
SES 생성하기를 누른 후 Email로 인증하기를 선택한다.
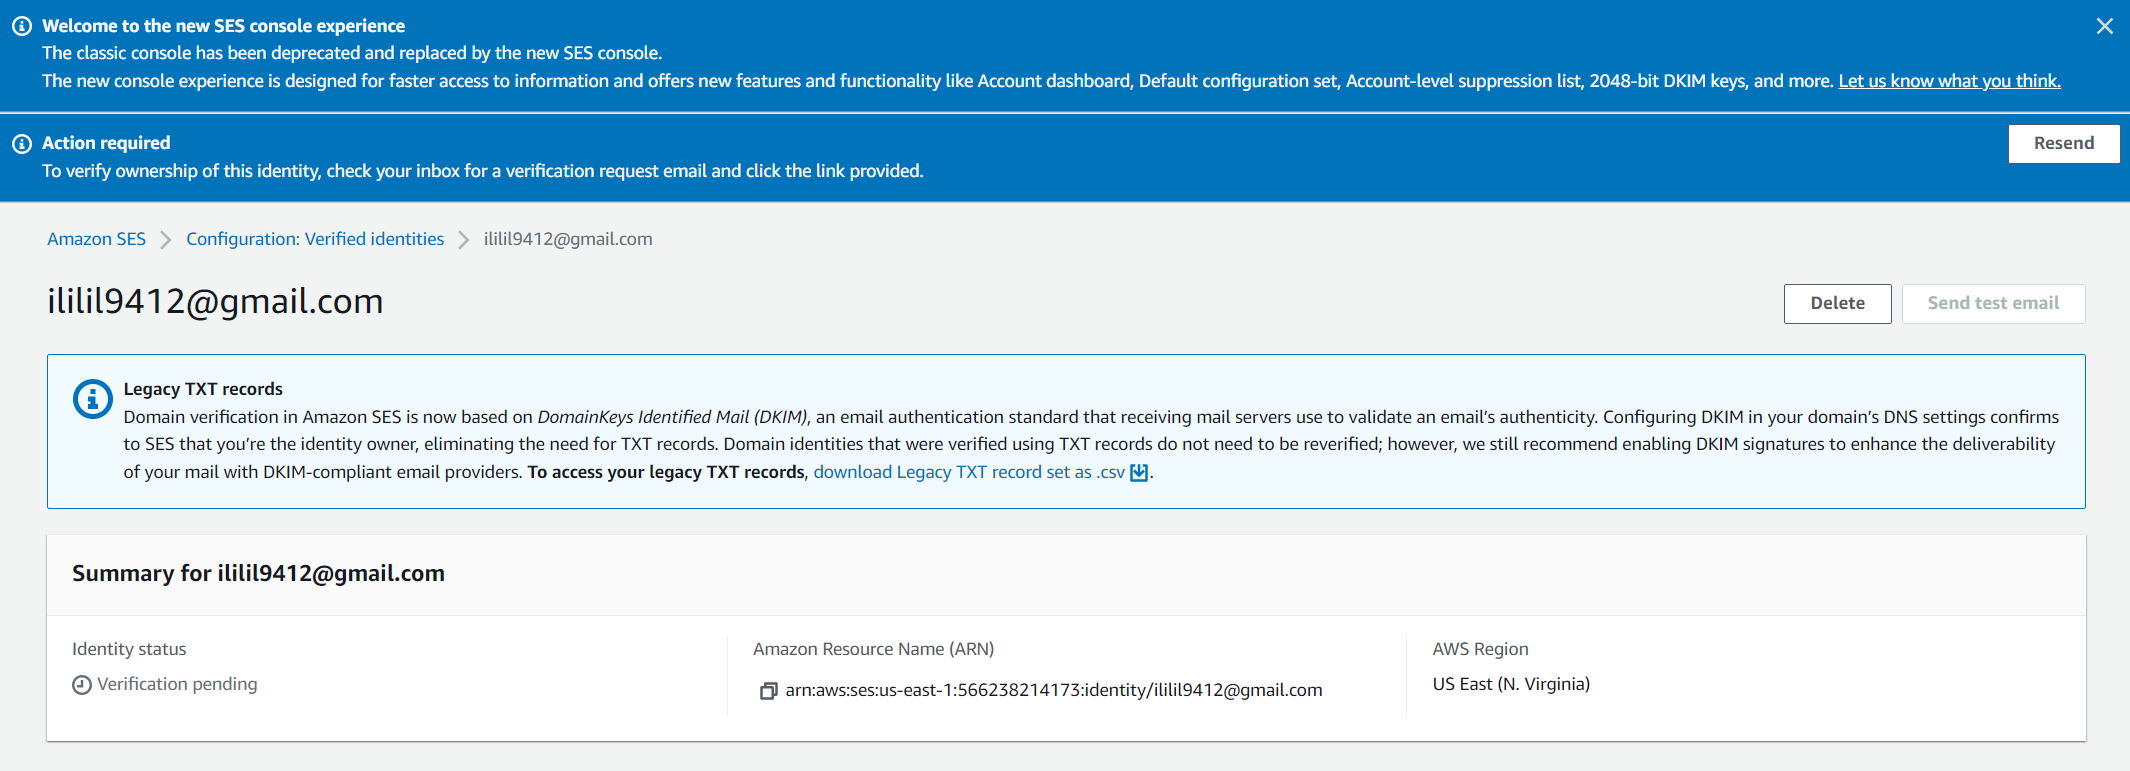
그럼 다음과 같이 인증 후에 사용이 가능하다는 화면이 표시된다.
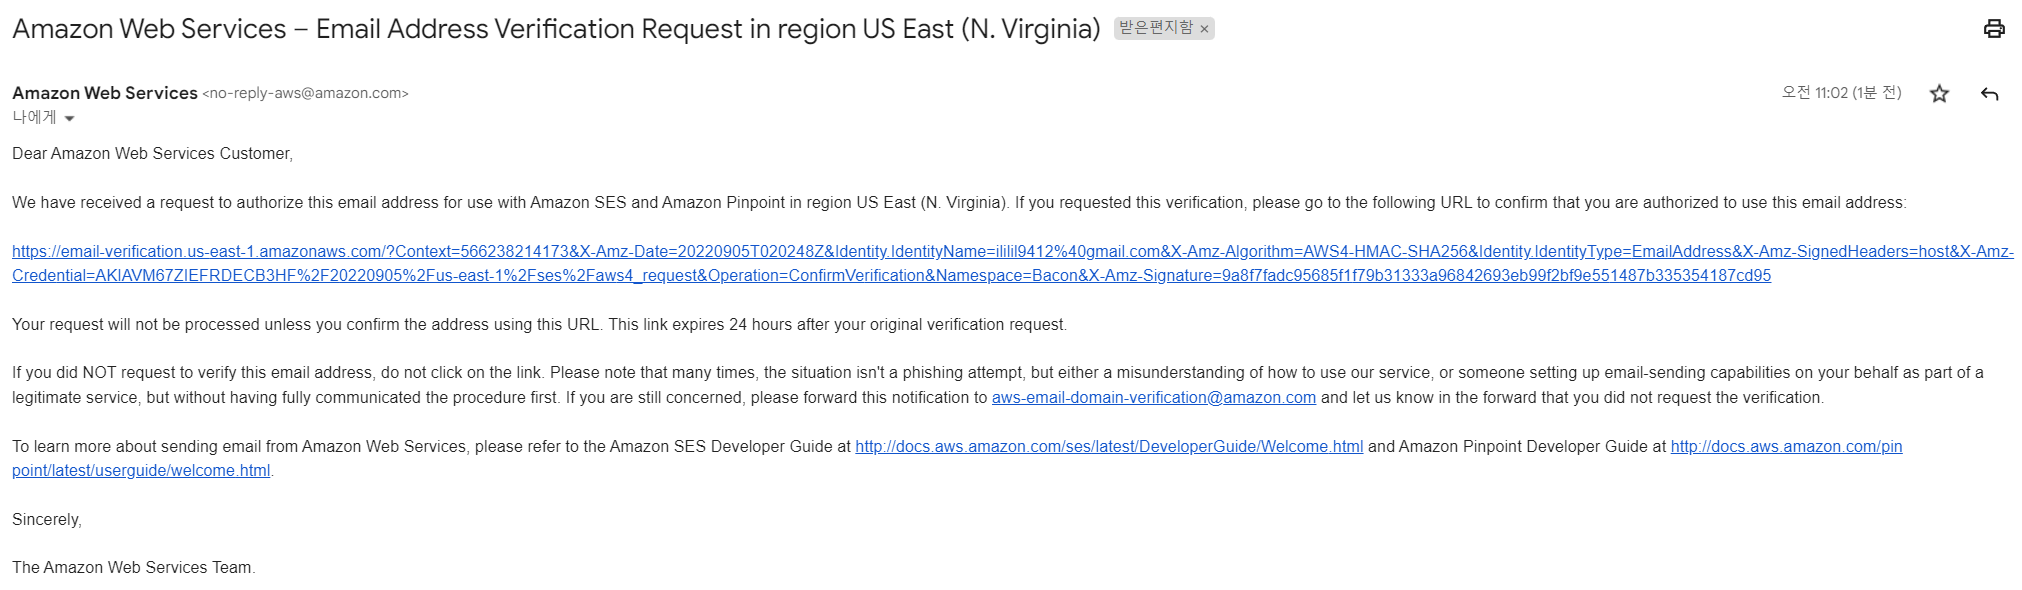
다음과 같이 인증 메일이 전송되고 링크를 눌러 인증을 진행하자!
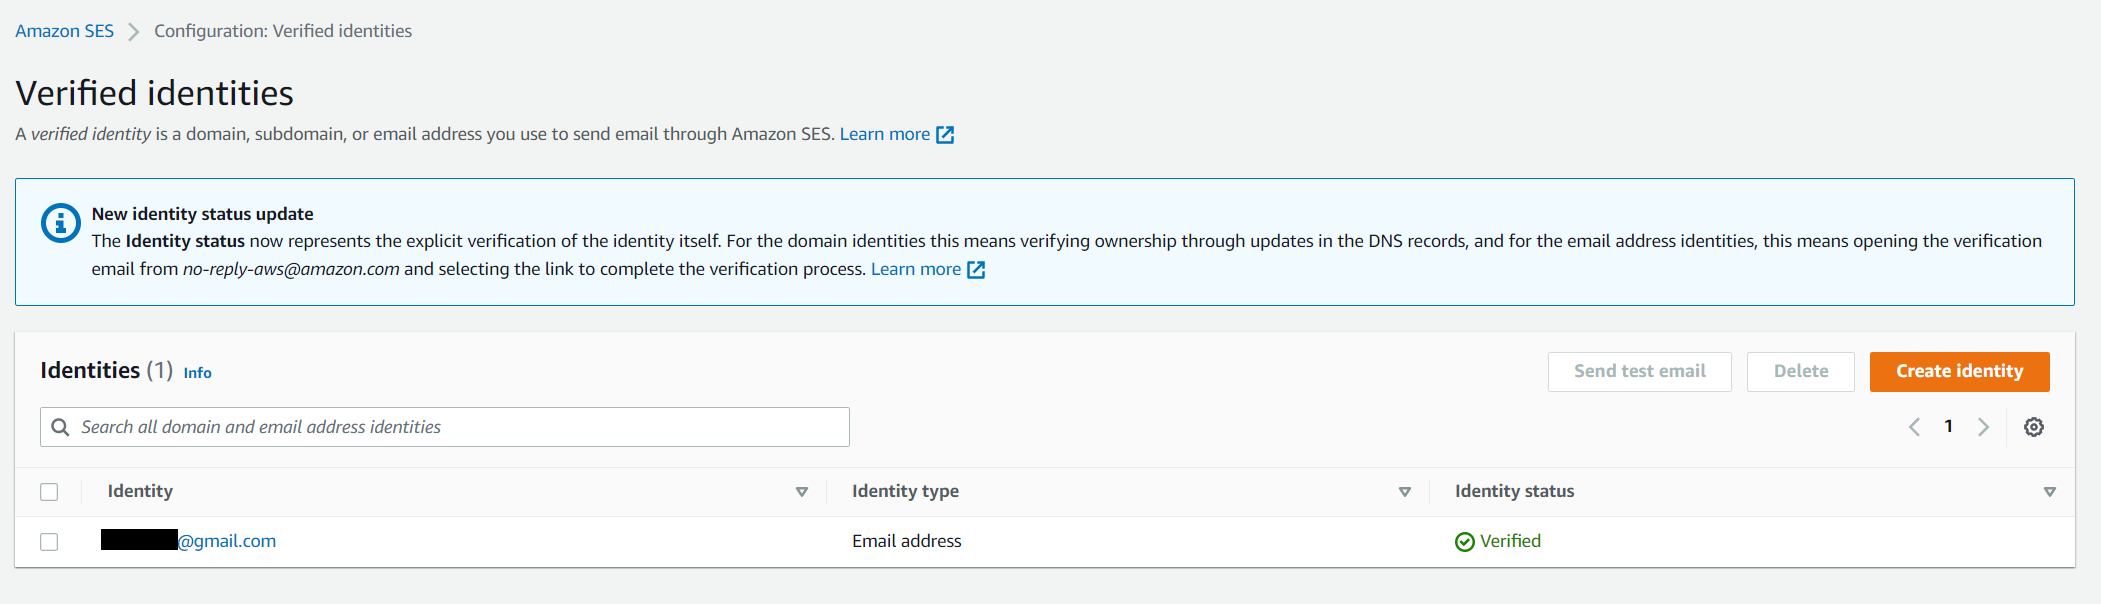
인증이 완료되면 다음과 같이 인증 완료로 표시되어진다. 해당 화면에서 이메일을 선택하여 다음 화면으로 넘어가고
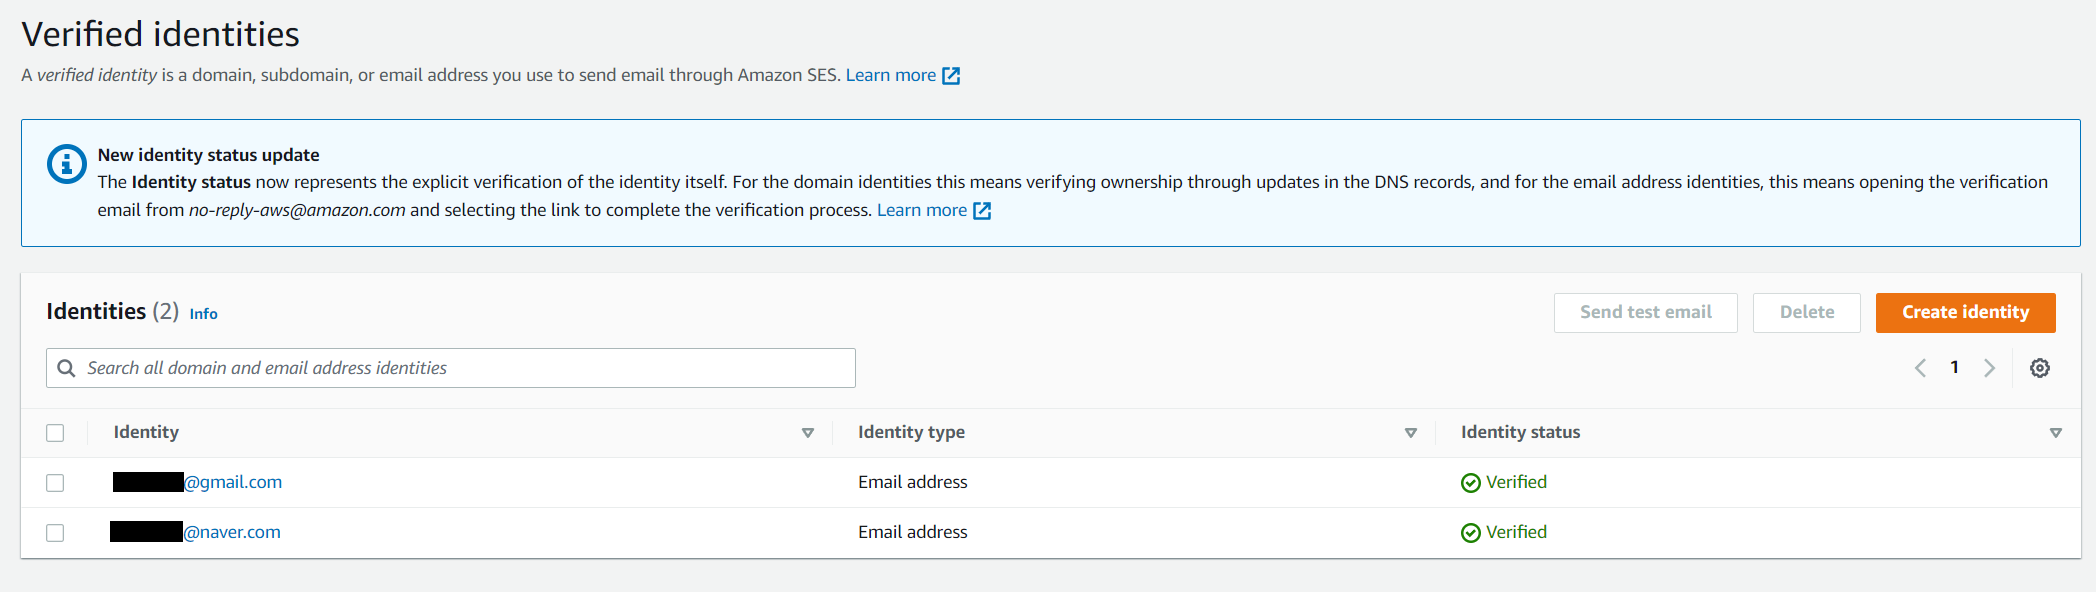
받을 메일도 aws에 등록되어 있어야 한다. 만약 실제로 메일을 받아서 보고 싶다면 메일을 아래 그림과 같이 하나 더 등록해주자.
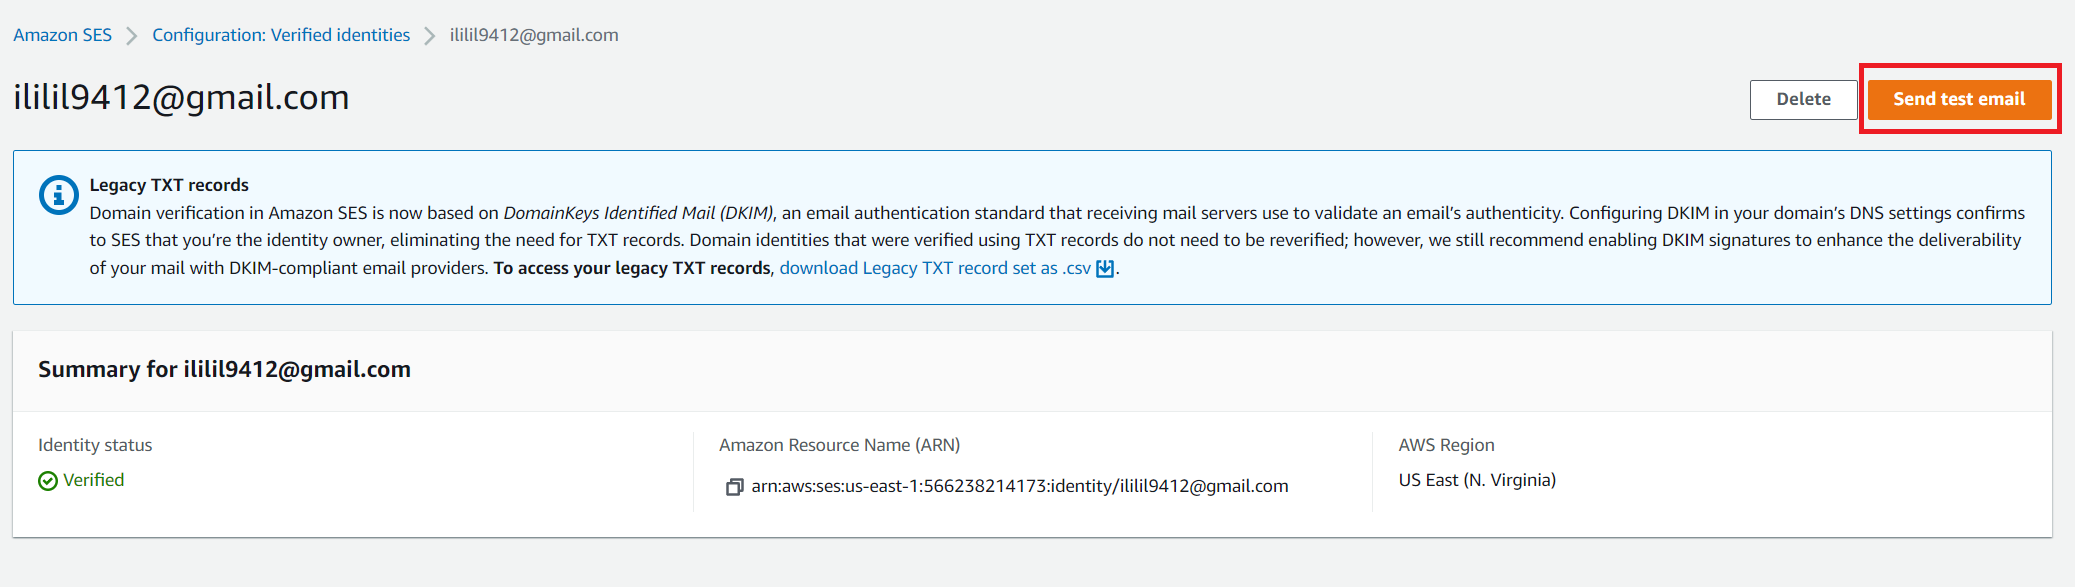
send test email을 눌러본다.
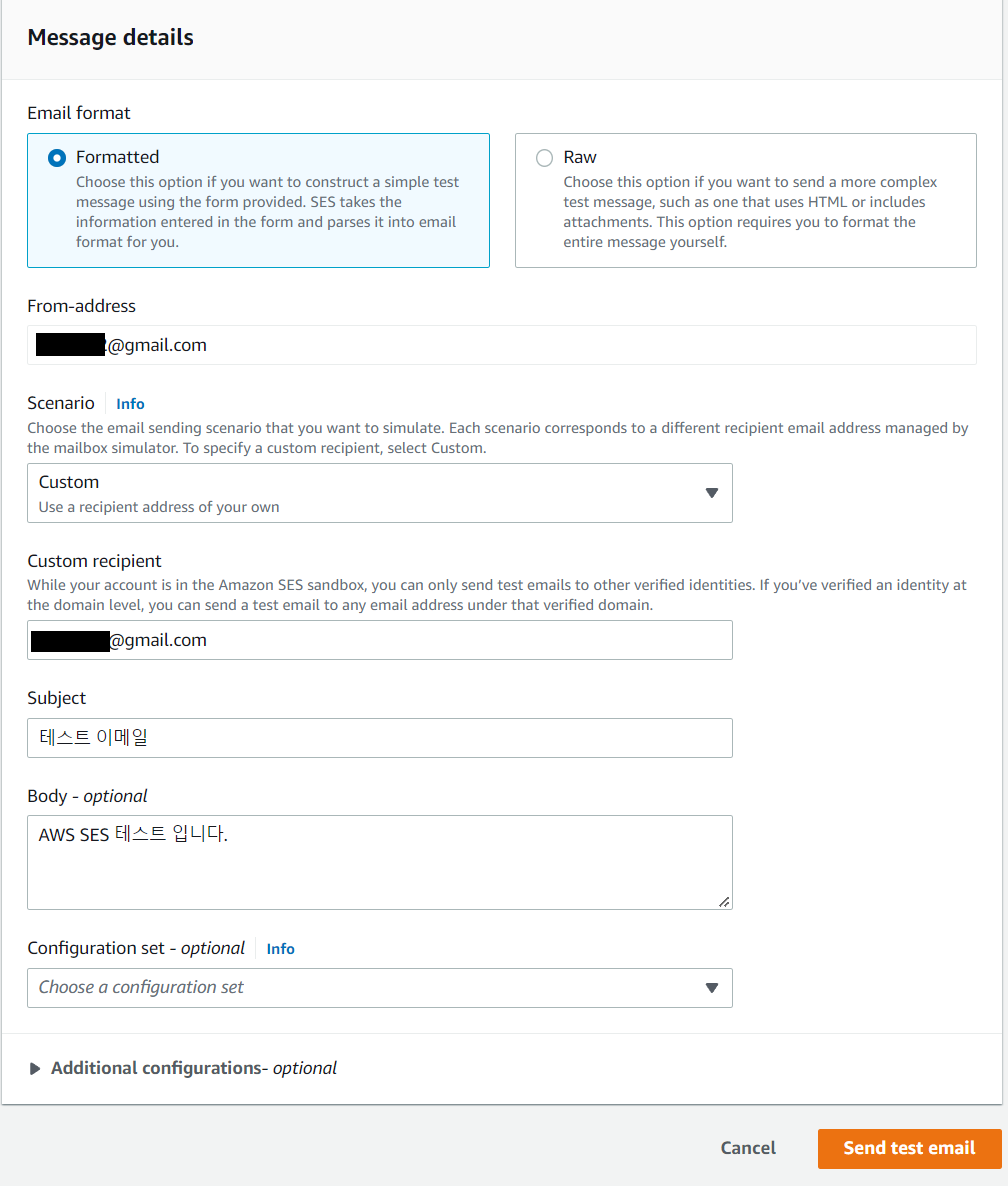
Custom을 선택하여 전송할 메일을 작성하고 send 해보자.
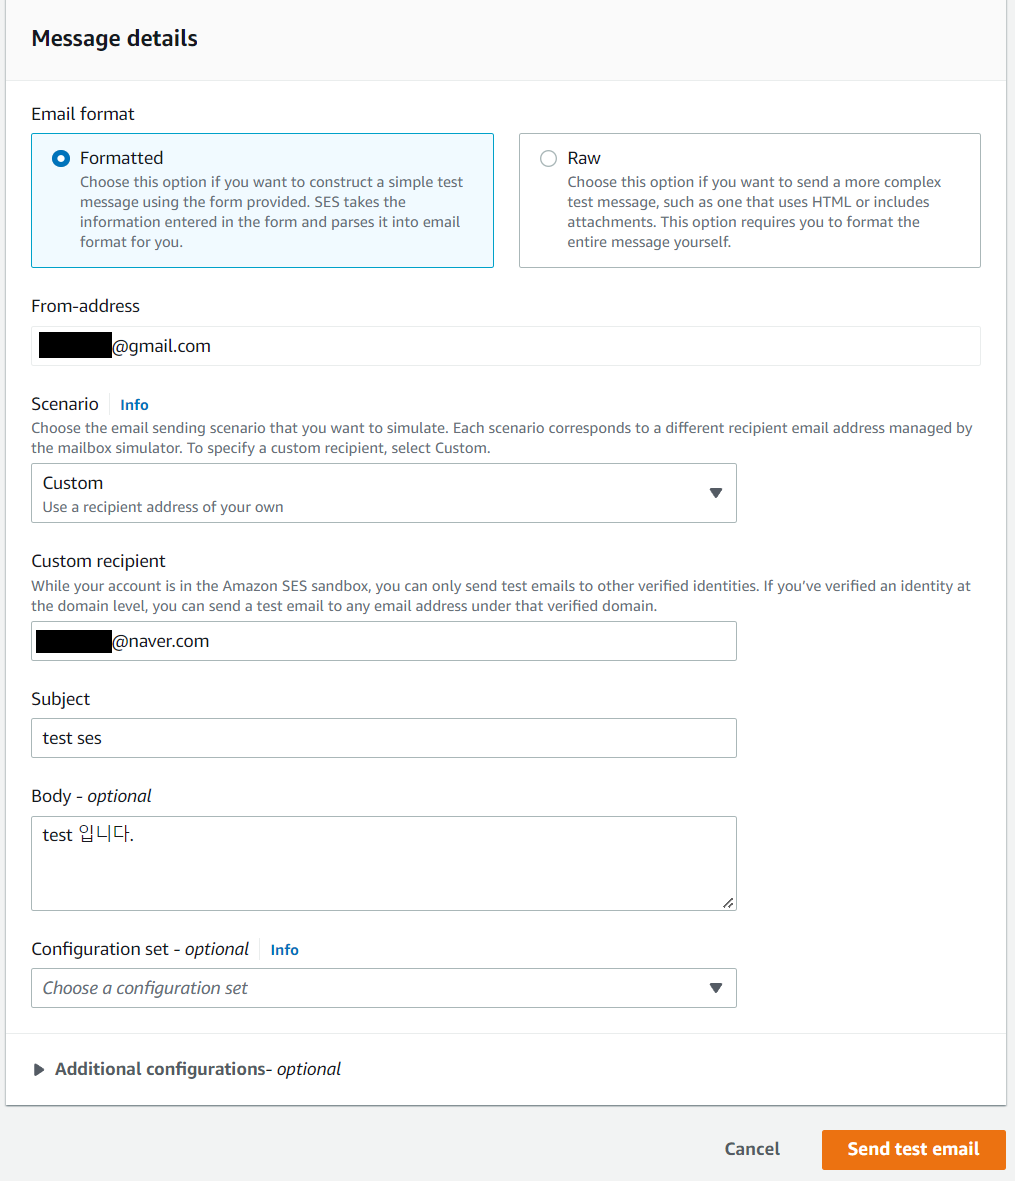
AWS에서 정삭적으로 전송이 되었다면 다음과 같이 success alert가 뜬다.

메일도 정상적으로 전송된 것을 받아볼 수 있다.
📄 보안 자격 증명 발급
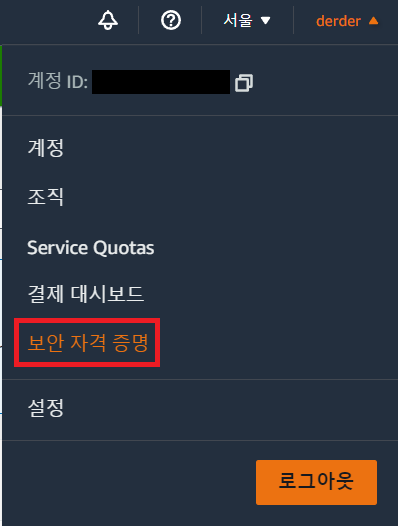
보안 자격 증명을 선택하고
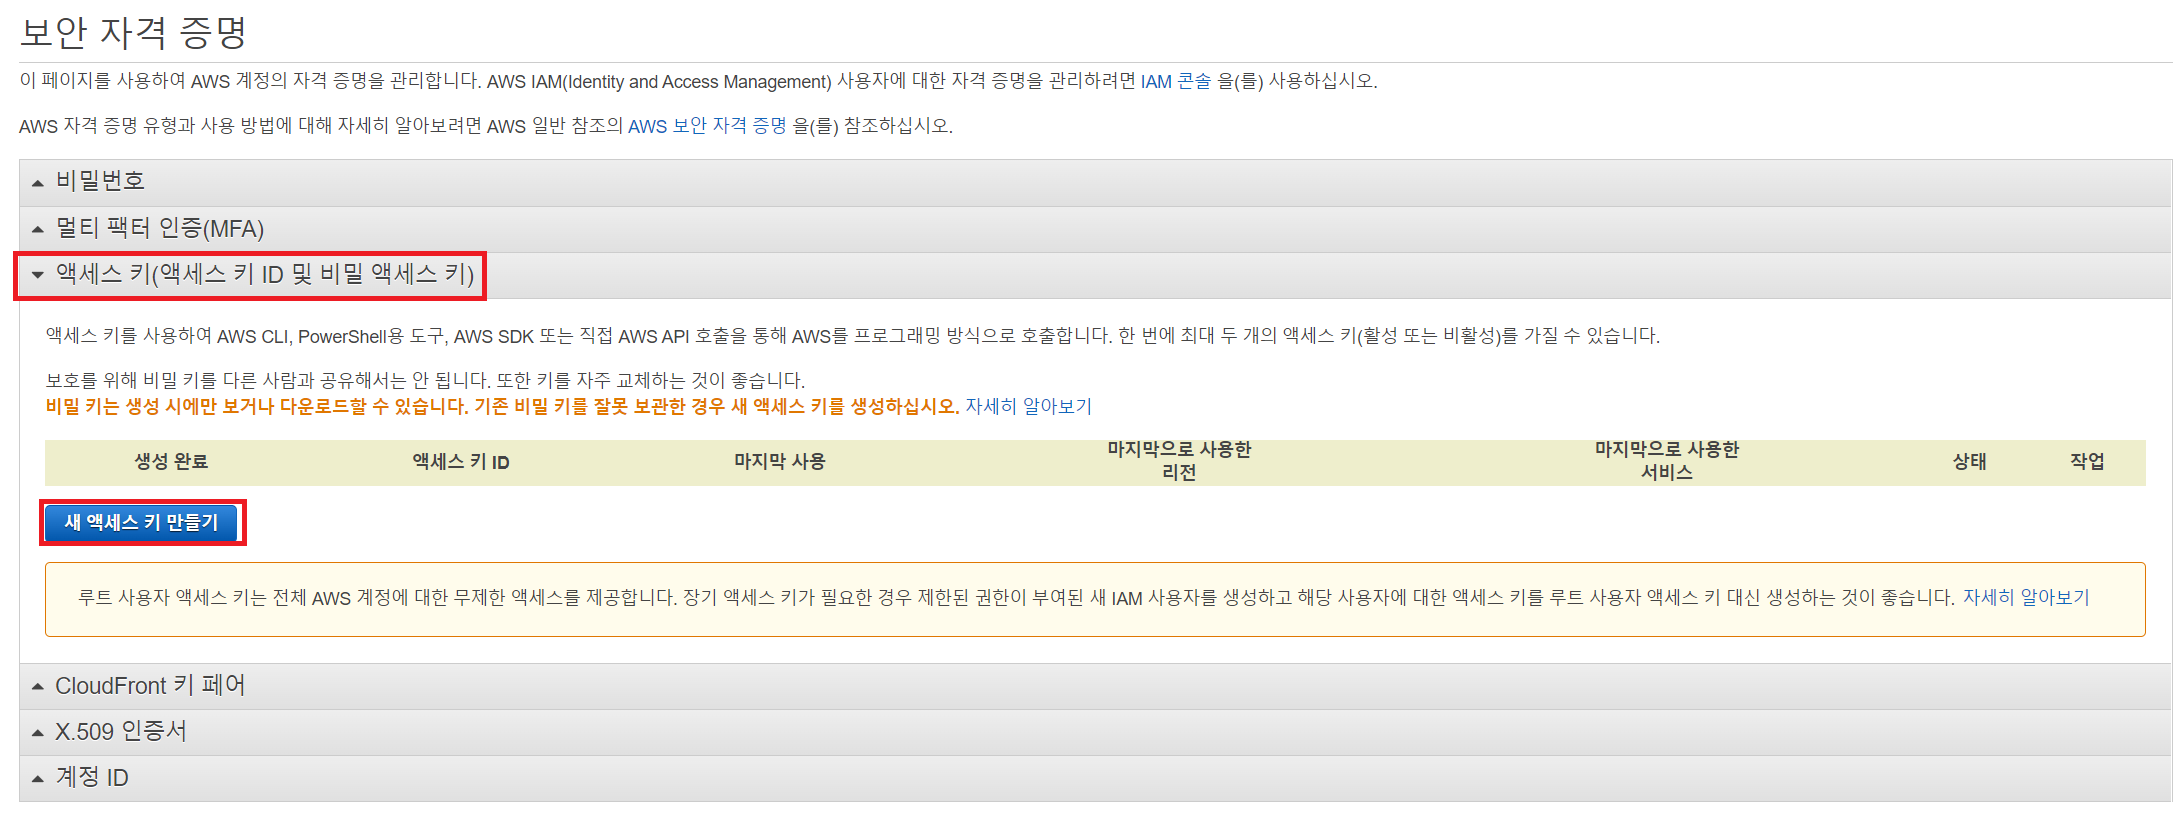
액세스 키 -> 새 액세스 키 만들기 순서로 접근한다.
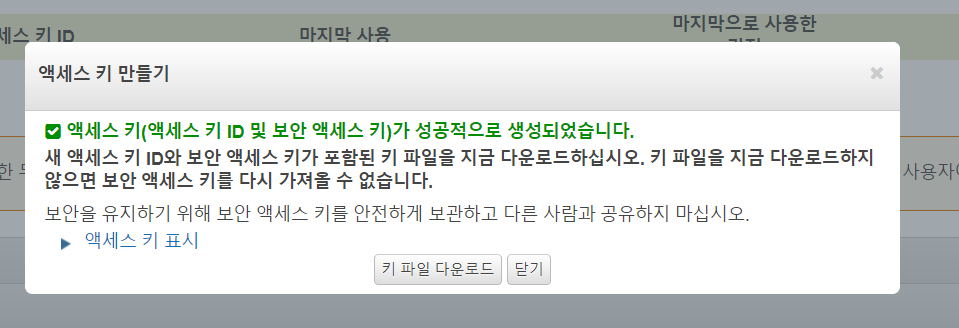
액세스 키를 만들어지면 키 파일을 다운로드 한 뒤 타인에게 노출되지 않도록 주의하자.
📗 Spring Boot SES 적용하기
참고 향로님 AWS SES (Simple Email Service) Spring Boot 프로젝트에서 사용하기
참고 AWS SES(Simple Email Service) 사용법과 Spring Boot에서 SES 사용하기
dependencies {
	...

	// Bill Of Materials (bom) 추가
	// https://mvnrepository.com/artifact/software.amazon.awssdk/bom
	implementation platform('software.amazon.awssdk:bom:2.17.230')
	// AWS ses 추가
	implementation 'software.amazon.awssdk:ses'
}
bom을 통해서 ses를 추가해주었다.
📄 SenderDto 작성
@Getter
@Builder
public class SenderDto {
    private String from;
    private List<String> to = new ArrayList<>();
    private String subject;
    private String content;

    public void addTo(String email){
        this.to.add(email);
    }

    public SendEmailRequest toSendRequestDto(){
        Destination destination = Destination.builder()
                .toAddresses(this.to)
                .build();

        Message message = Message.builder()
                .subject(createContent(this.subject))
                .body(Body.builder().html(createContent(this.content)).build())
                .build();

        return SendEmailRequest.builder()
                .source(this.from)
                .destination(destination)
                .message(message)
                .build();
    }

    private Content createContent(String text) {
        return Content.builder()
                .charset("UTF-8")
                .data(text)
                .build();
    }
}
메일을 보낼 때 SES에서 요구하는 사항에 맞춰서 작성을 해주어야하는데 매번 작성하는게 힘드니 Dto를 하나 만들어서 다음과 같이 작성해준다.
📄 SesClient 작성
@Configuration
@RequiredArgsConstructor
public class SesConfig {
    private final Environment env;

    @Bean
    public SesClient sesClient(){
        AwsBasicCredentials credentials = AwsBasicCredentials.create(env.getProperty("aws.ses.access-id"), env.getProperty("aws.ses.secret-key"));
        return SesClient.builder()
                .region(Region.AP_NORTHEAST_2)
                .credentialsProvider(StaticCredentialsProvider.create(credentials))
                .build();
    }
}
다음과 같이 SesClient를 만들어서 전송할 준비를 해두고
📄 Service 작성
public interface SesService {
    boolean send(String subject, String content, List<String> toEmail);
}
@Service
@Slf4j
@RequiredArgsConstructor
public class SesServiceImpl implements SesService{
private final SesClient sesClient;
private final Environment env;
@Override
public boolean send(String subject, String content, List<String> toEmail) {
log.info("AWS SES send start ...");
SenderDto senderDto = SenderDto.builder()
.from(env.getProperty("aws.ses.sender"))
.to(toEmail)
.subject(subject)
.content(content)
.build();
SendEmailResponse sesResponse = sesClient.sendEmail(senderDto.toSendRequestDto());
boolean result = sesResponse.sdkHttpResponse().isSuccessful();
log.info("AWS SES send result = {}", result);
return result;
}
}다음과 같이 작성하였다.
📄 테스트
@SpringBootTest
public class SesServiceTest {

    @Autowired
    private SesService sesService;

    @Test
    @DisplayName("SES Mail 전송에 성공한다.")
    void mailSend(){
        // given & when
        boolean result = sesService.send("스프링 테스트 메일 전송", "<h1>테스트 메일 입니다!!!!</h1>", List.of("ililil9482@naver.com"));
        //then
        assertTrue(result);
    }
}
테스트 코드는 간단하게 작성했다. 테스트를 실행해보자.
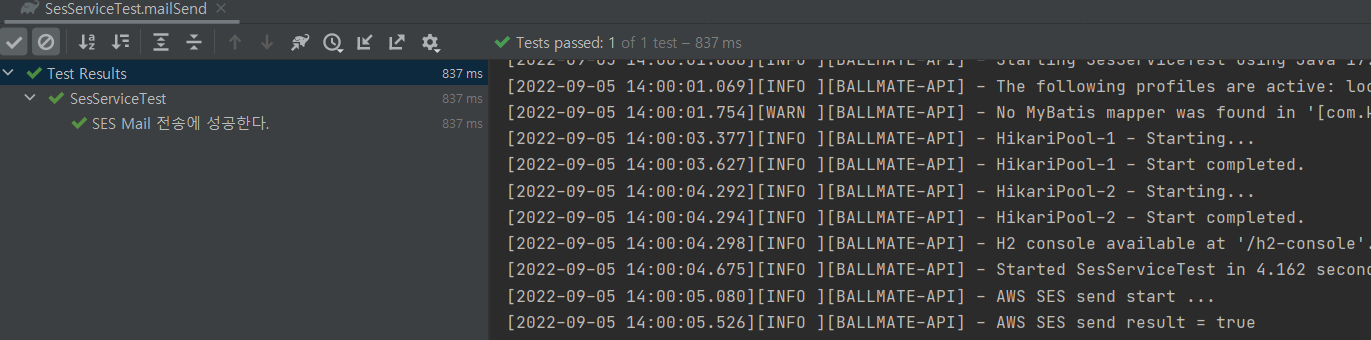
테스트가 정상 종료되었고
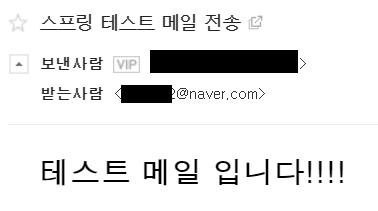
html이 정상 적용되어 잘 전송된 것을 확인할 수 있다.

덕분에 잘 해결했어요 감사합니다!