User Microservice Project
-
생성

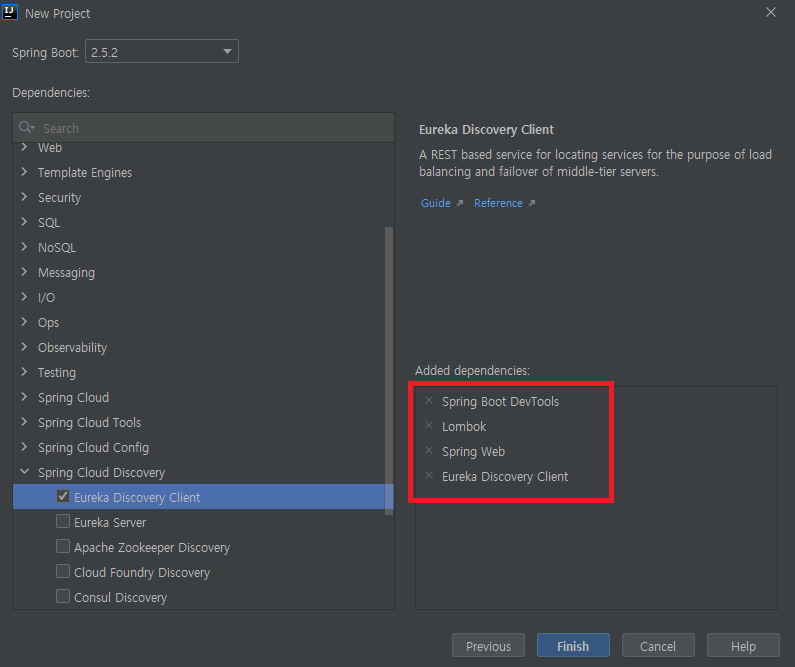
다음과 같은 설정으로 프로젝트를 생성한다.
-
설정

실행되는 application은 다음과 같이 설정해주고 properties파일은 yml 파일로 변경하여 설정을 해준다.
server: port: 0 spring: application: name: user-service eureka: instance: #instance-id: ${spring.cloud.client.hostname} 으로 작성시 ip 번호로 들어옴 instance-id: ${spring.application.name}:${spring.application.instance_id:${random.value}} client: #eureka에 등록할지에 대한 설정 register-with-eureka: true fetch-registry: true service-url: defaultZone: http://127.0.0.1:8761/eureka #eureka 서버 정보 -
서버 실행
그 후 Eureka 서버와 service를 각각 실행하여 정상 작동을 확인한다.

H2 DB 연동
-
maven 추가
<!-- https://mvnrepository.com/artifact/com.h2database/h2 -->
<dependency>
  <groupId>com.h2database</groupId>
  <artifactId>h2</artifactId>
  <version>1.3.176</version>
  <scope>runtime</scope>
</dependency>
혹은 최신 버전으로 추가해주면 된다. scope는 test가 아닌 runtime으로 변경해준다. 그리고 버전은 1.3.xxx로 설정해주는데 그 이유는 1.4.xxx 이후로 보안 문제로 인해 내장 h2 db를 사용할때 접근할 수 없는 문제가 발생하기 때문이다.
-
yml 설정
spring:
  application:
    name: user-service
  h2:
    console:
      enabled: true
      settings:
        web-allow-others: true  #외부 접속 허용
      path: /h2-console
yml의 spring 부분에 h2를 설정해준다. 다음과 같이 설정 해줘야 spring 내장 h2 db가 생성된다.
-
서버 실행
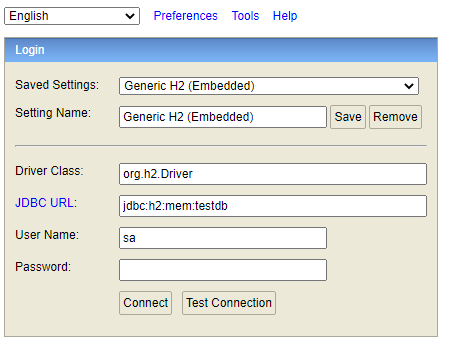
서버를 실행 한 후 Eureka에서 인스턴스를 클릭하거나 spring에 나오는 포트번호로 접속하여 '/h2-console' url로 접속하면

화면을 확인할 수 있다.
