
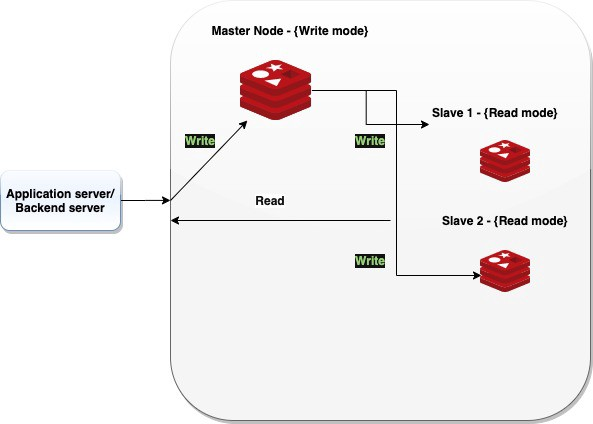
😂 Redis Master Slave 구성이 뭐야?
Redis Master Slave 구성이란 Redis 서버를 한개만 띄워서 사용하는 것이 아니라 Master 서버 한대와 Slave 서버 n대로 구성하여 Redis 서버가 가지는 부하를 줄이고 성능을 더 향상시키기 위한 구성이다.
여기서 Master는 각 Slave 는 리더와 팔로워의 개념 or 마스터와 복제본의 개념을 가진다. Slave는 링크가 끊어질 때마다 자동으로 Master에 다시 연결되며 Master가 어떤 상황이든 관계없이 계속해서 정확한 복제본이 되려 시도한다.
📕 Reids 구성하기
참고 Redis Master-Slave Configuration and Tested in Spring Boot
🐳 docker-compose 사용하기
📄 redis.conf 파일 작성
################################# REPLICATION #################################

# Master-Replica replication. Use replicaof to make a Redis instance a copy of
# another Redis server. A few things to understand ASAP about Redis replication.
#
#   +------------------+      +---------------+
#   |      Master      | ---> |    Replica    |
#   | (receive writes) |      |  (exact copy) |
#   +------------------+      +---------------+
#
# 1) Redis replication is asynchronous, but you can configure a master to
#    stop accepting writes if it appears to be not connected with at least
#    a given number of replicas.
# 2) Redis replicas are able to perform a partial resynchronization with the
#    master if the replication link is lost for a relatively small amount of
#    time. You may want to configure the replication backlog size (see the next
#    sections of this file) with a sensible value depending on your needs.
# 3) Replication is automatic and does not need user intervention. After a
#    network partition replicas automatically try to reconnect to masters
#    and resynchronize with them.
#
# replicaof <masterip> <masterport>

replicaof master 6379
redis.conf 파일을 생성하여 replicaof 옵션을 사용할 수 있도록 다음과 같이 작성해둔다. 여기서 master 대신 ip를 넣어주어도 된다. 여기서는 container 이름을 사용하였다.
replicaof master 6379내용 이외에는 모두 주석이나 혹시나 이 한줄만 남겨두면 헷갈리실 분들을 위해 ㅎㅎ... 그리고 공식 홈페이지를 보니 현재 배포중인 redis에는 더 많은 옵션을 설정할 수 있고 해당 내용이 config 파일에 주석으로 처리되어 있다고 하니 더 많은 옵션을 확인하고 싶은 분들은 현재 배포중인 redis의 config 파일을 뜯어보자!
📄 docker-compose 작성
version: '3.7'
services:
  master:
    container_name: master
    image: redis
    ports:
      - 6379:6379
  slave-a:
    container_name: slave-a
    image: redis
    ports:
      - 7000:6379
    volumes:
      - ./conf:/usr/local/etc/redis/
    command: redis-server /usr/local/etc/redis/redis.conf
  slave-b:
    container_name: slave-b
    image: redis
    ports:
      - 7001:6379
    volumes:
      - ./conf:/usr/local/etc/redis/
    command: redis-server /usr/local/etc/redis/redis.conf
작성한 뒤 docker-compose up -d 명령어로 실행 시켜주었다.
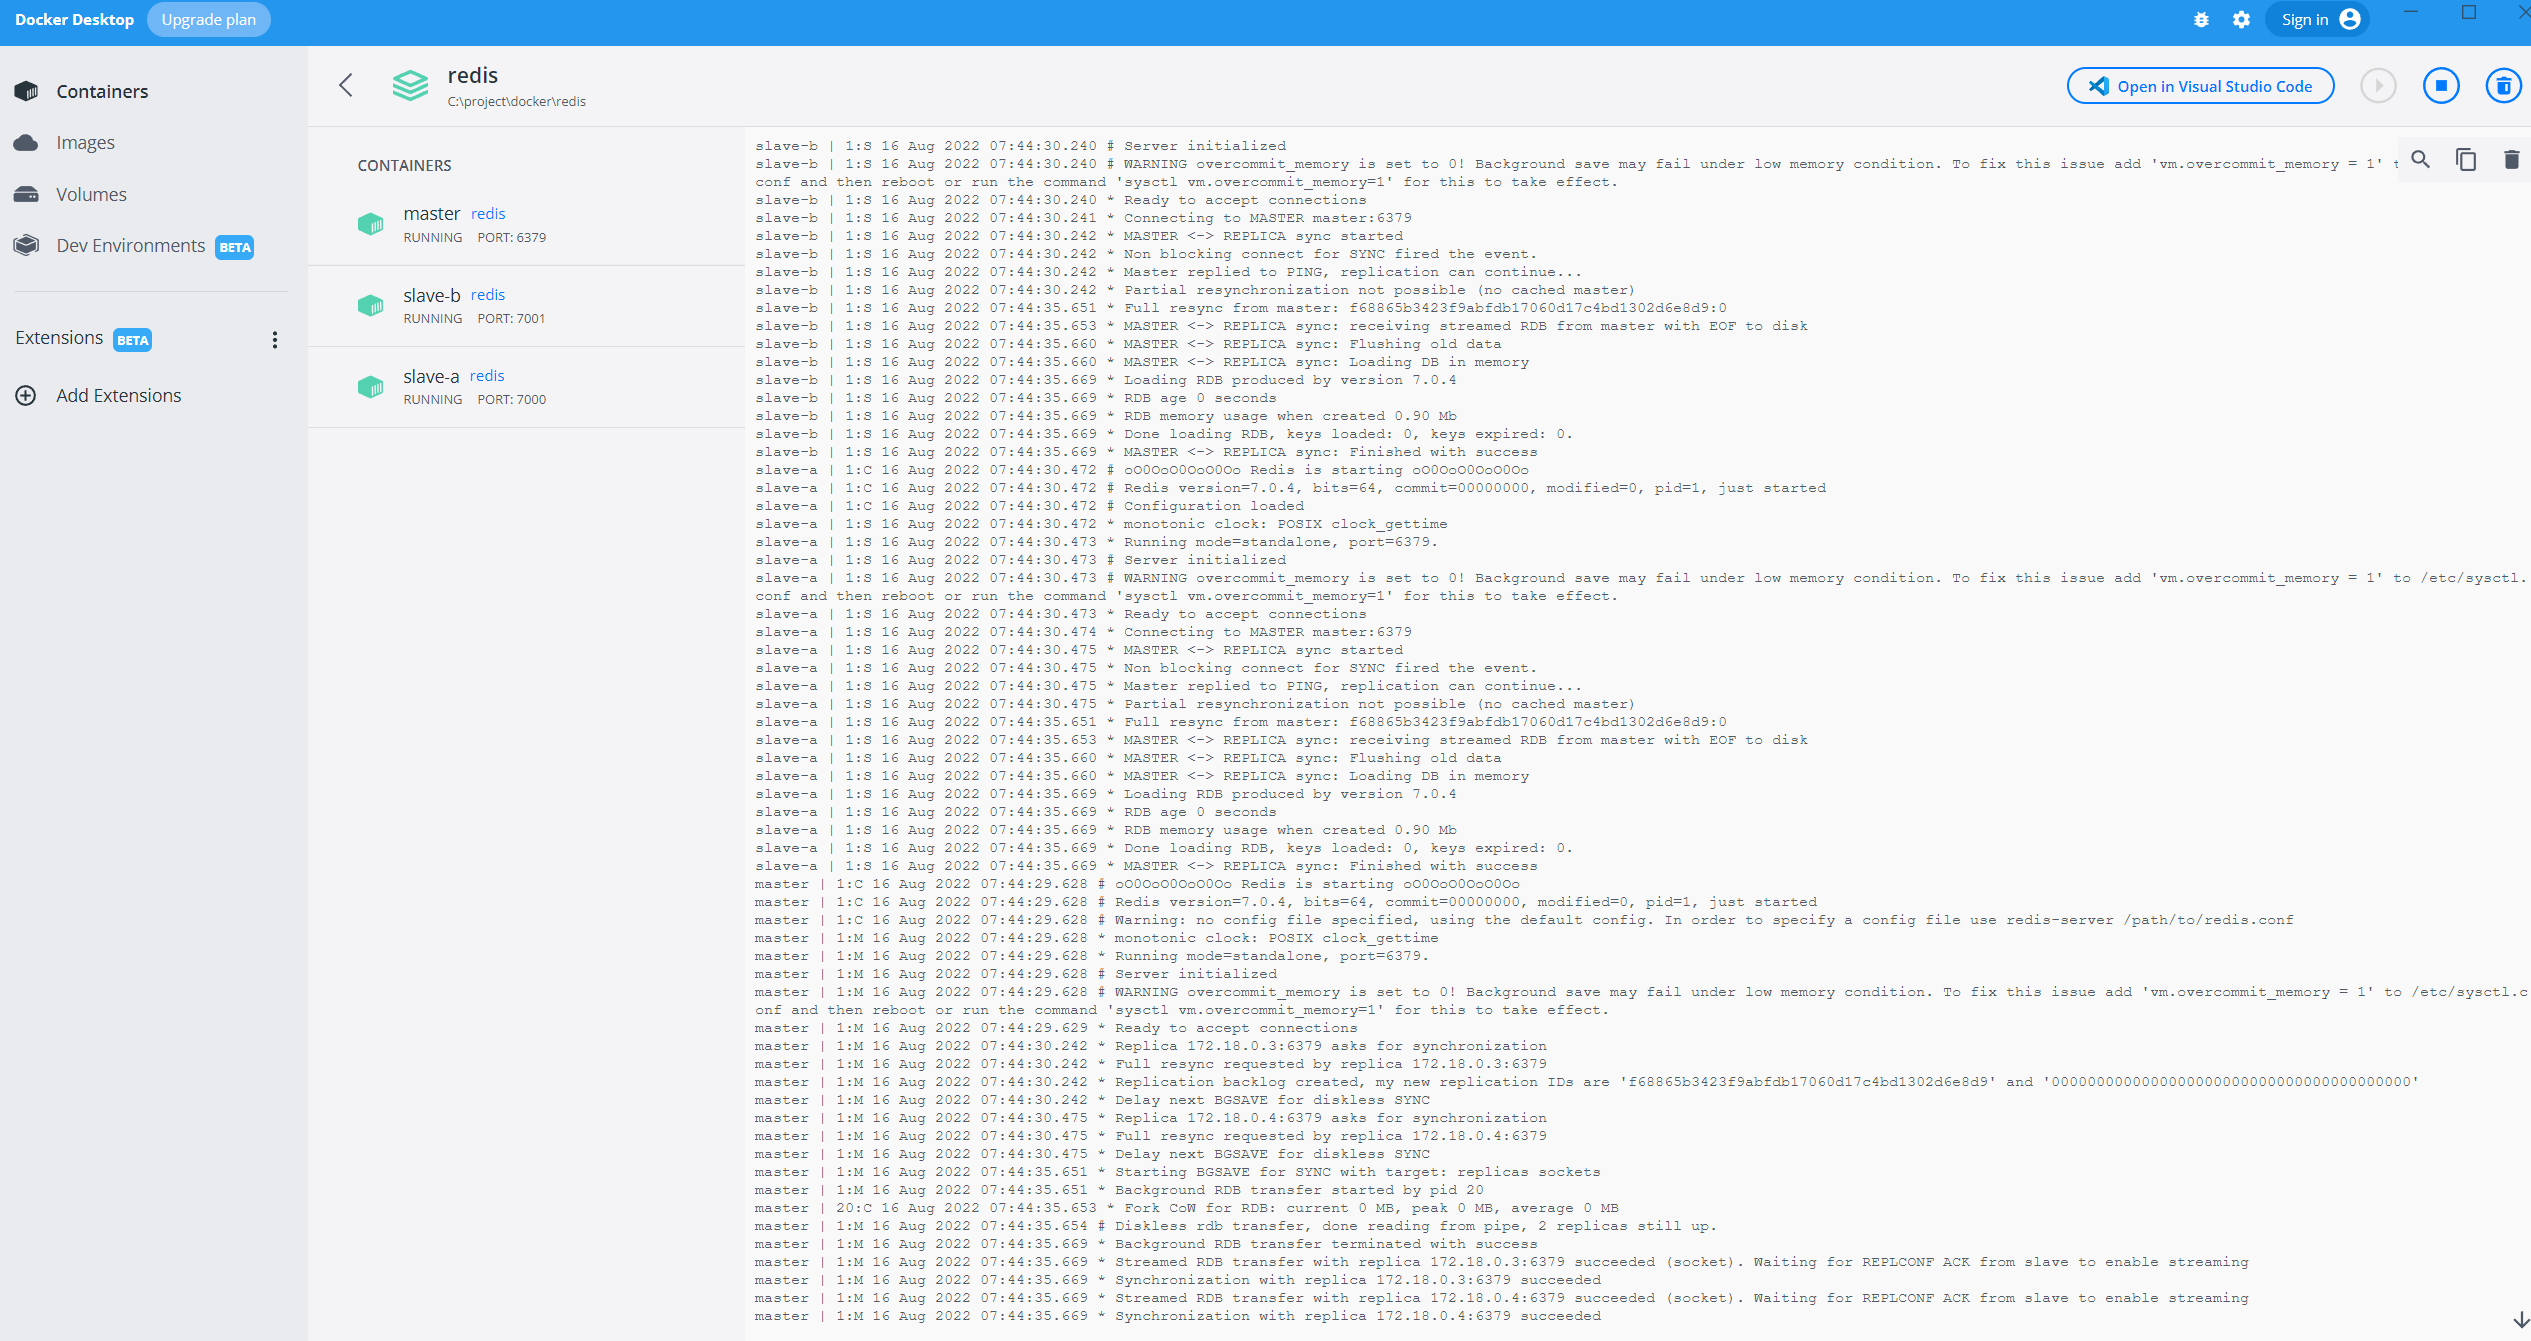
docker desktop 에서는 다음과 같이 확인할 수 있으며

확대해보면 다음과 같이 replica가 성공했다라는 로그를 확인할 수 있다.
📄 테스트하기
정말 master에 insert되면 slave-a slave-b에 함께 적용이 되어지는지 확인해보자!

docker desktop으로 간단하게 할수 있지만 혹시나 linux 환경이나 mac 환경에서 명령어만으로 하고 싶은 분들도 있으니까 이렇게 진행해보자! (나 포함)
이제 cmd창을 3개를 띄워놓자
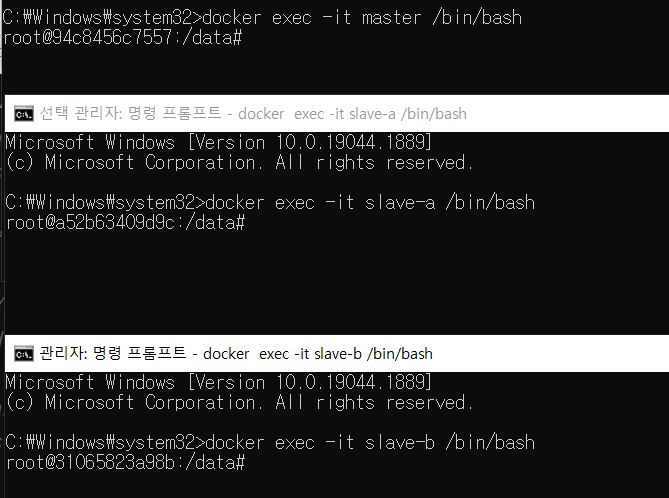
모두 master, slave 컨테이너에 접속하고

redis-cli 명령어로 redis에 접속한다.
이제 마스터에
set key1 "hello redis"를 입력해주자.

OK가 뜨면 정상 실행된거다.
이제 모든 redis에서 get을 해보자
get key1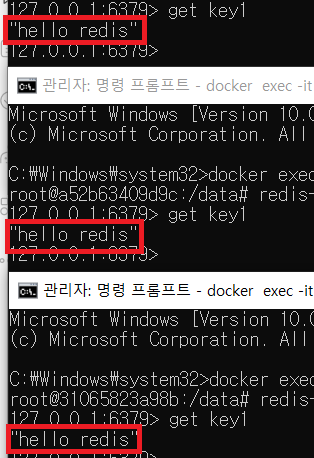
모두 동일하게 hello redis를 반환해주는 것을 확인할 수 있다!
✅ 만약 replication에서 insert를 한다면?

다음과 같이 replica 옵션으로 master를 복제하고 있는 redis에서는 READONLY 옵션이 걸려있으므로 insert할 수 없다!
