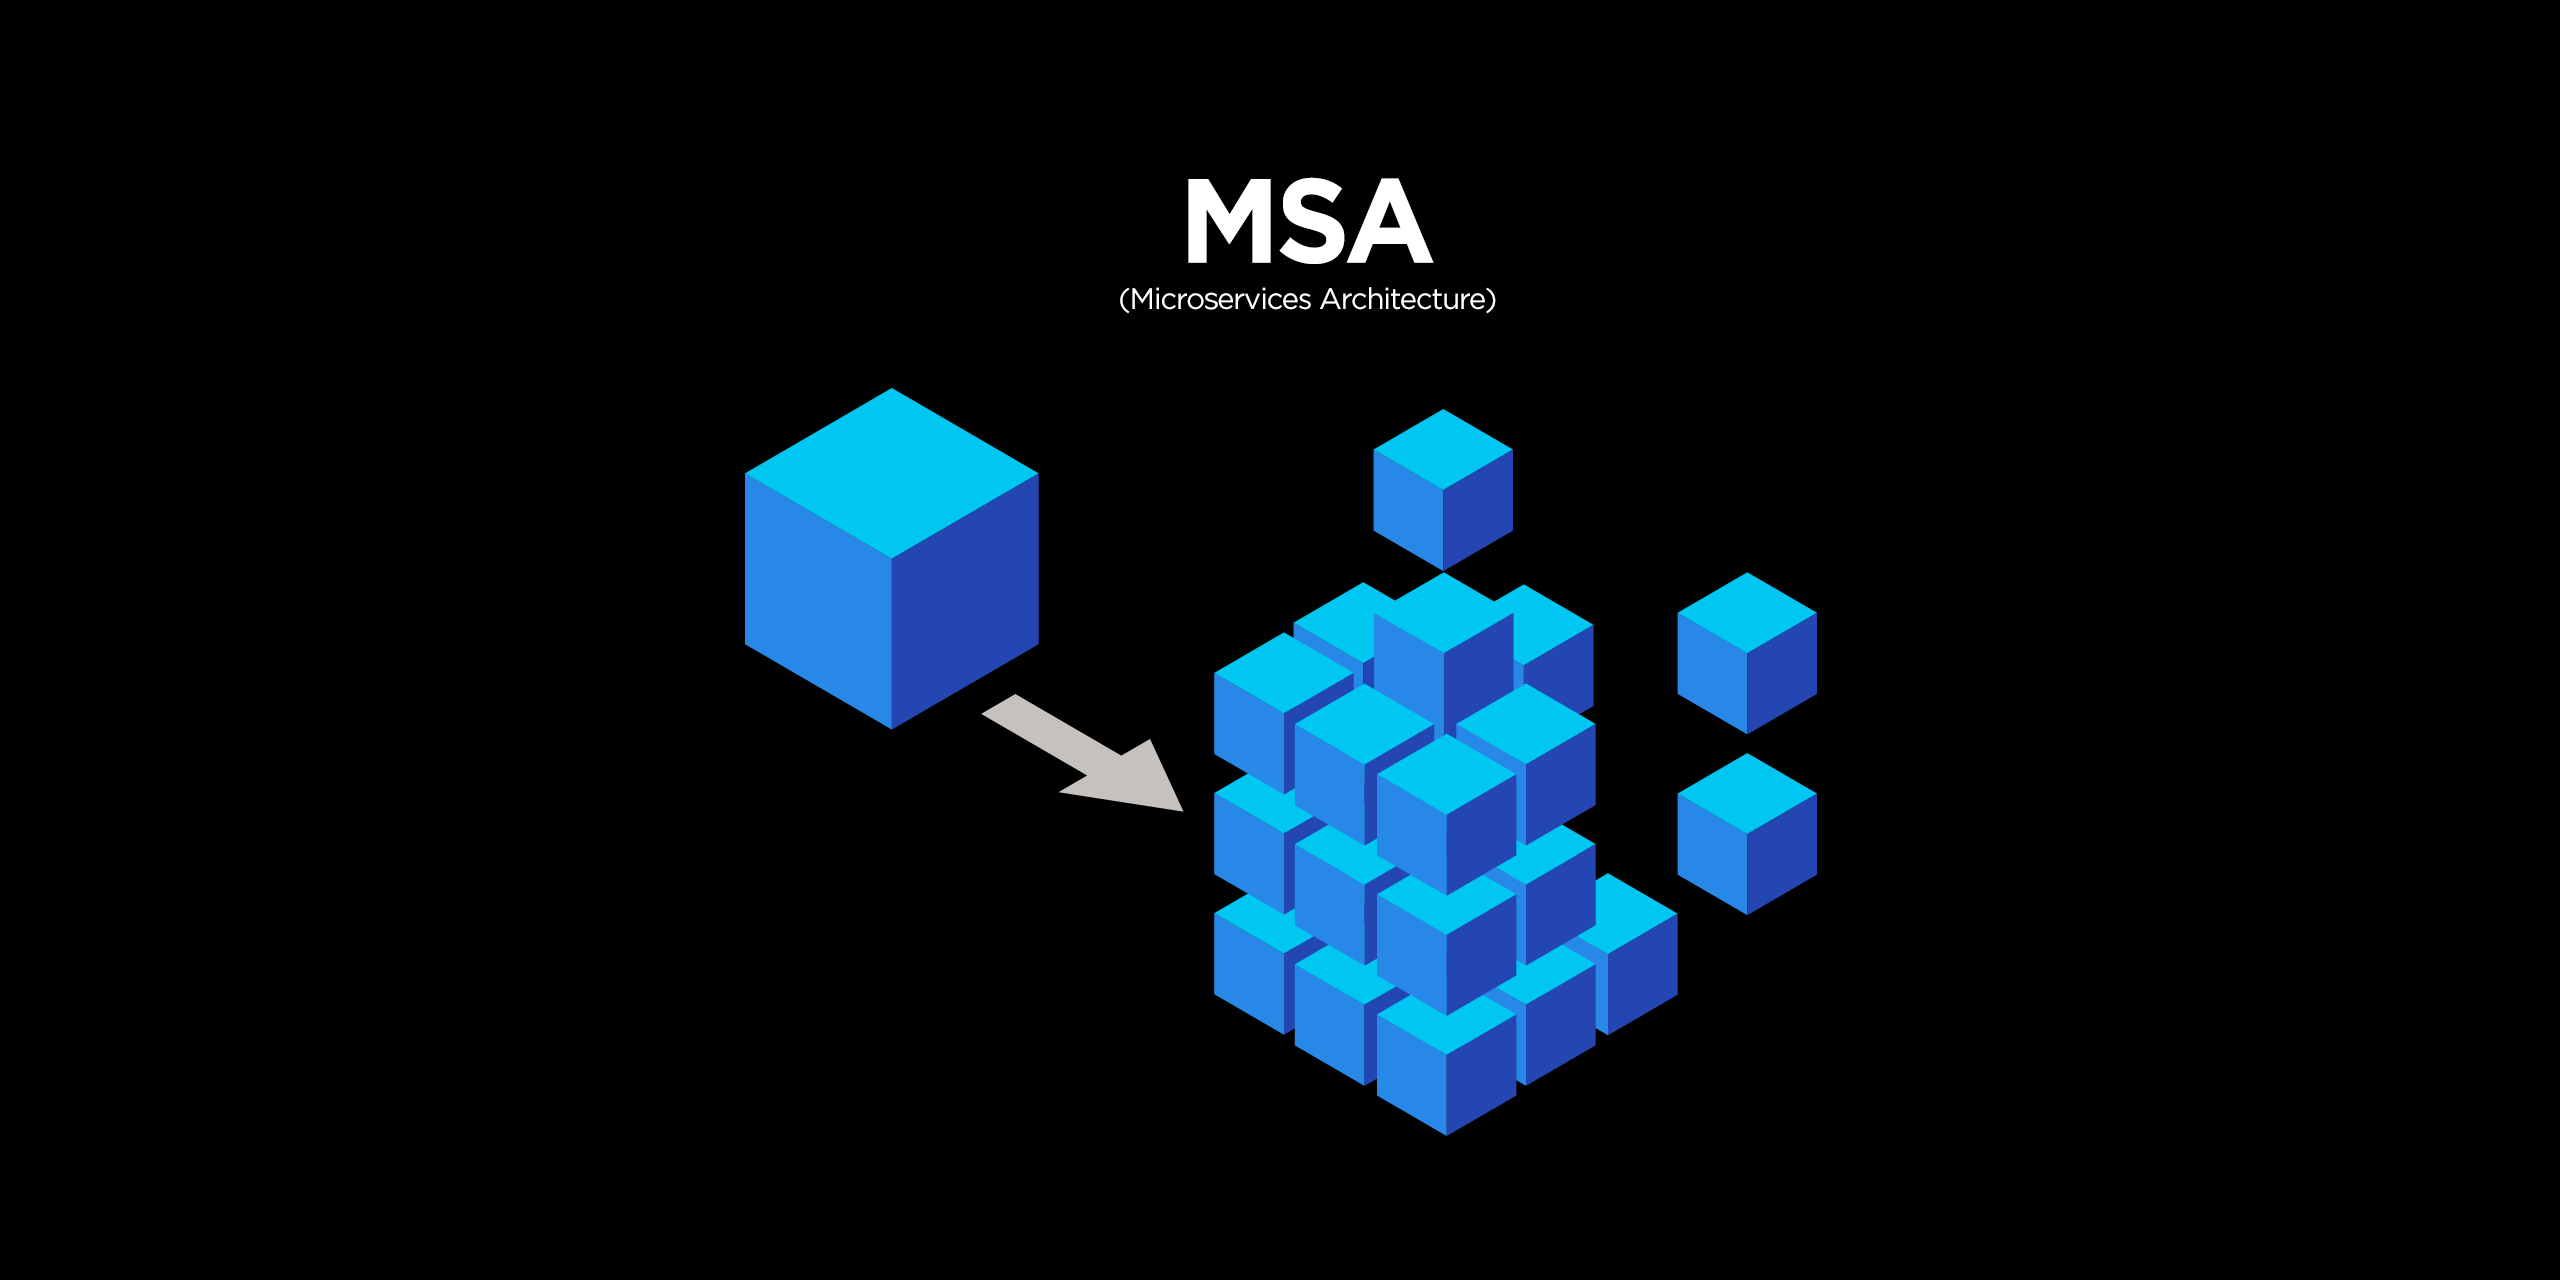
🔨프로젝트 생성
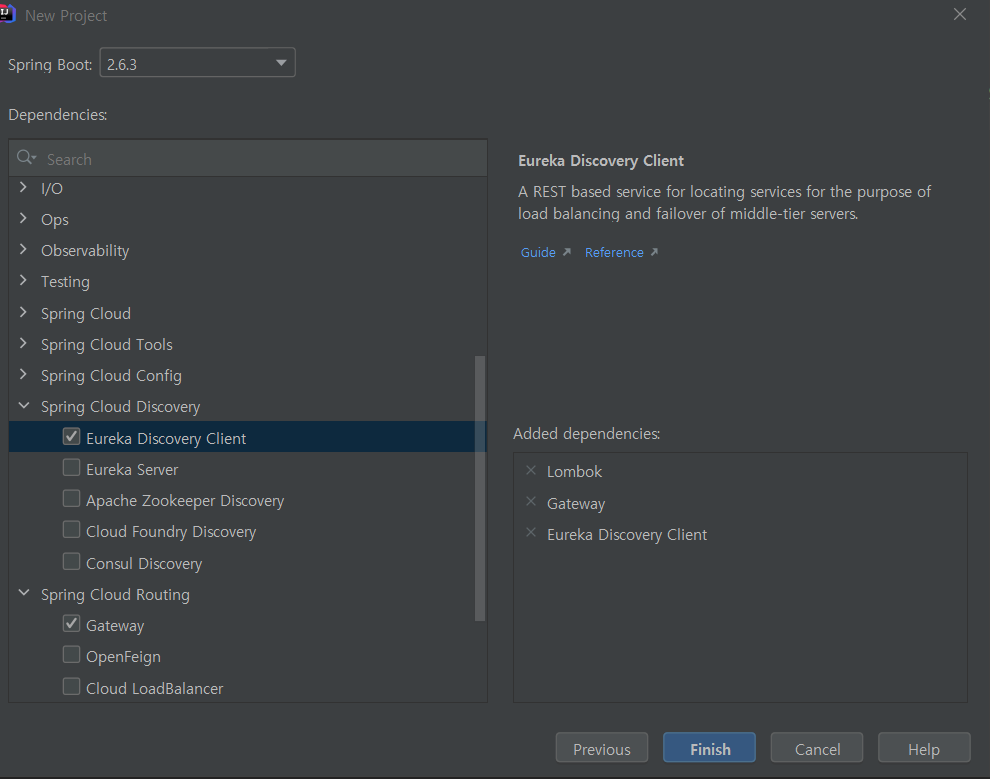
다음과 같이 3개의 의존성을 추가해서 생성한다.
server:
  port: 8000

eureka: #eureka 세팅은 현재 사용 안함
  client:
    fetch-registry: false
    register-with-eureka: false
    service-url:
      defaultZone: http://127.0.0.1:8761/eureka

spring:
  application:  #gateway service 이름름
    name: apigateway-service
  cloud:
    gateway:  #gateway 설정
      routes:
        - id: first-service #gateway로 연결될 서비스 이름
          uri: http://127.0.0.1:8001/ #gateway로 연결될 서비스 uri
          predicates: #gateway로 연결될 서비스의 url 매핑
            - Path=/first-service/**
        - id: second-service
          uri: http://127.0.0.1:8002/
          predicates:
            - Path=/second-service/**
yml 파일을 설정한 뒤에 서버를 실행해보자!

그럼 정상적으로 실행되며 was가 Tomcat(동기)이 아닌 Netty(비동기)로 실행됨을 확인할 수 있다. was가 Netty로 실행됨을 확인할 수 있으며 gateway 서버는 비동기 방식으로 실행됨을 확인할 수 있다!
🔨서비스 1 생성

3개의 의존성을 추가한 뒤 서비스를 시작한다.
server:
  port: 8001
spring:
  application:
    name: first-service
eureka:
  client:
    register-with-eureka: false
    fetch-registry: false
    service-url:
      defaultZone: http://127.0.0.1:8761/eureka
eureka는 바로 보진 않을거지만 그래도 우선 설정해놓았다.
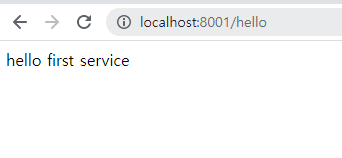
@RestController
public class HelloController {
@GetMapping("hello")
public String hello(){
return "hello first service";
}
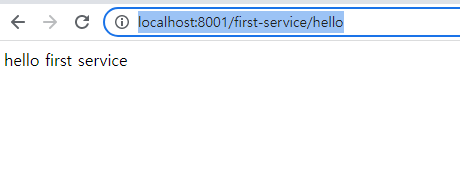
}그 후 간단한 controller를 생성하여 first service를 반환하도록 만들었다.
2번 서비스도 똑같이 만들어주자!(포트 번호만 다르게 해주면 된다)
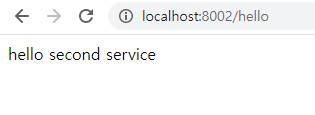
2번 서버도 동일하게 만들었다.
이제 gateway로 요청해보자!
👏Gateway service 이름으로 요청해보기
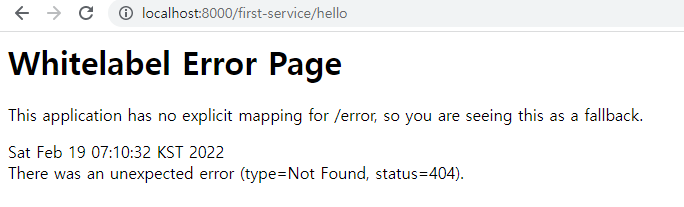
하지만 404 에러가 뜬다. 그 이유는 gateway에서 서비스를 구별하기 위해 pre 경로를 붙이는데 해당 경로가 해당 서버의 요청에 그대로 붙기 때문이다.
예를들어 /first-service/hello라고 요청했을 때 first-service에 /hello로 요청되는것이 아닌 /first-service/hello 그대로 요청이 된다.
Controller에 RequestMapping 설정
방법은 간단하다.
@RestController
@RequestMapping("/first-service")
public class HelloController {
    @GetMapping("hello")
    public String hello(){
        return "hello first service";
    }
}
@RestController
@RequestMapping("/second-service")
public class HelloController {
@GetMapping("hello")
public String hello(){
return "hello second service";
}
}각 서비스가 매핑되는 pre path를 그대로 붙여주면 된다.
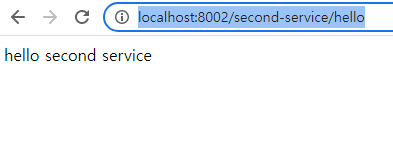
두개의 서비스를 각각 호출해보고 정상 작동되는 것을 확인했다. 이제 gateway로 불러보자.

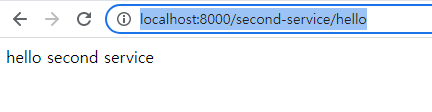
gateway만으로 두개의 서비스를 모두 호출할 수 있는 것을 확인할 수 있었다.
