
✍️Spring ExceptionResolver
저번 포스트에서 학습했던 HandlerExceptionResolver를 통해 예외 처리는 너무 복잡하고 코드도 너무 많았다. 그래서 Spring에서는 어노테이션을 통해 간단하게 적용할 수 있도록 도와주는데 해당 내용을 학습하려고 한다.
스프링 부트에서 제공되는 ExceptionResolver는
- ExceptionHandlerExceptionResolver
- ResponseStatusExceptionResolver
- DefaultHandlerExceptionResolver
가 있다.
✅ResponseStatusExceptionResolver
ResponseStatusExceptionResolver는 예외에 따라 HTTP 상태 코드를 지정해주는 역할을 한다.
@ResponseStatus(code = HttpStatus.BAD_REQUEST, reason = "잘못된 요청 오류")
public class BadRequestException extends RuntimeException{
}
Excetion을 하나 만들고 @ResponseStatus의 설정을 해준다.
@RestController
@Slf4j
public class ApiExceptionController {
...
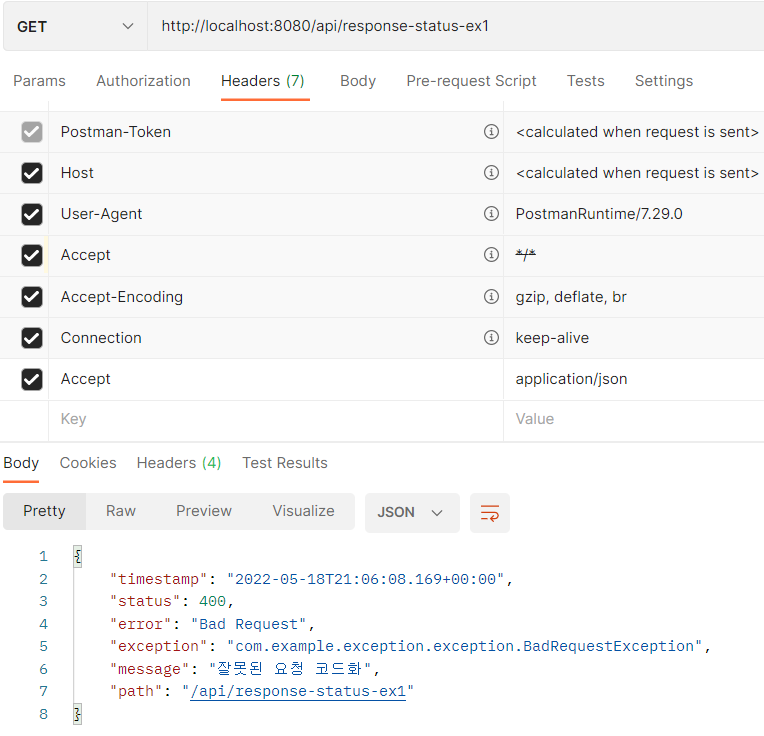
@GetMapping("/api/response-status-ex1")
public String responseStatusEx1(){
throw new BadRequestException();
}
}이러면 끝이다. 확실히 지난 설정보다는 코드량이 눈에 띄게 줄어든 것을 확인할 수 있다.

지난 시간에 내용을 기억한다면 Spring에서는 Exception의 경우 다른 설정을 해주지 않는 한 무조건 500의 상태값으로 처리되던 것과는 다르게 우리가 어노테이션에 설정한 내용대로 400으로 처리되는 것을 확인할 수 있다.
예외가 처리되는 과정은 @ResponseStatus 어노테이션이 적용되었다면 해당 Exception이 발생했을 때 ResponseStatusExceptionResolver가 실행되며 해당 코드를 뜯어보면
public class ResponseStatusExceptionResolver extends AbstractHandlerExceptionResolver implements MessageSourceAware {

    ...

    protected ModelAndView applyStatusAndReason(int statusCode, @Nullable String reason, HttpServletResponse response) throws IOException {
        if (!StringUtils.hasLength(reason)) {
            response.sendError(statusCode);
        } else {
            String resolvedReason = this.messageSource != null ? this.messageSource.getMessage(reason, (Object[])null, reason, LocaleContextHolder.getLocale()) : reason;
            response.sendError(statusCode, resolvedReason);
        }

        return new ModelAndView();
    }
}
다음과 같이 우리가 지난 시간에 했던 response.sendError를 세팅한 후 비어있는 ModelAndView를 반환한다. 우리가 했던 동작과 똑같이 진행되는 것이다.
error message 코드화
server.error.whitelabel.enabled=false
server.error.include-exception=true
server.error.include-message=always
다음과 같이 message가 노출되도록 설정하고 메세지를 확인해볼 수 있도록 하자
@ResponseStatus(code = HttpStatus.BAD_REQUEST, reason = "error.bad")
public class BadRequestException extends RuntimeException{
}
reason에 직접 데이터를 적는 것이 아닌 다음과 같이 적어주고
error.bad = 잘못된 요청 코드화resources > messages.properties로 작성해주면
다음과 같이 메세지를 properties로 관리할 수 있게된다.
ResponseStatusException
직접 custom한 Exception이 아닌 기존의 Exception들 중 상태코드와 에러 메세지를 수정해서 사용하고 싶을 때 ResponseStatusException를 사용하면 되는데
@RestController
@Slf4j
public class ApiExceptionController {

    ...

    @GetMapping("/api/response-status-ex2")
    public String responseStatusEx2(){
        throw new ResponseStatusException(HttpStatus.NOT_FOUND, "error.bad", new IllegalArgumentException());
    }
}
다음과 같이 Exception으로 던질 때 상태값, 에러메세지, 예외 종류까지 설정해주면
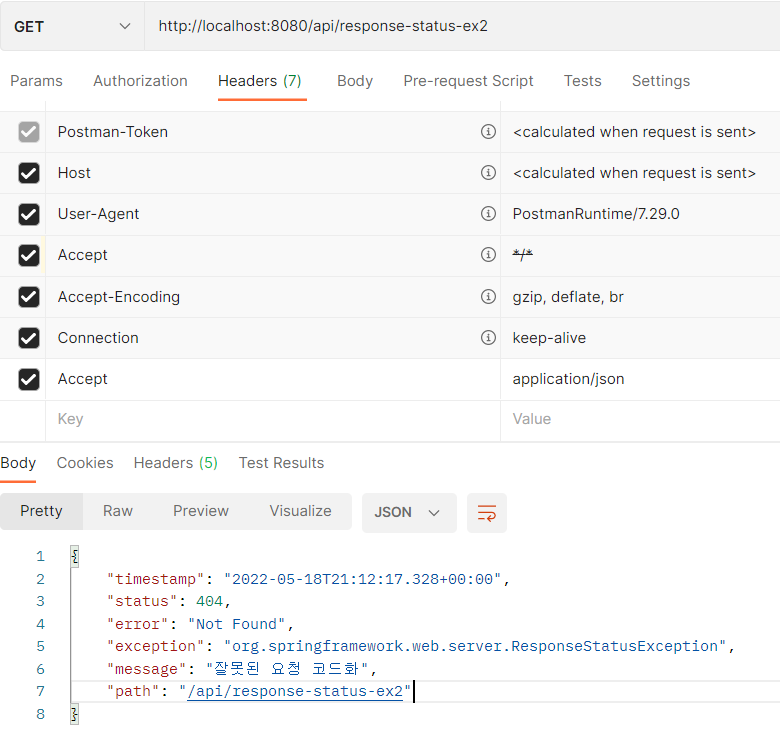
다음과 같이 상태 값과 메세지를 확인할 수 있다.
해당 동작도 ResponseStatusExceptionResolver에서 실행되며 코드를 살펴보면 바로 알수 있다.
✅DefaultHandlerExceptionResolver
설명보다 예시로 보는게 더 빠르기 때문에 바로 예시를 만들어보자
@RestController
@Slf4j
public class ApiExceptionController {

    ...

    @GetMapping("/api/default-handler-ex")
    public String defaultException(@RequestParam Integer data){
        return "";
    }
}
파라미터로 Integer type을 받는 url에
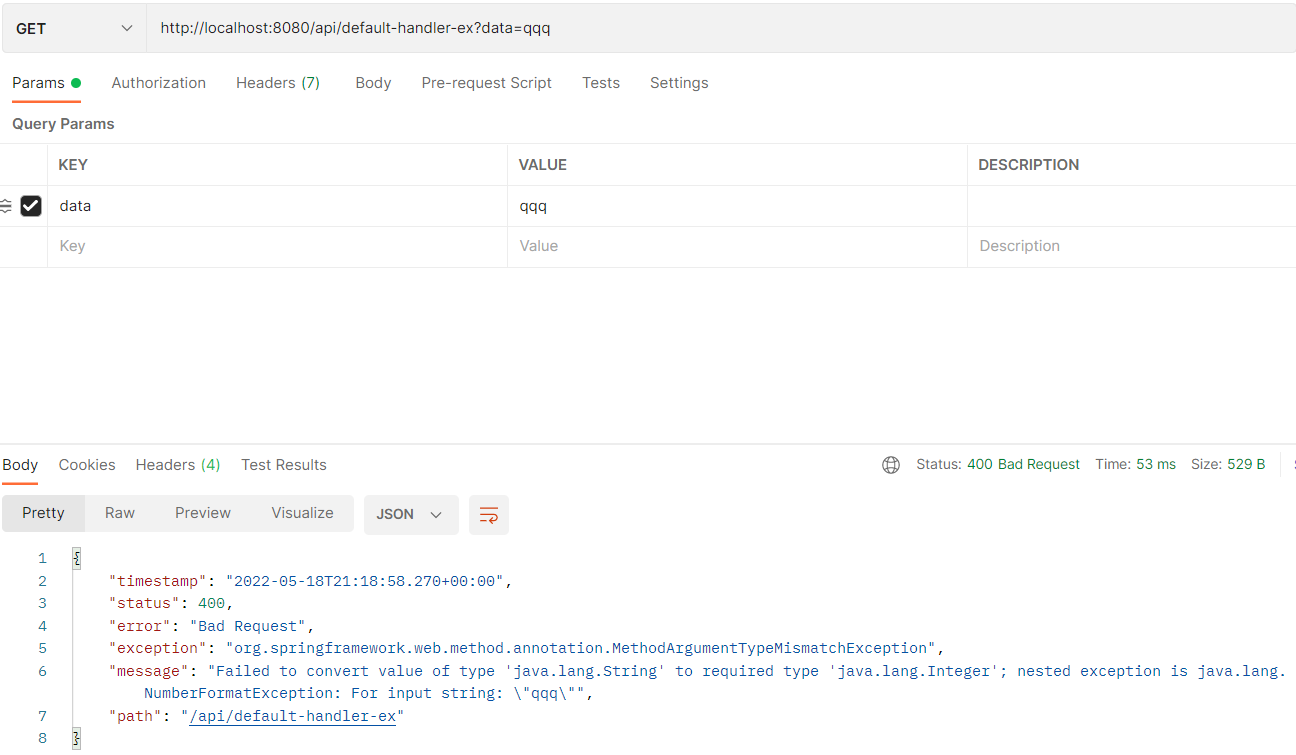
Integer 대신 String을 넣으면 다음과 같이 Bad Reqeust가 나온다. 어떻게 보면 당연한 결과인데 우리가 지금까지 확인했던 에러 처리 방식을 생각하면 어떤 에러가 났을 때 설정을 해주지 않으면 서블릿 컨테이너까지 올라갔을 경우 무조건 Exception은 500 에러가 발생했었다. 근데 지금 상황은 누군가 400으로 처리해주고 있는 것을 예상할 수 있다.

그래서 예외 발생한 뒤 로그를 확인하면 DefaultHandlerExceptionResolver라는 곳에서 우리가 따로 설정하지 않았지만 해당 에러를 처리하고 있다는 것을 확인할 수 있다.
그럼 저기로 가서 코드를 봐보자

우선 예외 로그에 찍혀있는 MethodArgumentTypeMismatchException을 검색해보면 다음과 같은 내용이며 TypeMismatchException을 상속받아 사용하고 있는 것을 확인할 수 있다.
그리고 DefaultHandlerExceptionResolver의 코드를 확인하면 doResolveException라는 메서드 내에
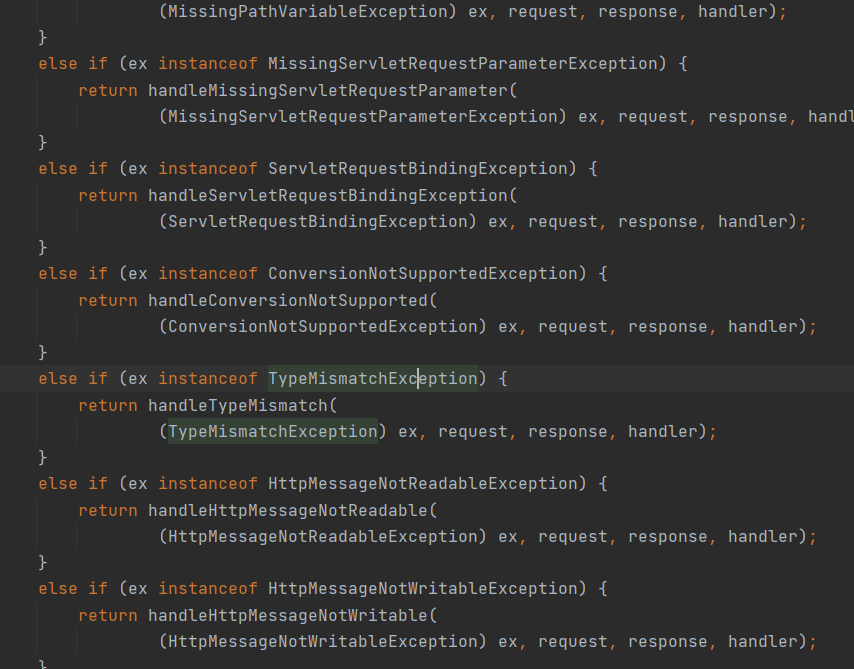
수 많은 타입 중 TypeMismatchException을 확인할 수 있고

다음과 같이 예외를 400 코드로 처리해주고 비어있는 view를 반환하는 것을 확인할 수 있다.
DefaultHandlerExceptionResolver 코드를 확인해보면 왠만한 Spring에서 처리되는 에러들이 정의되어 있는 것을 확인할 수 있다.
✅ExceptionHandlerExceptionResolver
지금까지 공부한 ExceptionResolver 들은 확실히 편하다고 생각할 수 있다. 하지만 편한건 html 예외가 발생했을 경우이다. 상태 코드를 변경해주는 건 쉬웠지만 메세지를 api와 같은 json 형태로 반환하기에는 다소 코드가 아직도 복잡하고 어렵다. 그래서 화면에 대한 에러처리가 아닌 api 에러 처리를 위해서는 다른 ExceptionResolver가 필요하다.
Spring에서는 해당 문제를 해결하기 위해 @ExceptionHandler라는 어노테이션을 사용하여 매우 편하게 처리할 수 있게 해주는데 해당 어노테이션으로 처리되는 곳이 ExceptionHandlerExceptionResolver이다.
api를 한번이라도 작성해봤다면 @ExceptionHandler를 본적이 있을텐데 어떻게 동작하는지 확인해본 적은 없었을 것이다. 이제 확인해보자!
방법 1
@Data
@AllArgsConstructor
public class ErrorResult {
    private String code;
    private String message;
}
먼저 api 형태로 반환하기 위해 다음과 같은 Object로 사용될 class를 정의해놓자.

기존에는 다음과 같이 상태코드만 중요하게 처리되었던 형태인데 이걸 json 형태로 변경해보자
@RestController
@Slf4j
public class ApiExceptionV2Controller {

    @ExceptionHandler(IllegalArgumentException.class)
    public ErrorResult illegalExHandler(IllegalArgumentException e){
        log.error("[exceptionHandler] ex", e);
        return new ErrorResult("BAD", e.getMessage());
    }

    @GetMapping("/api2/members/{id}")
    public MemberDto getMember(@PathVariable("id") String id){
        if(id.equals("ex")) throw new RuntimeException("잘못된 사용자");
        if(id.equals("bad")) throw new IllegalArgumentException("잘못된 요청");
        if(id.equals("user-ex")) throw new UserException("사용자 에러");
        return new MemberDto(id, "hello " + id);
    }

    @Data
    @AllArgsConstructor
    static class MemberDto{
        private String memberId;
        private String name;
    }
}
다음과 같이 코드를 작성해주고 실행해보자!
이제는 우리가 생각하던 json 형태로 반환되는 것을 확인할 수 있다.
여기서 이해해야할 부분은 Spring은 Exception이 발생하면 무조건 ExceptionResolver를 통해서 에러를 해결하려 요청한다. 그런데 여기서 ExceptionResolver들에게서도 우선 순위가 존재하는데
ExceptionHandlerExceptionResolver > ResponseStatusExceptionResolver > DefaultHandlerExceptionResolver순서의 우선 순위를 갖고 있고 ExceptionHandlerExceptionResolver가 최우선으로 처리되기 때문에 ExceptionHandlerExceptionResolver는 @ExceptionHandler에 정의되어진 Exception을 찾고 해당 예외가 존재한다면 정의된 반환값으로 반환해주는 것이다.
또한 우선순위가 동작하는 방법은 이전에 Resolver를 직접 작성했을 때 처럼 null 일 경우 다음 Resolver를 호출하는 동작으로 처리된다.
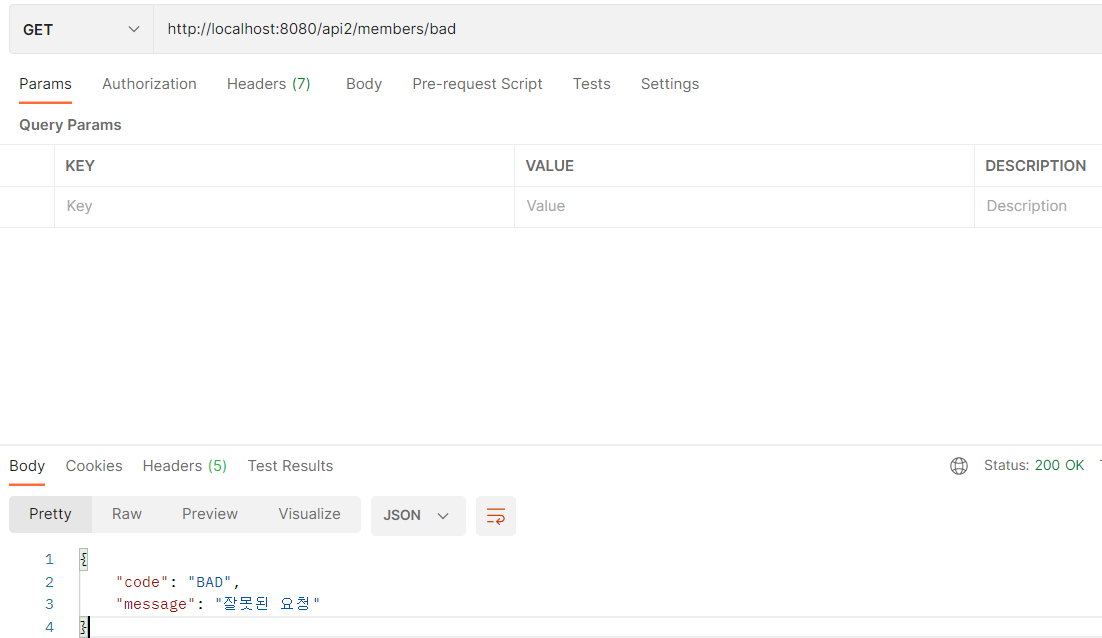
하지만 위의 에러를 반환할때 상태코드를 보면 상태값이 200으로 처리된 것을 확인할 수 있다.
@RestController
@Slf4j
public class ApiExceptionV2Controller {

    @ResponseStatus(HttpStatus.BAD_REQUEST)
    @ExceptionHandler(IllegalArgumentException.class)
    public ErrorResult illegalExHandler(IllegalArgumentException e){
        log.error("[exceptionHandler] ex", e);
        return new ErrorResult("BAD", e.getMessage());
    }

    @GetMapping("/api2/members/{id}")
    public MemberDto getMember(@PathVariable("id") String id){
        if(id.equals("ex")) throw new RuntimeException("잘못된 사용자");
        if(id.equals("bad")) throw new IllegalArgumentException("잘못된 요청");
        if(id.equals("user-ex")) throw new UserException("사용자 에러");
        return new MemberDto(id, "hello " + id);
    }

    @Data
    @AllArgsConstructor
    static class MemberDto{
        private String memberId;
        private String name;
    }
}
그래서 해당 부분까지 처리하고 싶다면 코드 그대로에서 @ResponseStatus만 추가해주면
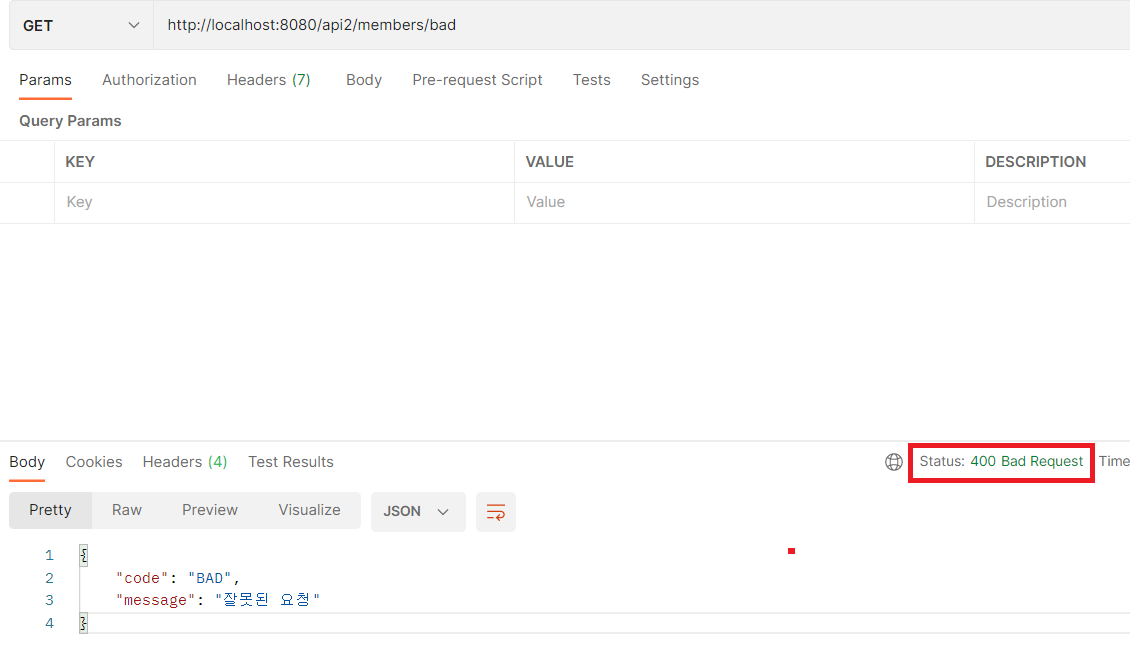
상태코드까지 잘 적용된 것도 확인할 수 있다.
방법2
하지만 위의 코드를 ResponseEntity를 사용하면 더 깔끔하게 적용할 수 있다.
@RestController
@Slf4j
public class ApiExceptionV2Controller {

    @ResponseStatus(HttpStatus.BAD_REQUEST)
    @ExceptionHandler(IllegalArgumentException.class)
    public ErrorResult illegalExHandler(IllegalArgumentException e){
        log.error("[exceptionHandler] ex", e);
        return new ErrorResult("BAD", e.getMessage());
    }

    @ExceptionHandler
    //@ExceptionHandler(UserException.class)    //파라미터와 동일한 Exception이라면 생략 가능
    public ResponseEntity<ErrorResult> userExHandler(UserException e){
        log.error("[exception] ex", e);
        ErrorResult errorResult = new ErrorResult("USER-EX", e.getMessage());
        return new ResponseEntity<>(errorResult, HttpStatus.BAD_REQUEST);
    }

    @GetMapping("/api2/members/{id}")
    public MemberDto getMember(@PathVariable("id") String id){
        if(id.equals("ex")) throw new RuntimeException("잘못된 사용자");
        if(id.equals("bad")) throw new IllegalArgumentException("잘못된 요청");
        if(id.equals("user-ex")) throw new UserException("사용자 에러");
        return new MemberDto(id, "hello " + id);
    }

    @Data
    @AllArgsConstructor
    static class MemberDto{
        private String memberId;
        private String name;
    }
}
userExHandler로 정의해놓은 코드대로 작성한 뒤 실행해보면

이전과 동일하게 실행되며 더 깔끔해진 것을 확인할 수 있다.
자식 처리
@RestController
@Slf4j
public class ApiExceptionV2Controller {

    @ResponseStatus(HttpStatus.BAD_REQUEST)
    @ExceptionHandler(IllegalArgumentException.class)
    public ErrorResult illegalExHandler(IllegalArgumentException e){
        log.error("[exceptionHandler] ex", e);
        return new ErrorResult("BAD", e.getMessage());
    }

    @ExceptionHandler
    //@ExceptionHandler(UserException.class)    //파라미터와 동일한 Exception이라면 생략 가능
    public ResponseEntity<ErrorResult> userExHandler(UserException e){
        log.error("[exception] ex", e);
        ErrorResult errorResult = new ErrorResult("USER-EX", e.getMessage());
        return new ResponseEntity<>(errorResult, HttpStatus.BAD_REQUEST);
    }

    @ResponseStatus(HttpStatus.INTERNAL_SERVER_ERROR)
    @ExceptionHandler
    public ErrorResult exHandler(Exception e){
        log.error("[exceptionHandler] e",e);
        return new ErrorResult("EX", "내부 오류");
    }


    @GetMapping("/api2/members/{id}")
    public MemberDto getMember(@PathVariable("id") String id){
        if(id.equals("ex")) throw new RuntimeException("잘못된 사용자");
        if(id.equals("bad")) throw new IllegalArgumentException("잘못된 요청");
        if(id.equals("user-ex")) throw new UserException("사용자 에러");
        return new MemberDto(id, "hello " + id);
    }

    @Data
    @AllArgsConstructor
    static class MemberDto{
        private String memberId;
        private String name;
    }
}
다음과 같이 Exception 중의 최상위 부모인 Exception 자체를 정의해두면 어떻게 될까? 우리가 정의하지 않은 RuntimeException으로 실행해보자.
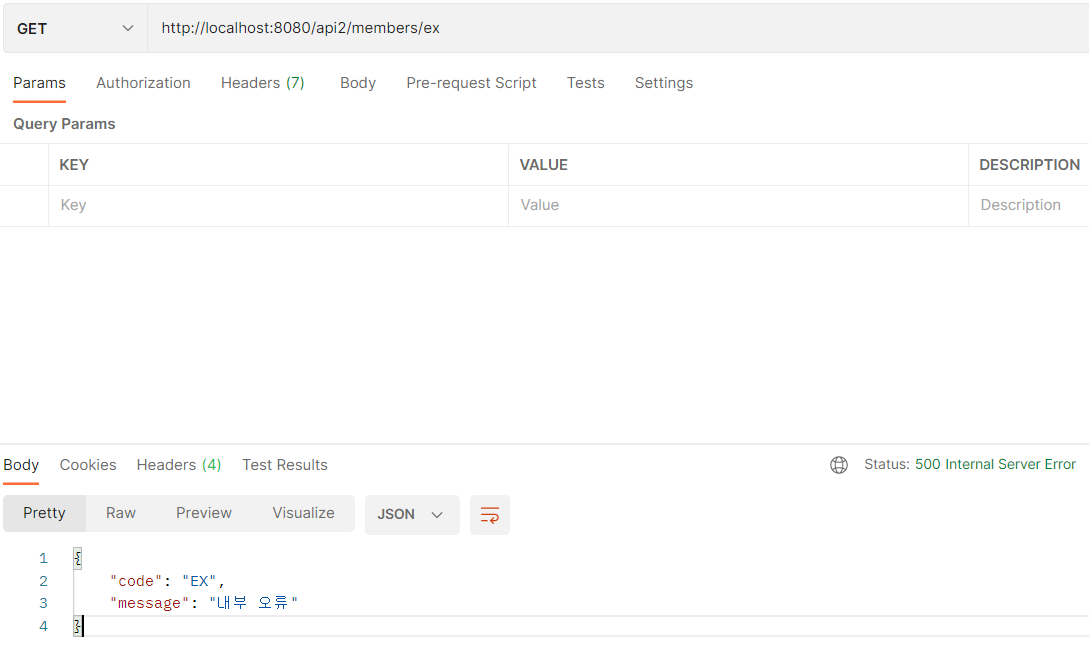
다음과 같이 RuntimeException을 따로 정의하진 않았지만 Exception으로 정의해둔 내용으로 반환되는 것을 확인할 수 있다. 여기서 알 수 있는 것은 부모 Exception으로 정의해둔 handler가 정의되어 있다면 해당 부모를 상속받은 자식도 Handler 처리된 내용으로 반환하는 것을 알 수 있다.
중요한 점은 자식 Handler가 있다면 부모보다 정의된 자식 Handler로 처리된다!
👏 최종 흐름 확인
- 컨트롤러를 호출한 결과 Exception이 발생 예외가 컨트롤러 밖으로 던져진다.
- 예오히가 발생했으므로
ExceptionResolver가 작동한다. ExceptionResolver는 우선순위 대로 실행된다. - ExceptionHandlerExceptionResolver 해당 Exception을 처리할 수 있는
@ExceptionHandler를 확인한다. - 해당 내용을 처리하는 @ExceptionHandler의 정의된 코드 내용대로 응답한다.
✅ControllerAdvice
지금까지 예외 처리를 등록해서 사용했다. 그런데 단점은 예외처리와 Controller 호출이 모두 하나의 코드에서 작성되고 있다는 것이다. 그래서 이 부분을 분리하는 코드를 작성하기 위해 ControllerAdvice를 사용해보자.
@Slf4j
@RestControllerAdvice
public class ExControllerAdvice {
    @ResponseStatus(HttpStatus.BAD_REQUEST)
    @ExceptionHandler(IllegalArgumentException.class)
    public ErrorResult illegalExHandler(IllegalArgumentException e){
        log.error("[exceptionHandler] ex", e);
        return new ErrorResult("BAD", e.getMessage());
    }

    @ExceptionHandler
    //@ExceptionHandler(UserException.class)    //파라미터와 동일한 Exception이라면 생략 가능
    public ResponseEntity<ErrorResult> userExHandler(UserException e){
        log.error("[exception] ex", e);
        ErrorResult errorResult = new ErrorResult("USER-EX", e.getMessage());
        return new ResponseEntity<>(errorResult, HttpStatus.BAD_REQUEST);
    }

    @ResponseStatus(HttpStatus.INTERNAL_SERVER_ERROR)
    @ExceptionHandler
    public ErrorResult exHandler(Exception e){
        log.error("[exceptionHandler] e",e);
        return new ErrorResult("EX", "내부 오류");
    }
}
ExControllerAdvice를 정의하고 이전에 우리가 정의했던 @ExceptionHandler들을 모두 복사 붙여넣기 해주자
@RestController
@Slf4j
public class ApiExceptionV2Controller {

    @GetMapping("/api2/members/{id}")
    public MemberDto getMember(@PathVariable("id") String id){
        if(id.equals("ex")) throw new RuntimeException("잘못된 사용자");
        if(id.equals("bad")) throw new IllegalArgumentException("잘못된 요청");
        if(id.equals("user-ex")) throw new UserException("사용자 에러");
        return new MemberDto(id, "hello " + id);
    }

    @Data
    @AllArgsConstructor
    static class MemberDto{
        private String memberId;
        private String name;
    }
}
그리고 Controller에서는 핸들러를 모두 제거해주면 이제 코드는 깔끔하게 적용되었다.
결과도 확인해보자.
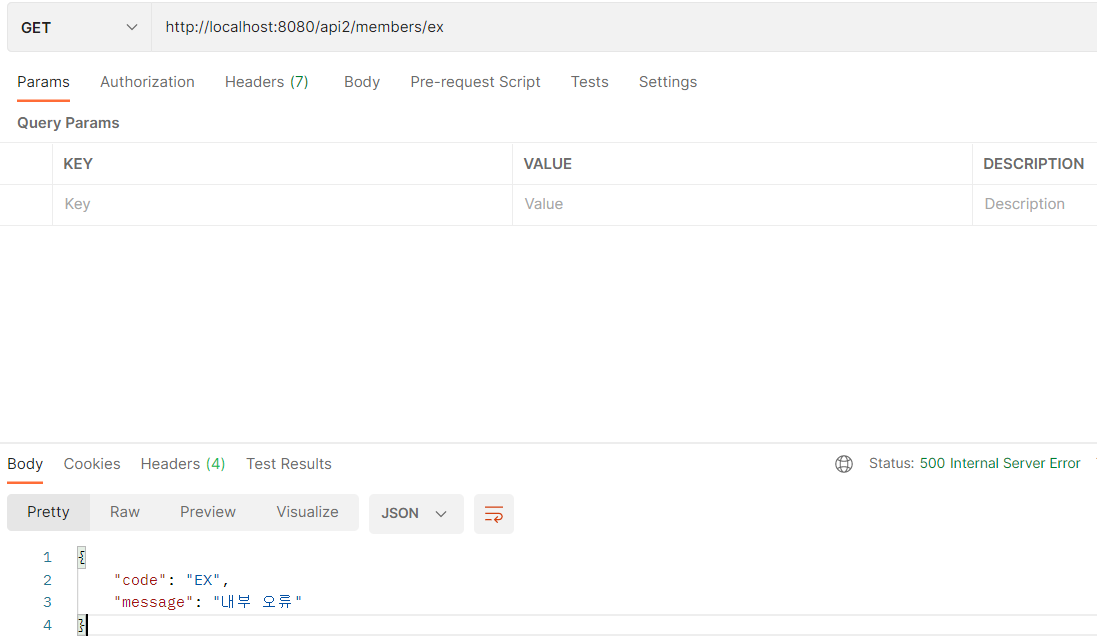
동일하게 반환되는 것을 알 수 있다.
대상 컨트롤러 지정
annotations
@RestControllerAdvice(annotations = RestController.class)다음과 같이 선언하면 해당 어노테이션이 적용되어진 곳에서만 작동한다.
pakcage
@RestControllerAdvice(basePackages = {"com.example.exception"})
@RestControllerAdvice({"com.example.exception"})
특정 패키지에서만 작동하도록 적용시킬 수 있다.
생략해서도 사용이 가능하다.
assignableTypes
@RestControllerAdvice(assignableTypes = {ApiExceptionV2Controller.class})특정 class나 interface에도 적용시킬 수 있다.
보통 package 설정 정도는 해준다.
