[Flutter 트랙] 앱개발 종합반 3주차
상태관리
상태란?
어플 내에서 변화되는 데이터나 정보.
상태관리란?
어플 내에서 변화되는 데이터나 정보를 효율적으로 관리하여 UI와 동기화 하는 과정
플러터 상태 관리
- StatefulWidget의 setState방식
- 서드 파트 라이브러리를 이용한 방식
StatefulWidget의 setState 상태관리
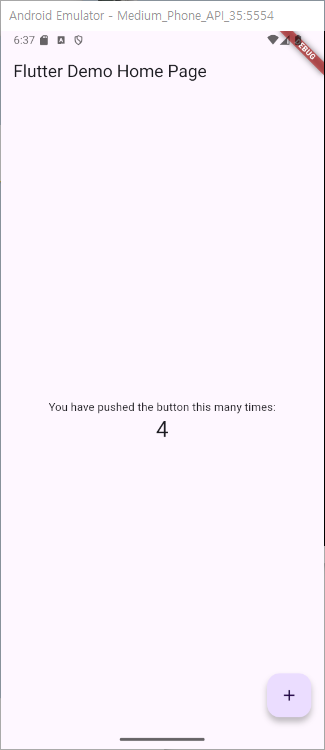
기본 프로젝스 생성하면 보여주는 카운터 앱이있다.
void _incrementCounter() {
    setState(() {
      _counter++;
    });
  }
이곳에서 print로 _counter를 출력하고 setState를 지워보면
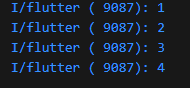
실제로 값은 증가가 되지만 
화면은 그대로다.
이유는 아까 지운 setState때문인데 + 버튼을 누를때 _incrementCounter 함수가 실행이되고 _counter 값이 증가했지만 아직 화면은 다시그려지지 않은 상태 이기에 값만 증가하고 화면은 아직 0 이다. setState는 이 build를 다시 시켜주는 함수로 증가된값을 가지고 다시 build를 하게되어 값과 화면이 동기화가 되는것이다.
hotreload로도 build를 시킬수 있기때문에 실행해보면 1씩 올라가는게 아닌 올라가있는 값 그대로 오르는걸 볼수있다.
setState의 한계
- 상태 공유의 어려움:
하나의 Statefulwidget에서 사용하기 때문에 서로 공유가 어렵다. - 규모가 커질 때 복잡도 증가:
값이 한곳에서 통제가 되지 않기때문에 복잡성이 증가한다. - 성능 문제:
setState는 build를 호출하기때문에 전체 화면을 다시 빌드한다. - 전역 상태 관리의 부재:
특정 부분에서만 호출이 하기때문에 필요한곳에서 사용이 제한된다.
한계 알아보기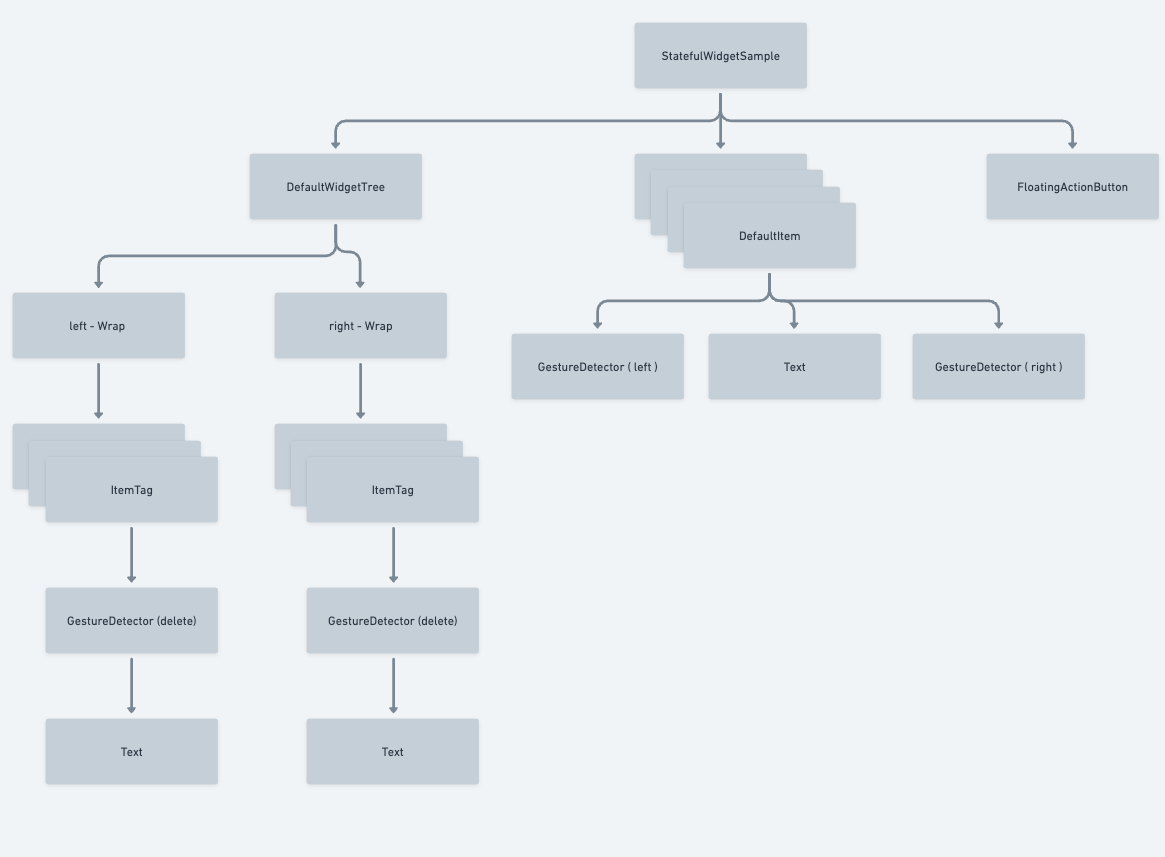
이런 트리의 화면 구성이 있고 이걸 setState로만 관리를 한다하면
Text에서 StatefulWidgetSample까지 계속된 상태를 보내야한다.
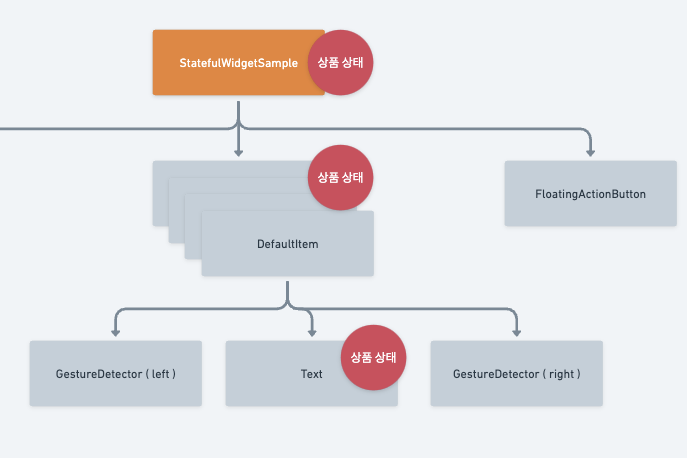
이는 매우 복잡한 관계이며 트리구조가 간단하지 않을때 더욱 문제점이 보인다
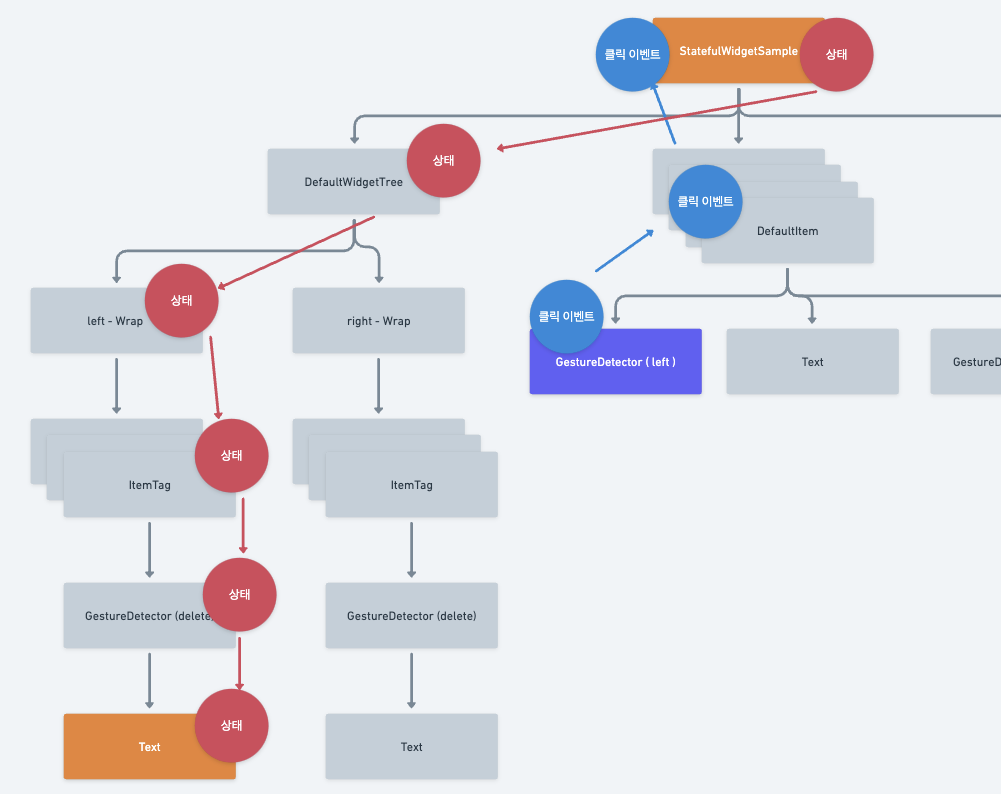
GestureDetector에서 좌하단의 Text 상태값을 바꾸려면 이러한 루트로 진행이 되며 값을 계속 옮겨야 하는 코드를 작성해야한다.
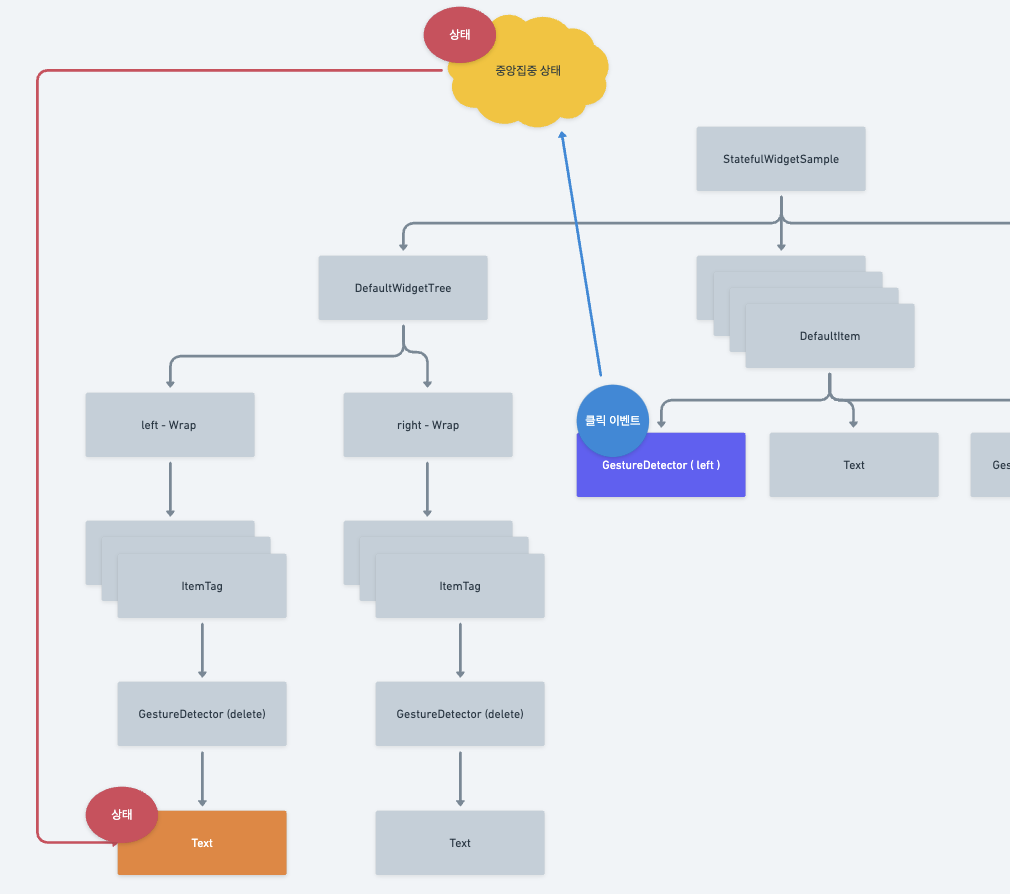
이러한 복잡한 과정을 생략하기위해 이렇게 한곳에서 상태를 관리하는 상태관리 라이브러리를 사용한다.
상태관리를 위한 예시 프로젝트를 하나 받고 실행을 해봤다.
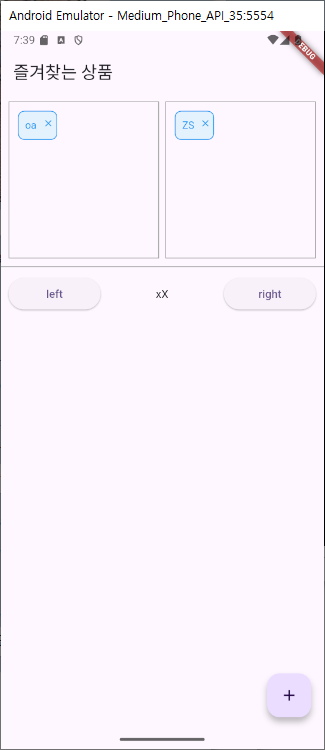
+로 아이템을 생성해서 left right버튼으로 즐겨찾기에 추가하는 앱이다.
한 파일로 모아둔 코드 실제로는 분리되어있다.
import 'package:flutter/material.dart';
import 'package:setstate_limit_sample/string_utils.dart';
class FullCodeStatefulWidgetSample extends StatefulWidget {
const FullCodeStatefulWidgetSample({super.key});
State<FullCodeStatefulWidgetSample> createState() =>
_FullCodeStatefulWidgetSampleState();
}
class _FullCodeStatefulWidgetSampleState
extends State<FullCodeStatefulWidgetSample> {
Set<String> products = {};
Set<String> leftProducts = {};
Set<String> rightProducts = {};
void update() => setState(() {});
Widget build(BuildContext context) {
return Scaffold(
appBar: AppBar(title: const Text('즐겨찾는 상품')),
body: Column(
children: [
Container(
padding: const EdgeInsets.all(10),
child: Row(
children: [
Expanded(
child: Container(
padding: const EdgeInsets.all(8),
height: 200,
decoration:
BoxDecoration(border: Border.all(color: Colors.grey)),
child: SingleChildScrollView(
child: Wrap(
children: List.generate(
leftProducts.length,
(index) => Container(
margin: const EdgeInsets.all(3),
child: GestureDetector(
onTap: () {},
child: Container(
width: 50,
padding: const EdgeInsets.symmetric(vertical: 8),
decoration: BoxDecoration(
borderRadius: BorderRadius.circular(8),
border: Border.all(color: Colors.blue),
color: Colors.blue.shade50,
),
child: const Stack(
children: [
Padding(
padding: EdgeInsets.only(left: 8.0),
child: Text(
'tag',
style: TextStyle(
fontSize: 13, color: Colors.blue),
),
),
Positioned(
right: 3,
child: Icon(
Icons.close,
size: 14,
color: Colors.blue,
),
)
],
),
),
),
),
),
),
),
)),
const SizedBox(width: 8),
Expanded(
child: Container(
padding: const EdgeInsets.all(8),
height: 200,
decoration:
BoxDecoration(border: Border.all(color: Colors.grey)),
child: SingleChildScrollView(
child: Wrap(
children: List.generate(
rightProducts.length,
(index) => Container(
margin: const EdgeInsets.all(3),
child: GestureDetector(
onTap: () {},
child: Container(
width: 50,
padding:
const EdgeInsets.symmetric(vertical: 8),
decoration: BoxDecoration(
borderRadius: BorderRadius.circular(8),
border: Border.all(color: Colors.blue),
color: Colors.blue.shade50,
),
child: const Stack(
children: [
Padding(
padding: EdgeInsets.only(left: 8.0),
child: Text(
'tag',
style: TextStyle(
fontSize: 13, color: Colors.blue),
),
),
Positioned(
right: 3,
child: Icon(
Icons.close,
size: 14,
color: Colors.blue,
),
)
],
),
),
),
),
),
),
),
),
),
],
),
),
const Divider(height: 1, color: Colors.grey),
Expanded(
child: SingleChildScrollView(
child: Column(
children: List.generate(
products.length,
(index) => Container(
padding: const EdgeInsets.all(10),
child: Row(children: [
Expanded(
child: ElevatedButton(
onPressed: () {},
child: const Text('left'),
),
),
const SizedBox(width: 20),
const Expanded(
child: Text(
'item',
textAlign: TextAlign.center,
)),
const SizedBox(width: 20),
Expanded(
child: ElevatedButton(
onPressed: () {},
child: const Text('right'),
),
)
]),
),
),
),
),
)
],
),
floatingActionButton: Builder(
builder: (context) => FloatingActionButton(
onPressed: () {
products.add(StringUtils.getRandomString(2));
update();
},
child: const Icon(Icons.add),
),
),
);
}
}GetX상태 관리
많은 상태관리 라이브러리가 있지만 이번엔 getX를 사용해볼거다.
위에서 보았던 중앙집중상태를 이 getX 라이브러리에선 컨트롤러로 부르기로 하겠다.
앞으로 하려는 작업은 setState만으로 관리가 되던 복잡한 코드에서 컨트롤러를 사용해 분리된 코드를 작성하려한다.
우선 컨트롤러 파일을 생성을하고 최상단인 메인에서 선언을 해준다.
import 'package:get/get.dart';

class ProductController extends GetxController {}
class MyApp extends StatelessWidget {
const MyApp({super.key});
// This widget is the root of your application.
Widget build(BuildContext context) {
Get.put(ProductController());
return MaterialApp(
title: 'Flutter Demo',
theme: ThemeData(
colorScheme: ColorScheme.fromSeed(seedColor: Colors.deepPurple),
useMaterial3: true,
),
home: const StatefulWidgetSample(),
);
}
}상태관리를 위해 관리가 되어야할 값들을 컨트롤러에 선언해주고
  Set<String> products = {};
  Set<String> leftProducts = {};
  Set<String> rightProducts = {};
추가가 되는 함수역시 함수에 추가를 해준다.
 void addProduct(String product) {
    products.add(product);
    update();
  }
여기서 쓰인 update(); 는 값이 변경됨에 따라 값을 사용하는 위젯에 컨트롤러에서 setState를 실행 한다고 생각하면된다.
생성된 함수를 호출하는 +버튼 부분에 코드를 수정해준다
 floatingActionButton: Builder(
        builder: (context) => FloatingActionButton(
          onPressed: () {
            Get.find<ProductController>()
                .addProduct(StringUtils.getRandomString(2));
          },
          child: const Icon(Icons.add),
        ),
      )
값이 바뀌어진 상태들을 사용하는 부분까지 controller의 값을 사용한다 명시해준다
GetBuilder<ProductController>(
  builder: (controller) {
    return Column(
      children: List.generate(
        controller.products.length,
        (index) => DefaultItem(
          item: controller.products.toList()[index],
          pushZone: (bool isLeftZone, String item) {
            if (isLeftZone) {
              leftProducts.add(item);
            } else {
              rightProducts.add(item);
            }
            products.remove(item);
            update();
          },
        ),
      ),
    );
  },
),
여기서 사용한 getBuilder는 화면에 보이는 위젯이라기 보단 컨트롤러에 접근이 가능하게 하는 역할을 한다 라고 보면될것 같다.
다음 기능은 pushZone을 이용해서 컨트롤햇던 상태들을 모두 끊어주는 작업이다.
매개변수로 넘겨주엇던 pushZone을 컨트롤러에 선언해주고
void pushZone(bool isLeft, String product) {
  if (isLeft) {
    leftProducts.add(product);
  } else {
    rightProducts.add(product);
  }
  products.remove(product);
  update();
}
넘겨주는 매개변수를 지우고 내부에서 컨트롤러로 이용해 호출할수있게변경
DefaultItem(
item: controller.products.toList()[index],
),
...
class DefaultItem extends StatelessWidget {
final String item;
const DefaultItem({Key? key, required this.item}) : super(key: key);
Widget build(BuildContext context) {
return Container(
padding: const EdgeInsets.all(10),
child: Row(children: [
Expanded(
child: ElevatedButton(
onPressed: () {
Get.find<ProductController>().pushZone(true, item);
},
child: const Text('left'),
),
),
const SizedBox(width: 20),
Expanded(
child: Text(
item,
textAlign: TextAlign.center,
)),
const SizedBox(width: 20),
Expanded(
child: ElevatedButton(
onPressed: () {
Get.find<ProductController>().pushZone(false, item);
},
child: const Text('right'),
),
)
]),
);
}
}기존에 값을 넘겨줫던 모든것을 제거
const DefaultWidgetTree(),
...
import 'package:flutter/material.dart';
import 'package:get/get.dart';
import 'package:setstate_limit_sample/item_tag.dart';
import 'product_controller.dart';
class DefaultWidgetTree extends StatelessWidget {
const DefaultWidgetTree({
super.key,
});
Widget build(BuildContext context) {
print('DefaultWidgetTree build!');
return Container(
padding: const EdgeInsets.all(10),
child: Row(
children: [
Expanded(
child: Container(
padding: const EdgeInsets.all(8),
height: 200,
decoration: BoxDecoration(border: Border.all(color: Colors.grey)),
child: SingleChildScrollView(
child: GetBuilder<ProductController>(
builder: (controller) {
return Wrap(
children: List.generate(
controller.leftProducts.length,
(index) => Container(
margin: const EdgeInsets.all(3),
child: ItemTag(
tag: controller.leftProducts.toList()[index],
removeItemTag: (String item) {},
)),
),
);
},
),
),
)),
const SizedBox(width: 8),
Expanded(
child: Container(
padding: const EdgeInsets.all(8),
height: 200,
decoration: BoxDecoration(border: Border.all(color: Colors.grey)),
child: SingleChildScrollView(
child: GetBuilder<ProductController>(
builder: (controller) {
return Wrap(
children: List.generate(
controller.rightProducts.length,
(index) => Container(
margin: const EdgeInsets.all(3),
child: ItemTag(
tag: controller.rightProducts.toList()[index],
removeItemTag: (String item) {},
)),
),
);
},
),
),
),
),
],
),
);
}
}여기까지 왓다면 이전 setState만을 사용하던 코드에서 getx로 관리하는 코드로 변경이 되었다.
알람 앱 getx적용
📚 기능 명세
- 알람 추가는 숫자 입력을 통해 설정할 수 있다.
- 알람 시간에 따라 자동으로 오전/오후가 설정이 바뀐다.
- 저장을 통해 홈 화면에 추가된 알람이 표시가 된다.
- 알람 홈 화면에 편집 버튼을 통해 추가된 알람을 건별로 삭제 할 수 있다.
- 삭제시 컨펌 알럿은 생략한다.
- 알람 홈 화면에 편집 상태에 별개로 알람 건별로 켜고/끌 수 있는 스위치가 상태 관리가 된다.
- 특정 알람을 선택 시 알람 추가 페이지로 이동되어 수정 모드로 변환 된다.
- 수정 시 변경된 알람 시간으로 표시된다.
2강에서 만들었던 프로젝트를 이렇게 진행하게 될것 같다.
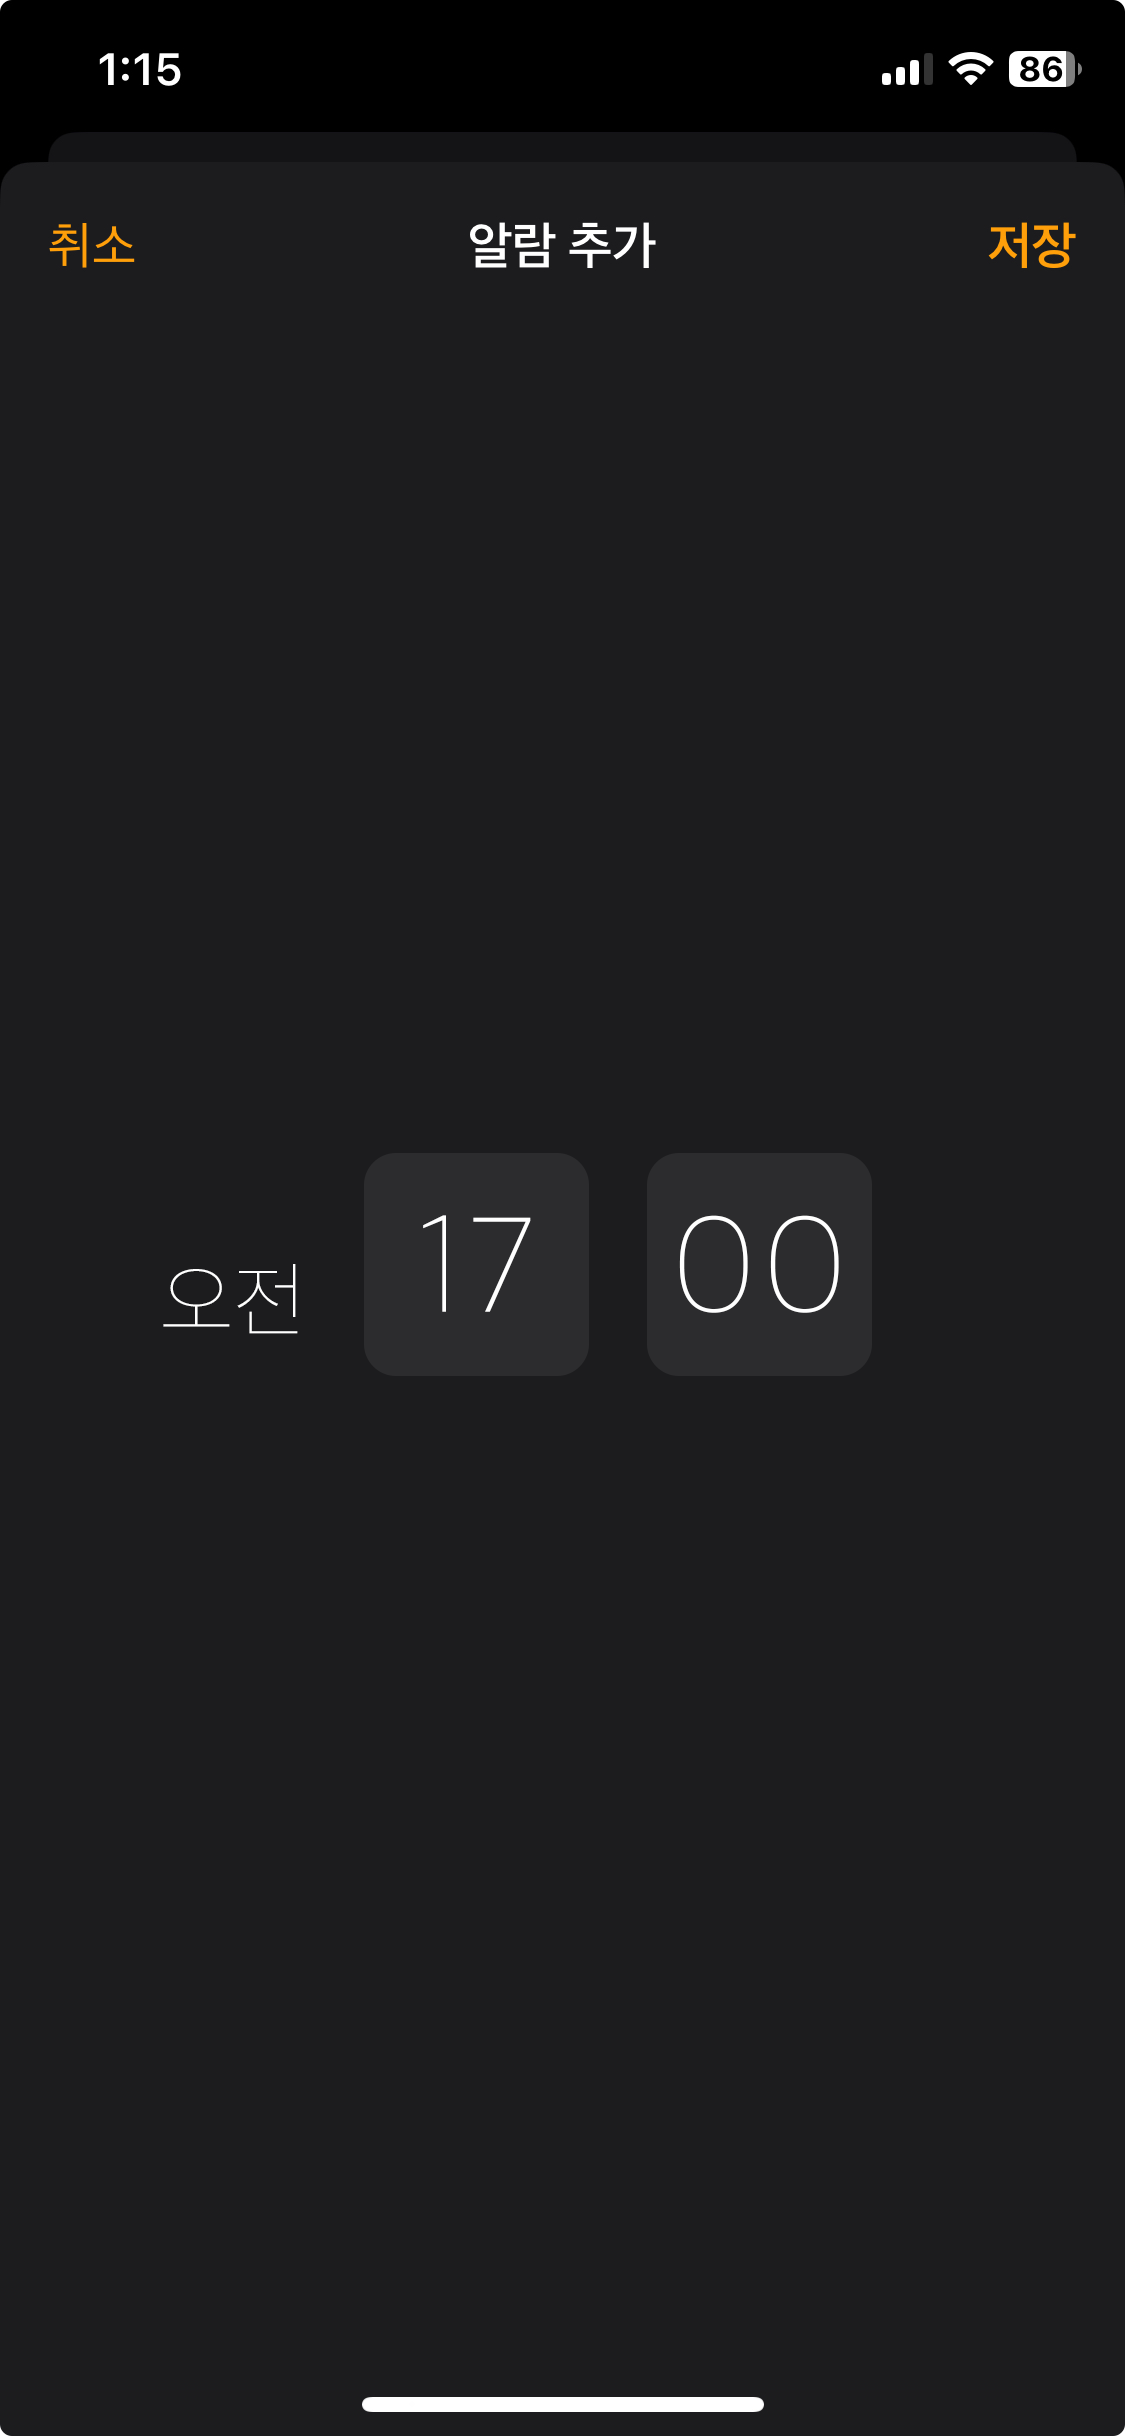
이화면까지 추가하게 되나보다.
기능명세
- 알람 등록 화면 Get route 설정
- 알람 등록 화면 구성(위젯 구성)
- 알람 등록 기능 개발
- 홈 화면 등록된 알람 리스트
- 홈 화면 알람 편집 이벤트로 편집화면 구성
- 알람 삭제 기능 개발
- 알람 선택 시 기존 알람 등록 화면 > 알람 편집 화면으로 변경
- 개별 알람에 활성화/비활성화 기능 적용
알람 등록 화면 Get route 설정
알람 등록 화면을 위해 라우팅과 화면을 생성해준다.
return  GetMaterialApp(
      title: 'Flutter Demo',
      theme: ThemeData(
        scaffoldBackgroundColor: Colors.black,
        textTheme: TextTheme(
          bodyMedium: TextStyle(color: Colors.white),
        ),
        useMaterial3: true,
      ),
      home: Home(),
    );
화면을 생성하고
import 'package:flutter/material.dart';
class AlarmWritePage extends StatelessWidget {
const AlarmWritePage({super.key});
Widget build(BuildContext context) {
return Scaffold(
body: Center(
child: Text('알람 등록'),
),
);
}
}라우팅을 해준다.
GestureDetector(
  onTap: () {
    Get.to(AlarmWritePage());
  },
  child: Padding(
    padding: const EdgeInsets.only(right: 15),
    child: Image.asset('assets/images/icon_add.png'),
  ),
)
화면이 넘어간 추가 화면에선 취소 누를시 뒤로가는 코드를 추가해준다
onTap: Get.back,알람 컨트롤러
import 'package:get/get.dart';

class AlarmController extends GetxController {
  int hour = 0;
  int minute = 0;

  void setHour(int hour) {
    this.hour = hour;
    update();
  }

  void setMinute(int minute) {
    this.minute = minute;
    update();
  }
}
알람을 추가하기위해 컨트롤러를 작성한다.
알람 추가 페이지에서 컨트롤러를 선언하고 값을 수정할때 컨트롤러 함수를 호출하게 코드를 작성한다
body: Center(
  child: Row(
    mainAxisAlignment: MainAxisAlignment.center,
    crossAxisAlignment: CrossAxisAlignment.end,
    children: [
      GetBuilder<AlarmController>(
        builder: (controller) {
          return Text(
            controller.hour < 12 ? '오전' : '오후',
            style: TextStyle(
              fontWeight: FontWeight.w100,
              fontSize: 28,
              color: Color(0xffababac),
            ),
          );
        },
      ),
      SizedBox(width: 15),
      SizedBox(
        width: 87,
        height: 87,
        child: Container(
          decoration: BoxDecoration(
            borderRadius: BorderRadius.circular(10),
            color: Color(0xff2c2c2e),
          ),
          child: Center(
            child: TextField(
              maxLength: 2,
              textAlign: TextAlign.center,
              keyboardType: TextInputType.number,
              inputFormatters: <TextInputFormatter>[
                FilteringTextInputFormatter.digitsOnly,
                RangeTextInputFormatter(1, 23),
              ],
              style: TextStyle(
                color: Colors.white,
                fontSize: 40,
                fontWeight: FontWeight.w100,
              ),
              decoration: InputDecoration(
                border: InputBorder.none,
                counterText: '',
              ),
              onChanged: (String hour) {
                if (hour == '') return;
                Get.find<AlarmController>().setHour(int.parse(hour));
              },
            ),
          ),
        ),
      ),
      SizedBox(width: 15),
      SizedBox(
        width: 87,
        height: 87,
        child: Container(
          decoration: BoxDecoration(
            borderRadius: BorderRadius.circular(10),
            color: Color(0xff2c2c2e),
          ),
          child: Center(
            child: TextField(
              maxLength: 2,
              textAlign: TextAlign.center,
              keyboardType: TextInputType.number,
              inputFormatters: <TextInputFormatter>[
                FilteringTextInputFormatter.digitsOnly,
                RangeTextInputFormatter(0, 59),
              ],
              style: TextStyle(
                color: Colors.white,
                fontSize: 40,
                fontWeight: FontWeight.w100,
              ),
              decoration: InputDecoration(
                border: InputBorder.none,
                counterText: '',
              ),
              onChanged: (String minute) {
                if (minute == '') return;
                Get.find<AlarmController>().setMinute(int.parse(minute));
              },
            ),
          ),
        ),
      ),
    ],
  ),
),
알람 세팅은 완료되엇고 저장시 알람이 저장이 되며 홈화면에서 보이게 해보겠다.
class AlarmModel {
  int hour;
  int minute;
  bool isOn;

  AlarmModel({
    required this.hour,
    required this.minute,
    this.isOn = true,
  });
}
알람으로 사용될 모델을 작성을 하고
List<AlarmModel> alarmList = [];우선 알람이 저장될 변수를 선언한다.
저장에 관한 함수를 작성하고 저장 버튼에 연결을 한다.
void saveAlarm(){
  alarmList.add(AlarmModel(hour: hour, minute: minute));
  update();
}

...

GestureDetector(
  onTap: () {
    Get.find<AlarmController>().saveAlarm();
    Get.back();
  },
  child: Padding(
    padding: const EdgeInsets.only(right: 15),
    child: Text(
      '저장',
      style: TextStyle(
        color: Color(0xffff9f0a),
        fontSize: 20,
      ),
    ),
  ),
)
때에따라 컨트롤러가 삭제가 되는 경우가 있다.
이는 getx에서 최적화를 자동으로 진행하기때문에 컨트롤러를 사용하지 않을경우 자동으로 제거를 한다. 때문에 유지를 하길 원한다면 해당 코드를 작성해야한다.
Get.put(AlarmController(), permanent: true);홈 화면 등록된 알람 리스트
컨트롤러에서 저장된 알람 리스트들을 메인에서 보여줘야한다.
GetBuilder<AlarmController>(builder: (controller) {
  if (controller.alarmList.isEmpty) {
    return Container(
      padding:
          const EdgeInsets.symmetric(horizontal: 10, vertical: 15),
      child: Text('등록된 알람이 없습니다.',
          style: TextStyle(fontSize: 18, color: Color(0xff8d8d93))),
    );
  }
  return Column(
    children: controller.alarmList.map((alarm) {
      return _etcAlarm(alarm);
    }).toList(),
  );
})
파라미터로 alarm을 보내주고 있기 때문에 받는쪽에서도 값에대한 처리를 진행해준다
Widget _etcAlarm(AlarmModel alarm) {
  return Container(
    padding: const EdgeInsets.symmetric(horizontal: 10, vertical: 15),
    decoration: BoxDecoration(
        border: Border(bottom: BorderSide(color: Color(0xff262629)))),
    child: Column(
      crossAxisAlignment: CrossAxisAlignment.stretch,
      children: [
        Row(
          mainAxisAlignment: MainAxisAlignment.spaceBetween,
          children: [
            Row(
              crossAxisAlignment: CrossAxisAlignment.end,
              children: [
                Text(alarm.hour < 12 ? '오전' : '오후',
                    style: TextStyle(fontSize: 25, color: Color(0xff8d8d93))),
                SizedBox(width: 10),
                Text(
                    '${alarm.hour.toString().padLeft(2, '0')}:${alarm.minute.toString().padLeft(2, '0')}',
                    style: TextStyle(
                        fontSize: 60,
                        color: Color(0xff8d8d93),
                        height: 1,
                        letterSpacing: -3))
              ],
            ),
            Switch(
              onChanged: (value) {
                print(value);
              },
              value: alarm.isOn,
            ),
          ],
        ),
        Text('알람', style: TextStyle(fontSize: 18, color: Color(0xff8d8d93))),
      ],
    ),
  );
}
홈 화면 알람 편집 이벤트로 편집화면 구성
메인 페이지에 있는 편집 버튼으로 알림 구성을 수정하는 코드를 작성해 보려한다.
bool isEditMode = false;
...
  void toggleEditMode() {
    isEditMode = !isEditMode;
    update();
  }
기능을 만들엇으니 터치이벤트에 내용을 작성해준다
leading: GestureDetector(
onTap: Get.find<AlarmController>().toggleEditMode,
child: Center(
  child: GetBuilder<AlarmController>(
    builder: (controller) {
      return Text(
        controller.isEditMode ? '완료' : '편집',
        style: TextStyle(
          color:
              controller.isEditMode ? Colors.red : Color(0xffff9f0a),
          fontSize: 20,
        ),
      );
    },
  ),
),
),
편집모드에 대한 위젯이 수정이 되어야하기때문에
_etcAlarm을 수정해준다 .
return Column(
  children: controller.alarmList.map((alarm) {
    return _etcAlarm(alarm, controller.isEditMode);
  }).toList(),
);
...
Widget _etcAlarm(AlarmModel alarm, bool isEditMode) {
  return Row(
    children: [
      if (isEditMode)
        Padding(
          padding: const EdgeInsets.symmetric(horizontal: 10),
          child: GestureDetector(
            onTap: () {},
            child: Icon(Icons.remove_circle, color: Colors.red),
          ),
        ),
      Expanded(
        child: Container(
          padding: const EdgeInsets.symmetric(horizontal: 10, vertical: 15),
          decoration: BoxDecoration(
              border: Border(bottom: BorderSide(color: Color(0xff262629)))),
          child: Column(
            crossAxisAlignment: CrossAxisAlignment.stretch,
            children: [
              Row(
                mainAxisAlignment: MainAxisAlignment.spaceBetween,
                children: [
                  Row(
                    crossAxisAlignment: CrossAxisAlignment.end,
                    children: [
                      Text(alarm.hour < 12 ? '오전' : '오후',
                          style: TextStyle(
                              fontSize: 25, color: Color(0xff8d8d93))),
                      SizedBox(width: 10),
                      Text(
                          '${alarm.hour.toString().padLeft(2, '0')}:${alarm.minute.toString().padLeft(2, '0')}',
                          style: TextStyle(
                              fontSize: 60,
                              color: Color(0xff8d8d93),
                              height: 1,
                              letterSpacing: -3))
                    ],
                  ),
                  Switch(
                    onChanged: (value) {
                      print(value);
                    },
                    value: alarm.isOn,
                  ),
                ],
              ),
              Text('알람',
                  style: TextStyle(fontSize: 18, color: Color(0xff8d8d93))),
            ],
          ),
        ),
      ),
    ],
  );
}
알람 삭제 기능 개발
알람 삭제 및 수정이 되려면 알람 고유의 값이 필요하다.
고유 id값을 정해주는 uuid 라이브러리를 사용한다.
바로 모델에 적용을 해보자
class AlarmModel {
  String id;
  int hour;
  int minute;
  bool isOn;

  AlarmModel({
    required this.hour,
    required this.minute,
    this.isOn = true,
  }) : id = Uuid().v4();
}
이제는 삭제 버튼누를시 컨트롤러의 함수를 호출하고 컨트롤러에서 알람을 삭제하고 화면을 다시 보여주는 코드를 작성해본다.
void removeAlarm(String id) {
  alarmList.removeWhere((element) => element.id == id);
  update();
}

...

GestureDetector(
        onTap: () {
          Get.find<AlarmController>().removeAlarm(alarm.id);
        },
        child: Icon(Icons.remove_circle, color: Colors.red),
      ),
알람 선택시 기존 알람 등록 화면 > 알람 편집 화면으로 변경
편집하기위해 아이템 터치시 페이지를 넘기는 코드를 작성한다.
GestureDetector(
  onTap: () {
    Get.to(AlarmWritePage(alarm: alarm));
  },
  child: Row(
화면은 기존 화면 그대로 재활용을 하기때문에 넘겨줄 값만 받는 코드를 추가해준다.
넘겨준 값이 있을때는 수정모드 아닐땐 추가 모드 로 작성을 해주며 수정모드일땐 시간을 값에 맞게 맞춰야한다.
class _AlarmWritePageState extends State<AlarmWritePage> {
final hourController = TextEditingController();
final minuteController = TextEditingController();
void initState() {
super.initState();
if (widget.alarm != null) {
hourController.text = widget.alarm!.hour.toString();
minuteController.text = widget.alarm!.minute.toString();
Get.find<AlarmController>().editAlarm(widget.alarm!);
}
}
...
title: Text(widget.alarm != null ? '알람 편집' : '알람 추가',
style: TextStyle(color: Colors.white)),화면단에선 코드를 작성했으니 컨트롤러에서 수정하는걸 진행한다.
 void editAlarm(AlarmModel alarm) {
   hour = alarm.hour;
   minute = alarm.minute;
 }
 ...
 void saveAlarm({String? id}) {
 if (id != null) {
   final newAlarmList = alarmList.map((element) {
     if (element.id == id) {
       element.hour = hour;
       element.minute = minute;
     }
     return element;
   }).toList();
   alarmList = newAlarmList;
 } else {
   alarmList.add(AlarmModel(hour: hour, minute: minute));
 }

 update();
}
개별 알람에 활성화/비활성화 기능 적용
이부분은 숙제로 남겨주었다 진행을 해보자.
개별알람이라하면 모델에서 생성한 값인 ison의 값을 스위치 컨트롤시 수정해주면 될것이다.
스위치클릭 -> 컨트롤러 함수호출 -> update
식으로 해보면될것같다.
 onChanged: (value) {
 Get.find<AlarmController>().setOn(alarm.id, value);
        },
개별 알람은 id로 체크하기때문에 같이 넘겨준다.
호출 함수에서도 이전 시간수정처럼 똑같이 진행해준다.
 void setOn(String id, bool isOn) {
    final newAlarmList = alarmList.map((element) {
      if (element.id == id) {
        element.isOn = isOn;
      }
      return element;
    }).toList();
    alarmList = newAlarmList;

    update();
  }
Getx활용 스레드 앱 만들기
알람앱에 이어 스레드 앱 만들기이다.
기능명세
- 스레드 등록 시 글은 반드시 입력되어야 한다.
- 이미지는 선택은 옵셔널이다.
- 스레드 등록이 완료되면 홈 화면에 등록된 피드를 확인할 수 있다.
- 피드 등록 시간이 timeago 라이브러리를 통해 표시한다.
- 피드 별 우측의 … 버튼을 통해 bottomsheet가 활성화되고 삭제 및 수정 버튼이 노출된다.
- 삭제 버튼을 통해 피드를 삭제할 수 있다.
- 수정 버튼을 누르면 수정 피드 페이지로 이동되어 수정이 가능하다
- 수정은 글과 이미지를 추가 및 삭제할 수 있다.
기능명세에 따른 할일목록
- 스레드 등록 페이지 route 설정
- 스레드 등록 화면 구성(위젯 구성)
- 이미지 선택 라이브러리를 통한 이미지 선택 개발
- 스레드 등록 기능 개발
- 홈 화면 저장된 피드 리스트
- timeago 라이브러리를 통한 피드 시간 표기
- 피드 우측 버튼을 통해 bottomSheet 활성화 및 삭제/수정 버튼 배치
- 피드 삭제 개발
큰기능만 얘기하고 getx세팅부분은 생략으로 진행하겟다.
스레드 등록 페이지 route 설정
스레드 작성 화면을 만들고 라우트에 연결해준다
import 'package:flutter/material.dart';
class ThreadWritePage extends StatelessWidget {
const ThreadWritePage({super.key});
Widget build(BuildContext context) {
return Scaffold(
appBar: AppBar(
title: Text('새로운 스레드'),
),
);
}
}
...
onTap: () {
Get.to(ThreadWritePage());
},새로운 페이지로 넘어가게 작성이 되었으면 새로운 페이지와 추가로 그 페이지에서의 피드 작성 화면을 분리해준다.
  body:
Padding(padding: const EdgeInsets.all(15.0), child: FeedWriteArea()),
새로운 소식이 있나요의 Text위젯 부분은 Textfield로 수정해준다.
import 'package:flutter/material.dart';
class FeedWriteArea extends StatelessWidget {
const FeedWriteArea({super.key});
Widget build(BuildContext context) {
return Column(
children: [
Row(
children: [
Image.asset(
'assets/images/profile_image.png',
width: 50,
),
SizedBox(width: 10),
Expanded(
child: Column(
crossAxisAlignment: CrossAxisAlignment.stretch,
children: [
Text(
'Kimsungduck',
style: TextStyle(
fontWeight: FontWeight.bold,
color: Color(0xff262626),
),
),
TextField(
cursorHeight: 16,
decoration: InputDecoration(
isDense: true,
hintText: '새로운 소식이 있나요?',
hintStyle: TextStyle(
color: Color(0xff9a9a9a),
fontSize: 14,
),
contentPadding: EdgeInsets.zero,
border: InputBorder.none,
),
),
],
),
)
],
),
SizedBox(height: 15),
Row(
mainAxisAlignment: MainAxisAlignment.start,
children: [
SizedBox(width: 60),
GestureDetector(
child: Image.asset('assets/images/photo_icon.png', width: 30)),
SizedBox(width: 10),
GestureDetector(
child: Image.asset('assets/images/photo_icon.png', width: 30)),
SizedBox(width: 10),
GestureDetector(
child: Image.asset('assets/images/gif_icon.png', width: 30)),
SizedBox(width: 10),
GestureDetector(
child: Image.asset('assets/images/mic_icon.png', width: 30)),
SizedBox(width: 10),
GestureDetector(
child: Image.asset('assets/images/align_icon.png', width: 30)),
],
)
],
);
}
}피드작성 부분에 이미지를 추가해주는 위젯도 추가해준다
Row(
  children: [
    SizedBox(width: 50),
    Expanded(
      child: SizedBox(
        height: 250,
        child: PageView(
          padEnds: false,
          controller: PageController(viewportFraction: 0.4),
          children: [
            Padding(
              padding: const EdgeInsets.all(4.0),
              child: ClipRRect(
                borderRadius: BorderRadius.circular(8),
                child: Stack(children: [
                  Container(
                    color: Colors.grey.shade200,
                  ),
                  Positioned(
                    right: 5,
                    top: 5,
                    child: Icon(Icons.close),
                  )
                ]),
              ),
            ),
          ],
        ),
      ),
    ),
  ],
),
이미지 선택 라이브러리를 통한 이미지 선택 개발
이미지를 추가하는 기능을 넣어보자.
라이브러리를 추가
https://pub.dev/packages/image_picker
추가하는 함수 작성 및 터치 이벤트에 연결
Future<void> getImagePickerData() async {
  final ImagePicker picker = ImagePicker();
  final List<XFile> images = await picker.pickMultiImage();
  print(images.length);
}
...
 onTap: () {
                getImagePickerData();
              },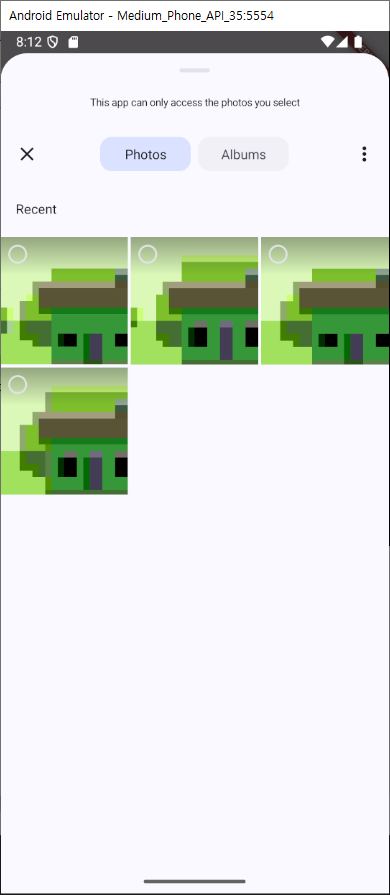
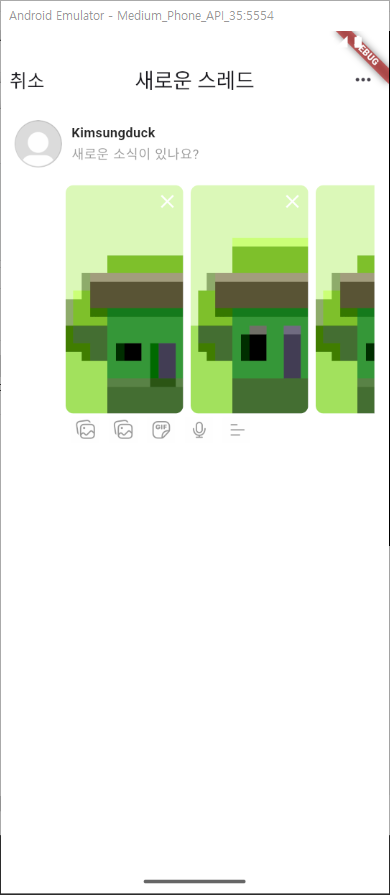
잘 올라가는 모습이다.
스레드 등록 기능 개발
이제 이미지를 포함한 스레드 등록 기능을 개발해보자
컨트롤러 생성
class ThreadFeedWriteController extends GetxController {
  String contents = '';
  List<XFile>? selectedImages;

  void setContent(String value) {
    contents = value;
    update();
  }

  void setSelectedImages(List<XFile>? value) {
    selectedImages = value;
    update();
  }
}
생성시에 필요한 값들을 입력하는곳, 글과 사진 쪽에 추가를 해주자
Future<void> getImagePickerData() async {
  final ImagePicker picker = ImagePicker();
  final List<XFile> images = await picker.pickMultiImage();
  Get.find<ThreadFeedWriteController>().setSelectedImages(images);
}
...

TextField(
  cursorHeight: 16,
  decoration: InputDecoration(
    isDense: true,
    hintText: '새로운 소식이 있나요?',
    hintStyle: TextStyle(
      color: Color(0xff9a9a9a),
      fontSize: 14,
    ),
    contentPadding: EdgeInsets.zero,
    border: InputBorder.none,
  ),
  onChanged: (value) {
    Get.find<ThreadFeedWriteController>()
        .setContent(value);
  },
),
이제 화면을 넘어갈때 컨트롤러를 연결해줌으로써 사용가능하게 만들어주자
 onTap: () {
          Get.to(ThreadWritePage(), binding: BindingsBuilder(() {
            Get.put(ThreadFeedWriteController());
          }));
        },
사진을 선택했을때 바로 보이도록 화면 수정
Row(
  children: [
    SizedBox(width: 50),
    Expanded(child: GetBuilder<ThreadFeedWriteController>(
      builder: (controller) {
        if (controller.selectedImages == null ||
            (controller.selectedImages?.isEmpty ?? true)) {
          return Container();
        }
        return SizedBox(
          height: 250,
          child: PageView(
            padEnds: false,
            pageSnapping: false,
            controller: PageController(viewportFraction: 0.4),
            children: List.generate(
              controller.selectedImages?.length ?? 0,
              (index) => Padding(
                padding: const EdgeInsets.all(4.0),
                child: ClipRRect(
                  borderRadius: BorderRadius.circular(8),
                  child: Stack(children: [
                    Image.file(
                      File(controller.selectedImages![index].path),
                    ),
                    Positioned(
                      right: 5,
                      top: 5,
                      child: Icon(Icons.close),
                    )
                  ]),
                ),
              ),
            ).toList(),
          ),
        );
      },
    )),
  ],
),
등록버튼 배치
쓰레드앱은 등록버튼이 아래에 있기때문에 바텀 네비게이션을 추가
bottomNavigationBar: Container(
        height: 70,
        padding: EdgeInsets.only(
            left: 15, right: 15, bottom: MediaQuery.of(context).padding.bottom),
        child: Row(
          children: [
            Expanded(
              child: Text(
                '누구에게나 답글 및 인용 허용',
                style: TextStyle(color: Color(0xff9a9a9a)),
              ),
            ),
            Container(
              padding: const EdgeInsets.symmetric(vertical: 10, horizontal: 15),
              decoration: BoxDecoration(
                borderRadius: BorderRadius.circular(50),
                color: Color(0xff9a9a9a),
              ),
              child: Text('개시'),
            )
          ],
        ),
      ),
게시 버튼은 입력된 내용이 있어야 활성화가 되어야 하기때문에 컨트롤러의 값에 접근해 이를 체크해준다.
GetBuilder<ThreadFeedWriteController>(builder: (controller) {
  return GestureDetector(
    onTap: () {
      if (controller.contents != '') {
        // 저장 이벤트 처리
      }
    },
    child: Container(
      padding:
          const EdgeInsets.symmetric(vertical: 10, horizontal: 15),
      decoration: BoxDecoration(
        borderRadius: BorderRadius.circular(50),
        color: controller.contents != ''
            ? Colors.black
            : Color(0xff9a9a9a),
      ),
      child: Text('게시'),
    ),
  );
})
저장 기능
피드 저장을 위한 피드 관련 모델을 작성해준다.
import 'dart:io';
import 'package:uuid/uuid.dart';

class FeedModel {
  String id;
  String contents;
  List<File> images;
  DateTime createdAt;

  FeedModel({
    required this.contents,
    required this.images,
  })  : id = Uuid().v4(),
        createdAt = DateTime.now();
}
uuid까지 라이브러리를 추가해주고 버튼관련 이벤트를 작성
void save() {
  Get.back(
    result: FeedModel(
      contents: contents,
      images: selectedImages?.map<File>((e) => File(e.path)).toList() ?? [],
    ),
  );
}
컨트롤러에서 저장을 하는 함수 작성
후에 게시 버튼에 이 함수를 연결
GetBuilder<ThreadFeedWriteController>(builder: (controller) {
	return GestureDetector(
	  onTap: () {
	    if (controller.contents != '') {
	      Get.find<ThreadFeedWriteController>().save();
	    }
	  },
	  child: Container(
	    padding:
	        const EdgeInsets.symmetric(vertical: 10, horizontal: 15),
	    decoration: BoxDecoration(
	      borderRadius: BorderRadius.circular(50),
	      color: controller.contents != ''
	          ? Colors.black
	          : Color(0xff9a9a9a),
	    ),
	    child: Text('게시'),
	  ),
	);
})
게시후 홈화면에서 관련 값을 체킹하면 완료
var result = await Get.to<FeedModel?>(ThreadWritePage(),
binding: BindingsBuilder(() {
Get.put(ThreadFeedWriteController());
}));
if (result != null) {
print(result.id);
print(result.contents);
print(result.images.length);
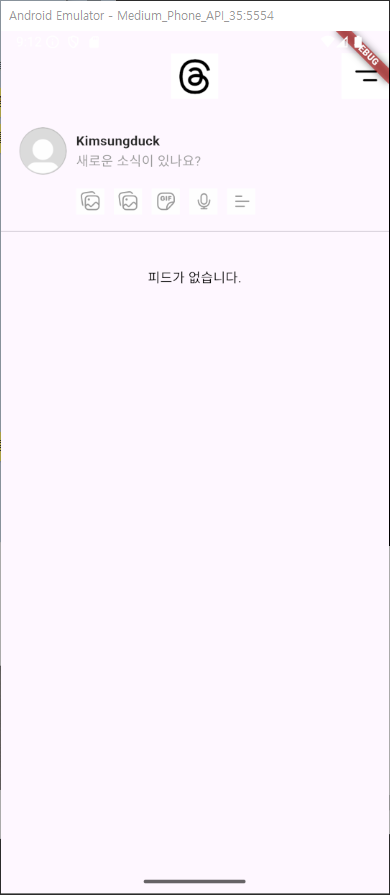
}홈 화면 저장된 피드 리스트
피드를 관리하기위한 피드 컨트롤러를 작성을 해보자.
import 'package:flutter_application_6/feed_model.dart';
import 'package:get/get.dart';

class HomeFeedListcontroller extends GetxController {
  List<FeedModel> feedList = [];

  void addFeed(FeedModel feed) {
    feedList.add(feed);
    update();
  }
}
...
Get.put(HomeFeedListcontroller());
리스트길이에 맞게 홈화면 변경을 해보자.
Widget build(BuildContext context) {
return Scaffold(
body: SafeArea(
child: ListView(
children: [
_header(),
SizedBox(height: 20),
Padding(
padding: const EdgeInsets.symmetric(horizontal: 20, vertical: 10),
child: _quickFeedWriteView(),
),
Divider(),
GetBuilder<HomeFeedListcontroller>(
builder: (controller) {
if (controller.feedList.isEmpty) {
return Center(
child: Padding(
padding: const EdgeInsets.all(30.0),
child: Text(
'피드가 없습니다.',
style: TextStyle(color: Colors.black),
),
),
);
}
return Padding(
padding:
const EdgeInsets.symmetric(horizontal: 20, vertical: 10),
child: _singleFeed(),
);
},
),
],
),
),
);
}
추가 관련 함수도 연결해준다.
Widget _quickFeedWriteView() {
  return GestureDetector(
    onTap: () async {
      var result = await Get.to<FeedModel?>(ThreadWritePage(),
          binding: BindingsBuilder(() {
        Get.put(ThreadFeedWriteController());
      }));
      if (result != null) {
        Get.find<HomeFeedListcontroller>().addFeed(result);
      }
    },
피드리스트에 맞게 화면도 추가해준다.
return Padding(
padding: const EdgeInsets.symmetric(horizontal: 15),
child: Column(
children: List.generate(
controller.feedList.length,
(index) => _singleFeed(controller.feedList[index]),
)),
);
...
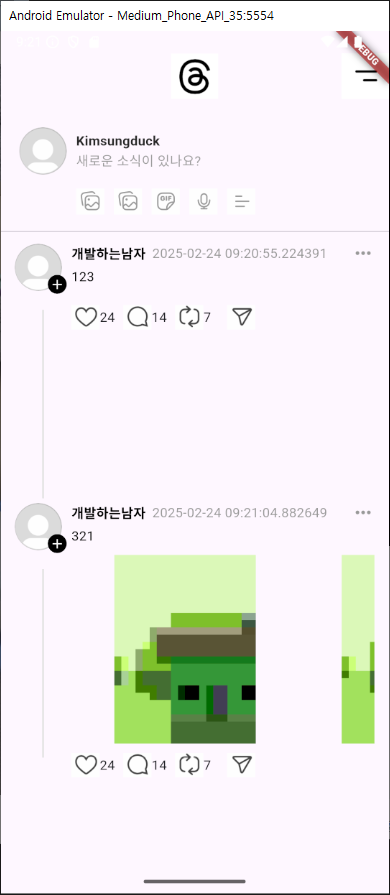
Widget _singleFeed(FeedModel model) {
return Row(
crossAxisAlignment: CrossAxisAlignment.start,
children: [
_leftProfileArea(),
Expanded(
child: _contentArea(model),
),
],
);
}
...
Widget _contentArea(FeedModel model) {
return Column(
crossAxisAlignment: CrossAxisAlignment.stretch,
children: [
SizedBox(
height: 30,
child: Row(
mainAxisAlignment: MainAxisAlignment.spaceBetween,
children: [
Row(
children: [
Text(
'개발하는남자',
style: TextStyle(
color: Colors.black,
fontSize: 14,
fontWeight: FontWeight.bold,
),
),
SizedBox(width: 7),
Text(
model.createdAt.toString(),
style: TextStyle(
color: Color(0xff999999),
fontSize: 14,
),
)
],
),
GestureDetector(
onTap: () {},
child: Icon(
Icons.more_horiz,
color: Color(0xff999999),
),
)
],
),
),
Text(
model.contents,
style: TextStyle(color: Colors.black),
),
SizedBox(height: 10),
if (model.images.isNotEmpty)
SizedBox(
height: 200,
child: PageView(
padEnds: false,
controller: PageController(viewportFraction: 0.75),
children: [
...model.images.map<Widget>(
(e) => Image.file(e),
)
]),
),
SizedBox(height: 10),
Row(
children: [
GestureDetector(
onTap: () {},
child: SizedBox(
width: 55,
child: Row(
children: [
Image.asset(
'assets/images/icon_like.png',
width: 30,
),
Text('24'),
],
),
),
),
GestureDetector(
onTap: () {},
child: SizedBox(
width: 55,
child: Row(
children: [
Image.asset(
'assets/images/icon_message.png',
width: 30,
),
Text('14'),
],
),
),
),
GestureDetector(
onTap: () {},
child: SizedBox(
width: 55,
child: Row(
children: [
Image.asset(
'assets/images/icon_share.png',
width: 30,
),
Text('7'),
],
),
),
),
GestureDetector(
onTap: () {},
child: Image.asset(
'assets/images/icon_send.png',
width: 30,
),
),
],
),
],
);
}
잘되긴하지만 조금씩 수정할 부분을 수정해보자
첫번째로 불필요한 여백
Widget _leftProfileArea() {
  return Column(
    children: [
      SizedBox(
        width: 60,
        height: 60,
        child: Stack(
          children: [
            Align(
              alignment: Alignment.centerLeft,
              child: ClipRRect(
                borderRadius: BorderRadius.circular(50),
                child: Image.network(
                  'https://yt3.googleusercontent.com/XmYJ7m6JFlhA5BNLnQdnlew7g1E6YGSE4p8hl8ow_pOI6-cZkGdjo38oJhBG7NPrj9eawodgqA=s900-c-k-c0x00ffffff-no-rj',
                  width: 50,
                ),
              ),
            ),
            Positioned(
                right: 5,
                bottom: 2,
                child: SizedBox(
                  width: 20,
                  height: 20,
                  child: ClipRRect(
                    borderRadius: BorderRadius.circular(20),
                    child: Container(
                      decoration: BoxDecoration(color: Colors.black),
                      child: Icon(
                        Icons.add,
                        color: Colors.white,
                        size: 17,
                      ),
                    ),
                  ),
                ))
          ],
        ),
      ),
    ],
  );
}
두번째로 이미지 보이는 방식
이건 이미지 뷰 위젯을 생성해주자
import 'dart:io';
import 'package:flutter/material.dart';
class ImageViewWidget extends StatelessWidget {
final List<File> images;
const ImageViewWidget({super.key, required this.images});
Widget build(BuildContext context) {
return SizedBox(
height: 250,
child: PageView(
padEnds: false,
pageSnapping: false,
controller: PageController(viewportFraction: 0.4),
children: List.generate(
images.length ?? 0,
(index) => Padding(
padding: const EdgeInsets.all(4.0),
child: ClipRRect(
borderRadius: BorderRadius.circular(8),
child: Stack(children: [
Positioned(
left: 0,
right: 0,
top: 0,
bottom: 0,
child: Image.file(
images[index],
fit: BoxFit.cover,
),
),
Positioned(
right: 5,
top: 5,
child: Icon(
Icons.close,
color: Colors.white,
),
)
]),
),
),
).toList(),
),
);
}
}그외 관련 코드들을 정리
thread_write_page 에서 사용한 이미지뷰를 수정하고
Expanded(child: GetBuilder<ThreadFeedWriteController>(
  builder: (controller) {
    if (controller.selectedImages == null ||
        (controller.selectedImages?.isEmpty ?? true)) {
      return Container();
    }
    return ImageViewWidget(
      images: controller.selectedImages
              ?.map<File>((e) => File(e.path))
              .toList() ??
          [],
    );
  },
)),
home에서 호출하는 코드도 수정해준다
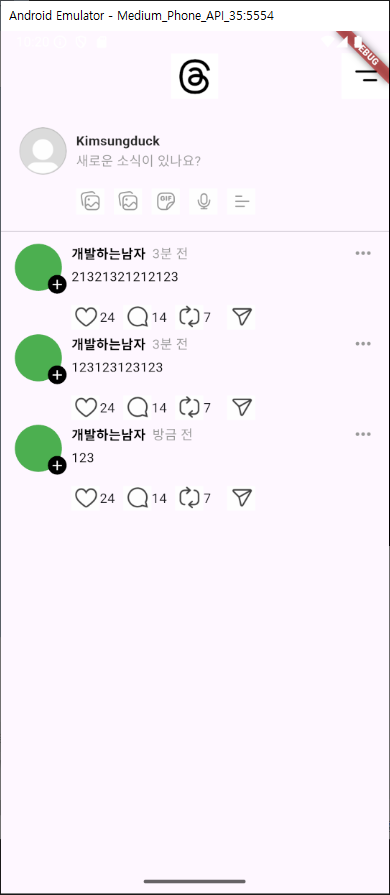
if (model.images.isNotEmpty) ImageViewWidget(images: model.images),timeago라이브러리를 통한 피드 시간 표기
피드관련 코드는 모두 작성이 되엇고 시간이 다른점을 좀 수정해보겠다.
timeago 라이브러리를 사용
https://pub.dev/packages/timeago
메인에서 로컬세팅을 해주고
timeago.setLocaleMessages('ko', timeago.KoMessages());값을 사용하면 쉽게 시간에대한 내용을 작성할수있다.
Text(
  timeago.format(
      DateTime.now().subtract(
          DateTime.now().difference(model.createdAt)),
      locale: 'ko'),
  style: TextStyle(
    color: Color(0xff999999),
    fontSize: 14,
  ),
)
피드 우측 버튼을 통해 bottomSheet 활성화 및 삭제/수정 버튼 배치
피드 수정 삭제를 진행해 보겠다.
관련 바텀 시트를 호출하는 코드 작성
GestureDetector(
  onTap: () {
    _showCupertinoActionSheet();
  },
  child: Icon(
    Icons.more_horiz,
    color: Color(0xff999999),
  ),
)
void _showCupertinoActionSheet() {
showCupertinoModalPopup(
context: Get.context!,
builder: (BuildContext context) => CupertinoActionSheet(
actions: <CupertinoActionSheetAction>[
CupertinoActionSheetAction(
onPressed: () {
Navigator.pop(context);
print('Edit Pressed');
},
child: Text('수정'),
),
CupertinoActionSheetAction(
onPressed: () {
Navigator.pop(context);
print('Delete Pressed');
},
isDestructiveAction: true,
child: Text('삭제'),
),
],
cancelButton: CupertinoActionSheetAction(
onPressed: () {
Navigator.pop(context);
},
child: Text('취소'),
),
),
);
}피드 삭제 개발
컨트롤러에 함수 작성
void removeFeed(String feedId) {
  feedList.removeWhere((feed) => feed.id == feedId);
  update();
}
액션시트에 함수 연결
void _showCupertinoActionSheet(String feedId) {
  showCupertinoModalPopup(
    context: Get.context!,
    builder: (BuildContext context) => CupertinoActionSheet(
      actions: <CupertinoActionSheetAction>[
        CupertinoActionSheetAction(
          onPressed: () {
            Navigator.pop(context);
            print('Edit Pressed');
          },
          child: Text('수정'),
        ),
        CupertinoActionSheetAction(
          onPressed: () {
            Navigator.pop(context);
            Get.find<HomeFeedListcontroller>().removeFeed(feedId);
          },
          isDestructiveAction: true,
          child: Text('삭제'),
        ),
      ],
      cancelButton: CupertinoActionSheetAction(
        onPressed: () {
          Navigator.pop(context);
        },
        child: Text('취소'),
      ),
    ),
  );
}
마지막으로 함수에 id값 을 넘겨주면 쓰레드 어플 완료다.
 GestureDetector(
  onTap: () {
    _showCupertinoActionSheet(model.id);
  },
  child: Icon(
    Icons.more_horiz,
    color: Color(0xff999999),
  ),
)
수정버튼
과제로 나오던 수정버튼이다 진행을 해보겠다.
기존 작성화면에 값을 보내 컨트롤하면 될것 같다.
CupertinoActionSheetAction(
            onPressed: () async {
              Navigator.pop(context);
              var feedModel = Get.find<HomeFeedListcontroller>()
                  .feedList
                  .firstWhere((element) => element.id == feedId);
              var result = await Get.to<FeedModel?>(
                  ThreadWritePage(feedModel: feedModel),
                  binding: BindingsBuilder(() {
                Get.put(ThreadFeedWriteController());
              }));
              Get.find<HomeFeedListcontroller>().updateFeed(result!);
            },
            child: Text('수정'),
          ),
수정버튼 클릭시 feedmodel을 넘겨준다.
ThreadWritePage에선 앱바 타이틀 변경도 해주고 아래 작성에도 넘겨주게 FeedWriteArea에도 피드를 넘겨준다
  title: feedModel == null
            ? Text(
                '새로운 스레드',
                style: TextStyle(
                  fontSize: 20,
                ),
              )
            : Text(
                '스레드 수정',
                style: TextStyle(
                  fontSize: 20,
                ),
              ),
...

Padding(
          padding: const EdgeInsets.all(15.0),
          child: FeedWriteArea(feedModel: feedModel)),
FeedWriteArea에선 들고온 기존값들을 매칭해준다.
final TextEditingController _textEditingController class _FeedWriteAreaState extends State<FeedWriteArea> {
final TextEditingController _textEditingController = TextEditingController();
void initState() {
super.initState();
if (widget.feedModel != null) {
_textEditingController.text = widget.feedModel!.contents;
Get.find<ThreadFeedWriteController>().selectedImages =
widget.feedModel!.images.map((e) => XFile(e.path)).toList();
Get.find<ThreadFeedWriteController>()
.setContent(widget.feedModel!.contents);
}
}
...
controller: _textEditingController,
게시를 할때 기존에 값이있으면 업데이트 없으면 세이브 하는 코드를 짜준다
  onTap: () {
                  if (controller.contents != '') {
                    feedModel == null
                        ? Get.find<ThreadFeedWriteController>().save()
                        : Get.find<ThreadFeedWriteController>()
                            .overWrite(feedModel!);
                  }
                },
마지막으로 그와 관련된 컨트롤러 함수 작성
 void overWrite(FeedModel feedModel) {
    feedModel.contents = contents;
    feedModel.images =
        selectedImages?.map<File>((e) => File(e.path)).toList() ?? [];
    Get.back(result: feedModel);
  }