들어가기 전
-
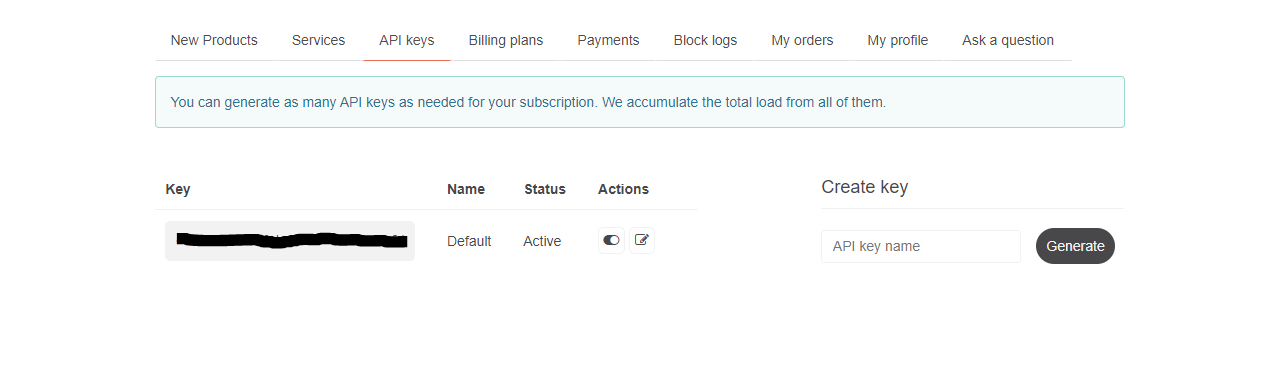
openweathermap이 링크로 들어가 회원가입 후, 사용할 API key 획득
=> 로그인 후 페이지 상단에 자신의 이름을 클릭하고 'My API keys'를 클릭

아래 그림과 같은 페이지가 나오고 검은색으로 칠해진 부분에서 사용할 API key 확인
-
자신이 사용할 API를 고르고 해당 URL 가져오기
=> 구현할 기능은 검색을 이용하여 특정 지역의 현재 날씨 정보 불러오기
상단의 API를 클릭하여 아래 페이지로 이동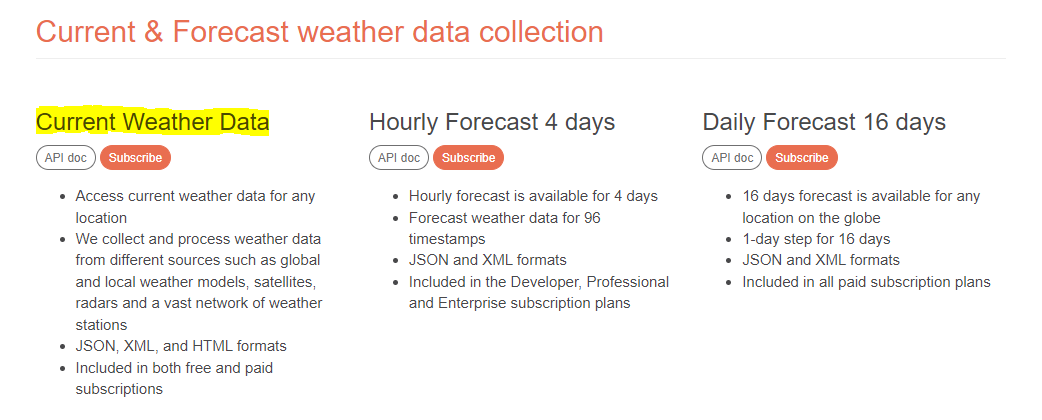
현재 날씨 데이터 제가 형광색으로 칠한 API를 사용합니다.
해당 API doc으로 들어가면 사용 방법과 여러 가지 정보를 알 수 있습니다.
- 사용할 API
https://api.openweathermap.org/data/2.5/weather?q={city name}&appid={API key}
JSON 형식 API 응답 필드
- 비 혹은 눈이 내리는 날씨가 되면 응답 필드에 추가적으로 데이터가 들어감

HTML를 사용하여 기본 구조 제작
- input 태그를 사용하여 사용자가 검색 할 수 있게 구현
- JSON 형식 API 응답 필드를 확인하여 같이 묶여 있는 정보의 경우 weatherData로 처리
<!DOCTYPE html>
<html lang="en">

<head>
  <meta charset="UTF-8">
  <meta name="viewport" content="width=device-width, initial-scale=1.0">
  <title>날씨앱</title>
  <link rel="stylesheet" href="style.css">
  <script src="https://kit.fontawesome.com/dc49441f6a.js" crossorigin="anonymous"></script>
</head>

<body>
  <div class="weather-container">
    <div class="weather-inner">
      <div class="searchBar">
        <input type="text" id="cityName" placeholder="도시 이름을 입력하세요">
        <button onclick="search()">검색</button>
      </div>
      <div id="area"></div>
      <div id="description"></div>
      <div id="clouds"></div>
      <div id="wind"></div>
      <div weatherData id="feels_like"></div>
      <div weatherData id="humidity"></div>
      <div weatherData id="pressure"></div>
      <div weatherData id="temp"></div>
      <div weatherData id="temp_max"></div>
      <div weatherData id="temp_min"></div>
      <div><img id="weatherIcon" alt="현재 날씨 아이콘"></div>
    </div>
  </div>
</body>
<script src="Weather.js"></script>
CSS
body {
  margin: 0;
  padding: 0;
  background-color: #e5e5f7;
  opacity: 0.8;
  background-size: 10px 10px;
}

.weather-container {
  display: flex;
  flex-direction: column;
  justify-content: center;
  align-items: center;
  min-height: 100vh;
}

.weather-inner {
  display: flex;
  flex-direction: column;
  justify-content: center;
  align-items: center;
  background-color: #78bddd;
  opacity: 0.8;
  border: 1px solid gray;
  border-radius: 8px;
  padding: 14px;
}

.weather-inner > div {
  margin-bottom: 7px;
}
JavaScript로 기능 구현
Weather.js
// OpenWeatherMap API에 필요한 정보
const API_KEY = '';
const BASE_URL = 'http://api.openweathermap.org/data/2.5/weather';

// 화면에 표시될 날씨 상태의 이름
const stateName = [
  '현재 온도',
  '체감 온도',
  '최저 기온',
  '최고 기온',
  '기압',
  '습도',
];

const clouds = document.getElementById('clouds');
const wind = document.getElementById('wind');
const description = document.getElementById('description');
const img = document.getElementById('weatherIcon');
const area = document.getElementById('area');
const weatherData = document.querySelectorAll('[weatherData]');

// API로부터 날씨 데이터를 받아와 각 요소에 해당하는 데이터를 할당하고 표시
async function getWeather(url) {
  await fetch(url)
    .then((response) => response.json()) // 가져온 데이터를 json 형태로 변환
    .then((data) => {
      const weahterMain = data.main;
      const stateData = Object.values(weahterMain);
      weatherData.forEach((item, idx) => {
        item.innerHTML = `${stateName[idx]}: ${stateData[idx]}`;
      });

      area.innerText = `검색 지역: ${data.name}`;
      clouds.innerText = `흐림 정도: ${data.clouds.all}%`;
      wind.innerText = `풍속: ${data.wind.speed}m/s`;
      description.innerText = `전체적인 날씨: ${data.weather[0].description}`;

      // 날씨 아이콘 이미지의 url
      const url = `http://openweathermap.org/img/wn/${data.weather[0].icon}.png`;
      img.src = url;
    });
}

// 사용자가 검색한 도시을 추가하기 위
function getWeatherUrl(city, key = API_KEY) {
// 끝에 &lang=kr를 사용하여 응답받은 데이터 일부 번역
  return `${BASE_URL}?q=${city}&appid=${key}&units=metric&lang=kr`;
}

// 웹 페이지가 로드될 때 실행되는 함수, 기본값 서울
window.onload = function () {
  getWeather(getWeatherUrl('seoul'));
};

// 사용자가 입력한 도시 이름을 이용해 해당 도시의 날씨 정보를 가져옴
function search() {
  const cityName = document.querySelector('#cityName').value;
  getWeather(getWeatherUrl(cityName));
  document.querySelector('#cityName').value = null;
}

const input = document.querySelector('#cityName');
input.addEventListener('keydown', function (event) {
  if (event.key === 'Enter') { // 사용자가 엔터 키를 누르면,
    event.preventDefault();
    search(); // search 함수를 호출
  }
});
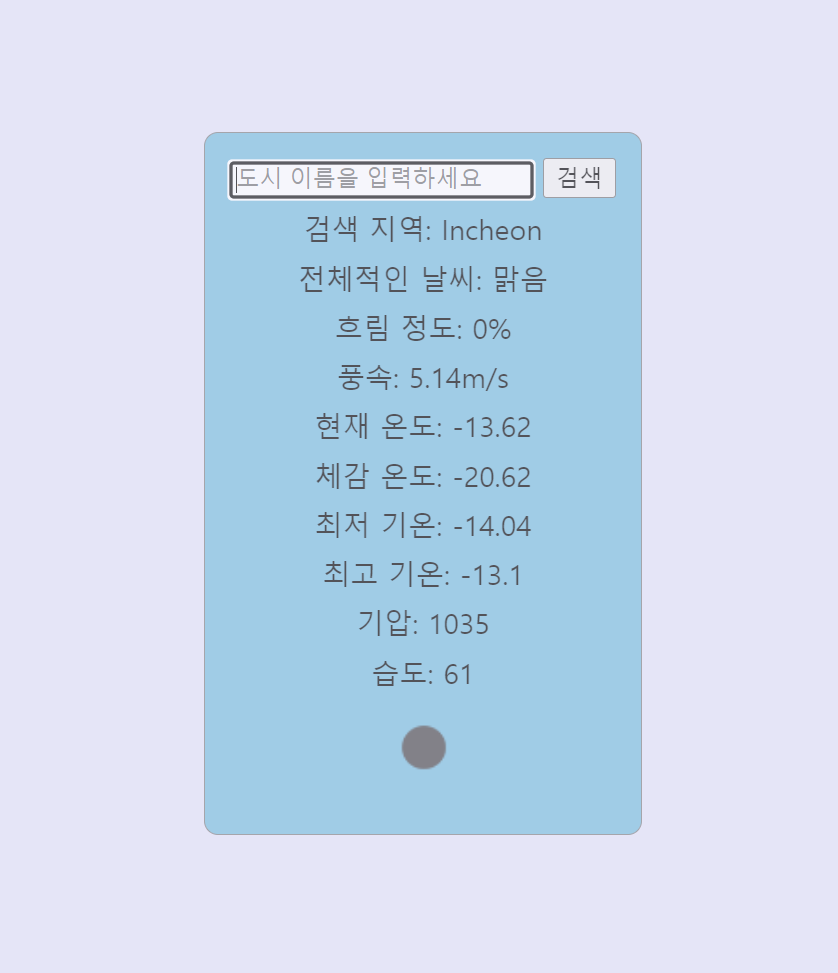
완성된 모습
- 외국의 API라서 번역이 완전하지 않음
서울 => 서울특별시, 부산 => 부산광역시 처럼 정식 명칭 사용
마치며
이번 글을 작성하기 위해 openweathermap의 API 문서를 자세히 살펴보았습니다. 생각보다 다양하고 유용한 기능들이 있었습니다. 구현해보고 싶은 생각이 들어 조만간 React를 사용하여 더 많은 기능을 구현해보려고 합니다.

걱정보다 생각을 하고 싶은 사람