
1. 모달 컴포넌트 등록
input box에 아무 것도 입력되지 않았을 때 알림을 띄우도록 한다.
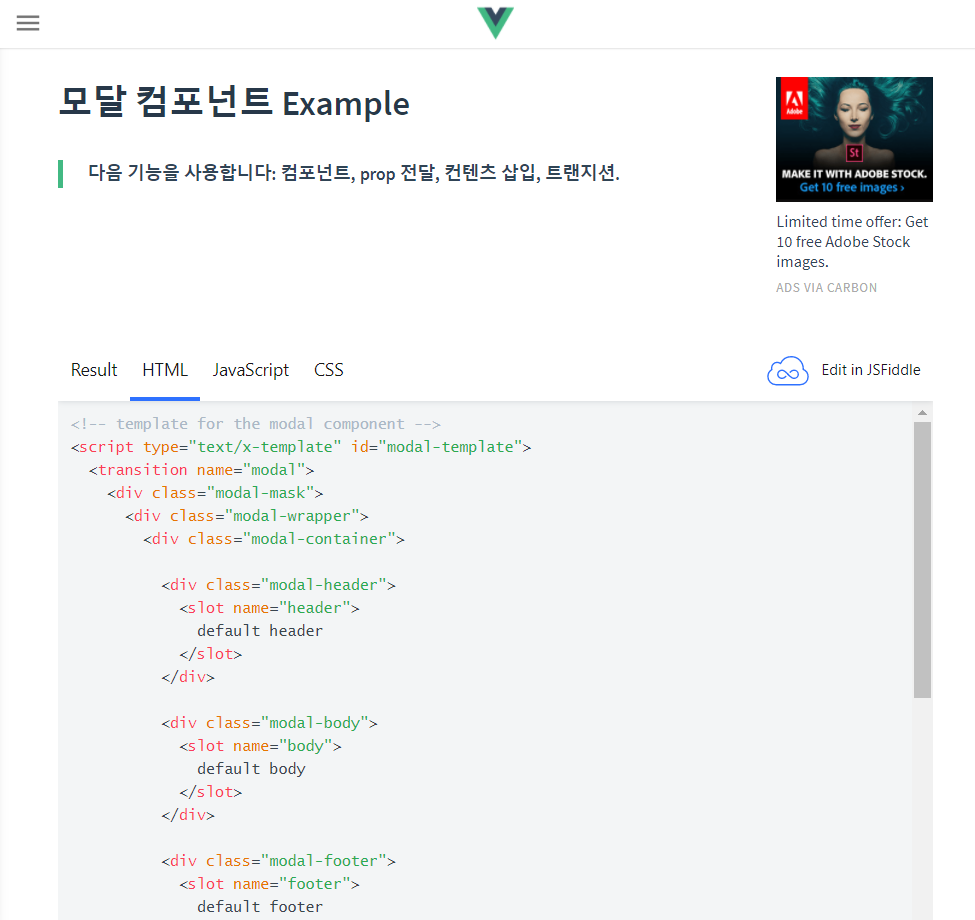
vue공식 사이트에서 모달 관련 코드를 긁어올 것이다.
/src/components/common 폴더 생성
Modal.vue파일 생성
vue + Tab해서 틀 만들고 사이트에서 script태그 부분은 안쓸거니까 지운다.
template태그와 style태그는 각각 HTML과 CSS 코드를 긁어서 붙여넣는다.
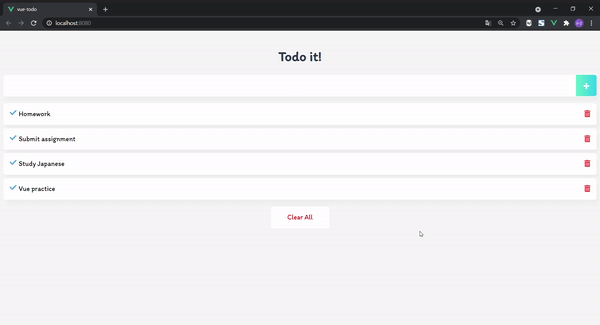
TodoInput.vue
<template>
  ...
      <Modal v-if="showModal" @close="showModal = false">
      <!--
       you can use custom content here to overwrite
        default content
     -->
      	<h3 slot="header">custom header</h3>
      </Modal>
  </div>
</template>

<script>
import Modal from './common/Modal'

...

export default {
  data: function() {
    return {
      newTodoItem: '',
      showModal: false
    }
  },
  methods: {
    addTodo: function() {
      ...},
    clearInput: function() {
      ...},
  components: {
    Modal: Modal
  }
}
</script>
2. 모달 컴포넌트의 slot
1)
header 관련 코드가 기본적으로 복붙되니까, 변경하고 확인해보자.
<template>
...
      <Modal v-if="showModal" @close="showModal = false">
        <h3 slot="header">
          경고!
        </h3>
      </Modal>
</template>

<script>
import Modal from './common/Modal'

export default {
  data: function() {
    return {
      newTodoItem: '',
      showModal: false
    }
  },
  methods: {
    addTodo: function() {
      if (this.newTodoItem !== '') {
        this.$emit('addTodoItem', this.newTodoItem)
        this.clearInput();
      } else {
        this.showModal = !this.showModal;
      }
    },
...

</script>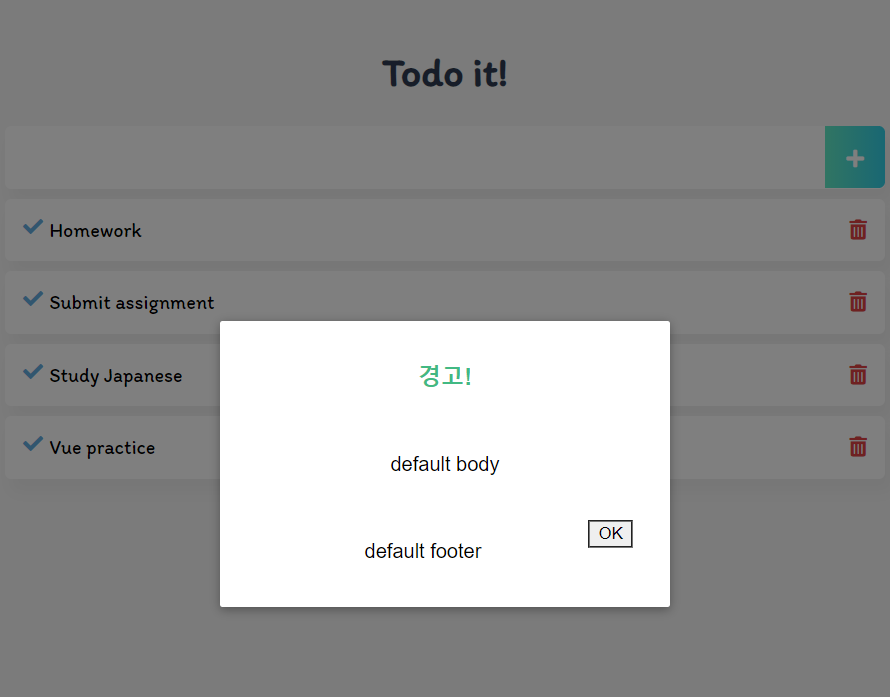
아하! slot 에 적힌 것에 어떤 말을 적냐에 따라 문구가 바뀔 것을 예상할 수 있다.
2)
같은 방식으로 body와 footer를 변경해본다.
TodoInput.vue
<template>
  <div class="inputBox shadow">
      <input type="text" v-model="newTodoItem" v-on:keyup.enter="addTodo">
      <!-- <button v-on:click="addTodo">add</button> -->
      <span class="addContainer" v-on:click="addTodo">
        <!--<i class="fas fa-plus-square addBtn"></i>-->
        <i class="fas fa-plus addBtn" aria-hidden="true"></i>
      </span>
      <Modal v-if="showModal" @close="showModal = false">
        <h3 slot="header">
          Caution!
        </h3>
        <h3 slot="body">
          Empty strings are not allowed.
        </h3>
        <h3 slot="footer">
          © genie
        </h3>
      </Modal>
  </div>
</template>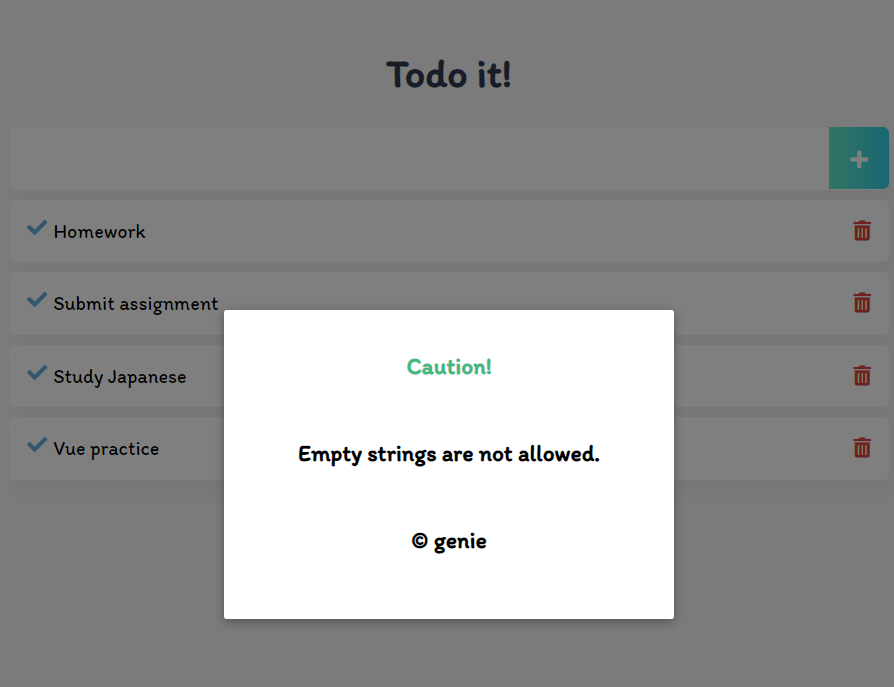
3)
X 이미지를 하나 넣고 클릭 시 Modal 창이 닫히도록 한다.
fontawesome에서 times를 검색해서 이미지를 찾아서 넣은 다음, 클릭이벤트를 준다.

TodoInput.vue
<h3 slot="header">
    Caution!
    <i class="fas fa-times closeModalBtn" @click="showModal = false"></i>
</h3>
스타일(색상)도 변경한다.
.closeModalBtn {
  color: #42b983;
}.gif)
확인해보면 클릭 시 부드럽게 창이 닫히는 것을 확인할 수 있다.
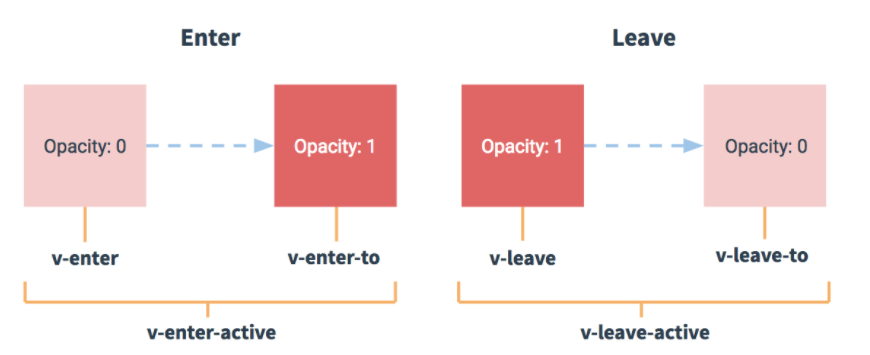
3. 트랜지션 소개
List가 추가되고 삭제될 때 뙇! 나오는 것보다 부드럽게~ 나타나는 것이 자연스러우므로 트랜지션을 넣는다.
일단 vue공식 사이트에서 트랜지션 관련 코드를 복붙한다.
TodoList.vue
<template>
  <div>
    <transition-group name="list" tag="p">
    ...
    </transition-group>
</template>
스타일 추가
/* 리스트 아이템 트랜지션 효과 */
.list-enter-active, .list-leave-active {
  transition: all 1s;
}
.list-enter, .list-leave-to {
  opacity: 0;
  transform: translateY(30px);
}
이런식으로 부드럽게 추가 및 삭제되는 것을 확인할 수 있다.

I can be your Genie🧞♀️ How ‘bout Aladdin? 🧞♂️