
여태까지 나는 OpenAPI문서를 작성할 때 Notion을 이용하여 만들었지만,
Swagger를 이용하여 만든다면 화려한 인터페이스에 테스트를 할 수 있다.

프론트엔드 개발자들에겐 읽기 쉬운 문서면서 백엔드를 테스트할 수 있게 만드는 Swagger를 Node.js에서 yml(yaml)를 이용하는 방법이 아닌
json파일을 이용하여 만들어보자.
세팅하기
기초 환경은 Node.js(express)에 Typescript를 이용한 프로젝트다.
설치
먼저, npm 모듈을 설치해주자.
npm install swagger-cli swagger-ui-express swagger-jsdoc
npm install -D @types/swagger-ui-express @types/swagger-jsdoc
아래에 적힌 명령어는 Typescript를 사용할 때 추가해줘야하는 명령어다.
코드 추가
원래 적혀있던 코드에 있는 라우터를 수정해야한다.
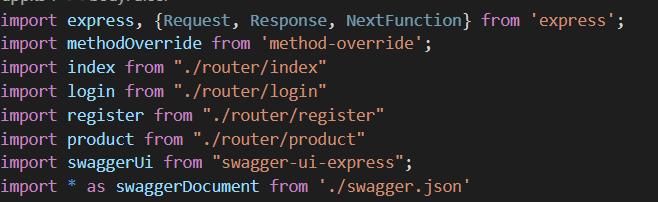

/swagger 에 들어가면 swaggerUi를 이용하여 기초 Ui를 만들고
swagger.json파일을 이용하여 문서를 작성한다.
JSON 파일
JSON 파일처럼 중괄호를 이용하여 만든다.
큰 구조로 잡자면
세부내용,paths,definitions고, 아래 사진이 세부내용이다.
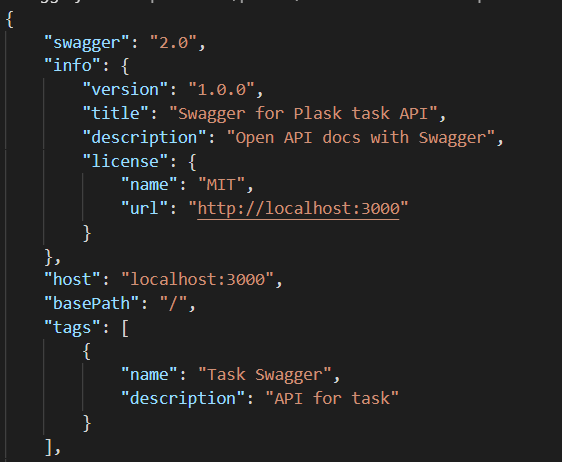
기초 정보들이다.
swagger - 버전 작성(2.0 or 3.0)
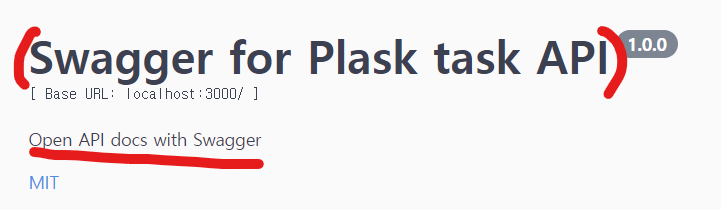
info > title - Swagger 제목
description - Swagger 세부 내용
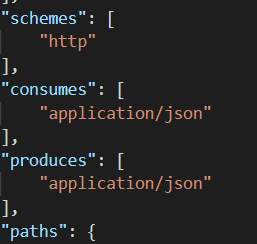
schemes - http,https 등을 선택할 수 있다
path - api 서버들을 등록하는 곳
path 추가 설명
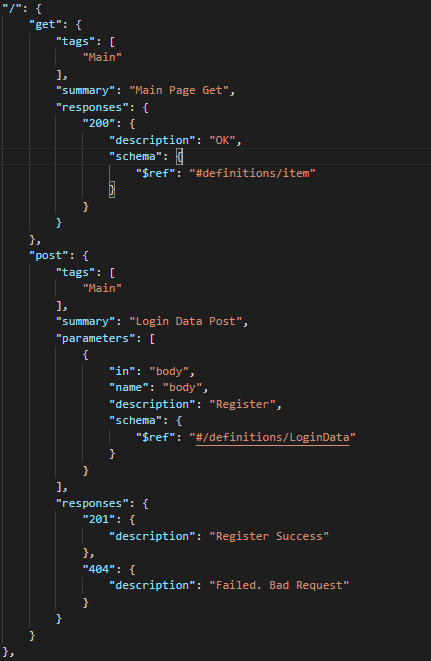
이런 구조로 만들 수 있다.
기본 url을 적은 후, get/post/put/post 방식을 골라 적어준다.
안엔 summary,parameters,responses로 크게 나눌 수 있는데,
summary - 하는 역할 간단히 소개
parameters - 받는 데이터를 스키마 형식으로 표현할 수 있고,
description으로 뭘 받는지 소개할 수 있다.
response - 응답 코드와 메세지를 보낼 수 있다.
definitions
정의라는 의미로 테이블을 정의시키는 곳이다.
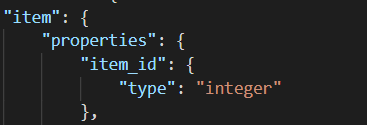
DB이름은 item이고, properties가 db행을 정의시킨다.
string, number, interger, array, boolean, null, object 종류가 있다.
전체코드가 좀 더럽지만 사진으로만 봤을 때 이해가 덜 될 수도 있으니
약간 수정해서 올리도록 하겠습니다.
{
        "swagger": "2.0",
    "info": {
        "version": "1.0.0",
        "title": "Swagger for Plask task API",
        "description": "Open API docs with Swagger",
        "license": {
            "name": "MIT",
            "url": "http://localhost:3000"
        }
    },
    "host": "localhost:3000",
    "basePath": "/",
    "tags": [
        {
            "name": "Task Swagger",
            "description": "API for task"
        }
    ],
    "schemes": [
        "http"
    ],
    "consumes": [
        "application/json"
    ],
    "produces": [
        "application/json"
    ],
    "paths": {
        "/": {
            "get": {
                "tags": [
                    "Main"
                ],
                "summary": "Main Page Get",
                "responses": {
                    "200": {
                        "description": "OK",
                        "schema": {
                            "$ref": "#definitions/item"
                        }
                    }
                }
            },
            "post": {
                "tags": [
                    "Main"
                ],
                "summary": "Login Data Post",
                "parameters": [
                    {
                        "in": "body",
                        "name": "body",
                        "description": "Register",
                        "schema": {
                            "$ref": "#/definitions/user"
                        }
                    }
                ],
                "responses": {
                    "201": {
                        "description": "Register Success"
                    },
                    "404": {
                        "description": "Failed. Bad Request"
                    }
                }
            }
        }
    },
    "definitions": {
        "user": {
            "properties": {
                "userid": {
                    "type": "integer"
                },
                "email": {
                    "type": "string"
                },
                "passwd": {
                    "type": "string"
                },
                "name": {
                    "type": "string"
                },
                "callnumber": {
                    "type": "string"
                },
                "refresh": {
                    "type": "string"
                },
                "salt": {
                    "type": "string"
                }
            }
        }
    }
}