2024.03.02 TIL - form태그의 활용!, tanstack-query(todo list), 한 컴포넌트에서 mutate 2개 쓰는법
TIL(Today I Learned)
목록 보기
79/147

form태그의 활용
💜 input, button을 담고 있는 form태그를 제대로 활용하는 방법!
// ✅ todo-list 예시

const TodoForm = ({ onSubmitTodo }) => {
  const handleSubmit = (e) => {
    e.preventDefault();
    // form태그는 제출 시 자동으로 새로고침되는 특성이 있음
    // ⭐️ 새로고침 방지하려면 필요!

    const title = e.target.title.value;
    const content = e.target.content.value;
    // ⭐️ form태그의 input에 일일이 value, onChange 안줘도 됨! 편-안
    // 대신, input태그의 ⭐️'name'속성을 줘야 이렇게 사용할 수 있음

    if (!title || !content) {
      return;
    }

    onSubmitTodo({
      id: crypto.randomUUID(),
      title,
      content,
      isDone: false,
    });

    e.target.reset();
    // ⭐️ 일일이 setTitle('') 이렇게 해줘야 빈칸으로 만들 수 있었는데,
    // 이거 한줄이면 input칸 전부다 빈칸으로 만들기 가능-!!!
  };

  return (
    <form onSubmit={handleSubmit}>
    // ⭐️ 버튼에 onClick주는 대신에, form태그에 onSubmit을 주면 됨
    // enter키로 제출하는 기능도 내장되어 있음!
      <input type="text" placeholder="제목" name="title" />
      <input type="text" placeholder="내용" name="content" />
      // ⭐️ 버튼 type은 submit!
      <button type="submit">제출</button>
    </form>
  );
};

export default TodoForm;
💜 정리
-
form태그는 제출 시 새로고침되는 특성이 있음
->e.preventDefault();를 맨 첫줄에 넣어주기 -
input태그에
name=""속성을 지정하면,e.target.속성이름.value로 접근할 수 있다!
-> input태그에 일일이 value={ }, onChange={ } 안해줘도 됨! -
제출 후 input태그를 전부 빈칸으로 만들고 싶다면
-> `e.target.reset();`` -
버튼에 onClick하는 대신, form태그에
onSubmit={ }지정하면 됨!
(대신 버튼의 type은submit으로!) -
버튼 대신 enter키로 submit되는 기능도 내장되어있음!!
-> form태그로 안 쓸 이유가 없다!! 엄청 편하네
응용
- 버튼을 꼭 button태그로 안하고 input태그로 하더라도, type="submit"만 해주면 버튼으로 생성됨!
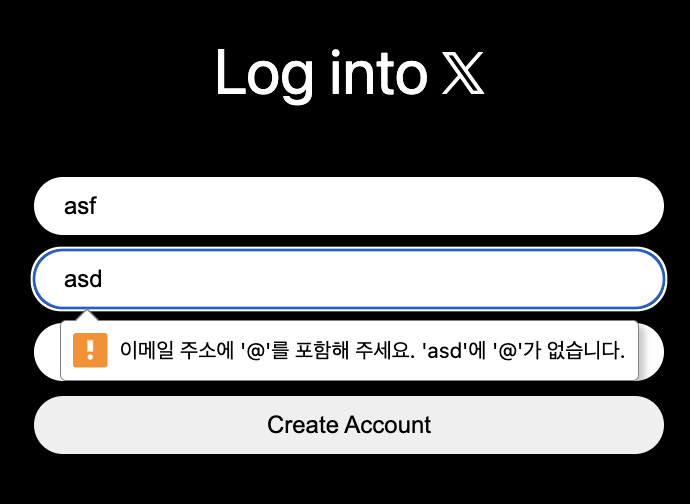
required: 필수값으로 지정하는 것. 형식이 다르거나 필수값이 입력되지 않는 경우 경고창을 말풍선으로 띄워줌
e.target.속성이름.value를 구조분해할당하여 사용할 수 있음!
ex)const { target: { name, value }, } = e;name에는 name="속성이름"의 속성이름값이 들어감value에는 input에 입력했던 값 들어감
// ✅ create-account.tsx - nwitter 클론코딩

import { useState } from "react";
import styled from "styled-components";

export const CreateAccount = () => {
  const [isLoading, setIsLoading] = useState(false);
  const [name, setName] = useState("");
  const [email, setEmail] = useState("");
  const [password, setPassword] = useState("");
  const [error, setError] = useState("");

  const onChange = (e: React.ChangeEvent<HTMLInputElement>) => {
    const {
      target: { name, value },
    } = e;
    if (name === "name") {
      setName(value);
    } else if (name === "email") {
      setEmail(value);
    } else if (name === "password") {
      setPassword(value);
    }
  };
  const onSubmit = (e: React.FormEvent<HTMLFormElement>) => {
    e.preventDefault();
    try {
      // 회원가입
      // set
      // 홈페이지로 이동
    } catch (error) {
      // error
    } finally {
      setIsLoading(false);
    }
  };

  return (
    <Wrapper>
      <Title>Join 𝕏</Title>
      <Form onSubmit={onSubmit}>
        <Input
          onChange={onChange}
          name="name"
          value={name}
          placeholder="Name"
          type="text"
          required
        />
        <Input
          onChange={onChange}
          name="email"
          value={email}
          placeholder="Email"
          type="email"
          required
        />
        <Input
          onChange={onChange}
          value={password}
          name="password"
          placeholder="Password"
          type="password"
          required
        />
        <Input
          type="submit"
          value={isLoading ? "Loading..." : "Create Account"}
        />
      </Form>
      {error !== "" ? <Error>{error}</Error> : null}
    </Wrapper>
  );
};
tanstack-query(aka.React-query)
🧡 클라이언트 상태와 서버 상태를 간단한 로직으로 동기화해주는 좋은 친구!
- 서버에서 가져온 데이터를 캐싱해두는데, 서버 상태의 데이터가 변경된 경우 캐싱되어있던 기존 데이터를 없애고 새로운 데이터로 가져오도록 해준다.
- 이 말은 결국, UI와 서버 상태를 동기화 해준다는 것과 같은 말이다.
- 캐싱이란? : 데이터를 가져올 때마다 매번 서버와 통신하지 않아도 되도록, 가져온 데이터를 저장해두는 것!
- install:
yarn add @tanstack/react-query
1. Provider 세팅 (QueryClientProvider)
import React from "react";
import ReactDOM from "react-dom/client";
import App from "./App.jsx";
import GlobalStyle from "./styles/GlobalStyle";
import { QueryClient, QueryClientProvider } from "@tanstack/react-query";

const queryClient = new QueryClient();  ⭐️

ReactDOM.createRoot(document.getElementById("root")).render(
  <React.StrictMode>
    <QueryClientProvider client={queryClient}>  ⭐️
      <GlobalStyle />
      <App />
    </QueryClientProvider>  ⭐️
  </React.StrictMode>
);
2. useQuery
- 서버로부터 데이터를 비동기적으로 fetching하고, 그 결과를 캐싱하여 관리함
data, isLoading, error등을 처리할 수 있음queryKey- 이 키를 기반으로 캐싱, 무효화, 업데이트 작업이 수행됨
(이 키로 데이터를 자동으로 캐싱함) - tanstack부터는 queryKey는 배열 형태로 넣어줘야함 (ex. ["todos"])
- 이 키를 기반으로 캐싱, 무효화, 업데이트 작업이 수행됨
queryFn: 서버로부터 데이터를 실제로 가져오는 비동기 함수
// ✅ TodoLists.jsx - todoList refactoring

import { getTodos } from "../api/todos-api";
import { useQuery } from "@tanstack/react-query";

const TodoLists = () => {
  const {
    data: todos,
    isLoading,
    error,
  } = useQuery({
    queryKey: ["todos"],
    queryFn: getTodos,
  });
  // queryFn으로 가져온 data는 아래에서 바로 사용 가능
  // data: todos라고 지정해줘서 아래에서 todos라고 바로 사용할 수 있음!

  // isLoading인 경우를 설정해놓지 않으면?
  // todos가 아직 안들어온 undefined인 상태에서도 아래에서 todos를 사용하려 하기때문에 오류 발생
  if (isLoading) return <div>로딩중...</div>;
  if (error) return <div>Error: {error.message}</div>;

  const workingTodos = todos.filter((todo) => !todo.isDone);
  const doneTodos = todos.filter((todo) => todo.isDone);

  return (
    // ...생략
3. useMutation
useMutation: 데이터 생성, 업데이트, 삭제 등의 변경 작업을 처리하는 데 사용됨- 성공할 경우, 캐싱된 데이터 무효화하고 최신데이터를 다시 가져오게 할 수 있다.
onSuccess:queryClient.invalidateQueries메서드를 사용하여 특정 쿼리(useQuery에서 정한 queryKey로 지정)의 캐시를 무효화하고, 최신 데이터로 쿼리를 다시 패칭함
-useQueryClient()와 함께 사용됨
(ex.const queryClient = useQueryClient();)
// ✅ inputBox.jsx - todoList refactoring

import { addTodo } from "../api/todos-api";
import { useMutation, useQueryClient } from "@tanstack/react-query";

const InputBox = () => {
  const queryClient = useQueryClient();
  const { mutate } = useMutation({
    mutationFn: (newTodo) => addTodo(newTodo),
    onSuccess: () => {
      queryClient.invalidateQueries("todos");
      // "todos"라는 queryKey로 가져와서 캐싱해둔 데이터를 무효화!
      // mutation이 성공하면, 최신 데이터로 다시 가져오게 해줌
    },
  });

  const onAddHandler = async (e) => {
    e.preventDefault();

    const title = e.target.title.value;
    const contents = e.target.contents.value;
    const deadline = e.target.trip.value;

    const newTodo = {
      id: Date.now().toString,
      title: title,
      body: contents,
      isDone: false,
      deadline: deadline,
    };
    mutate(newTodo);   // ⭐️ mutationFn의 인자로 newTodo 전달!

    e.target.reset();
  };

  return (
    // ...생략
한 컴포넌트에서 mutate를 2개 써야한다면?!
👍🏻 해결 : mutate에 이름을 지어주면 된다!
// ✅ TodoItem.jsx - todoList refactoring

import { deleteTodo, toggleTodo } from "../api/todos-api";
import { useMutation, useQueryClient } from "@tanstack/react-query";

const TodoItem = ({ todos }) => {
  const queryClient = useQueryClient();

  // ⭐️ mutate: deleteMutate 라고 이름 지어줌
  const { mutate: deleteMutate } = useMutation({
    mutationFn: (id) => deleteTodo(id),
    onSuccess: () => {
      queryClient.invalidateQueries("todos");
    },
  });

  // ⭐️ mutate: toggleMutate 라고 이름 지어줌
  const { mutate: toggleMutate } = useMutation({
    mutationFn: (todo) => toggleTodo(todo),
    onSuccess: () => {
      queryClient.invalidateQueries("todos");
    },
  });

  const reLocateHandler = async (todo) => {
    // ⭐️ mutate 이름으로 불러서 인자 전달!
    toggleMutate(todo);
  };

  const removeHandler = async (id) => {
    // ⭐️ mutate 이름으로 불러서 인자 전달!
    deleteMutate(id);
  };

  return (
    // ...생략
무서운 속도로 흡수하는 스펀지 개발자 🧽