Ajax 란
JavaScript 의 라이브러리 중 하나이며 Asynchronous Javacript And Xml 의 약자이다.
즉, JavaScript 를 사용한 비동기 통신 기술.
왜 사용하는가
클라이언트와 서버가 응답을 주고 받는 과정에서, 클라이언트가 요청을하고 서버가 응답을 받는다.
이 때 서버에서 다시 페이지를 갱신하게 된다. 지금까지는 아래와 같은 형식으로 사용해 왔다.
# render_template() 사용
@app.route('/test')
def test():
    '''
    test code
    '''
    return render_template('test.html')

# redirect() 사용
@app.route('/test2')
def test2():
    '''
    test2 code
    '''
    return redirect(url_for('___'))
하지만 위의 코드들은 일부분만 수정하고 싶을 때도 페이지 전체를 갱신해야하는 시간, 자원 낭비가 발생한다.
그래서 Ajax 가 나온것이다.
Ajax 경우 HTML 페이지 전체가 아닌 일부분만 갱신할 수 있도록 하게 해준다.
JSON or XML 형태로 필요한 데이터만 받아 갱신하기 때문에 그만큼의 시간과 자원을 아낄 수 있다.
Ajax 셋팅
$ pip install simplejson
-> 코드를 다 짜고 보니까 이 pip를 왜 설치한지 모르겠다. 사용하지를 않음.
또한 JQuery를 사용하기 위해 아래와 같은 CDN를 넣어줘야한다.
<script src="https://code.jquery.com/jquery-latest.min.js"></script>
Ajax 테스트
우선 HTML은 아래와 같이 코드를 짰습니다.
button을 누르면 <input type="text"> 에 담긴 내용이 data 에 담겨 POST 방식으로 보내지도록 했습니다.
<!--index.html-->
<html>
<head>
    <script src="https://code.jquery.com/jquery-latest.min.js"></script>
</head>
<body>
    <p id="example">AJAX</p>
    <input type="text" id="id1" placeholder="id">
    <input type="text" id="password1" placeholder="password">
    <input type="text" id="email1" placeholder="email">
    <input type="button" id="execute" value="execute">


    <script>
        $('#execute').click(function(){
            var id = $('#id1').val();
            var password = $('#password1').val();
            var email = $('#email1').val();

            var postdata = {
                'id':id, 'password':password, 'email':email
            }
            $.ajax({
                type: 'POST',
                url: '{{url_for("ajax")}}',
                data: JSON.stringify(postdata),
                dataType : 'JSON',
                contentType: "application/json",
                success: function(data){
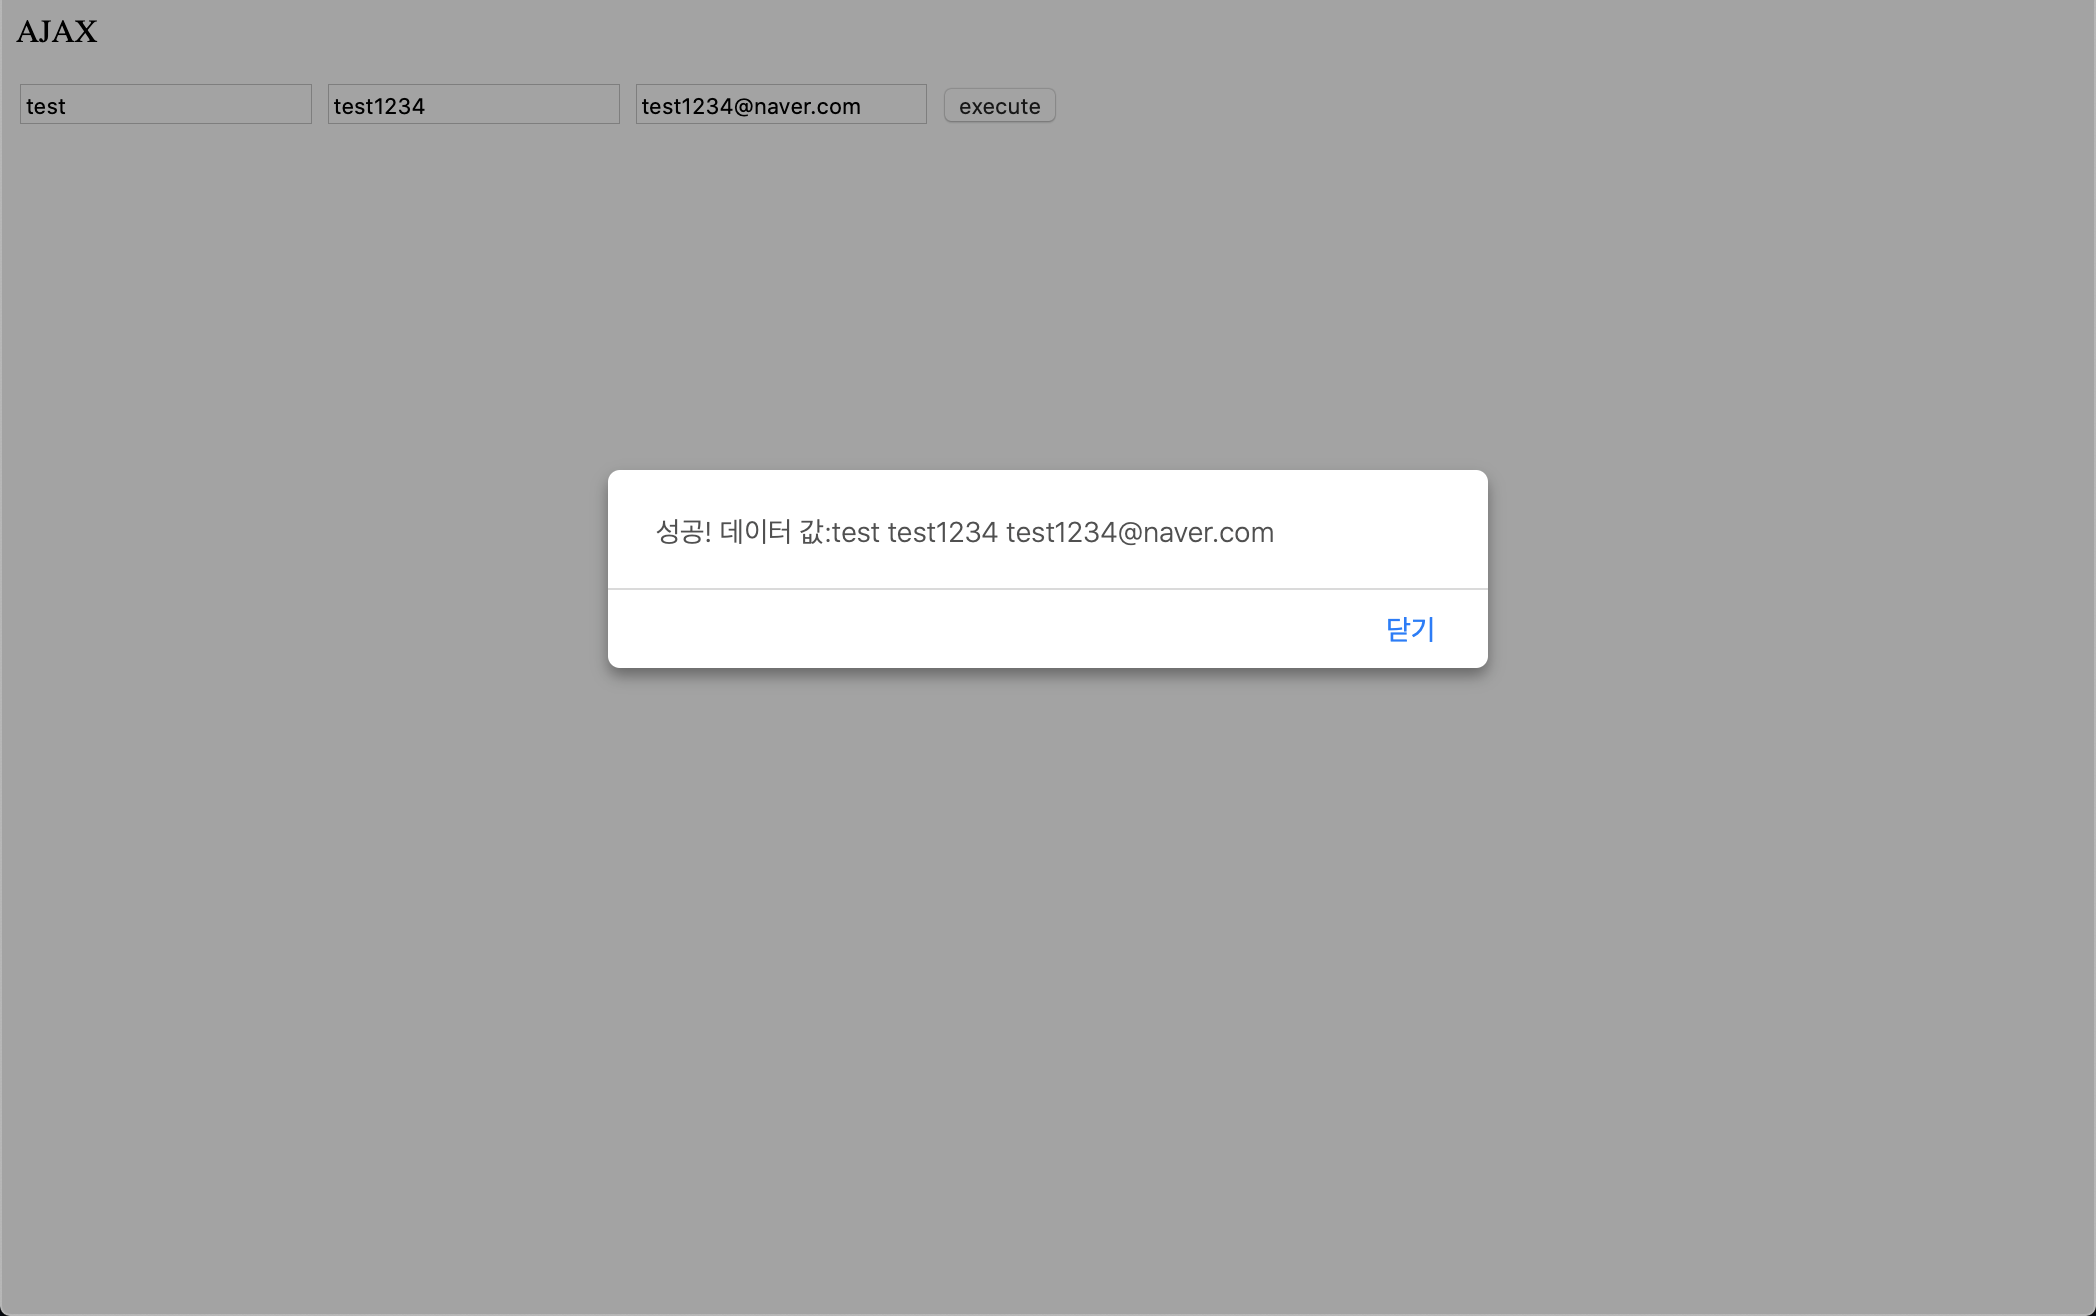
                    alert('성공! 데이터 값:' + data.result2['id']+" " + data.result2['password']+ " " + data.result2['email'])
                },
                error: function(request, status, error){
                    alert('ajax 통신 실패')
                    alert(error);
                }
            })
        })
    </script>


</body>
</html>- type : 서버에 GET 으로 보낼 것인지, POST로 보낼 것인지 결정
- url : 해당 url 로 보냄
- data : 데이터를 보냄
- dataType : 서버에서 반환받는 데이터 타입
- contentType : 정확히 모르겠는데 (없으면 안 됨)
- success : ajax 성공 했을 시, 이 안에 콜백함수를 작성하면 되는 듯.
- error : ajax 가 에러발생 시,
JSON.stringify()는 데이터를 JSON 형식에 맞도록 변환해주는 것 같다.
data: JSON.stringify(postdata), 이 부분은 아래와 같이 바꿔 쓸 수도 있다.
data: JSON.stringify({ 'id':id, 'password':password, 'email':email }),
"""
__init__.py
"""
from flask import Flask, render_template, jsonify, request

app = Flask(__name__)

@app.route('/')
def index():
    return render_template('index.html')


@app.route('/ajax', methods=['POST'])
def ajax():
    data = request.get_json()
    print(data)

    return jsonify(result = "success", result2= data)
위 HTML에서 보낸 값들을 request.get_json() 를 통해 받아 data 에 넣는다.

테스트 결과
데이터를 입력하고 execute 를 누르면 값들을 불러온다.

