
3.0 Understanding State
- 학습일자 : 2024.03.19
- 해당 목차에서의 강의는 State가 무엇인지 확인용으로 작성한 저급 수준의 코드
- 따라서, 실습에서는 진행하지 말 것!
⇒ 코드
<!DOCTYPE html>
<html>
  <body>
    <div id="root"></div>
  </body>

  <script src="https://unpkg.com/react@17.0.2/umd/react.production.min.js"></script>
  <script src="https://unpkg.com/react-dom@17.0.2/umd/react-dom.production.min.js"></script>
  <script src="https://unpkg.com/@babel/standalone/babel.min.js"></script>
  <!-- babel js -->
  <script type="text/babel">
    const root = document.getElementById("root");

    let counter = 0;
    function countUp() {
      counter = counter + 1;
      render();
    }

    /* Click me 버튼을 누를 때마다 render 사용자 정의함수를 활용해 숫자 갱신 진행*/
    function render() {
      ReactDOM.render(<Container />, root);
    }

    function Container() {
      return (
        <div>
          <h3>Total Clicks: {counter}</h3>
          <button onClick={countUp}>Click me</button>
        </div>
      );
    }

    render();
  </script>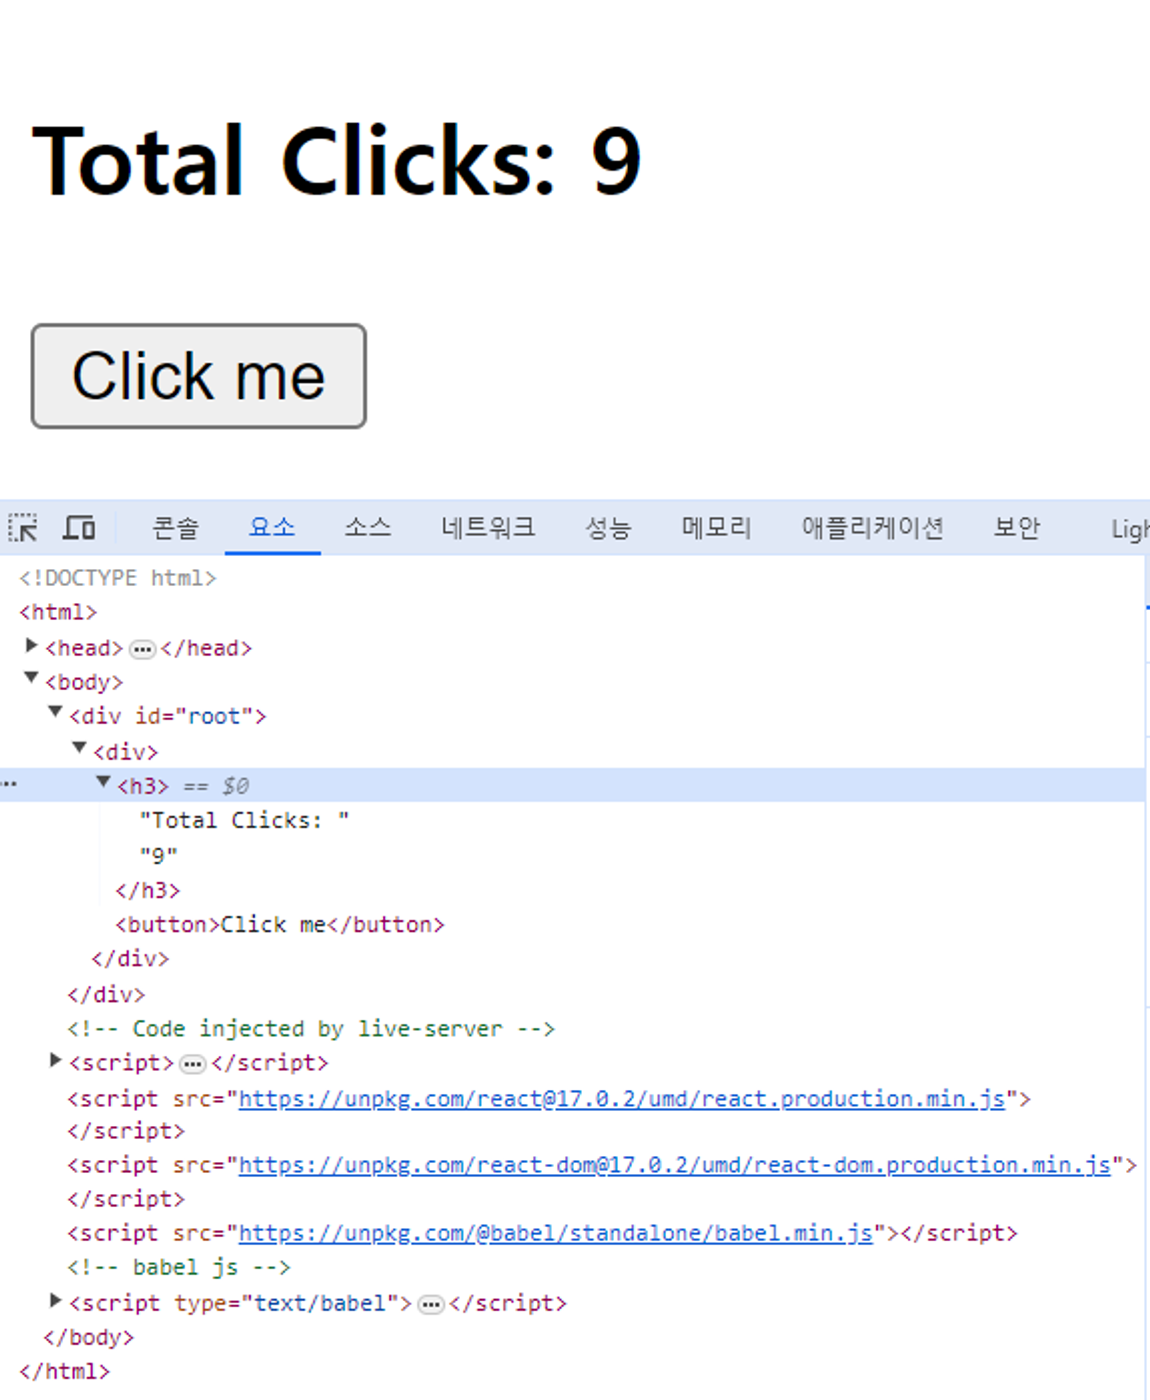
</html>- 이전까지 강의에서 했었던 UI에서 해당 코드로 변경
- 버튼 클릭을 할 때마다 숫자 1을 증가시키고, 이 내용을 UI에서도 반영해줘야 함
- 그래서 ReactDOM.render(, root); 소스 코드가 담겨 있는 render() 사용자 정의 함수를 화면 호출시와 버튼클릭을 했을 때 발생하는 사용자 정의 함수인 countUp()에 삽입
⇒ 결과
⇒ 개념 [Vanilla JavaScript 노드 변경 처리 과정 VS ReactJS는 노드 변경 처리 과정 ]
1. Vanilla JavaScript
- Vanilla JavaScript에서는 DOM 변경을 직접 처리합니다. 즉, 필요한 DOM 요소를 직접 선택하고, 요소의 속성을 변경하거나 새로운 요소를 추가하거나 기존 요소를 제거하는 등의 작업을 직접 수행합니다.
- DOM 변경이 발생하면, 브라우저는 변경된 DOM 트리를 다시 계산하고, 렌더 트리를 다시 생성한 후 화면에 그립니다.
- 이 과정은 비용이 많이 드는 연산으로, 자주 발생하게 되면 성능을 저하시킬 수 있습니다.
2. ReactJS
- ReactJS는 DOM 변경을 처리하기 위해 가상 DOM(Virtual DOM)이라는 개념을 도입합니다.
- ReactJS에서는 먼저 메모리에 가상 DOM 트리를 생성합니다. 이 트리는 실제 DOM 트리의 사본으로서, 실제 DOM 트리와 별도로 존재합니다.ReactJS는 상태 변경이 발생할 때마다 새로운 가상 DOM 트리를 생성하고, 이전의 가상 DOM 트리와 비교하여 변경된 부분을 파악합니다. 이렇게 파악된 변경 사항만 실제 DOM에 반영하는 방식을 사용합니다. 이 과정을 '재조정(Reconciliation)' 또는 'Diffing'이라고 부릅니다.
- 가상 DOM을 사용함으로써, 변경이 필요한 최소한의 요소만 실제 DOM에 반영되기 때문에 불필요한 연산을 줄이고 성능을 향상시킬 수 있습니다.
- 따라서, ReactJS는 복잡한 UI 업데이트를 효과적으로 처리할 수 있으며, 이를 통해 웹의 응답성을 향상시키고 사용자 경험을 개선할 수 있습니다!
3.1 setState part One
- 학습일자 : 2024.03.19
- 저번 목차에서는 render를 사용해서 실행을 했었음
- 하지만, UI에서 발생하는 이벤트가 많아지거나 변동되는 사항이 많을 때
- 관련된 모든 것에서 render 정의 함수를 사용하면 귀찮을 것임
- 하지만, UI에서 발생하는 이벤트가 많아지거나 변동되는 사항이 많을 때
- 따라서, 이번 목차에서는 그 불필요한 과정을 걷어내는 행위를 진행
- 완성 X
⇒ 코드
<!DOCTYPE html>
<html>
  <body>
    <div id="root"></div>
  </body>

  <script src="https://unpkg.com/react@17.0.2/umd/react.production.min.js"></script>
  <script src="https://unpkg.com/react-dom@17.0.2/umd/react-dom.production.min.js"></script>
  <script src="https://unpkg.com/@babel/standalone/babel.min.js"></script>
  <!-- babel js -->
  <script type="text/babel">
    const root = document.getElementById("root");

    function App() {
      const [counter, modifier] = React.useState(0);

      return (
        <div>
          <h3>Total Clicks: {counter}</h3>
          <button>Click me</button>
        </div>
      );
    }

    ReactDOM.render(<App />, root);
  </script>
</html>
- 리액트JS에서 데이터를 저장시켜 자동으로 리렌더링을 일으킬 수 있는 방법
- const data = React.useState();를 console.log 시키면 [undefined, f ] -> undefined와 함수가 적힌 배열이 나타남
- undefined는 data이고 f는 data를 바꿀 때 사용하는 함수
- React.useState() 함수는 초기값을 설정할 수 있음
- 즉, undefined는 초기값이고 두 번째 요소인 f는 그 값을 바꾸는 함수
- 배열을 꺼내기
- const x = [1, 2, 3]; const [a, b, c] = x; 으로 꺼낼 수 있음
- const data = React.useState();를 console.log 시키면 [undefined, f ] -> undefined와 함수가 적힌 배열이 나타남
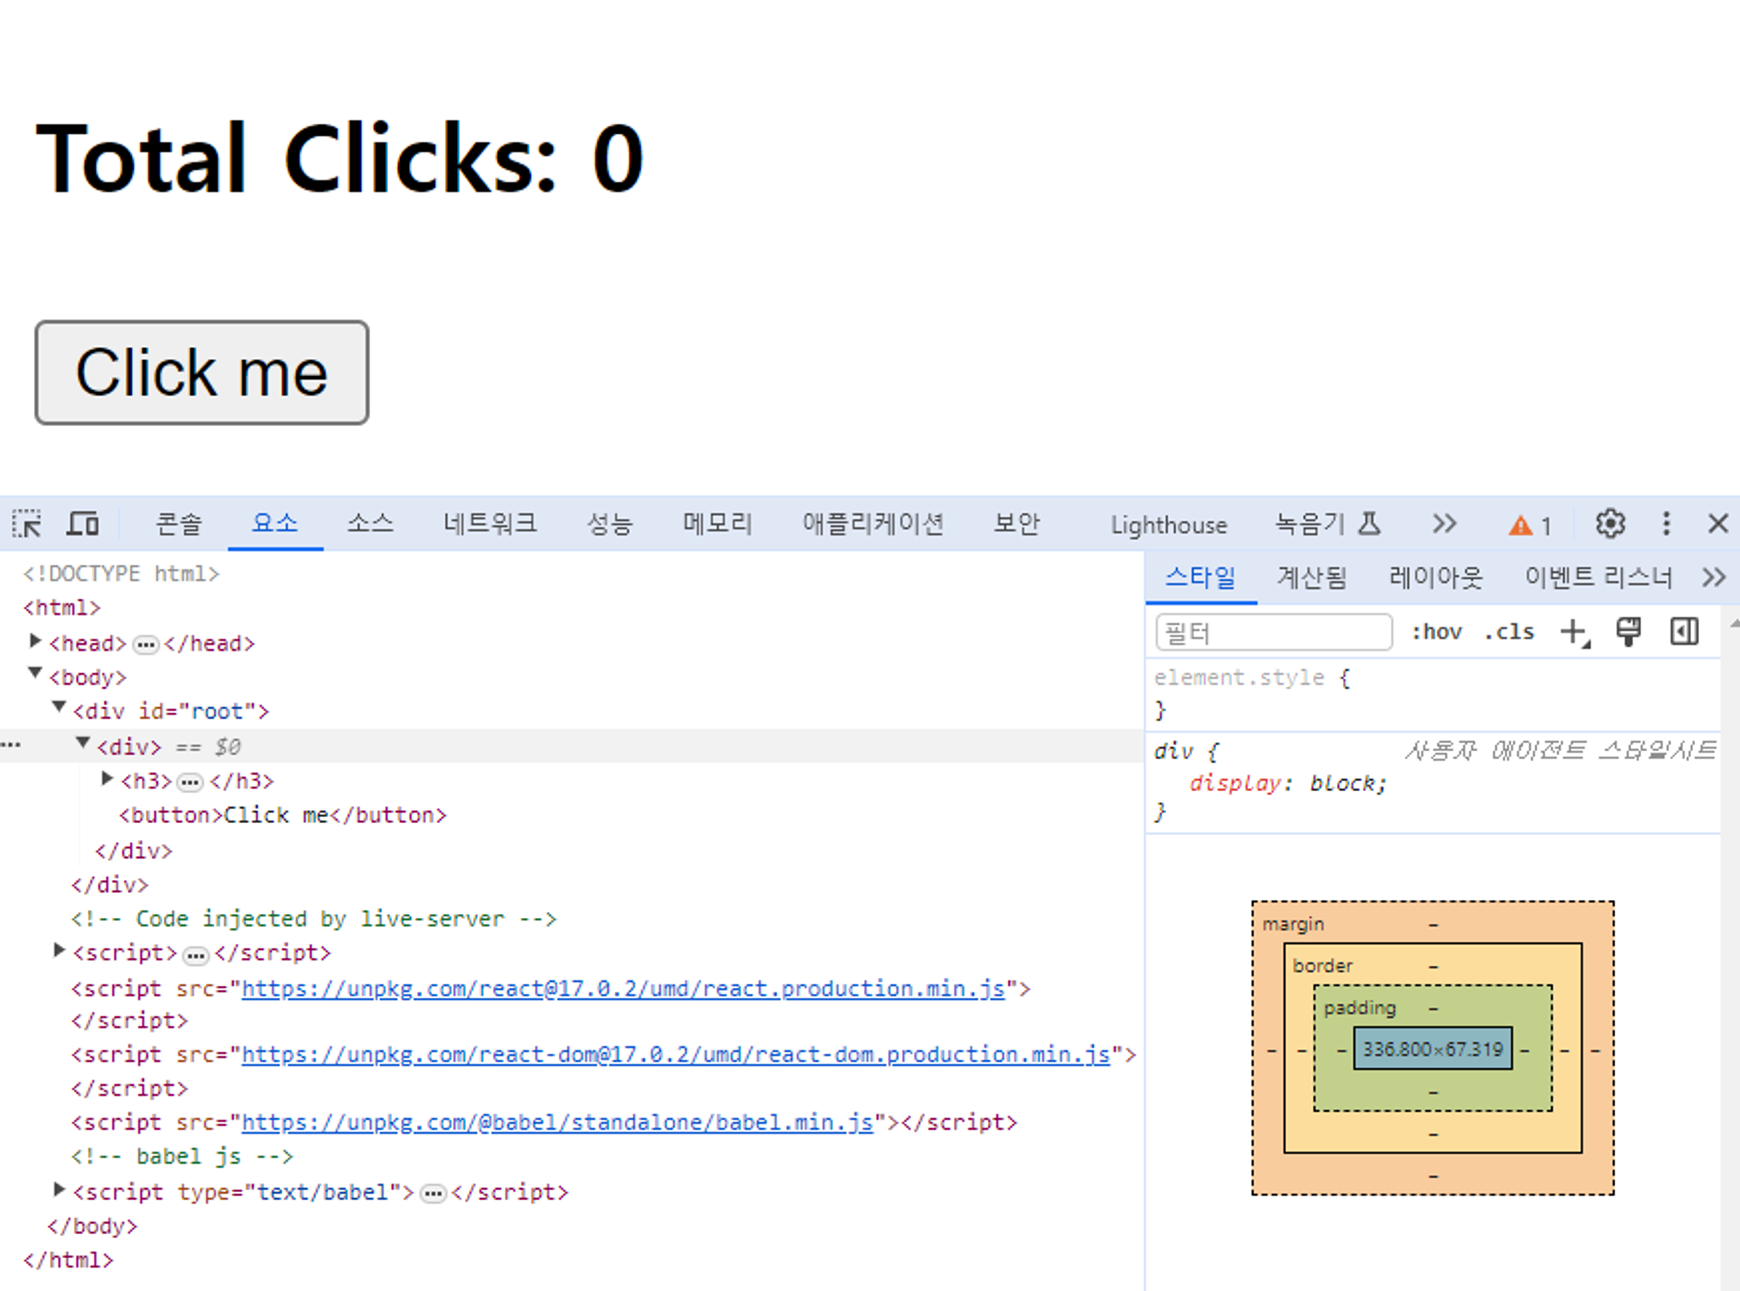
⇒ 결과
3.2 setState part Two
- 학습일자 : 2024.03.19
- 저번 강의에서 const [counter, modifier] = React.useState(0);를 활용해서 여러번 render를 막는 것까지 방지하는 취지였음
- 하지만, 실제 이벤트 발생시 UI 변경하는 것까지는 진행하지 않았음
⇒ 코드
<!DOCTYPE html>
<html>
  <body>
    <div id="root"></div>
  </body>

  <script src="https://unpkg.com/react@17.0.2/umd/react.production.min.js"></script>
  <script src="https://unpkg.com/react-dom@17.0.2/umd/react-dom.production.min.js"></script>
  <script src="https://unpkg.com/@babel/standalone/babel.min.js"></script>
  <!-- babel js -->
  <script type="text/babel">
    const root = document.getElementById("root");

    function App() {
      // setCounter : 이전 강의의 'modifier'과 동일한 것
      const [counter, setCounter] = React.useState(0);
      // 사용자 정의 함수 => 버튼 클릭 이벤트
      const onClick = () => {
        setCounter(counter + 1); // 숫자 변화
      };

      // 버튼 클릭할 때마다 사용자 정의함수 onClick 호출하여서 갱신 진행
      return (
        <div>
          <h3>Total Clicks: {counter}</h3>
          <button onClick={onClick}>Click me</button>
        </div>
      );
    }

    ReactDOM.render(<App />, root);
  </script>
</html>
- React.useState() 배열에서 보통 데이터에는 counter처럼 원하는대로 붙이고, f는 set 뒤에 데이터 이름을 붙임 (setCounter)
- 어떤값을 부여하던 setCounter 함수는 그 값으로 업데이트하고 리렌더링 일으킴
-
counter라는 데이터를 받음
-
return()에 그 데이터를 담고 있음 (리턴은 사용자가 보게될 컴포넌트)
-
버튼이 클릭되면 counter값을 바꿔줄 함수 호출 -> setCounter
-
counter의 새로운 값을 가지고 counter 함수를 호출
-
그 새로운 값은 setCounter(counter + 1)에 써준 counter + 1
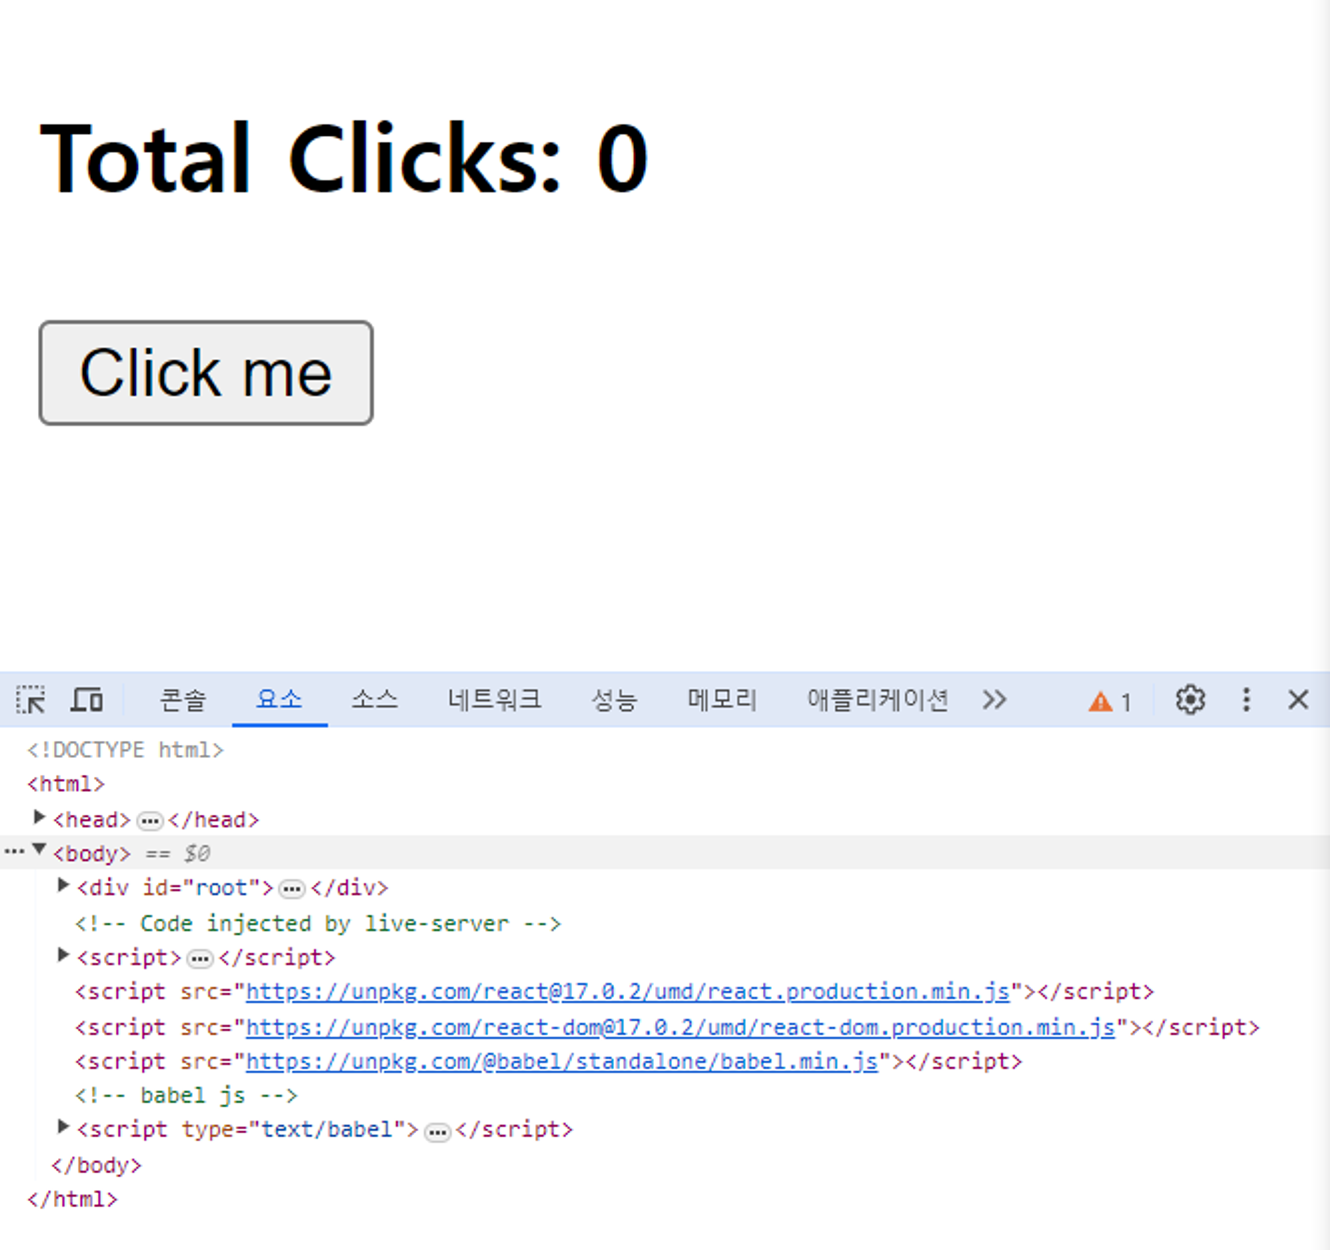
⇒ 결과

3.3 Recap
- 학습일자 : 2024.03.19
- 해당 강의는 저번 강의들 복습 내용이다.
⇒ Recap
- const [counter, setCounter] = React.useState(); 에서
- React.useState() 는 react기능을 쓸 수있게 해주는 하나의 도구이고,
- counter은 현재의 값 state 이며,
- setCounter은 이벤트 발생시 변화를 주는 부분이어서 이후 counter로 다시 저장된다.
3.4 State Functions
- 학습일자 : 2024.03.19
⇒ 코드
<!DOCTYPE html>
<html>
  <body>
    <div id="root"></div>
  </body>

  <script src="https://unpkg.com/react@17.0.2/umd/react.production.min.js"></script>
  <script src="https://unpkg.com/react-dom@17.0.2/umd/react-dom.production.min.js"></script>
  <script src="https://unpkg.com/@babel/standalone/babel.min.js"></script>
  <!-- babel js -->
  <script type="text/babel">
    const root = document.getElementById("root");

    function App() {
      // setCounter : 이전 강의의 'modifier'과 동일한 것
      const [counter, setCounter] = React.useState(0);
      // 사용자 정의 함수 => 버튼 클릭 이벤트
      const onClick = () => {
        // setCounter(counter + 1); // 기존
        setCounter((current) => current + 1);
      };

      // 버튼 클릭할 때마다 사용자 정의함수 onClick 호출하여서 갱신 진행
      return (
        <div>
          <h3>Total Clicks: {counter}</h3>
          <button onClick={onClick}>Click me</button>
        </div>
      );
    }

    ReactDOM.render(<App />, root);
  </script>
</html>
- state를 세팅하는 데는 2가지 방법이 존재
- setCounter(counter + 1);
- setCounter((current) => current + 1);
- 보안적으로 밑의 방식이 더 안전함
⇒ 결과
3.5 Inputs and State
- 학습일자 : 2024.03.20
⇒ 코드
<!DOCTYPE html>
<html>
  <body>
    <div id="root"></div>
  </body>

  <script src="https://unpkg.com/react@17.0.2/umd/react.development.js"></script>
  <script src="https://unpkg.com/react-dom@17.0.2/umd/react-dom.development.js"></script>
  <script src="https://unpkg.com/@babel/standalone/babel.min.js"></script>
  <!-- babel js -->
  <script type="text/babel">
    function App() {
      const [minutes, setMinutes] = React.useState("");

      // 분을 입력하는 input 창에서 입력을 한 숫자가 있을 때마다 input 창에 바로 반영
      const onChange = (event) => {
        setMinutes(event.target.value);
      };

      return (
        <div>
          <h1 className="hi">Super Converter</h1>
          <label htmlFor="minutes">Minutes</label>
          <input
            value={minutes}
            id="minutes"
            placeholder="Minutes"
            type="number"
            onChange={onChange}
          />
          <h4>You want to convert {minutes}</h4>
          <label htmlFor="hours">Hours</label>
          <input id="hours" placeholder="Hours" type="number" />
        </div>
      );
    }

    ReactDOM.render(<App />, root);
  </script>
</html>
- react와 reactdom을 import하는 script tag
- 기존
- 수정
- 차이
- production은 배포 모드
- development는 개발 모드
- 개발모드는 버그로 이어질 수 있는 요소들을 미리 경고하는 검증 코드가 포함되어 있음
- 참고
- 기존
- JSX의 특징
- JSX는 class나 for 과 같이 JavaScript에서 선점된 문법 용어를 사용 못한다.
- class는 className으로, for은 htmlFor로 바꿔쓴다
- JSX는 class나 for 과 같이 JavaScript에서 선점된 문법 용어를 사용 못한다.
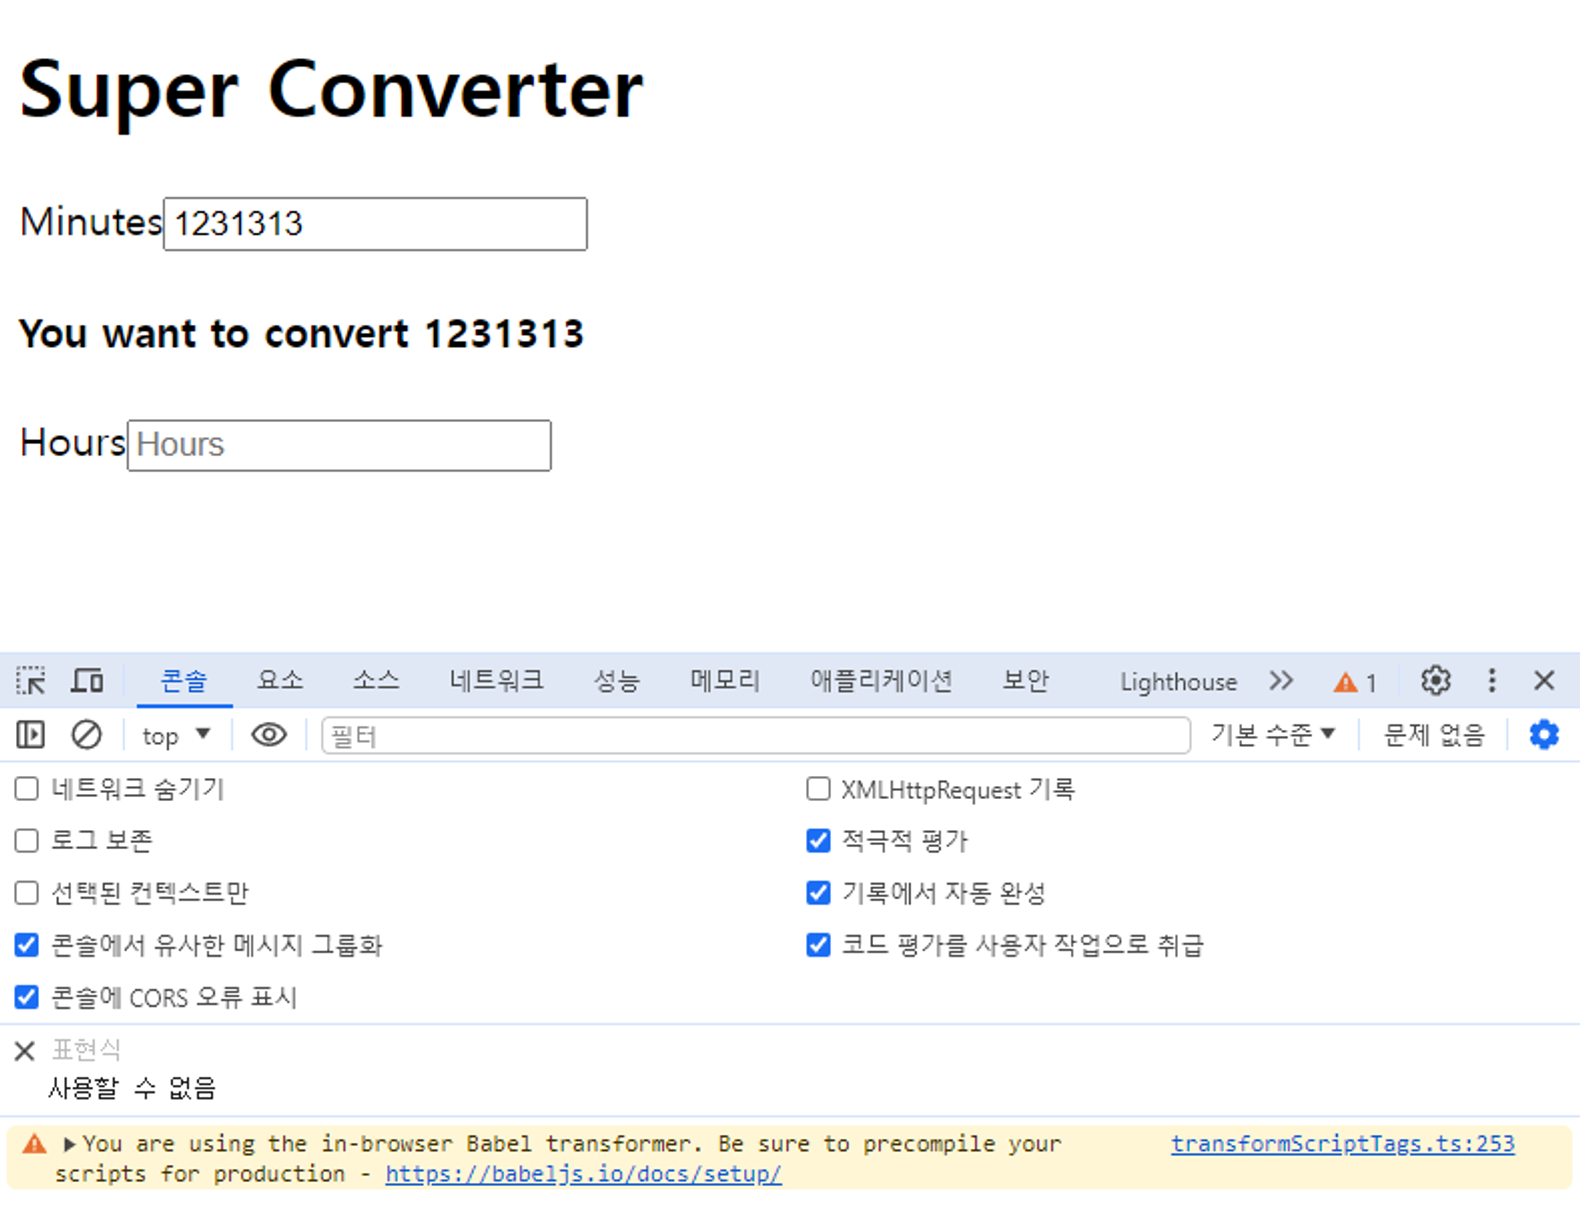
⇒ 결과
3.6 State Practice part One
- 학습일자 : 2024.03.20
⇒ 코드
<!DOCTYPE html>
<html>
  <body>
    <div id="root"></div>
  </body>

  <script src="https://unpkg.com/react@17.0.2/umd/react.development.js"></script>
  <script src="https://unpkg.com/react-dom@17.0.2/umd/react-dom.development.js"></script>
  <script src="https://unpkg.com/@babel/standalone/babel.min.js"></script>
  <!-- babel js -->
  <script type="text/babel">
    function App() {
      const [minutes, setMinutes] = React.useState(0);

      // 분을 입력하는 input 창에서 입력을 한 숫자가 있을 때마다 input 창에 바로 반영
      const onChange = (event) => {
        setMinutes(event.target.value);
      };

      const reset = () => setMinutes(0);

      return (
        <div>
          <h1 className="hi">Super Converter</h1>
          <div>
            <label htmlFor="minutes">Minutes</label>
            <input
              value={minutes}
              id="minutes"
              placeholder="Minutes"
              type="number"
              onChange={onChange}
            />
          </div>
          <div>
            <label htmlFor="hours">Hours</label>
            <input
              value={Math.round(minutes / 60)}
              id="hours"
              placeholder="Hours"
              type="number"
              disabled
            />
          </div>
          <button onClick={reset}>Reset</button>
        </div>
      );
    }

    ReactDOM.render(<App />, root);
  </script>
</html>
- 혹시 retrun안에 반드시 div안에 작성해야하는 이유가 있나요? div없으면 에러가 나와서 반드시 써야하는건 알겠는데 반드시 써야하는 이유가 있나해서요! 그냥 react의 규칙인가요?
- react 에 하나의 컴포넌트가 여러개 엘리멘트를 반환합니다.
- 즉 JSX 를 사용하면서 return 문을 사용할때 최상위 태그가 있어야합니다.
- div태그말고도 다른 태그로도 가능합니다
- 자세한 내용은 react Fragments 검색추천 드립니다 ㅎㅎ
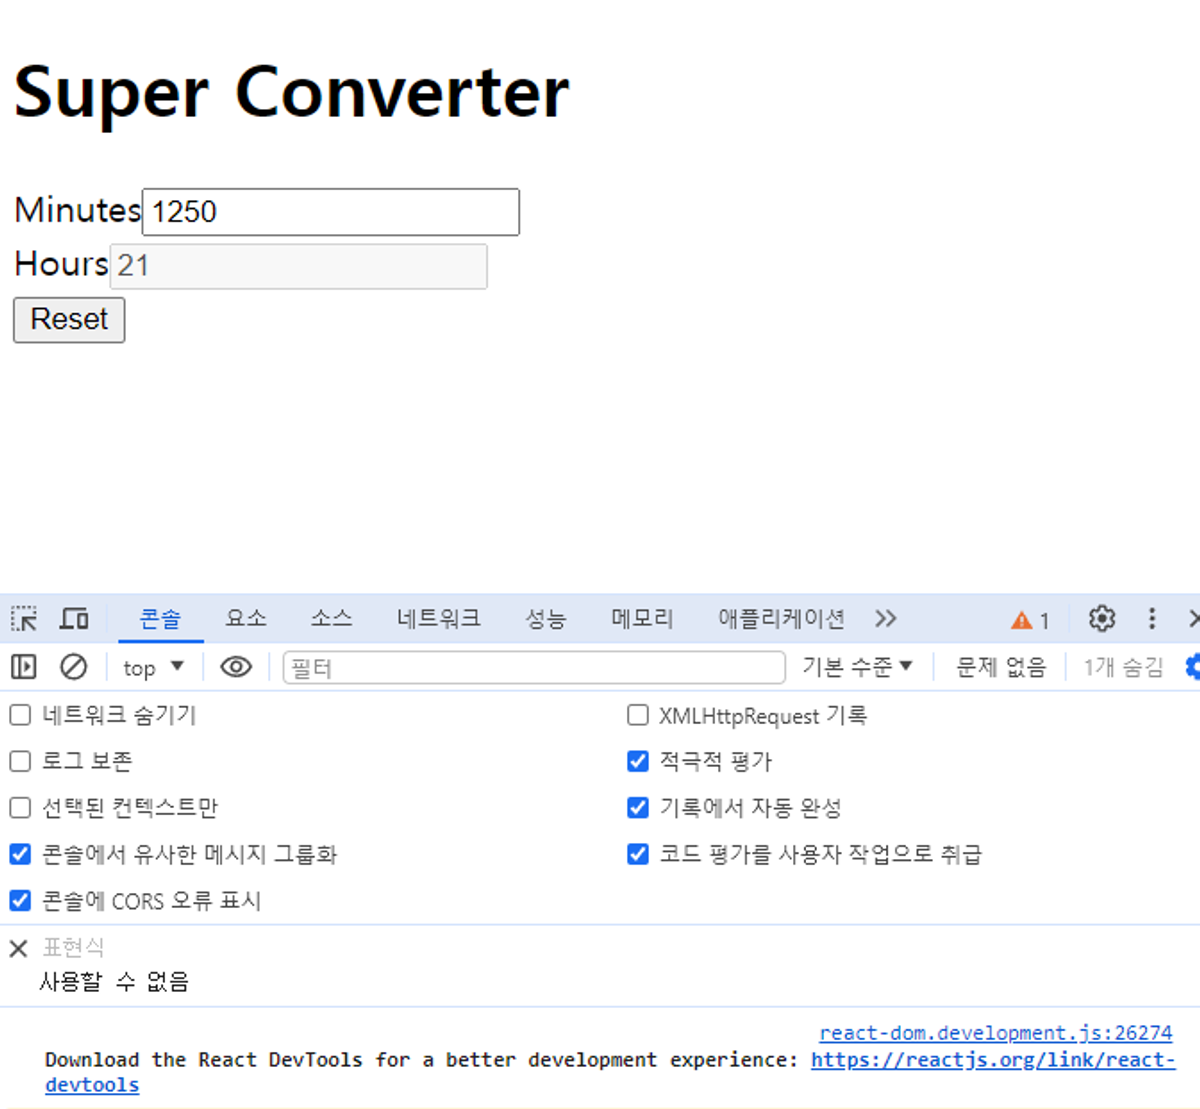
- [React] input 엘리먼트에 value 속성만 지정했을때 값이 입력불가한 현상 해결방법
- Hours 부분은 disabled 처리하여 수정 불가하게 하였음
- Reset 버튼
- 입력값 초기화
⇒ 결과
3.7 State Practice part Two
- 학습일자 : 2024.03.20
⇒ 코드
<!DOCTYPE html>
<html>
  <body>
    <div id="root"></div>
  </body>

  <script src="https://unpkg.com/react@17.0.2/umd/react.development.js"></script>
  <script src="https://unpkg.com/react-dom@17.0.2/umd/react-dom.development.js"></script>
  <script src="https://unpkg.com/@babel/standalone/babel.min.js"></script>
  <!-- babel js -->
  <script type="text/babel">
    function App() {
      const [amount, setAmount] = React.useState(0);
      const [flipped, setFlipped] = React.useState(false);

      // 분을 입력하는 input 창에서 입력을 한 숫자가 있을 때마다 input 창에 바로 반영
      const onChange = (event) => {
        setAmount(event.target.value);
      };
      const reset = () => setAmount(0);
      const onFlip = () => {
        reset();
        setFlipped((current) => !current);
      };

      return (
        <div>
          <h1 className="hi">Super Converter</h1>
          <div>
            <label htmlFor="amount">Minutes</label>
            <input
              value={flipped ? amount * 60 : amount}
              id="amount"
              placeholder="Minutes"
              type="number"
              onChange={onChange}
              disabled={flipped}
            />
          </div>
          <div>
            <label htmlFor="hours">Hours</label>
            <input
              value={flipped ? amount : Math.round(amount / 60)}
              id="hours"
              placeholder="Hours"
              type="number"
              onChange={onChange}
              disabled={!flipped}
            />
          </div>
          <button onClick={reset}>Reset</button>
          <button onClick={onFlip}>Flip</button>
        </div>
      );
    }

    ReactDOM.render(<App />, root);
  </script>
</html>
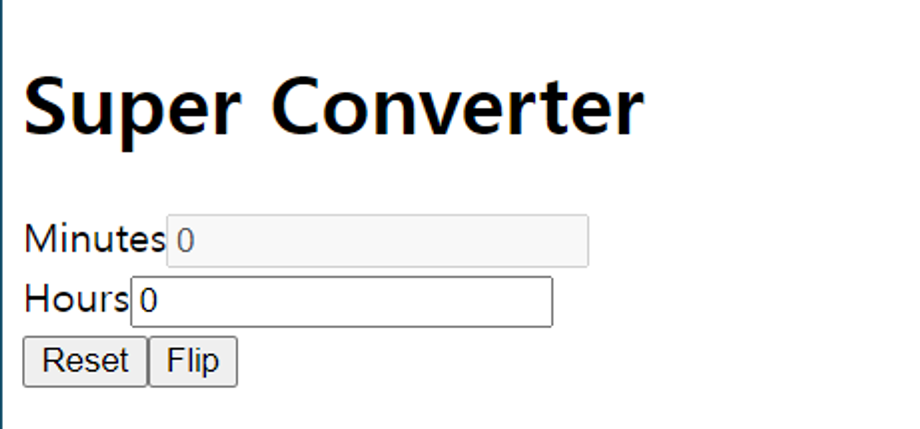
- const onFlip = () => setFlipped(!flipped);
- flipped가 true라면 부정명제인 !flipped는 false
- false라면 true
- state값으로 input을 enabled할지 disabled 할지를 결정할 수 있음
- 디폴트 값이 false 라고 정했으므로 Hours는 disabled 되어야함
- 그래서 disabled={flipped === false}를 써줘서
- flipped가 false라면, disabled는 true가 되도록 만들어줌
- 그래서 disabled={flipped === false}를 써줘서
- Minuets에는 반대로 disabled={flipped === true}라고 써줌
- 그러나
- Hours는 disabled={!flipped}
- Minuets에는 반대로 disabled={flipped}
- 주는게 더 짧고 좋음
- 그러나
- 삼항연산자(ternary operator) 사용하기
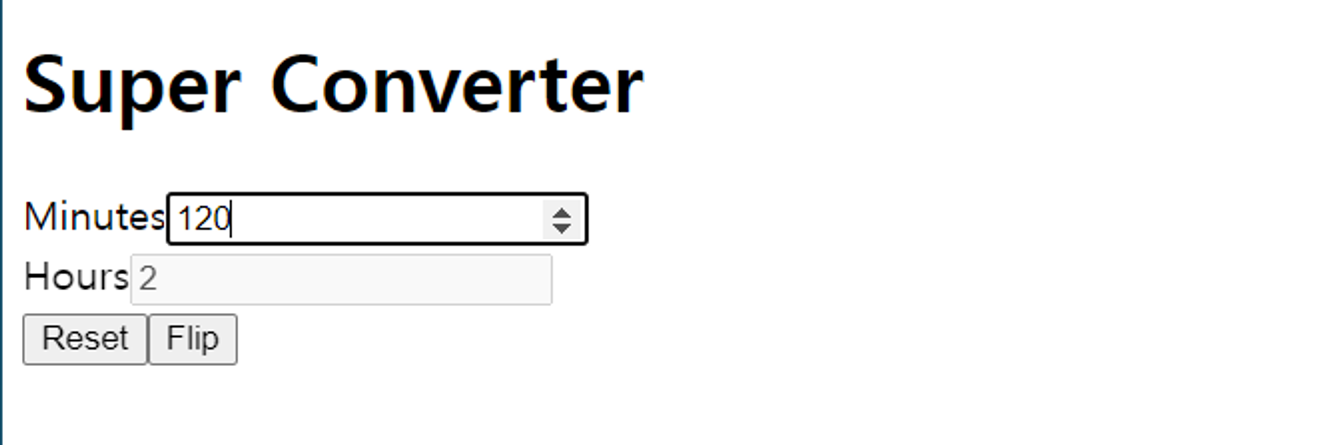
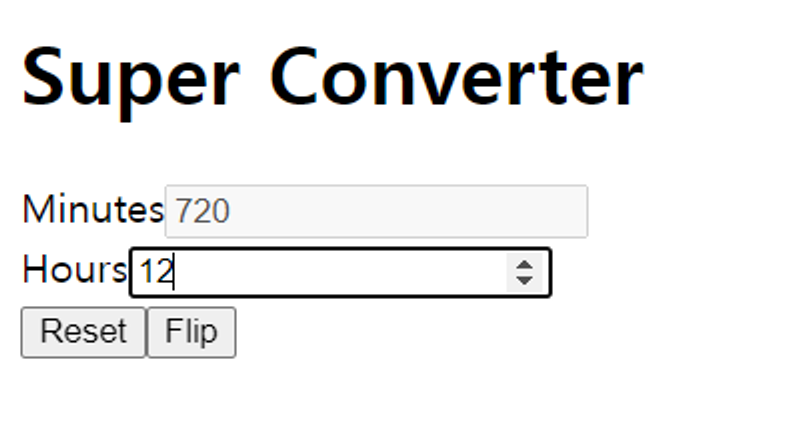
- 시간 -> 분 컨버터
- flipped ? amount : amount / 60
- 만약 flipped 상태면 state에 있는 값을 그대로 보여주기
- 아니라면 60으로 나눈 변환된 값 보여주기
- value={flipped ? amount * 60 : amount}
- 만약 flipped 상태면 60으로 곱한 변환된 값 보여주기
- 아니라면 state에 있는 값을 그대로 보여주기
- flipped ? amount : amount / 60
- 시간 -> 분 컨버터
- flip누르면 변화된 값 그대로 가져오므로
- onFlip 변수에 reset(); 넣어주기
⇒ 결과
3.8 Recap
- 학습일자 : 2024.03.21
⇒ 코드
<!DOCTYPE html>
<html>
  <body>
    <div id="root"></div>
  </body>

  <script src="https://unpkg.com/react@17.0.2/umd/react.development.js"></script>
  <script src="https://unpkg.com/react-dom@17.0.2/umd/react-dom.development.js"></script>
  <script src="https://unpkg.com/@babel/standalone/babel.min.js"></script>
  <!-- babel js -->
  <script type="text/babel">
    function App() {
      const [amount, setAmount] = React.useState(0);
      const [inverted, setInverted] = React.useState(false);

      // 분을 입력하는 input 창에서 입력을 한 숫자가 있을 때마다 input 창에 바로 반영
      const onChange = (event) => {
        setAmount(event.target.value);
      };
      const reset = () => setAmount(0);
      const onInvert = () => {
        reset();
        setInverted((current) => !current);
      };

      return (
        <div>
          <h1 className="hi">Super Converter</h1>
          <div>
            <label htmlFor="amount">Minutes</label>
            <input
              value={inverted ? amount * 60 : amount}
              id="minutes"
              placeholder="Minutes"
              type="number"
              onChange={onChange}
              disabled={inverted}
            />
          </div>
          <div>
            <label htmlFor="hours">Hours</label>
            <input
              value={inverted ? amount : Math.round(amount / 60)}
              id="hours"
              placeholder="Hours"
              type="number"
              disabled={!inverted}
              onChange={onChange}
            />
          </div>
          <button onClick={reset}>Reset</button>
          <button onClick={onInvert}>
            {inverted ? "Turn back" : "Invert"}
          </button>
        </div>
      );
    }

    ReactDOM.render(<App />, root);
  </script>
</html>
- inverted 쉽게 바꾸는 법
- 확장프로그램 Multiple cursor case preserve 다운 받고
- 복사할 때 처럼 하나 선택* 해서 ctrl + d 로 다 선택하고 text 수정하면 setFlipped -> setInverted
- camelcase 적용해서 한번에 수정 가능
- p.s *단어 수준으로 선택하는 법 - ctrl + shift + 방향키
- 깜빡하고 괄호나 콜론 안 적었을 때 위 방법이든 드래그해서
- 선택하든 선택하고 괄호, 콜론, 백틱 쓰면 드래그된 부분만
- 괄호, 콜론, 백틱 적용 가능
3.9 Final Practice and Recap
- 학습일자 : 2024.03.21
<!DOCTYPE html>
<html>
<body>
<div id="root"></div>
</body>
<script src="https://unpkg.com/react@17.0.2/umd/react.development.js"></script>
<script src="https://unpkg.com/react-dom@17.0.2/umd/react-dom.development.js"></script>
<script src="https://unpkg.com/@babel/standalone/babel.min.js"></script>
<!-- babel js -->
<script type="text/babel">
function MinutesToHours() {
const [amount, setAmount] = React.useState(0);
const [inverted, setInverted] = React.useState(false);
// 분을 입력하는 input 창에서 입력을 한 숫자가 있을 때마다 input 창에 바로 반영
const onChange = (event) => {
setAmount(event.target.value);
};
const reset = () => setAmount(0);
const onInvert = () => {
reset();
setInverted((current) => !current);
};
return (
<div>
<div>
<label htmlFor="amount">Minutes</label>
<input
value={inverted ? amount * 60 : amount}
id="minutes"
placeholder="Minutes"
type="number"
onChange={onChange}
disabled={inverted}
/>
</div>
<div>
<label htmlFor="hours">Hours</label>
<input
value={inverted ? amount : Math.round(amount / 60)}
id="hours"
placeholder="Hours"
type="number"
disabled={!inverted}
onChange={onChange}
/>
</div>
<button onClick={reset}>Reset</button>
<button onClick={onInvert}>
{inverted ? "Turn back" : "Invert"}
</button>
</div>
);
}
function KmToMiles() {
return <h3>KM 2 MM</h3>;
}
function App() {
const [index, setIndex] = React.useState("xx");
const onSelect = (event) => {
setIndex(event.target.value);
};
return (
<div>
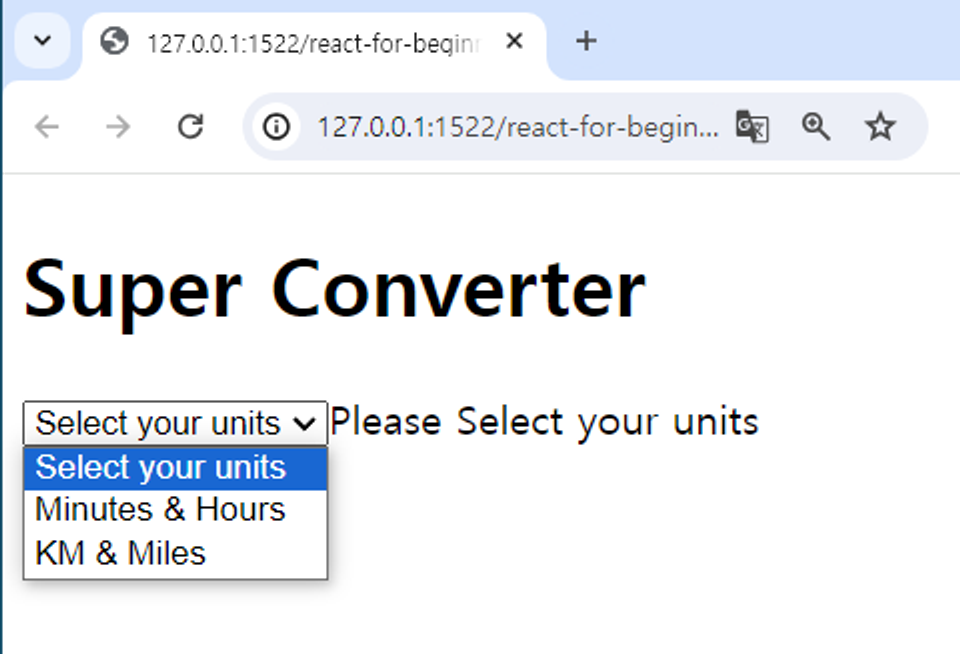
<h1>Super Converter</h1>
<select value={index} onChange={onSelect}>
<option value="xx">Select your units</option>
<option value="0">Minutes & Hours</option>
<option value="1">KM & Miles</option>
</select>
{index === "xx" ? "Please Select your units" : null}
{index === "0" ? <MinutesToHours /> : null}
{index === "1" ? <KmToMiles /> : null}
</div>
);
}
ReactDOM.render(<App />, root);
</script>
</html>
- 컴포넌트는 그 안에 또 다른 컴포넌트를 렌더링 할 수 있다.
- 분할 정복(divide and conquer)
- App 컴포넌트는 root div를 그려주는 역할
- App 컴포넌트는 그 안에 다른 2개(분->시간, km->miles 컨버터)의 컴포넌트들을 렌더링
- App 컴포넌트가 state를 가지도록 만들자
- select는 그냥 HTML
- {}안에는 JS를 쓸 수 있다.
- state를 변화시킬 때, 모든게 다 새로고침 된다.
⇒ 결과

#Software Engineer #IRISH