
@Cacheable을 이용하여 해당 데이터를 캐싱하려고 하는데, redis DB에 데이터가 저장되지를 않는다. 즉, 동작을 하지 않는 것이다.
하지만 다른 코드의 어노테이션은 동작을 잘 수행하는데, 특정 코드의 @Cacheable만 동작하지 않는 것이다.
구글링을 해본 결과 내부 메서드에 @Cacheable을 설정하면 동작하지 않는다는 것이다.
✔️Spring Cache 동작 원리
Spring Cache는 AOP를 이용한다. Aspect Oriented Programming !
관점 지향 프로그래밍이라고 불린다.
@Cacheable이 설정된 메서드를 호출할 때, Proxy 객체가 생성되어 해당 호출을 intercept 한다. 그리고 proxy 객체가 다시 @Cacheable이 설정된 메서드를 호출하는 방법이다.
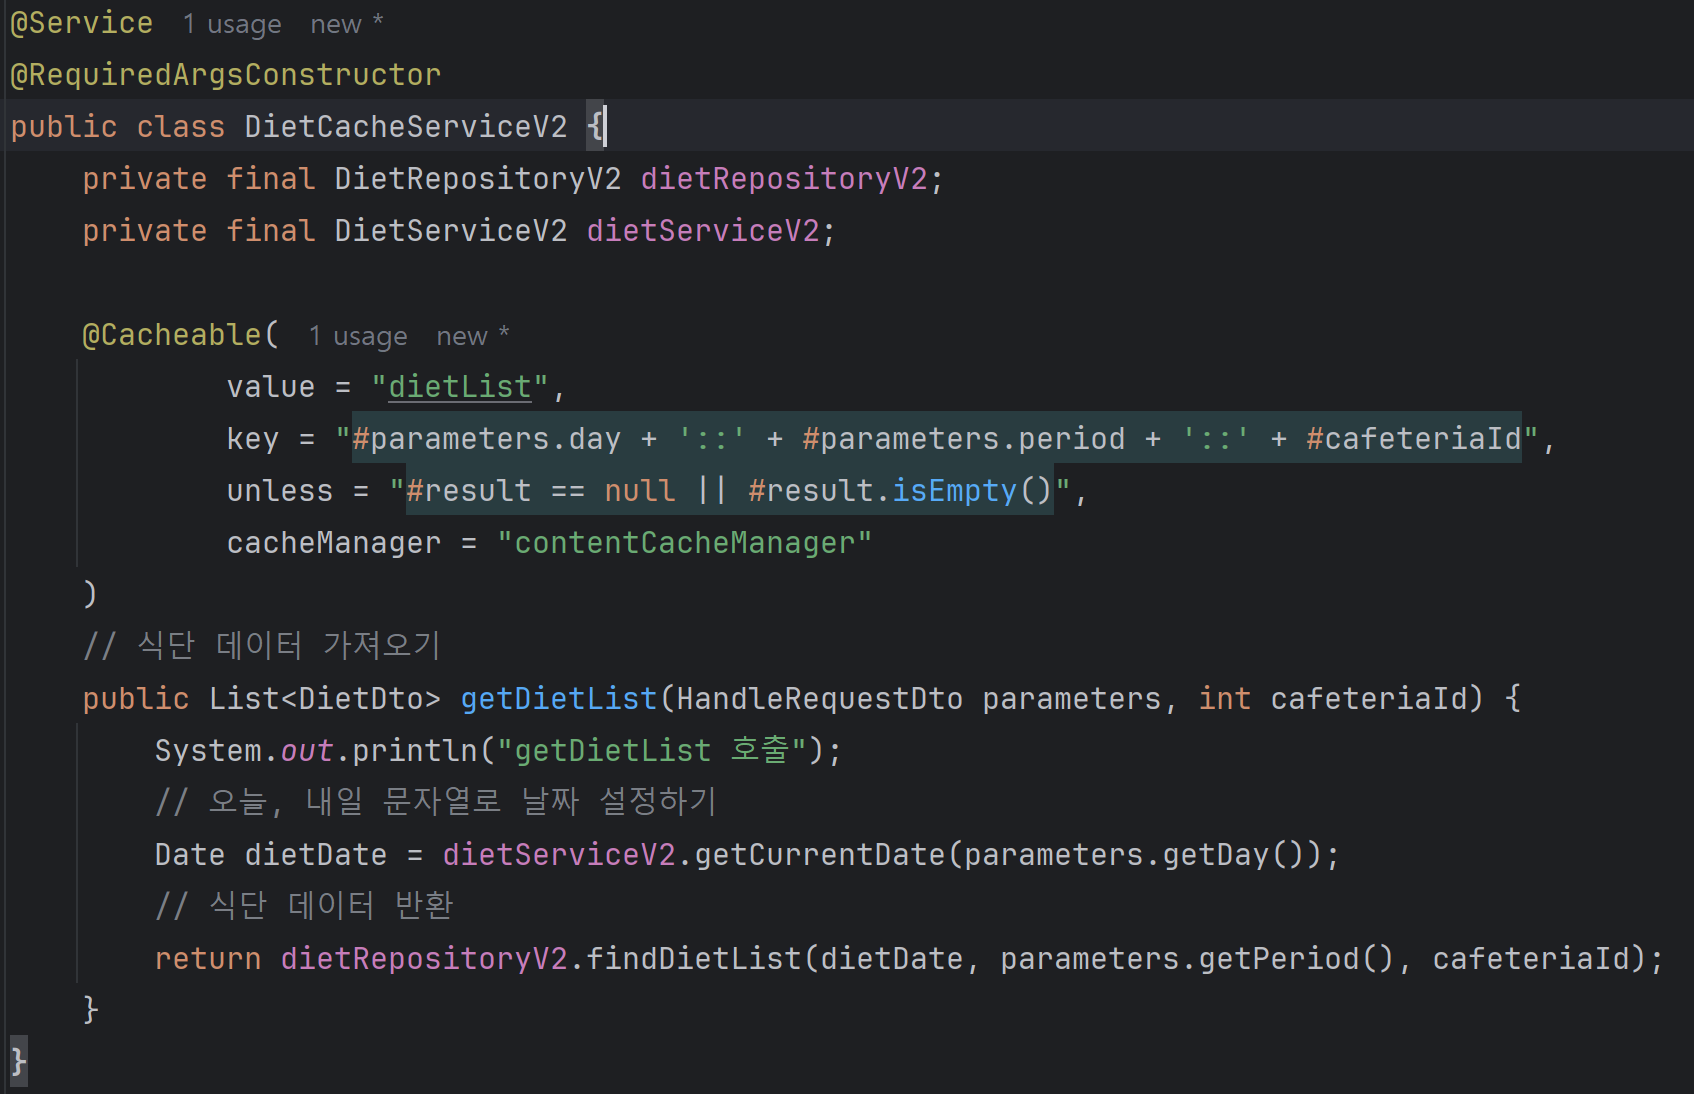
@Cacheable(
            value = "dietList",
            key = "#parameters.day + '::' + #parameters.period + '::' + #cafeteriaId",
            unless = "#result == null || #result.isEmpty()",
            cacheManager = "contentCacheManager"
    )
    // 식단 데이터 가져오기
    public List<DietDto> getDietList(HandleRequestDto parameters, int cafeteriaId) {
        System.out.println("getDietList 호출");
        // 오늘, 내일 문자열로 날짜 설정하기
        Date dietDate = getCurrentDate(parameters.getDay());
        // 식단 데이터 반환
        return dietRepositoryV2.findDietList(dietDate, parameters.getPeriod(), cafeteriaId);
    }
// 카테고리별 메뉴 리스트 생성하기
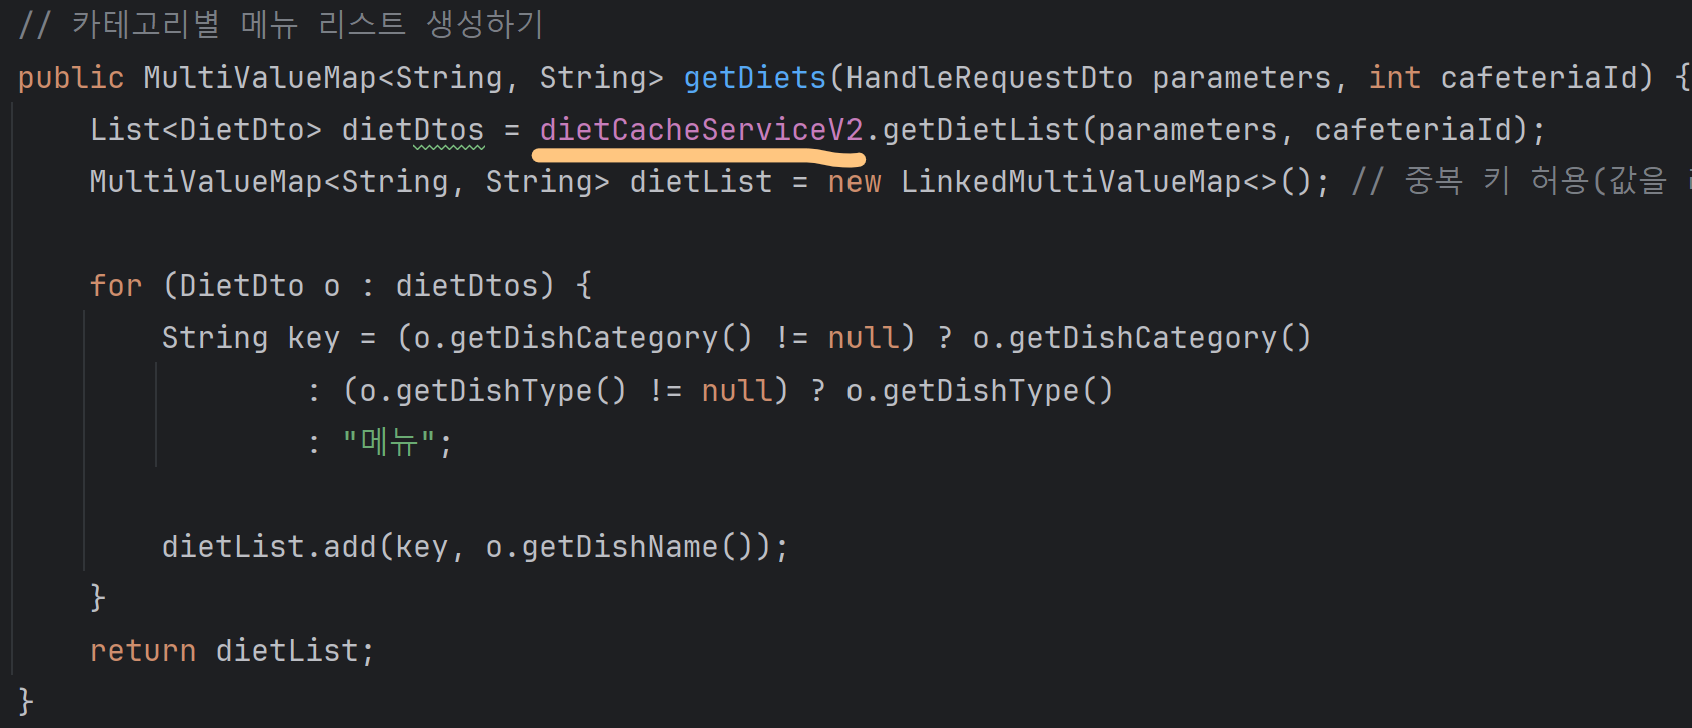
public MultiValueMap<String, String> getDiets(HandleRequestDto parameters, int cafeteriaId) {
List<DietDto> dietDtos = getDietList(parameters, cafeteriaId);
MultiValueMap<String, String> dietList = new LinkedMultiValueMap<>(); // 중복 키 허용(값을 리스트로 반환)
for (DietDto o : dietDtos) {
String key = (o.getDishCategory() != null) ? o.getDishCategory()
: (o.getDishType() != null) ? o.getDishType()
: "메뉴";
dietList.add(key, o.getDishName());
}
return dietList;
}getDietList함수에 @Cacheable을 적용했고, 같은 클래스 내부의 getDiets 함수 내에서 getDietList를 호출하는 코드이다.
@Cacheable self-invocation (in effect, a method within the target object calling another method of the target object). The cache annotation will be ignored at runtime
Spring AOP 기반의 @Cacheable은 자기 자신의 메서드를 호출할 때 동작하지 않는다. -> Self Invocation 문제 발생
위의 코드처럼 자기 자신의 메서드를 호출하면 프록시를 거치지 않아서 @Cacheable이 무시된다.
📑현재 코드 흐름
- getDiets 실행
- getDietList를 자기 자신이 직접 호출
- 프록시를 거치지 않으므로
@Cacheable이 무시됨 - 매번 db에서 데이터를 가져옴
해결 방법
@Cacheable 메서드를 외부에서 호출하도록 변경
현재 클래스가 아닌 다른 빈에서 getDietList를 호출하는 것 !
 이렇게 클래스를 분리하여 import하여 사용하는 방식으로 변경하였다.
또 다른 방법으로는 ApplicationContext를 이용해 프록시를 직접 호출하는 것이다.
클래스를 분리하기 어려운 경우에 사용할 수 있다.
@Autowired
private ApplicationContext applicationContext;

public MultiValueMap<String, String> getDiets(HandleRequestDto parameters, int cafeteriaId) {
    DietService dietServiceProxy = applicationContext.getBean(DietService.class); // 프록시를 직접 가져옴
    List<DietDto> dietDtos = dietServiceProxy.getDietList(parameters, cafeteriaId);

    MultiValueMap<String, String> dietList = new LinkedMultiValueMap<>();
    for (DietDto o : dietDtos) {
        String key = (o.getDishCategory() != null) ? o.getDishCategory()
                : (o.getDishType() != null) ? o.getDishType()
                : "메뉴";

        dietList.add(key, o.getDishName());
    }
    return dietList;
}
spring이 직접 프록시를 가져와 실행하므로 @Cacheable이 적용될 것이다.
하지만 서비스 클래스를 따로 분리해서 하는 방식이 명확하고 유지보수에 좋을 것 같아 저 방법을 사용하였다.