김영한 강사님 [실전! 스프링 부트와 JPA 활용1 - 웹 애플리케이션 개발] 강의 참조
🌼 Spring Boot
-
스프링 부트는 스프링으로 애플리케이션을 만들 때에 필요한 설정을 간편하게 처리해주는 별도의 프레임워크
-
스프링 부트는 자체적인 웹 서버를 내장하고 있어, 빠르고 간편하게 배포 가능
- 스프링 부트를 사용하면 독립적으로 실행 가능한 Jar 파일로 프로젝트를 빌드할 수 있어, 클라우드 서비스 및 도커와 같은 가상화 환경에 빠르게 배포
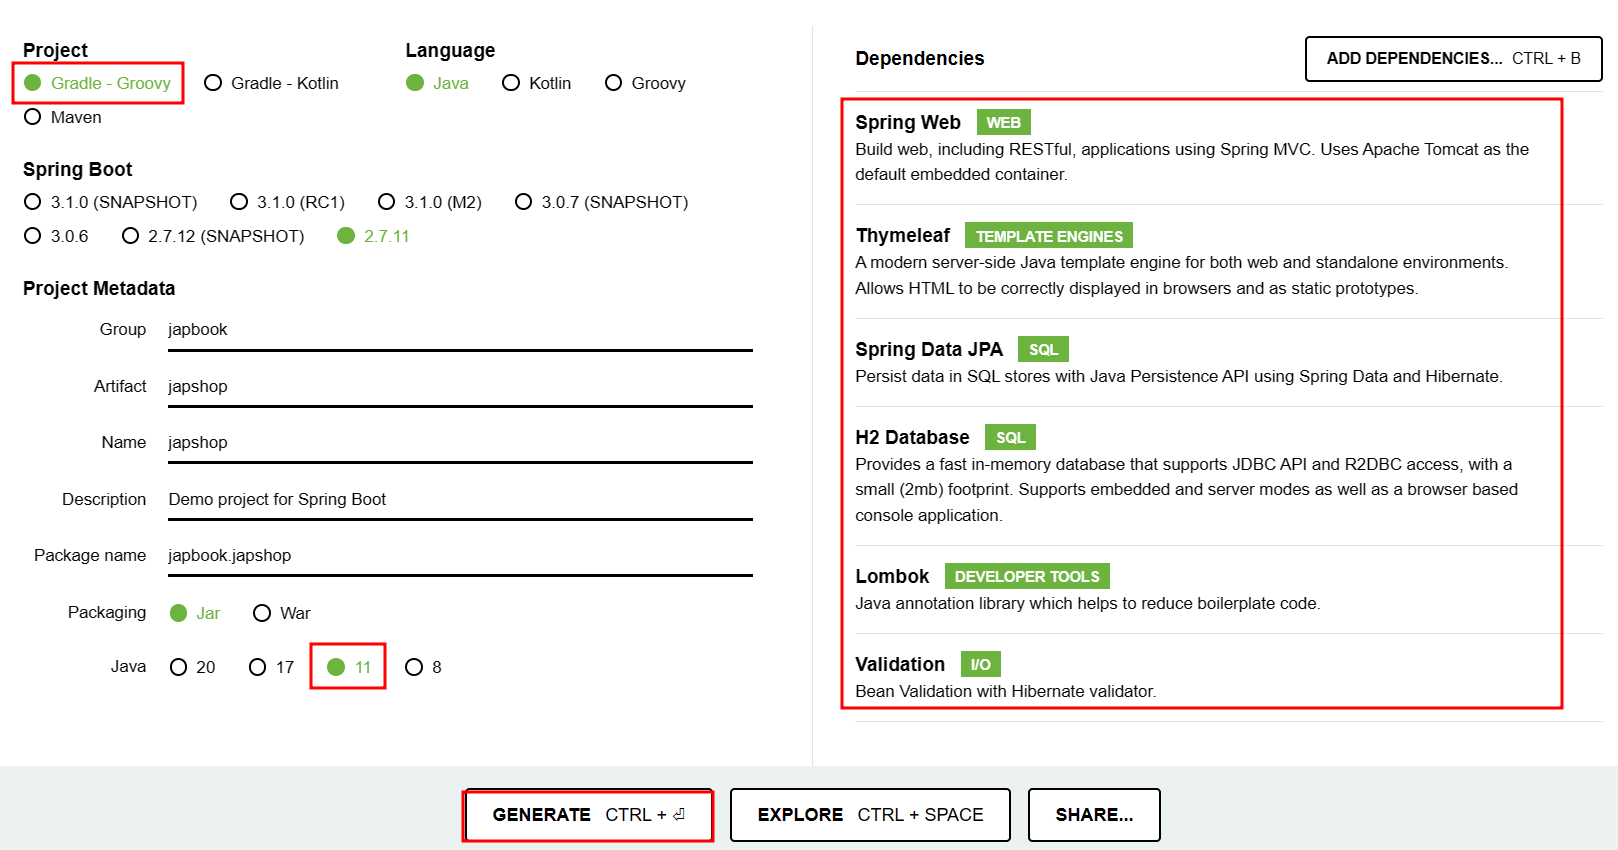
📕 프로젝트 생성
- 스프링 부트 스타터(Spring Initializr) : https://start.spring.io
- Intellij를 이용해서 프로젝트 open (환경설절을 쉽게 하기 위해서 build.gradle로 open할 것을 권장)
🐣 build.gradle
plugins {
	id 'java'
	id 'org.springframework.boot' version '2.7.11'
	id 'io.spring.dependency-management' version '1.0.15.RELEASE'
}

group = 'jpabook'
version = '0.0.1-SNAPSHOT'
sourceCompatibility = '11'

configurations {
	compileOnly {
		extendsFrom annotationProcessor
	}
}

repositories {
	mavenCentral()
}

dependencies {
	implementation 'org.springframework.boot:spring-boot-starter-data-jpa'
	implementation 'org.springframework.boot:spring-boot-starter-thymeleaf'
	implementation 'org.springframework.boot:spring-boot-starter-validation'
	implementation 'org.springframework.boot:spring-boot-starter-web'
	compileOnly 'org.projectlombok:lombok'
	runtimeOnly 'com.h2database:h2'
	annotationProcessor 'org.projectlombok:lombok'
	testImplementation 'org.springframework.boot:spring-boot-starter-test'

	testImplementation("org.junit.vintage:junit-vintage-engine") {
		exclude group: "org.hamcrest", module: "hamcrest-core"
	}

}

tasks.named('test') {
	useJUnitPlatform()
}
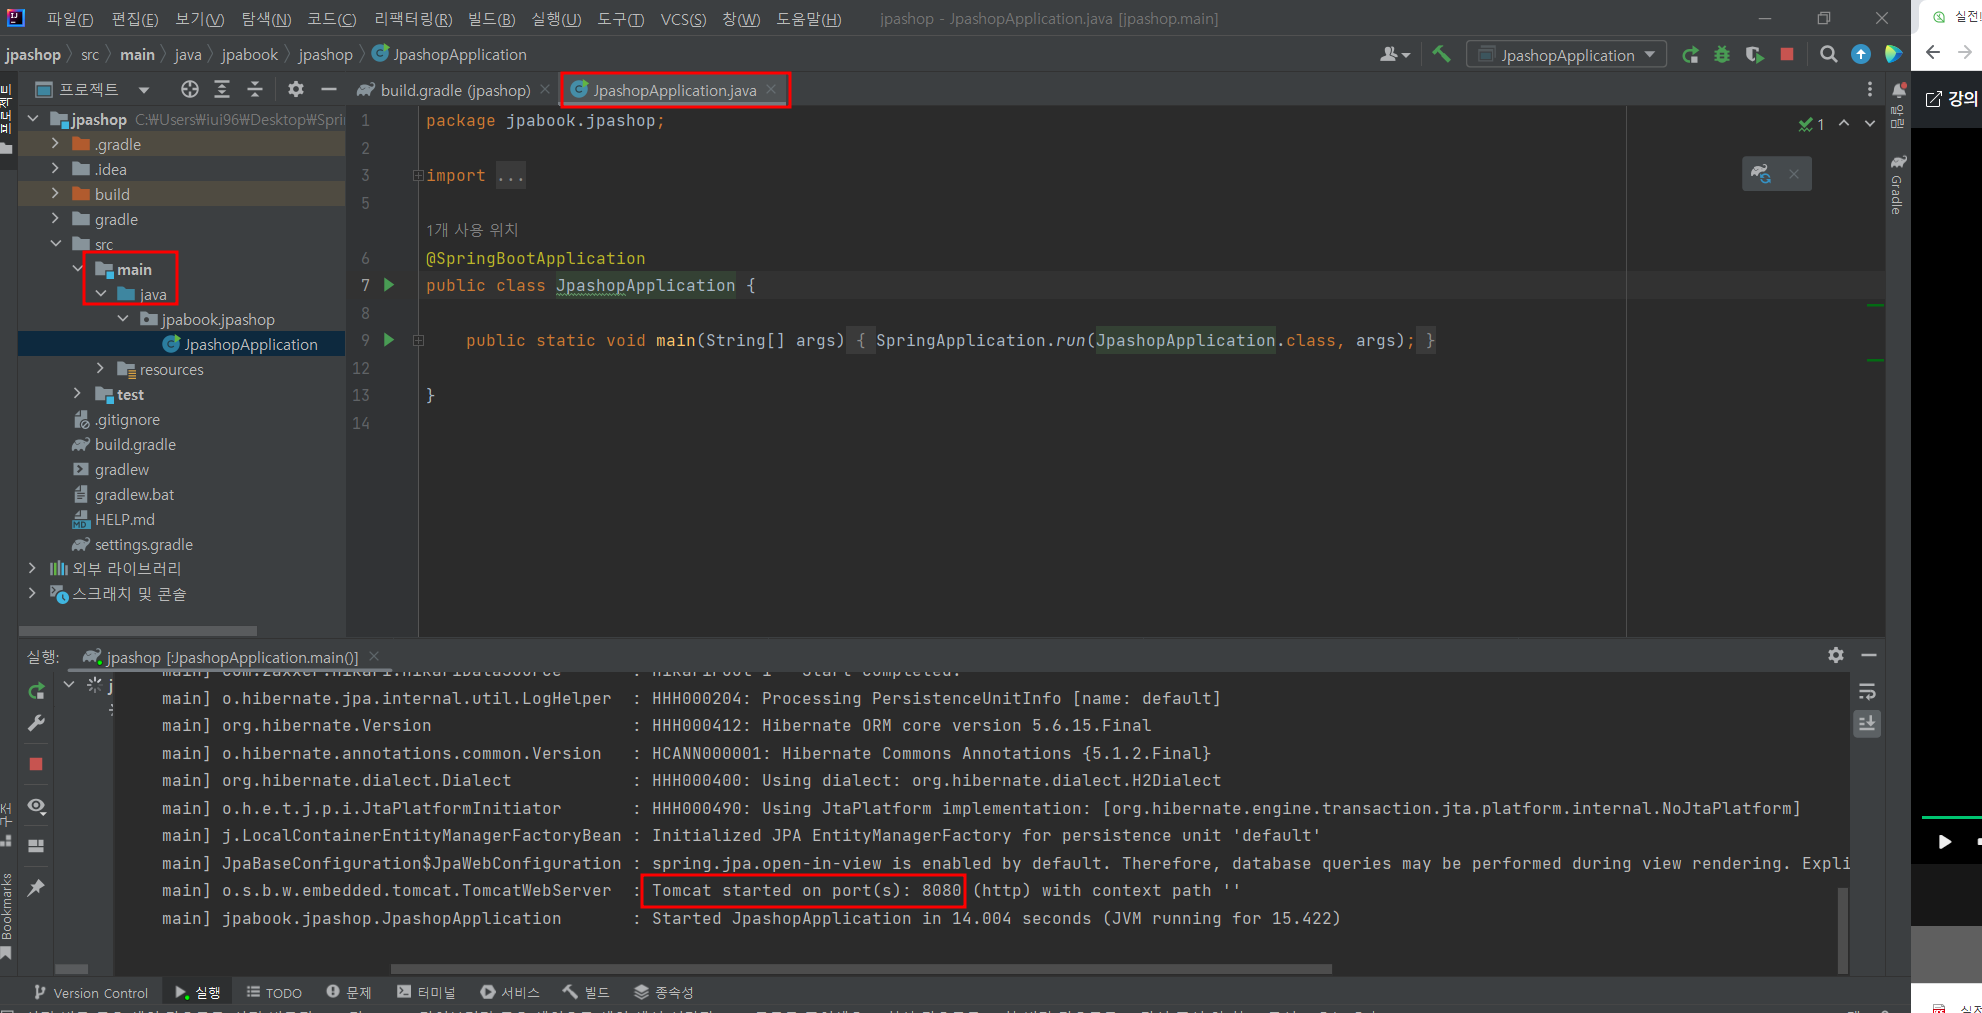
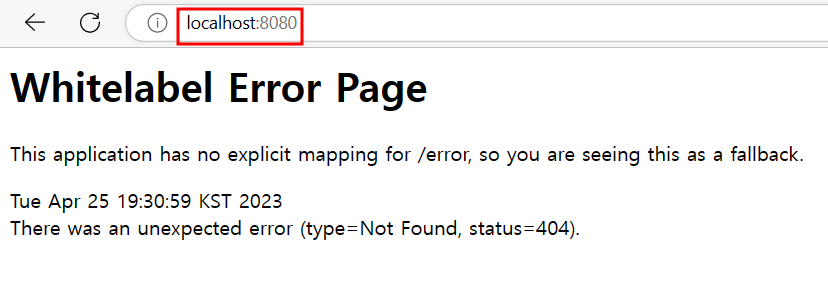
🐣 실행 확인
- 스프링 부트 스타터가 생성해준 java클래스를 Run한 후 localhost:8080에 접속하여 확인
📌 추가 설정
-
plugins에서 lombok 검색 실행
-
Enable Annotation processing : 어노테이션 프로세싱 활성화하기

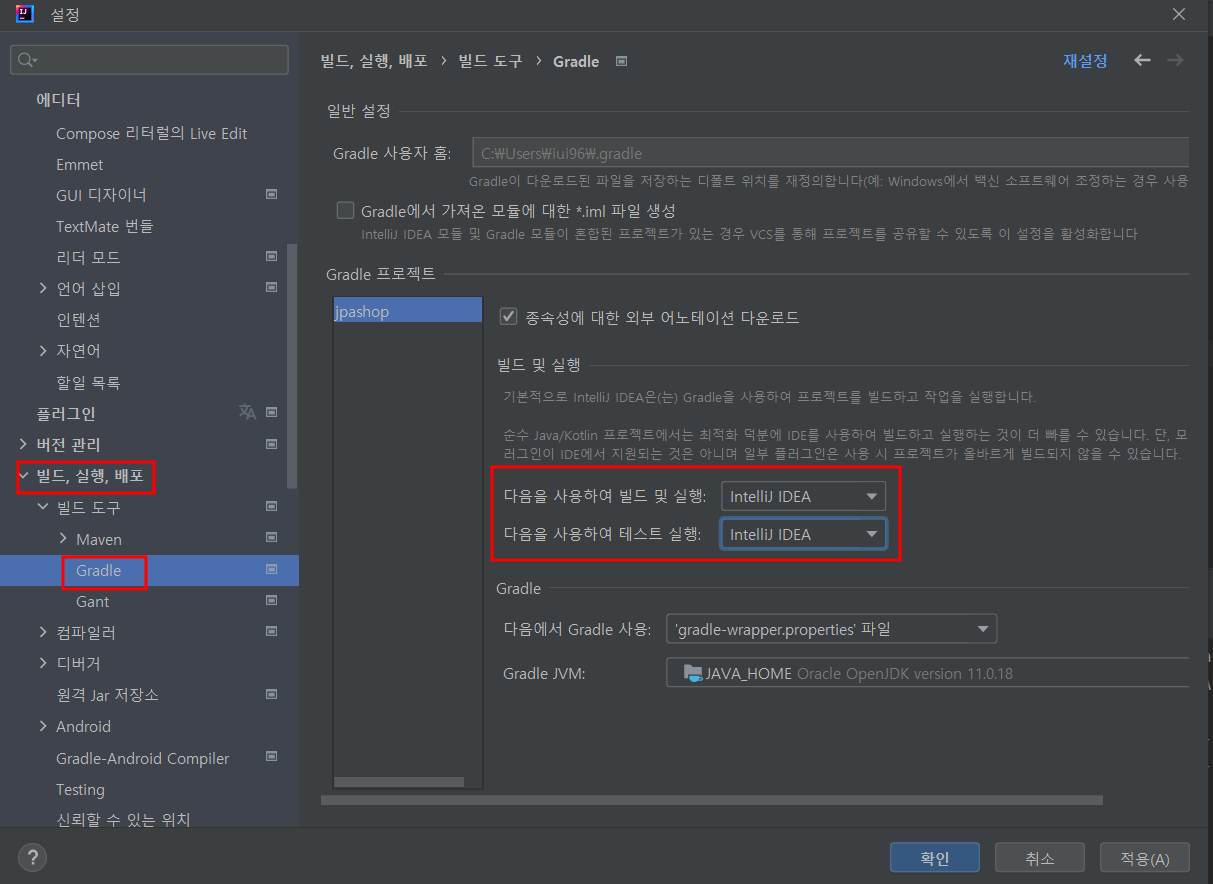
-
Gradle로 실행 시 실행속도가 느림 → IntelliJ IDEA로 변경
🐣 lombok lib 실행 확인
package jpabook.jpashop;

import lombok.Getter;
import lombok.Setter;

@Getter @Setter
public class Hello {
    private String data;
}
- hello class의 getter, setter 메소드를 이용하여 data 출력 확인
package jpabook.jpashop;

import org.springframework.boot.SpringApplication;
import org.springframework.boot.autoconfigure.SpringBootApplication;

@SpringBootApplication
public class JpashopApplication {

	public static void main(String[] args) {
		Hello hello = new Hello();
		hello.setData("hello");
		String data=hello.getData();
		System.out.println("data="+data);

		SpringApplication.run(JpashopApplication.class, args);
	}

}
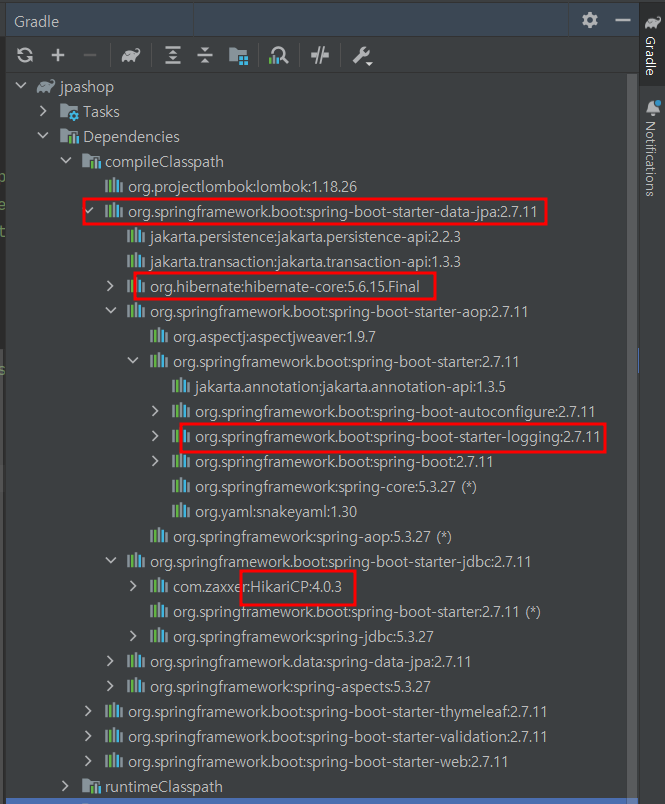
📌 dependencies lib 확인
- 경로 복사 : Shift + Ctrl + C
- spring boot starter web에 tomcat서버(8080)가 embed로 저장되어있음
- 또한 webmvc도 의존하고 있음 (web만 가져다 쓰면 tomcat, spring web mvc 쓸 수 있음)

- thymeleaf : template engine
- spring boot starter data jpa : database connection과 관련된 모든 것
- HikariCP : Connection Pool
- hibernate-core : 자바 언어를 위한 ORM 프레임워크
- spring boot starter logging을 의존 (slf4j 로거를 찍는 인터페이스의 모음이고 이거에 대한 구현체는 logback, log4j사용)
- test dependencies lib
- junit : 테스트 프레임워크, mockito : 목(진짜 객체와 비슷하게 동작하지만, 프로그래머가 직접 행동을 관리하는 객체) 라이브러리, assertj : 테스트 코드를 좀 더 편하게 작성하도록 도와주는 라이브러리, spring-test : 스프링 통합 테스트 지원

📙 View 환경 설정
🐣 1. HelloController
(요청:hello, 결과:hello.html(html은 자동으로 들어가므로 생략), model속성으로 data에 hello저장)
package jpabook.jpashop;

import org.springframework.stereotype.Controller;
import org.springframework.ui.Model;
import org.springframework.web.bind.annotation.GetMapping;

@Controller
public class HelloController {

    @GetMapping("hello")
    public String hello(Model model){
        model.addAttribute("data","hello!!!");
        return "hello";
    }
}
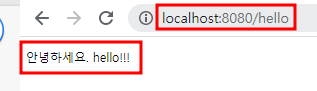
🐣 2. thymeleaf 동작 확인
- html의 namespace를 thymeleaf로 설정 (html xmlns:th="http://www.thymeleaf.org")
- 서버사이드렌더링을 타면 th:text="'안녕하세요. ' + ${data}" 데이터 렌더링된 것에 안녕하세요. 손님이 들어감
<!DOCTYPE HTML>
<html xmlns:th="http://www.thymeleaf.org">
<head>
    <title>Hello</title>
    <meta http-equiv="Content-Type" content="text/html; charset=UTF-8" />
</head>
<body>
<p th:text="'안녕하세요. ' + ${data}" >안녕하세요. 손님</p>
</body>
</html>
🐣 3. 실행확인
📌 thymeleaf (템플릿 엔진)
- thymeleaf 공식 홈페이지 : https://www.thymeleaf.org
- 웹브라우저에서 열린다는 장점(Natural templates)
- 메뉴얼을 봐야 사용할 수 있다는 단점(익숙해지면 편함)
🎀 정적 컨텐츠 작성(template X)
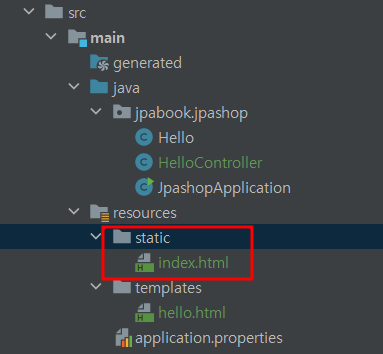
- 정적인 컨텐츠는 static안에, template engine을 통해 렌더링 되야 하는 것들은 template안에 작성
<!DOCTYPE HTML>
<html>
<head>
    <title>Hello</title>
    <meta http-equiv="Content-Type" content="text/html; charset=UTF-8" />
</head>
<body>
Hello
<a href="/hello">hello</a>
</body>
</html>
📌 스프링 공식 튜토리얼
- https://spring.io → Learn → Guides → Find a guide에서 검색하면 확인 가능
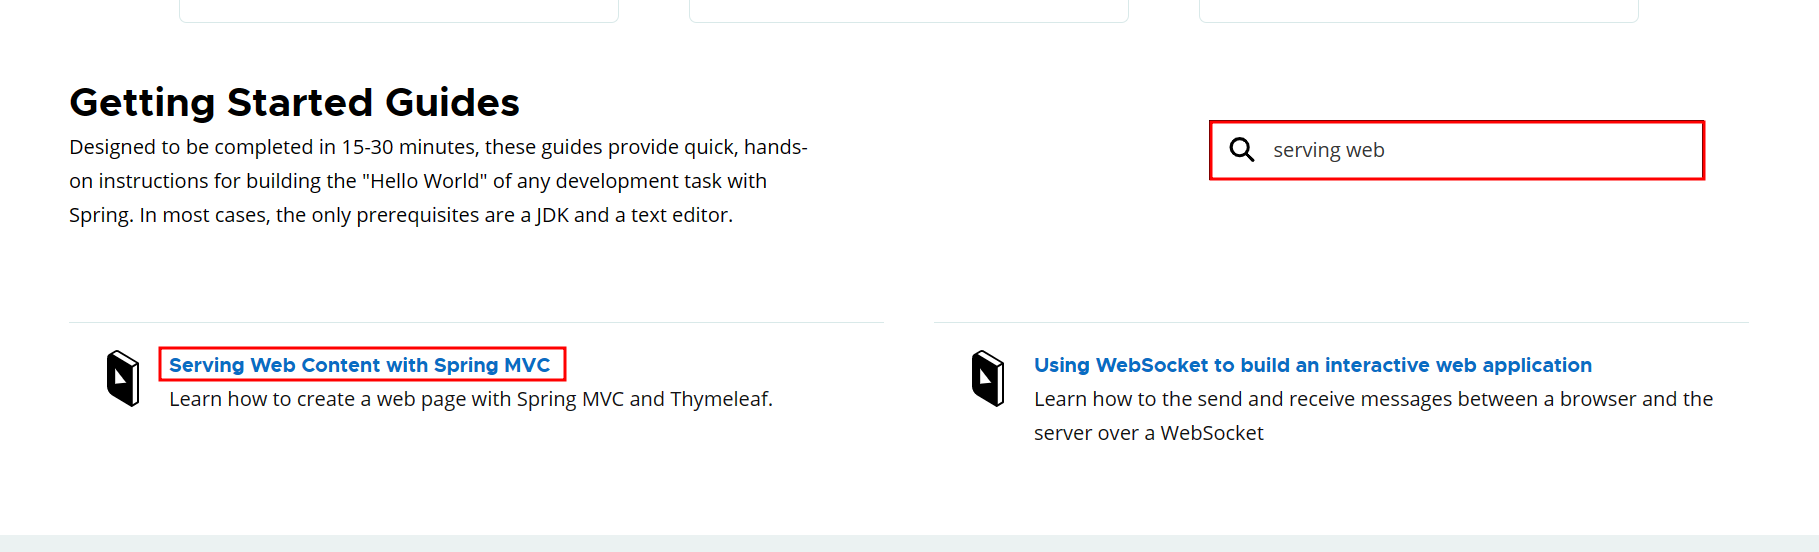
- 스프링 부트 메뉴얼 참고(2.1.6버전)
https://docs.spring.io/spring-boot/docs/2.1.6.RELEASE/reference/html/boot-features-developing-web-applications.html#boot-features-spring-mvc-template-engines
📌 꿀팁! (재시작 안해도됨)
- view 파일 변경 시 서버 재시작해줘야 하는 번거로움이 있음(recompile해도 안됨)
- build.gradle에서 dependecies에 devtools(개발시 유용한 기능) 라이브러리 추가 후 재시작
- implementation 'org.springframework.boot:spring-boot-devtools'

- implementation 'org.springframework.boot:spring-boot-devtools'
- restartedMain으로 뜨면 성공 → 재시작 없이 build탭의 recompile 파일명으로 변경 확인 가능!!
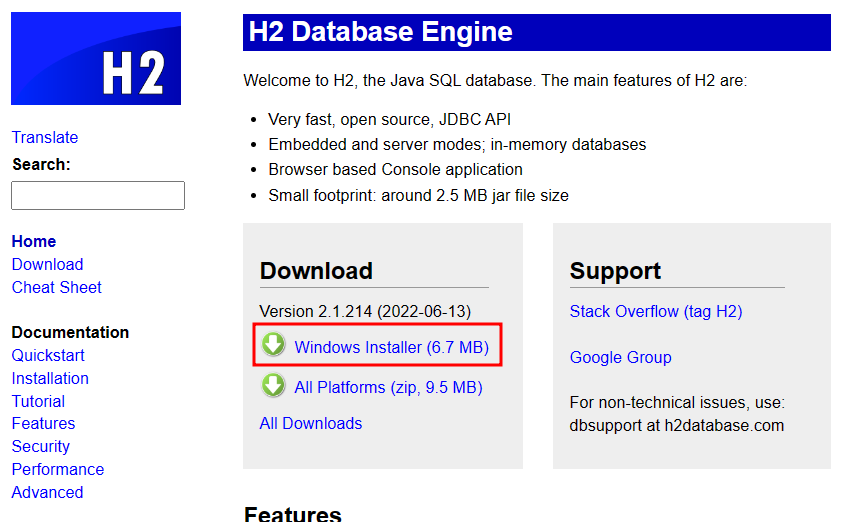
📒 H2 DB 설치 및 실행
- H2 데이터베이스 : 개발이나 테스트 용도로 가볍고 편리한 DB, 웹 화면 제공
-
H2 다운로드
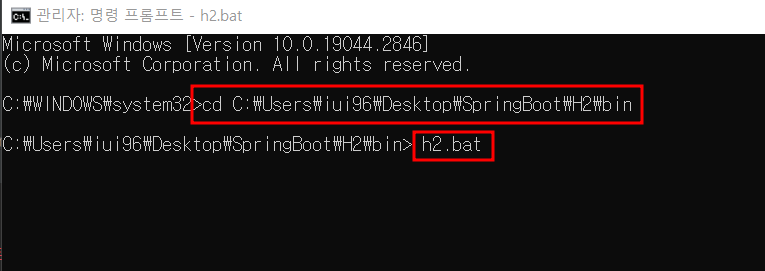
-
cmd를 관리자권한으로 실행하여 설치된 h2의 bin폴더로 경로 설정하여 h2.bat실행
-
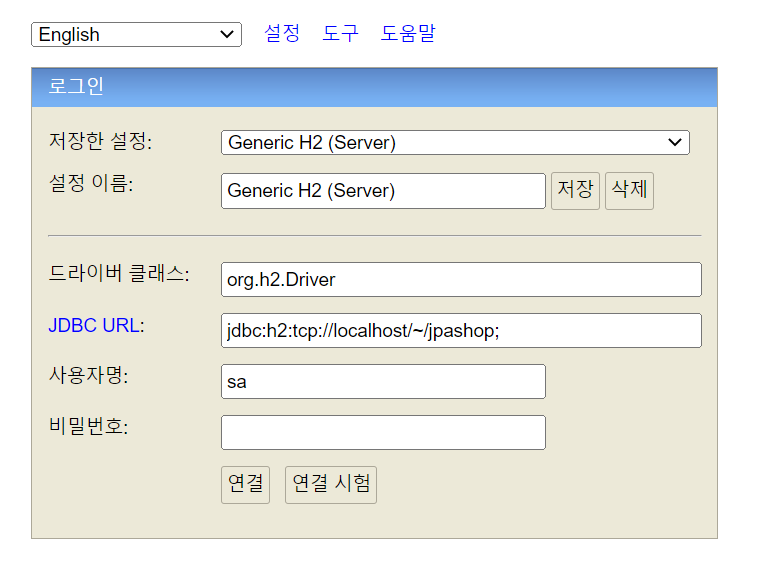
H2콘솔이 실행됩니다. 여기서 실행안될경우 key값에는 변경없이 localhost로
JDBC URL : jdbc:h2:~/jpashop (db파일을 생성할 경로 설정 → 파일모드로 실행됨) 작성후 연결
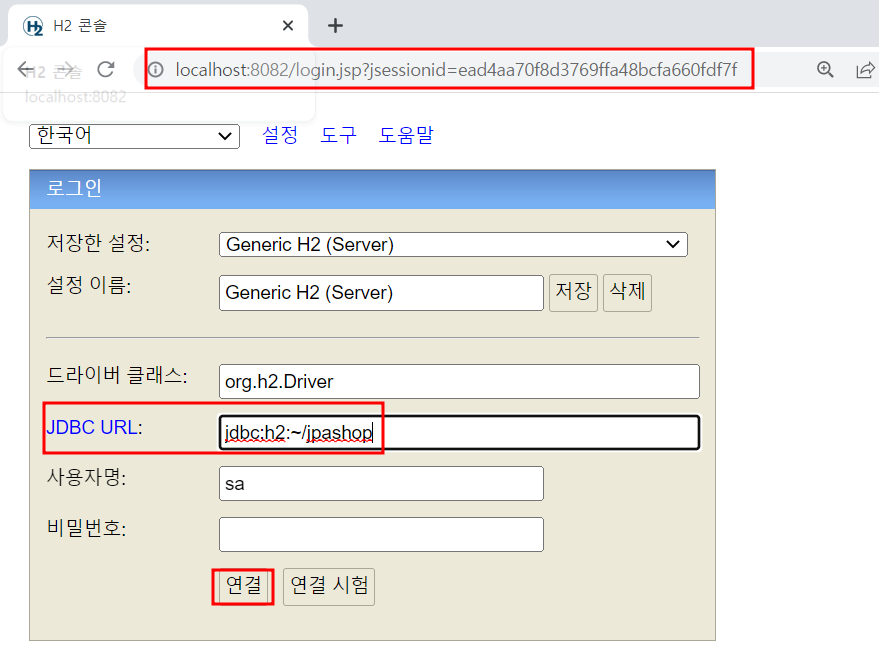
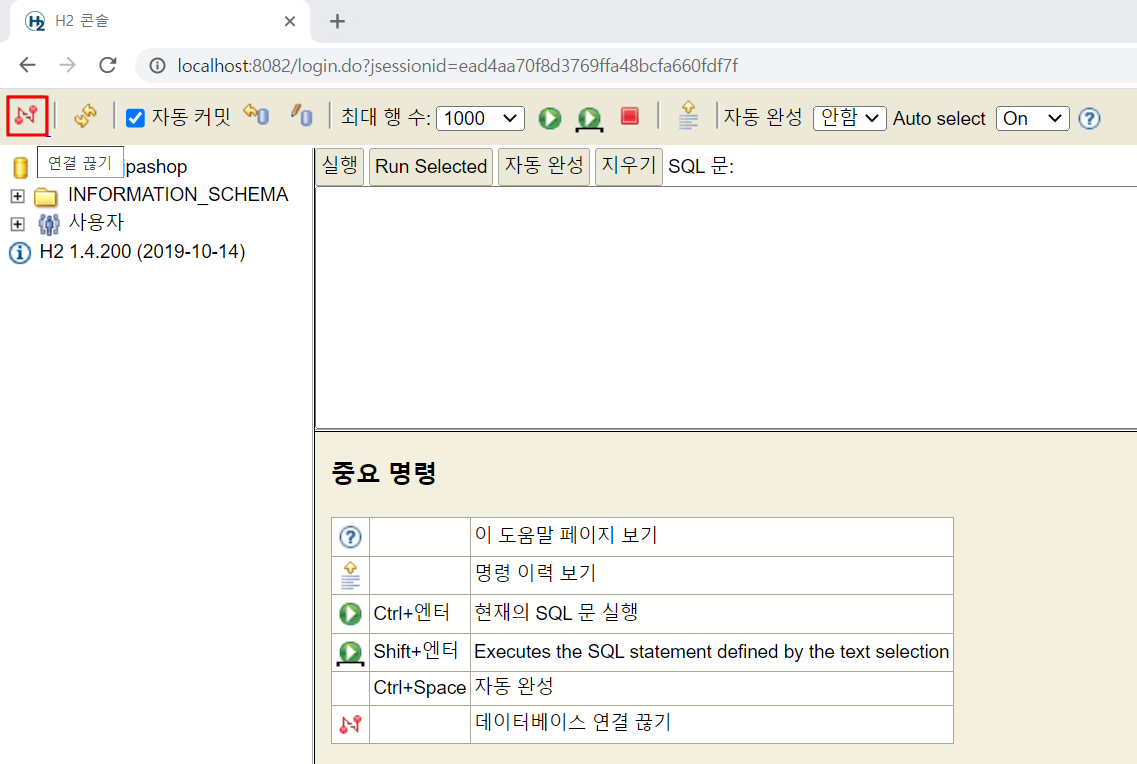
연결이 완료되었다면 jpashop.mv.db 생성됨 확인

-
연결 끊기 해서 나오기
-
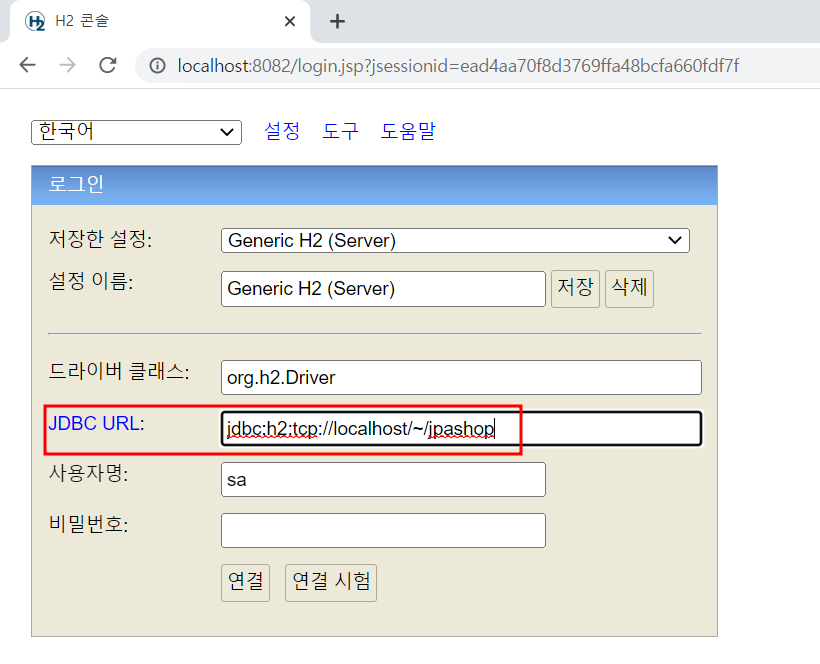
JDBC URL을 jdbc:h2:tcp://localhost/~/jpashop 작성 후 연결 (파일 생성 시 권한이 필요하므로 파일모드로 생성한 것이고 생성 이후로는 자유롭게 접근가능) - tcp 네트워크 모드로 접근
-
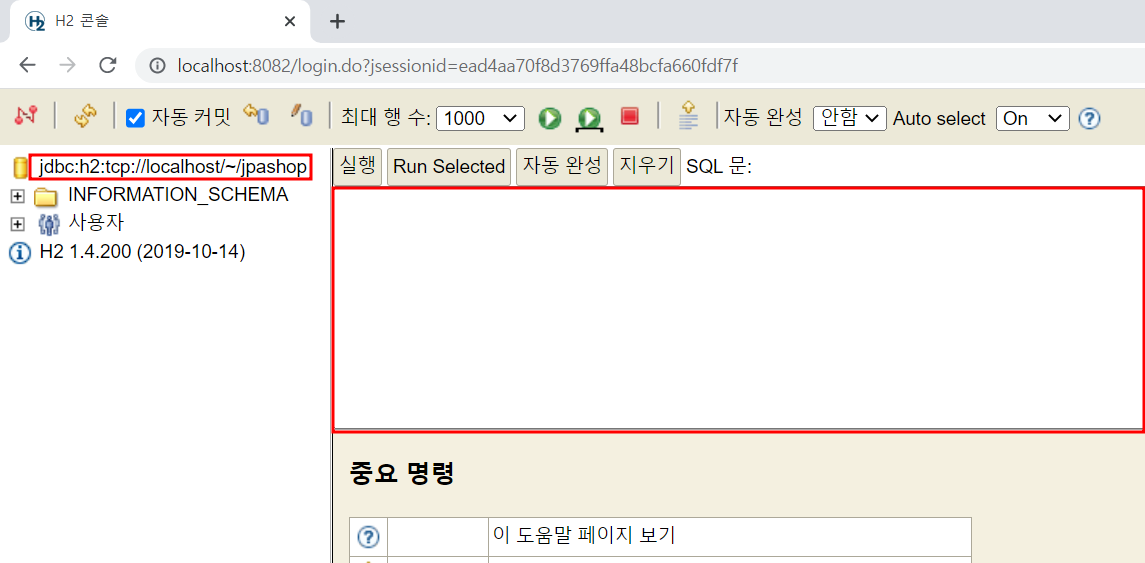
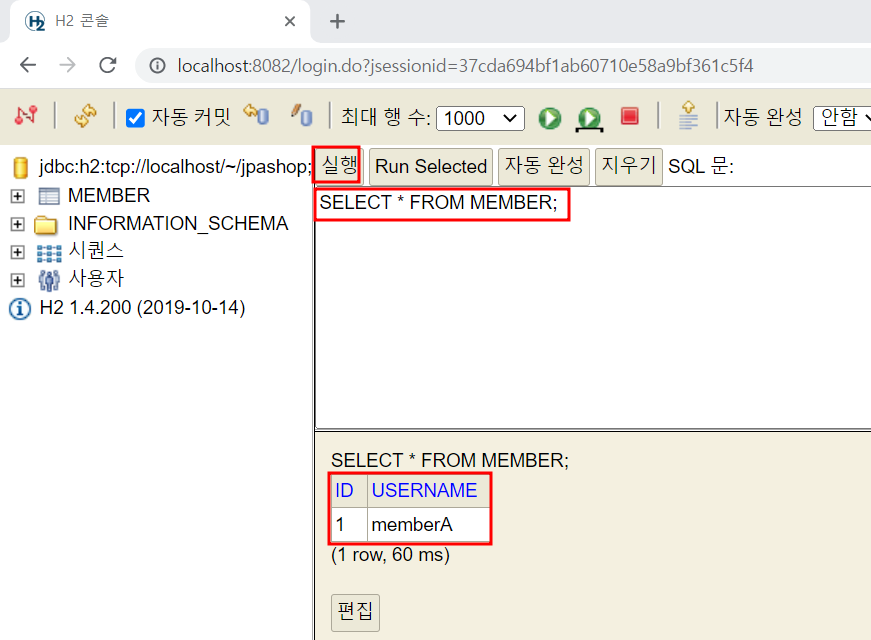
연결 확인 후 SQL명령 작성하여 사용 가능 (h2.bat이 실행상태여야 함 아닐 시 실행 안됨)
📗 JPA와 DB설정, 동작확인
🐣 1. 설정파일 설정(application.yml)
- resources → application.properties를 삭제하고 application.yml생성(둘 중 어느것을 해도 상관 없지만 설정 파일이 많아지고 복잡해질 경우 yml이 더 편리)
- ddl-auto : create ㅡ> 자동으로 탭을 만들어주는 모듈(애플리케이션 실행 시점에 테이블을 drop 하고, 다시 생성)
- show_sql : sql을 확인하겠다(system.out으로 볼수있기때문에 사용하지 않고 ↓ 사용)
- org.hibernate.SQL: debug ㅡ> hibernate SQL로그를 디버그 모드로 사용하겠다(남겨놓은 모든 sql을 다 볼수있음: 로거를 통해 확인)
spring:
  datasource:
    url: jdbc:h2:tcp://localhost/~/jpashop;
    username: sa
    password:
    driverClassName: org.h2.Driver

  jpa:
    hibernate:
      ddlAuto: create
    properties:
      hibernate:
#        show_sql: true
        format_sql: true

logging:
  level:
    org.hibernate.SQL: debug
🐣 2. 동작확인
🎀 Member class
package jpabook.jpashop;

import lombok.Getter;
import lombok.Setter;

import javax.persistence.Entity;
import javax.persistence.GeneratedValue;
import javax.persistence.Id;

@Entity
@Getter @Setter
public class Member {

    @Id @GeneratedValue
    private Long id;
    private String username;
}
🎀 MemberRepository class (dao라고 생각하면 됨)
- entity를 찾아주는 역할
- @PersistenceContext : spring boot가 이 어노테이션에 있으면 entitymanager를 주입해줌
package jpabook.jpashop;

import org.springframework.stereotype.Repository;

import javax.persistence.EntityManager;
import javax.persistence.PersistenceContext;

@Repository
public class MemberRepository {

    @PersistenceContext
    private EntityManager em;

    //저장하는 메소드
    public Long save(Member member){
        em.persist(member);
        return member.getId();
    }

    //조회하는 메소드
    public Member find(Long id){
        return em.find(Member.class, id);
    }
}
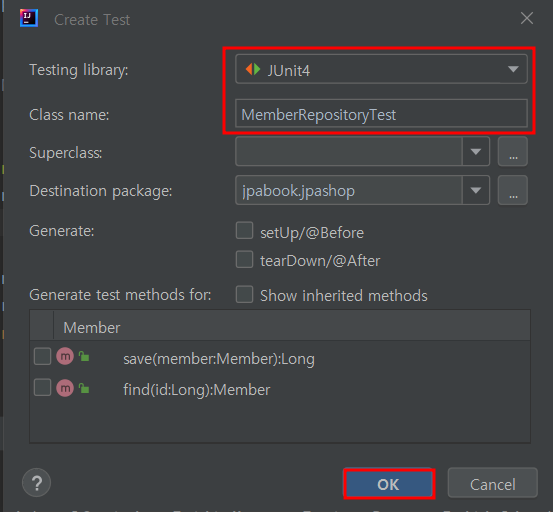
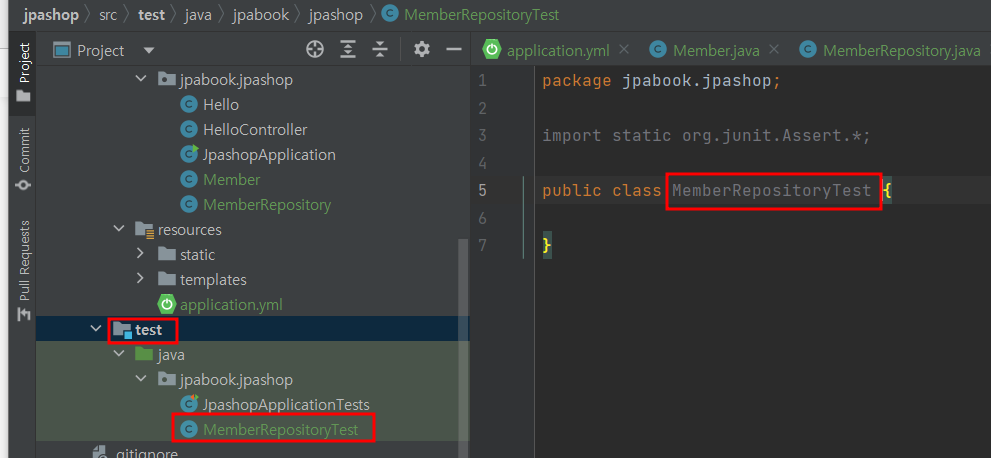
🐣 테스트 class 생성
- test 단축키 : Shift + Ctrl + T
- create test에서 ok하면 test폴더 안에 test class 생성됨
🐣 테스트 실행
package jpabook.jpashop;

import org.assertj.core.api.Assertions;
import org.junit.Test;
import org.junit.runner.RunWith;
import org.springframework.beans.factory.annotation.Autowired;
import org.springframework.boot.test.context.SpringBootTest;
import org.springframework.test.annotation.Rollback;
import org.springframework.test.context.junit4.SpringRunner;
import org.springframework.transaction.annotation.Transactional;

import static org.junit.Assert.*;

@RunWith(SpringRunner.class)
@SpringBootTest
public class MemberRepositoryTest {

    @Autowired MemberRepository memberRepository;

    @Test
    @Transactional
    @Rollback(false)
    public void testMember() throws Exception {
        //given
        Member member = new Member();
        member.setUsername("memberA");
        //when
        Long saveId = memberRepository.save(member);
        Member findMember = memberRepository.find(saveId);

        //then
        Assertions.assertThat(findMember.getId()).isEqualTo(member.getId());
        Assertions.assertThat(findMember.getUsername()).isEqualTo(member.getUsername());
        Assertions.assertThat(findMember).isEqualTo(member);//JPA 엔티티 동일성 보장

    }
}
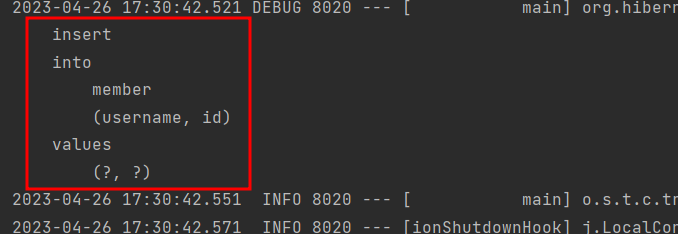
💡 JPA 엔티티 동일성
- 같은 트랜잭션 안에서 저장하고 조회하면 같은 영속성 context 안에서 아이디가 같으면 같은 엔티티를 갖음(식별자 동일-1차캐시에서 기존에 관리하던것을 출력)
→ select 실행 없이 바로 insert
- junit에게 나 스프링과 관련된 테스트를 할거라고 알려줘야해 : @RunWith(SpringRunner.class)
- ★ Ctrl + Alt + V : 저장된 변수 추출하는 단축키 ★
- application.yml에서 ddlAuto: create로 설정했기 때문에 테이블 삭제한 후 생성됨
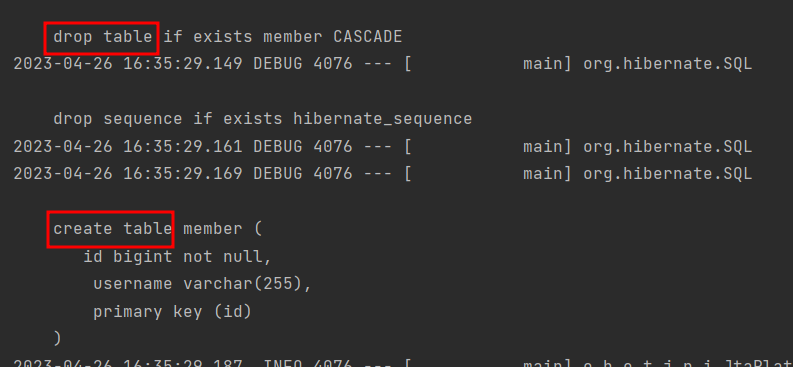
- application.yml에서 설정한 url로 연결
- 실행해보면 test 확인 가능
📌 @transactional
-
entitymanager를 통한 모든 데이터 변경은 항상 transaction안에서 이루어져야함
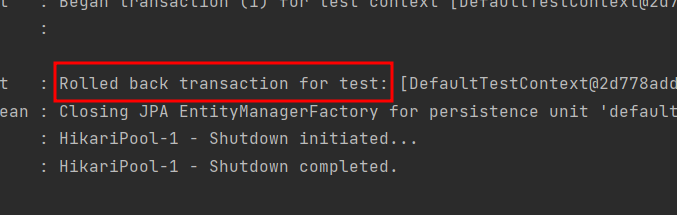
-
transactional은 test후 바로 rollback처리됨
💡 Live template을 이용하여 나만의 template 생성
- ex. test하는 템플릿 생성(이름 : tdd)
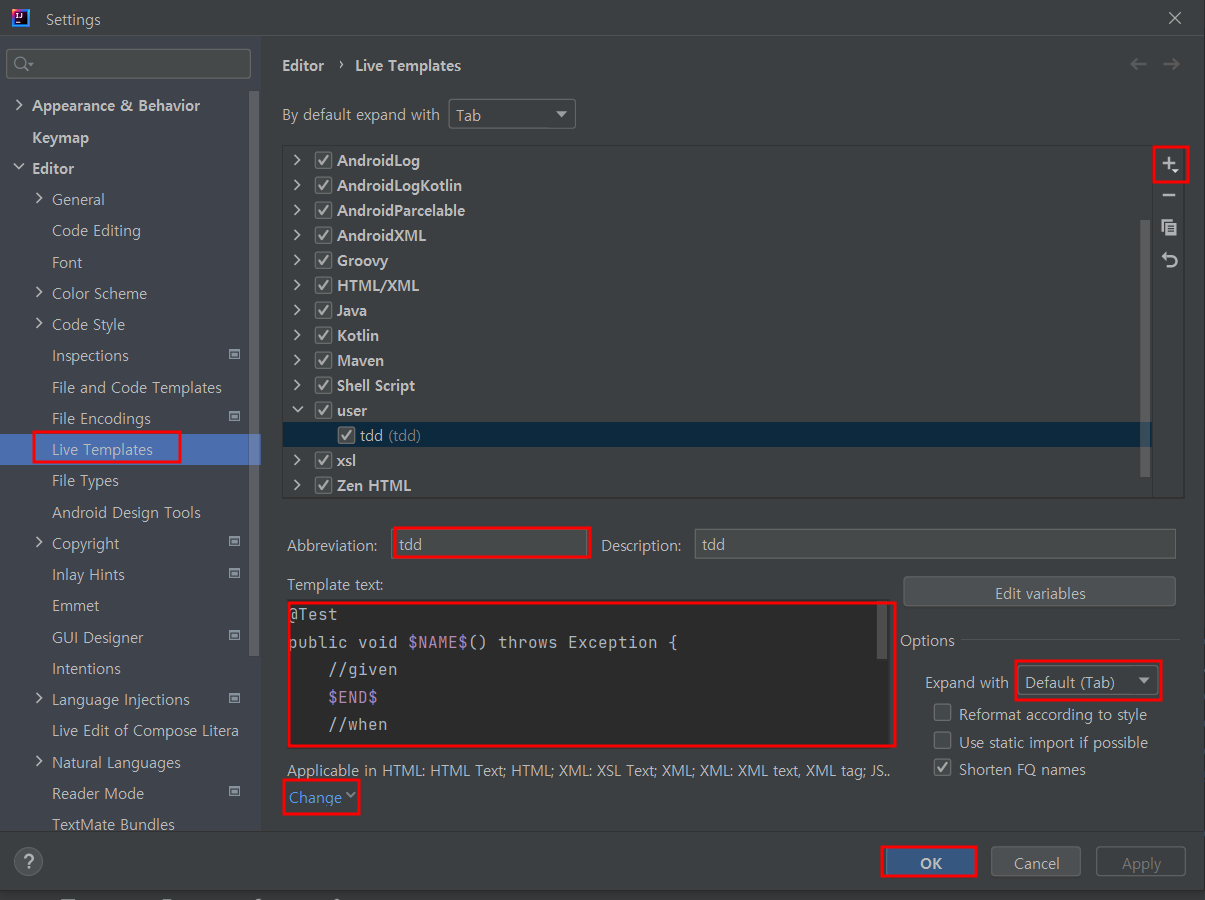
- template text :
    @Test
    public void testMember() throws Exception {
        //given

        //when

        //then
}- tdd입력 후 tab사용 시 template text 자동 생생
📌 jar 빌드해서 동작 확인
- gradlew (gradle wrapper) : 새로운 환경에서 프로젝트를 설정할 때 java나 gradle을 설치하지 않고 바로 빌드할 수 있게 해주는 역할
- clean build : 깔끔하게 지우고 다시 빌드
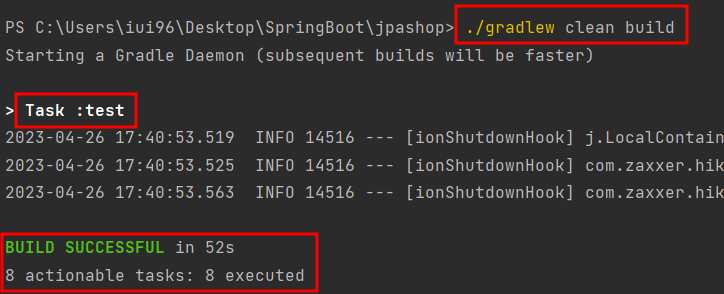
- 빌드된 파일 콘솔에서 실행 (intellij에서 실행X)
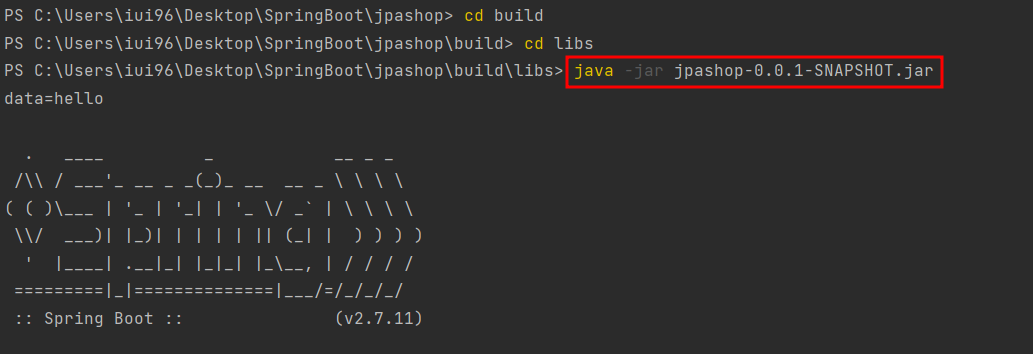
- 실행 확인

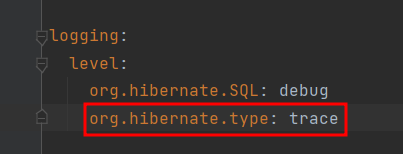
📌 쿼리 파라미터 로그 남기기
- 방법1
- application.yml파일의 logging정보에 org.hibernate.type: trace추가(SQL 실행 파라미터를 로그로 남긴다)
- 파라미터에 바인딩된 값 확인 가능

- 방법2 외부라이브러리 사용
- https://github.com/gavlyukovskiy/spring-boot-data-source-decorator
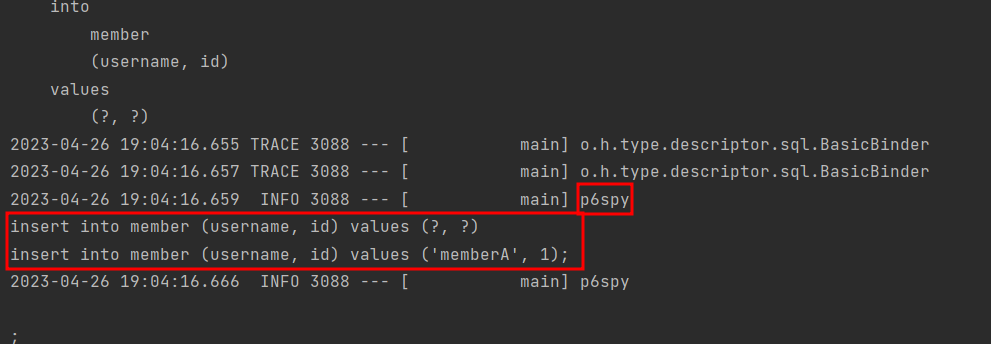
- build.gradle의 dependencies에 추가 (implementation 'com.github.gavlyukovskiy:p6spy-spring-boot-starter:1.5.6')
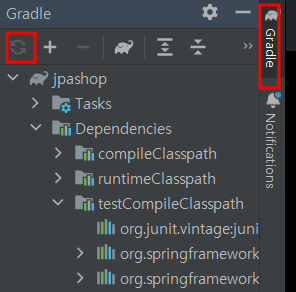
- 추가 후 Gradle 재실행(Reload)
- 실행해보면 p6spy를 통해서 파라미터값 확인 가능
- 외부 라이브러리는 시스템 자원을 사용하므로 개발 단계에서는 편하게 사용해도 되지만 운영시스템에 적용하려면 성능테스트 필수(성능이 확 저하될 가능성 있음)