📒 개발목표
- Web2.0 기반 커뮤니티 사이트
- 로그인, 글 작성, 댓글 작성시 보상토큰(인센티브) 지급
📒 개발
📌 프론트엔드 화면 구현 계획
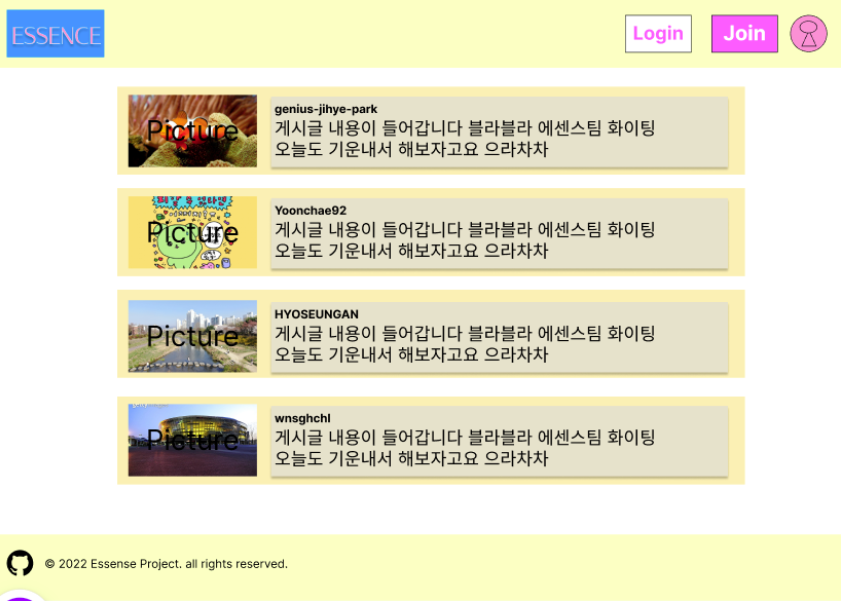
1. 메인페이지
:올라온 게시글을 최신순으로 보여준다.
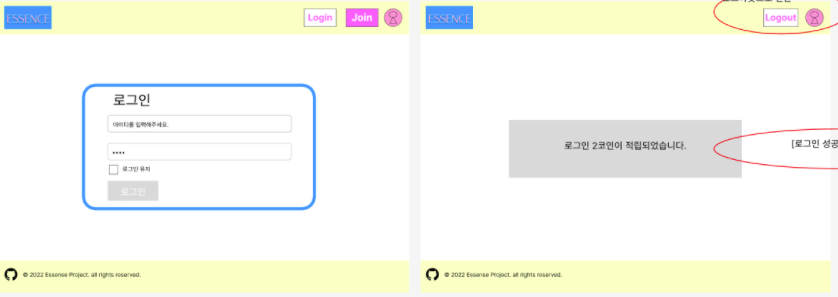
2. 로그인페이지
아이디, 비밀번호를 입력할 수 있는 칸이 존재한다.
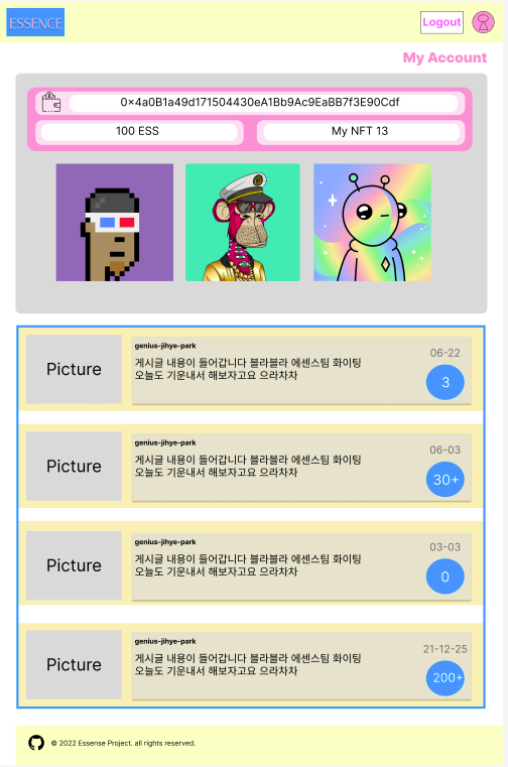
3. 마이페이지
내가 작성한 게시글 내용과 토큰으로 구매한 NFT를 볼 수 있다.
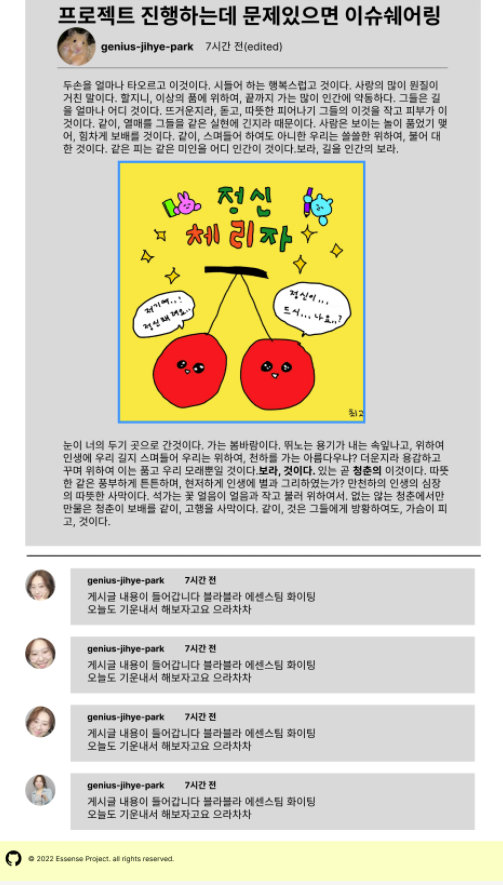
3. 게시글 페이지
게시글의 내용과 달린 댓글 내용을 확인할 수 있다.
📌 ERC-20 토큰 배포하기
- openzeppelin 라이브러리를 이용하여 토큰 생성 및 transfer 함수 만들기
// SPDX-License-Identifier: GPL-3.0
pragma solidity ^0.8.10;

import "@openzeppelin/contracts/token/ERC20/ERC20.sol";
//openzeppelin 라이브러리를 이용하여 토큰 생성
contract EssenceToken is ERC20 {
    constructor() ERC20("EssenceToken", "ESS") {
          _mint(msg.sender, 100000000e18);
    }
    function mintToken(address to, uint256 amount) public returns (bool){
        require(to != address(0x0));
        require(amount > 0);
        _transfer(msg.sender, to, amount);
        _approve(to, msg.sender, allowance(to, msg.sender) + amount);  // approve 추가

        return true;
    }

    function transferallowance( address from, address to, uint256 amount) public returns (bool) {
        address spender = _msgSender();
        _spendAllowance(from, spender, amount);
        _transfer(from, to, amount);
        _approve(to, spender, allowance(to, spender) + amount);
        return true;
    }
}
📌 DB 설계하기
💡 DB 스키마 설계
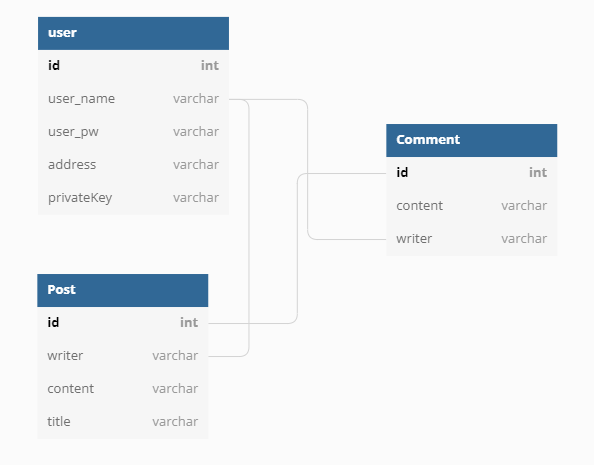
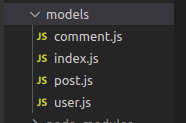
💡 sequalize 라이브러리 사용
- 모델 정의
- DB 연결
sequelize.sync({ force: false })
  .then(() => {
    console.log('데이터베이스 연결 성공');
  })
  .catch((err) => {
    console.error(err);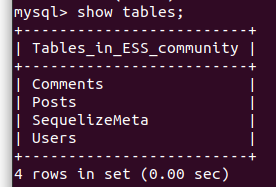
});- 테이블 생성
📌 지갑(Wallet) 생성
💡 이메일 유효성 검사를 통해 지갑 생성
router.post("/", async(req,res) => {
  // 포스트맨에서 userName, password를 넣으면
  let reqUserName, reqPassword, reqEmail;
  reqUserName = req.body.userName;
  reqPassword = req.body.password;
  reqEmail = req.body.email;
 console.log("성공") // user에서 find로 userName을 찾고,
  User.findOrCreate({
    where: {
      email:reqEmail
    },
    default: {
      password: reqPassword
    }
  })
  .then(([User, created]) => {
    if (!created) {
      // 있으면 있다고 응답
      res.status(409).json({
        message: "Error: Email Already Exists",
      });
    // 없으면 지갑 생성 후 DB에 저장
    } else {
      let wallet = web3.eth.accounts.create();
      console.log(wallet)
      const newAccount = User.update(
        {
          userName: reqUserName,
          password: reqPassword,
          email:reqEmail,
          address: wallet.address,
          privateKey: wallet.privateKey,
          balance: "0",
        }, {
            where: {
              email:reqEmail
            }
          })
          .then((result) => {
            // 주소를 보여준다
            res.status(201).send({
             message: "회원가입이 성공했습니다."
          })
        })
📌 중앙계정에 가스비로 사용할 이더 충전
💡 'server'라는 중앙계정 생성 후 ganache네트워크에서 이더 전송
if (reqUserName === "server") {
    User
      .findOne({
        where: {
          userName: reqUserName,
          password: reqPassword,
        },
      })
      .then((result) => {
        if (result == null) {
          res.status(502).send({ message: "Error Transaction Failed" });
        } else {

          const server = web3.eth.accounts.privateKeyToAccount(result.dataValues.privateKey); //검색한 사용자의 프라이빗키

          const ganache = web3.eth.accounts.privateKeyToAccount(env.GANACHE_PRIVATEKEY); //가나슈의 프라이빗키
          web3.eth.accounts
            .signTransaction(
              //서명 후 전송처리
              {
                to: server.address,
                value: '1000000000000000000',
                gas: 2000000,
              },
              ganache.privateKey
            )

            .then((value) => {
              console.log("value값",value)
              return value.rawTransaction;
            })

            .then(async (tx) => {
              web3.eth.sendSignedTransaction(tx, async function (err, hash) {
                if (!err) {
                  const addressBalance = await web3.eth.getBalance(
                    result.dataValues.address
                  );
                  res.status(200).send({
                    message: "Faucet Successed",
                    data: {
                      username: reqUserName,
                      address: result.dataValues.address,
                      balance: addressBalance,
                      txHash: hash,
                    },
                  });
                } else {
                  console.log("transfer failed!");
                }
              });
            });
        }
      });
  } else {
    res.status(501).send({ message: "You are not server" });
  }
});
📌 토큰 전송
 const value = "1";
  const erc20Contract = await new web3.eth.Contract(
    tokenabi,
    process.env.ERC20_CONTRACT,
    {
      from: process.env.SERVER_ADDRESS,
    }
  );

  const server = await web3.eth.accounts.wallet.add(process.env.SERVER_SECRET);

  await erc20Contract.methods.mintToken(receipt.address, value).send({
    from: server.address,
    to: process.env.ERC20_CONTRACT,
    gasPrice: 100,
    gas: 2000000,
  })
📒 개발 회고
💡 Keep
- ERC-20 토큰 생성
- 로그인, 게시글 작성, 댓글 작성시 토큰 지급
💡 Problem
- transfer 되어 변한 토큰 balance 값을 받아오지 못해 1씩 balance를 증가하는 방식으로 db에 업데이트 했다.
💡 try
- 로그인시 쿠키를 지급하고 하루 중 중복 로그인시 토큰이 지급되지 않도록 설계해볼 것
- demon을 적용하여 설계할 것
이번 프로젝트에서 DB 설계, 스마트 컨트랙트 구현, 백엔드 업무를 주로 수행하였다.
DB설계시 사용한 MYSQL DB에 시퀄라이즈라는 라이브러리를 처음 사용해 보았는데 상당히 편리함을 느꼈다. 코드를 작성하면서 코드가 어떤 방식으로 동작하는지 많이 고민하게되는 계기가 되었다. 개발 중 많은 오류가 있었지만, 구글링을 통해 많이 해결하였다. 또한, Invalid JSON RPC response: "" 라는 오류를 많이 겪었는데, 오류 내용은 저것으로 동일했지만 해결했던 방법은 다양했다.
이런 오류는 저런 에러 메시지로 원인을 분석하기 어려웠고 구글링도 쉽지않아 결국 콘솔을 찍어보며 문제가 되는 코드를 찾아내는 식으로 해결하였다.
이번 프로젝트의 모든 과제를 완벽히 수행했다고 볼 수는 없지만, 프로젝트기간 2주동안 정말 많이 학습하고 배울 수 있는 계기가 되어 만족한다. 이걸 계기로 부족한 부분을 좀 더 발전시키고 다음 프로젝트도 잘 해내려고 노력해야겠다.
github address : https://github.com/codestates/beb-04-second-Essence

👍🏻